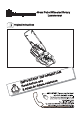
40cm Petrol Wheeled Rotary Lawnmower Original Instructions AT ORM ION F T IN N A RT O P use ence r e M r I e f o f e be re r Read in for futu a & ret
Carton Contents Brake lever Cable tie Powerdrive lever (If fitted) Cord guide nut Cable tie Cord guide washer x2 Upper Handle Cord guide Handle knob Cord guide nylock nut Lower handle plug x2 Handle knob washer Grassbox Upper Lower Handle screws x2 Lower Handle Grassbox Lower Instruction manual IMPORTANT ! Please check the contents of the carton are correct BEFORE assembling your new product. IF ANY PARTS ARE MISSING CONTACT:Husqvarna UK Ltd.
Safety Precautions If not used properly this lawnmower can be dangerous! This lawnmower can cause serious injury to the operator and others, the warnings and safety instructions must be followed to ensure reasonable safety and efficiency in using this lawnmower. The operator is responsible for following the warning and safety instructions in this manual and on the lawnmower. Never use the mower unless the grassbox or guards provided by the manufacturer are in the correct position. General 1.
Assembly Instructions A1 A2 Lower Handles 1. Insert the lower handle into the deck as shown in Fig. A1 2. Push the handle firmly down until it is located securely into the deck. 3. Insert the screw into the hole using a pozidrive screwdriver and tighten fully. (A2). Repeat for other side Lower Handle Plug A3 B1 1. Insert the two lower handle plugs into the top of each of the lower handles (A3). B2 Upper Handles When viewing product from the rear the yellow Warning labels should be facing upwards. 1.
D1 Grassbox Assembly D2 2. When the location points are matched correctly firmly press the grassbox together until all clips are securely connected. (D2) 1. Position the two grassbox halves together (D1) and press each location point into position without fully connecting the clips. Cutting Height Adjustment E1 E2 Cutting Height The cutting height can be adjusted by removing the front and back wheels on the product. 1.
Starting and Stopping cont’d 3. Pull the recoil starter (F3) cord towards you until you feel the full resistance, return the handle slowly then pull the handle firmly towards you to its full extent. 4. After the engine has started, allow to run for 30 seconds before commencing to use. To stop your lawnmower - release the start/stop lever POWERDRIVE LAWNMOWER 1. Follow the procedure for Push lawnmowers. 2.
Transport Remove the spark plug lead Loosen the wire/cable from the handle before carefully folding it. Avoid damaging the wire/cable. Empty the petrol tank. The machine must be drained of oil and fuel when moving it by public transport. Service When ordering spare parts, always quote the mower’s product number. Always check oil level after service. At the End of the Mowing Season 1. Replace blade, bolts, nuts or screws, if necessary. 2. Clean your lawnmower thoroughly. 3.
Service Recommendations 1. We strongly recommend that your product is serviced at least every twelve months, more often in a professional application. 2. Always use genuine Husqvarna Spare Parts. 3. Prepacked spares are available from most Husqvarna UK Ltd. stockists. 4. Your product is uniquely identified by a silver and black product rating label 5.
EC Declaration of Conformity Husqvarna AB, 561 82 Huskvarna, Sweden Declare under our sole responsibility that the product(s); Category............................Petrol Lawnmower Type(s) ...........................540, 540D Identification of Series.......See Product Rating Label Year of Construction..........See Product Rating Label Conforms to the essential requirements & provisions of the following EC Directives: 98/37/EC (until 28.12.09), 2006/42/EC (from 29.12.