benutzerinformation notice d'utilisation istruzioni per l’uso user manual Kühlschrank Réfrigérateur Frigorifero Refrigerator SK23111
electrolux Electrolux. Thinking of you. Mehr zu unserem Denken finden Sie unter www.electrolux.
electrolux 3 • Achten Sie darauf, den Kühlkreislauf nicht zu beschädigen. • Das Kältemittel Isobutan (R600a) im Kältekreislauf des Gerätes ist ein natürliches und sehr umweltfreundliches Gas, das jedoch leicht entflammbar ist. Achten Sie beim Transport und bei der Aufstellung des Gerätes darauf, nicht die Komponenten des Kältekreislaufs zu beschädigen.
electrolux • Kontrollieren Sie nach dem Auspacken das Gerät auf eventuelle Beschädigungen. Nehmen Sie das Gerät nicht in Betrieb, wenn es beschädigt ist. Melden Sie die Schäden umgehend dem Händler, bei dem Sie es erworben haben. Bewahren Sie in diesem Fall die Verpackung auf. • Lassen Sie das Gerät mindestens vier Stunden stehen, bevor Sie es elektrisch anschließen, damit das Öl in den Kompressor zurückfließen kann.
electrolux 5 Erste Inbetriebnahme Reinigung des Innenraums Bevor Sie das Gerät in Betrieb nehmen, beseitigen Sie den typischen "Neugeruch" am besten durch Auswaschen der Innenteile mit lauwarmem Wasser und einem neutralen Reinigungsmittel. Sorgfältig nachtrocknen. Wichtig! Verwenden Sie keine Reinigungsmittel oder Scheuerpulver, da hierdurch die Oberfläche beschädigt wird.
electrolux Praktische Tipps und Hinweise Normale Betriebsgeräusche • Unter Umständen ist ein leichtes Gurgeln und Blubbern zu hören, wenn das Kältemittel durch die Leitungen gepumpt wird. Das ist normal. • Bei eingeschaltetem Kompressor wird das Kältemittel umgewälzt und Sie hören ein Surren und ein pulsierendes Geräusch vom Kompressor. Das ist normal. • Die thermische Ausdehnung kann ein plötzliches Krachen verursachen. Das ist eine natürliche und nicht gefährliche physikalische Erscheinung.
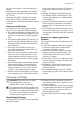
electrolux 7 nig Luft wie möglich in der Verpackung zu haben. Milchflaschen: bitte bewahren Sie Milchflaschen stets mit Deckel im Flaschenregal in der Tür auf. Bananen, Kartoffeln, Zwiebeln und Knoblauch sollten nicht im Kühlschrank aufbewahrt werden, außer diese sind dafür speziell verpackt. Hinweise zum Einfrieren Im Folgenden finden Sie einige wertvolle Tipps für einen optimalen Gefriervorgang: • die maximale Menge an Lebensmitteln, die innerhalb von 24 Stunden eingefroren werden kann.
electrolux Wichtig! Ziehen Sie nicht an Leitungen und/ oder Kabeln im Innern des Kühlschranks und achten Sie darauf, diese nicht zu verschieben oder zu beschädigen. Benutzen Sie zur Reinigung des Innenraums keinesfalls Putzmittel, Scheuerpulver, stark parfümierte Reinigungsmittel oder Wachspolituren, da diese die Oberfläche des Innenraums beschädigen und einen starken Eigengeruch hinterlassen können.
electrolux 9 Wichtig! Verwenden Sie bitte niemals scharfe Gegenstände zum Entfernen von Reif und Eis vom Verdampfer, da dieser dadurch beschädigt werden könnte. Benutzen Sie keine mechanischen oder sonstigen Hilfsmittel, um den Abtauprozess zu beschleunigen; halten Sie sich dazu ausschließlich an die Angaben des Geräteherstellers. Ein Temperaturanstieg des Gefrierguts während des Abtauens des Gerätes kann die Lagerzeit dieser Lebensmittel verkürzen.
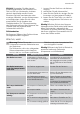
electrolux Störung Mögliche Ursache Abhilfe Die Temperatur der zu kühlenden Lebensmittel ist zu hoch. Lassen Sie die Lebensmittel auf Raumtemperatur abkühlen, bevor Sie sie in das Gerät legen. Die Raumtemperatur ist zu hoch. Senken Sie die Raumtemperatur. Wasser fließt an der Rückwand des Kühlschranks hinunter. Beim automatischen Abtauen fließt das abgetaute Wasser an der Rückwand des Kühlschranks hinunter. Das ist normal. Wasser fließt in den Innenraum des Kühlschranks.
electrolux 11 Schließen Sie die Tür 1. Reinigen Sie die Türdichtungen. 2. Stellen Sie die Tür nach Bedarf ein. Siehe hierzu "Gerät aufstellen". 3. Ersetzen Sie die defekten Türdichtungen, falls erforderlich. Kontaktieren Sie den Kundendienst. Technische Daten Abmessungen Höhe 1250 mm Breite 550 mm Tiefe 612 mm Ausfalldauer 11 h Die technischen Informationen befinden sich auf dem Typschild innen links im Gerät sowie auf der Energieplakette.
100mm 12 electrolux 1 Warnung! Es muss möglich sein, das Gerät vom Netz zu trennen; nach der Installation muss die Steckdose daher zugänglich bleiben. 15mm Standort Das Gerät sollte möglichst weit entfernt von Wärmequellen wie Heizungen, Boilern oder direktem Sonnenlicht usw. aufgestellt werden. Sicherstellen, dass die Luft frei auf der Rückseite des Gerätes zirkulieren kann.
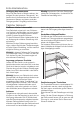
electrolux 13 3. Schieben Sie die Arbeitsplatte nach hinten und heben Sie sie an. 4. Schrauben Sie beide Schraubfüße ab. 5. Lösen Sie die Schrauben des unteren Türscharniers. Nehmen Sie das Scharnier ab. Stecken Sie den Bolzen in Pfeilrichtung um.
electrolux festigen Sie das Scharnier an der gegenüberliegenden Seite. 6. Lösen Sie die Schraube und bringen Sie sie an der gegenüberliegenden Seite wieder an. 1 2 3 11. Ziehen Sie das Scharnier fest. 7. Befestigen Sie das Scharnier an der gegenüberliegenden Seite. 8. Schrauben Sie beide Schraubfüße wieder an. 9. Lösen Sie die Schrauben am oberen Türscharnier. 10. Nehmen Sie das Scharnier ab. Stecken Sie den Bolzen in Pfeilrichtung um. Be- 12.
electrolux 15 15. Bauen Sie den Griff ab 4) und auf der gegenüberliegenden Seite wieder an. 1 3 2 16. Schieben Sie das Gerät wieder an seinen Standort, richten Sie es waagerecht aus und nehmen Sie es mindestens vier Stunden lang nicht in Betrieb. Schließen Sie es dann an die Stromversorgung an. Prüfen Sie alles erneut, um sicherzustellen, dass: • Alle Schrauben fest angezogen sind. • Die Tür korrekt öffnet und schließt. Bei niedrigen Umgebungstemperaturen (z.B.
electrolux Missachtung der oben genannten Sicherheitshinweise entstehen. Das Gerät entspricht den EU- Richtlinien. Hinweise zum Umweltschutz Das Symbol auf dem Produkt oder seiner Verpackung weist darauf hin, dass dieses Produkt nicht als normaler Haushaltsabfall zu behandeln ist, sondern an einem Sammelpunkt für das Recycling von elektrischen und elektronischen Geräten abgegeben werden muss.
electrolux 17 Electrolux. Thinking of you. Partagez notre imagination sur www.electrolux.
electrolux • N'endommagez pas le circuit de refroidissement. • Le circuit de refroidissement de l'appareil contient de l'isobutane (R600a), un gaz naturel offrant un haut niveau de compatibilité avec l'environnement mais qui est néanmoins inflammable. Pendant le transport et l'installation de l'appareil, assurez-vous qu'aucune pièce du circuit de refroidissement n'est endommagée.
electrolux 19 • Déballez l'appareil et vérifiez qu'il n'est pas endommagé. Ne branchez pas l'appareil s'il est endommagé. Signalez immédiatement au revendeur de l'appareil les dommages constatés. Dans ce cas, gardez l'emballage. • Il est conseillé d'attendre au moins quatre heures avant de brancher l'appareil pour que le circuit frigorifique soit stabilisé. • Veillez à ce que l'air circule librement autour de l'appareil pour éviter qu'il ne surchauffe.
electrolux Important Si le thermostat est réglé sur la position de froid maximum, lorsque la température ambiante est élevée et que l'appareil est plein, il est possible que le compresseur fonctionne en régime continu. Dans ce cas, il y a un risque de formation excessive de givre sur la paroi postérieure à l'intérieur de l'appareil.
electrolux 21 peuvent être positionnés à différentes hauteurs. Pour les ajuster, procédez comme suit : tirez progressivement dans le sens des flèches pour les dégager, puis repositionnezles selon les besoins. Conseils utiles Bruits de fonctionnement normaux • Le liquide de refroidissement qui passe dans le circuit d'évaporation peut produire un bruit de gargouillis ou de bouillonnement. Ce phénomène est normal. • Le compresseur peut produire un ronronnement aigu ou un bruit de pulsation.
electrolux Bananes, pommes de terre, oignons et ail ne se conservent pas au réfrigérateur, s'ils ne sont pas correctement emballés. Conseils pour la congélation Pour obtenir les meilleurs résultats, voici quelques conseils importants : • la quantité maximale de denrées que vous pouvez congeler par 24 heures est indiquée sur la plaque signalétique. • le temps de congélation est de 24 heures. Aucune autre denrée à congeler ne doit être ajoutée pendant cette période.
electrolux 23 Dégivrage du réfrigérateur Le givre est automatiquement éliminé de l'évaporateur du compartiment réfrigérateur à chaque arrêt du compresseur, en cours d'utilisation normale. L'eau de dégivrage est collectée dans un récipient spécial situé à l'arrière de l'appareil, au-dessus du compresseur, d'où elle s'évapore.
electrolux Important Certains bruits pendant le fonctionnement (compresseur, circuit de réfrigérant) sont normaux. Anomalie Cause possible Remède L'appareil est bruyant L'appareil n'est pas stable Vérifiez la stabilité (les quatre pieds doivent être en contact avec le sol) L'appareil ne fonctionne pas. L'ampoule ne fonctionne pas. L'appareil est éteint. Mettez l'appareil en fonctionnement. La fiche n'est pas correctement branchée à la prise de courant.
electrolux 25 Anomalie Cause possible Remède La température du produit est trop élevée. Laissez le produit revenir à température ambiante avant de le ranger dans le congélateur. Trop de produits ont été introduits simultanément. Introduisez moins de produits en même temps. La température du compartiment réfrigérateur est trop élevée. L'air froid ne circule pas dans l'appareil. Assurez-vous que l'air froid circule dans l'appareil. La température du congélateur est trop élevée.
electrolux matique indiquée sur la plaque signalétique de l'appareil : Température ambiante +16 à + 32 °C ST +16 à + 38 °C T +16 à + 43 °C Entretoises arrière Le sachet avec la documentation contient deux entretoises, qui doivent être mises en place comme le montre l'illustration. 1. Introduisez les entretoises dans les orifices. Veillez à ce que la flèche (A) se trouve dans la position illustrée sur la photo. 2.
electrolux 27 Réversibilité de la porte Important Pour effectuer les opérations suivantes, il est conseillé de se faire aider par une autre personne pour maintenir fermement les portes de l'appareil pendant les opérations. Pour changer le sens d'ouverture de la porte, suivez les étapes suivantes : 1. Retirez la fiche de la prise de courant. 2. Dévissez les deux vis sur l'arrière. 4. Dévissez les deux pieds réglables. 3. Repoussez le "top" et soulevez-le.
electrolux 5. Dévissez les vis de la charnière inférieure de la porte. Retirez la charnière. Placez la goupille dans le sens de la flèche. 7. Installez la charnière sur le côté opposé. 1 3 2 6. Dévissez et installez la vis sur le côté opposé. 8. Vissez les deux pieds réglables. 9. Dévissez les vis de la charnière supérieure de la porte. 10. Retirez la charnière. Placez sur la goupille dans le sens de la flèche. Installez la charnière de l'autre côté.
electrolux 29 11. Serrez la charnière. 12. 13. 14. 15. 16. Remettez l'appareil en place, mettez-le d'aplomb, attendez quatre heures au moins puis branchez-le dans la prise de courant. Vérifiez enfin que : • Toutes les vis sont serrées. • La porte ouvre et ferme correctement. Si la température ambiante est basse (en hiver, par exemple), il se peut que le joint n'adhère pas parfaitement.
electrolux Réversibilité de la porte du congélateur 180˚ Branchement électrique Contrôlez, avant de brancher l'appareil, si la tension et la fréquence indiquées sur la plaque signalétique correspondent à celles de votre réseau. L'appareil doit être relié à la terre. La fiche du câble d'alimentation comporte un logement pour mise à la terre.
electrolux 31 Electrolux. Thinking of you. Per conoscere meglio il nostro modo di pensare, visitate il sito www.electrolux.
electrolux • Nel circuito refrigerante dell'apparecchio è contenuto il refrigerante isobutano (R600a), un gas naturale con un elevato livello di compatibilità ambientale, che è però infiammabile. Durante il trasporto e l'installazione dell'apparecchio, assicurarsi che nessuno dei componenti del circuito refrigerante venga danneggiato.
electrolux 33 • Si consiglia di attendere almeno due ore prima di collegare l'apparecchio per consentire all'olio di arrivare nel compressore. • Attorno all'apparecchio vi deve essere un'adeguata circolazione dell'aria, altrimenti si può surriscaldare. Per ottenere una ventilazione sufficiente seguire le istruzioni di installazione.
electrolux Importante Non usare detergenti corrosivi o polveri abrasive che danneggiano le finiture. Utilizzo quotidiano Congelazione dei cibi freschi Il vano congelatore è adatto alla congelazione di cibi freschi e alla conservazione a lungo termine di cibi congelati e surgelati. Per congelare cibi freschi non è necessario cambiare la regolazione media. Tuttavia, per un'operazione di congelamento più rapida, ruotare il termostato verso una regolazione più alta per ottenere il massimo raffreddamento.
electrolux 35 Consigli e suggerimenti utili Rumori normali durante il funzionamento • Quando il refrigerante viene pompato attraverso le bobine o le tubazioni si può sentire un fievole gorgoglio e un borbottio. Non si tratta di un'anomalia. • Quando il compressore è in funzione, viene pompato il refrigerante e si può sentire un ronzio e un rumore pulsante dal compressore. Non si tratta di un'anomalia. • La dilatazione termica potrebbe provocare uno schiocco improvviso.
electrolux Conservazione per la conservazione di cibi congelati Per ottenere i migliori risultati con questo apparecchio: • accertare che i cibi congelati commercialmente siano adeguatamente conservati dal rivenditore; • fare in modo che i cibi congelati siano trasferiti dal negozio al congelatore nel più breve tempo possibile; • non aprire la porta frequentemente o lasciarla aperta più del tempo strettamente necessario.
electrolux 37 Sbrinamento del congelatore Una certa quantità di brina si formerà sempre sui ripiani del congelatore e attorno allo scomparto superiore. Importante Sbrinare il congelatore quando lo strato di brina raggiunge uno spessore di ca. 3-5 mm. Per rimuovere la brina, seguire le istruzioni sottostanti: 1. Spegnere l'apparecchio. 2. Rimuovere il cibo eventualmente conservato, avvolgendolo in diversi strati di carta di giornale e collocandolo in un luogo fresco. 3. Lasciare la porta aperta. 4.
electrolux Problema La lampadina non si accende. Il compressore rimane sempre in funzione. Possibile causa Soluzione La lampadina è in stand-by. Aprire e chiudere la porta. La lampadina è difettosa. Vedere "Sostituzione della lampadina". La temperatura non è regolata correttamente. Impostare una temperatura superiore. La porta non è chiusa correttamente. Vedere "Chiusura della porta". La porta viene aperta troppo frequentemente. Limitare il più possibile il tempo di apertura della porta.
electrolux 39 Problema Possibile causa La temperatura non è regolata correttamente. Sostituzione della lampada 1. Staccare la spina dalla presa. 2. Rimuovere la vite dalla copertura della lampada. 3. Rimuovere la copertura della lampada (vedere l'illustrazione). 4. Sostituire la lampada usata con una nuova dalla stessa potenza (la potenza massima è indicata sulla copertura della lampada). 5. Installare la copertura della lampada. 6. Serrare la vite della copertura della lampada. 7.
electrolux Se l'apparecchio è installato in un angolo con il lato incernierato verso la parete, la distanza rispetto a quest'utima deve essere di almeno 10 mm, in modo che la porta possa aprirsi in misura sufficiente per consentire la rimozione dei ripiani. 15mm Livellamento L'apparecchio deve trovarsi perfettamente in piano. Per correggere gli eventuali dislivelli è possibile regolare in altezza i due piedini anteriori (2). Se necessario, regolare i piedini rimuovendo il distanziatore (1). 15mm 2.
electrolux 41 3. Spingere all'indietro la copertura superiore e sollevarla. 4. Svitare i due piedini regolabili. 5. Rimuovere le viti dalla cerniera inferiore della porta. Rimuovere la cerniera. Inserire il perno nella direzione della freccia.
electrolux 6. Rimuovere la vite e installarla sul lato opposto. 10. Rimuovere la cerniera. Inserire il perno nella direzione della freccia. Installare la cerniera sul lato opposto. 1 2 3 11. Fissare la cerniera. 7. Installare la cerniera sul lato opposto. 8. Avvitare i due piedini regolabili. 9. Rimuovere le viti dalla cerniera superiore della porta. 12. Riapplicare la copertura superiore. 13. Premere sul lato anteriore della copertura. 14. Stringere le due viti sul lato posteriore.
electrolux 43 15. Rimuovere e installare la maniglia 12) sul lato opposto. 1 3 2 16. Riposizionare l'apparecchio, livellarlo, attendere almeno quattro ore e inserire la spina nella presa. Effettuare un controllo finale per verificare che: • Tutte le viti siano serrate. • La porta si apra e si chiuda correttamente. Se la temperatura ambiente è bassa (ad esempio in inverno), è possibile che la guarnizione non aderisca perfettamente. In tal caso, attendere che aderisca naturalmente.
electrolux Il presente apparecchio è conforme alle direttive CEE. Considerazioni ambientali Il simbolo sul prodotto o sulla confezione indica che il prodotto non deve essere considerato come un normale rifiuto domestico, ma deve essere portato nel punto di raccolta appropriato per il riciclaggio di apparecchiature elettriche ed elettroniche.
electrolux 45 Electrolux. Thinking of you. Share more of our thinking at www.electrolux.
electrolux • The refrigerant isobutane (R600a) is contained within the refrigerant circuit of the appliance, a natural gas with a high level of environmental compatibility, which is nevertheless flammable. During transportation and installation of the appliance, be certain that none of the components of the refrigerant circuit become damaged.
electrolux 47 • Wherever possible the back of the product should be against a wall to avoid touching or catching warm parts (compressor, condenser) to prevent possible burn. • The appliance must not be located close to radiators or cookers. • Make sure that the mains plug is accessible after the installation of the appliance. • Connect to potable water supply only.
electrolux Daily use Freezing fresh food The freezer compartment is suitable for freezing fresh food and storing frozen and deep-frozen food for a long time. To freeze fresh foods it is not necessary to change the medium setting. However, for a faster freezing operation, turn the temperature regulator toward higher settings to obtain the maximum coldness. Important! In this condition, the refrigerator compartment temperature might drop below 0°C.
electrolux 49 • The thermic dilatation might cause a sudden cracking noise. It is natural, not dangerous physical phenomenon. This is correct. • When the compressor switches on or switches off, you will hear a faint "click" of the temperature regulator. This is correct. Hints for energy saving • Do not open the door frequently or leave it open longer than absolutely necessary.
electrolux Care and cleaning Caution! Unplug the appliance before carrying out any maintenance operation. This appliance contains hydrocarbons in its cooling unit; maintenance and recharging must therefore only be carried out by authorized technicians. inside. Use the special cleaner provided, which you will find already inserted into the drain hole. Periodic cleaning The equipment has to be cleaned regularly: • clean the inside and accessories with lukewarm water and some neutral soap.
electrolux 51 Important! Never use sharp metal tools to scrape off frost from the evaporator as you could damage it. Do not use a mechanical device or any artificial means to speed up the thawing process other than those recommended by the manufacturer. A temperature rise of the frozen food packs, during defrosting, may shorten their safe storage life. Periods of non-operation When the appliance is not in use for long periods, take the following precautions: 1.
electrolux Problem Water flows into the refrigerator. Possible cause Solution The water outlet is clogged. Clean the water outlet. Products prevent that water flows into the water collector. Make sure that products do not touch the rear plate. Water flows on the ground. The melting water outlet does not Attach the melting water outlet to flow in the evaporative tray above the evaporative tray. the compressor. The temperature in the appliance is too low.
electrolux 53 Technical data Dimension Height 1250 mm Width 550 mm Depth 612 mm Rising Time 11 h The technical information are situated in the rating plate on the internal left side of the appliance and in the energy label. Installation Read the "Safety Information" carefully for your safety and correct operation of the appliance before installing the appliance.
electrolux Door reversibility Important! To carry out the following operations, we suggest that this be made with another person that will keep a firm hold on the doors of the appliance during the operations. 1 2 Location The appliance should be installed well away from sources of heat such as radiators, boilers, direct sunlight etc. Ensure that air can circulate freely around the back of the cabinet.
electrolux 55 5. Unscrew the screws of the door bottom hinge. Remove the hinge. Put over the pin in the direction of the arrow. 1 3 4. Unscrew both adjustable feet. 2 6. Unscrew and install the screw on the opposite side.
electrolux 7. Install the hinge on the opposite side. 11. Tighten the hinge. 8. Screw both adjustable feet. 9. Unscrew the screws of the door top hinge. 10. Remove the hinge. Put over the pin in the direction of the arrow. Install the hinge on the opposite side. 12. 13. 14. 15. 1 3 2 Put the top in position. Push front the top. Screw both screws on the rear side. Remove and install the handle16) on the opposite side. 1 3 2 16.
electrolux 57 In case you do not want to carry out the above mentioned operations, contact the nearest After Sales Service Force. The After Sales Service specialist will carry out the reversibility of the doors at your cost. Reversibility of the freezer door 180˚ Electrical connection Before plugging in, ensure that the voltage and frequency shown on the rating plate correspond to your domestic power supply. The appliance must be earthed.
electrolux
electrolux 59
www.electrolux.com Für Gerätezubehör und Ersatzeile besuchen Sie unseren Web Shop: www.electrolux.ch Pour les accessoires et le pièces détachées visité notre Web Shop: www.electrolux.ch Per gli accessori e i pezzi di ricambio vogliate visitare il nostro Web Shop: www.electrolux.