SKS31240S0 SKS61240S0 EN REFRIGERATOR USER MANUAL
FOR PERFECT RESULTS Thank you for choosing this AEG product. We have created it to give you impeccable performance for many years, with innovative technologies that help make life simpler – features you might not find on ordinary appliances. Please spend a few minutes reading to get the very best from it. ACCESSORIES AND CONSUMABLES In the AEG webshop, you’ll find everything you need to keep all your AEG appliances looking spotless and working perfectly.
Contents 3 CONTENTS 4 6 7 7 8 9 11 13 13 20 Safety information Operation First use Daily use Helpful hints and tips Care and cleaning What to do if… Technical data Installation Environmental concerns The following symbols are used in this user manual: Important information concerning your personal safety and information on how to avoid damaging the appliance.
Safety information SAFETY INFORMATION In the interest of your safety and to ensure the correct use, before installing and first using the appliance, read this user manual carefully, including its hints and warnings. To avoid unnecessary mistakes and accidents, it is important to ensure that all people using the appliance are thoroughly familiar with its operation and safety features.
Safety information 5 • It is dangerous to alter the specifications or modify this product in any way. Any damage to the cord may cause a short-circuit, fire and/or electric shock. WARNING! Any electrical component (power cord, plug, compressor) must be replaced by a certified service agent or qualified service personnel. • • • • 1. Power cord must not be lengthened. 2. Make sure that the power plug is not squashed or damaged by the back of the appliance.
Operation • Adequate air circulation should be around the appliance, lacking this leads to overheating. To achieve sufficient ventilation follow the instructions relevant to installation. • Wherever possible the back of the product should be against a wall to avoid touching or catching warm parts (compressor, condenser) to prevent possible burn. • The appliance must not be located close to radiators or cookers. • Make sure that the mains plug is accessible after the installation of the appliance.
First use 7 • the location of the appliance. If the ambient temperature is high or the appliance is fully loaded, and the appliance is set to the lowest temperatures, it may run continuously causing frost to form on the rear wall. In this case the dial must be set to a higher temperature to allow automatic defrosting and therefore reduced energy consumption.
Helpful hints and tips Movable shelves The walls of the refrigerator are equipped with a series of runners so that the shelves can be positioned as desired. Positioning the door shelves To permit storage of food packages of various sizes, the door shelves can be placed at different heights. HELPFUL HINTS AND TIPS Hints for energy saving • Do not open the door frequently or leave it open longer than absolutely necessary.
Care and cleaning 9 Butter and cheese: these should be placed in special airtight containers or wrapped in aluminium foil or polythene bags to exclude as much air as possible. Milk bottles: these should have a cap and should be stored in the bottle rack on the door. Bananas, potatoes, onions and garlic, if not packed, must not be kept in the refrigerator.
Care and cleaning • clean the inside and accessories with lukewarm water and some neutral soap. • regularly check the door seals and wipe clean to ensure they are clean and free from debris. • rinse and dry thoroughly. Do not pull, move or damage any pipes and/or cables inside the cabinet. Never use detergents, abrasive powders, highly perfumed cleaning products or wax polishes to clean the interior as this will damage the surface and leave a strong odour.
What to do if… 11 1. Switch off the appliance. 2. Remove any stored food, wrap it in several layers of newspaper and put it in a cool place. 3. Open the door. 4. When defrosting is completed, dry the interior thoroughly. 5. Switch on the appliance. 6. Set the temperature regulator to obtain the maximum coldness and run the appliance for two or three hours using this setting. 7. Reload the previously removed food into the compartment.
What to do if… Problem Possible cause Solution The appliance has no power. Connect a different electrical apThere is no voltage in the mains pliance to the mains socket. socket. Contact a qualified electrician. The lamp does not work. The compressor operates continually. The lamp is in stand-by. Close and open the door. The lamp is defective. Refer to "Replacing the lamp". The temperature is not set correctly. Set a higher temperature. The door is not closed correctly.
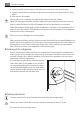
Technical data 13 3. Remove the lamp cover (refer to the illustration). 4. Replace the used lamp with a new lamp of the same power and specifically designed for household appliances. (the maximum power is shown on the lamp cover). 5. Install the lamp cover. 6. Tighten the screw to the lamp cover. 7. Connect the mains plug to the mains socket. 8. Open the door. Make sure that the lamp comes on. Closing the door 1. Clean the door gaskets. 2. If necessary, adjust the door. Refer to "Installation". 3.
Installation Climate class Ambient temperature SN +10°C to + 32°C N +16°C to + 32°C ST +16°C to + 38°C T +16°C to + 43°C Electrical connection Before plugging in, ensure that the voltage and frequency shown on the rating plate correspond to your domestic power supply. The appliance must be earthed. The power supply cable plug is provided with a contact for this purpose.
Installation 15 Ventilation requirements The airflow behind the appliance must be sufficient. 50 mm min. 200 cm2 min. 200 cm2 Installing the appliance CAUTION! Make sure that the mains cable can move freely. Do the following steps: 1. Apply the adhesive sealing strip to the appliance as shown in figure.
Installation 2. Install the appliance in the niche. Push the appliance in the direction of the arrow (1) until the upper gap cover stops against the kitchen furniture. Push the appliance in the direction of the arrow (2) against the cupboard on the opposite side of the hinge. 2 1 3. 4. Adjust the appliance in the niche. Make sure that the distance between the appliance and the cupboard frontedge is 44 mm.
Installation 5. Remove the correct part from the hinge cover (E). Make sure to remove the part DX, in the case of right hinge, SX in opposite case. 6. Attach the covers (C, D) to the lugs and the hinge holes. Attach the hinge covers (E) to the hinge. D C E E 7. Disconnect the parts (Ha), (Hb), (Hc) and (Hd).
Installation 8. Install the part (Ha) on the inner side of the kitchen furniture door. ca. 50 mm 90° 21 mm 90° ca. 50 mm 9. 21 mm Push the part (Hc) on the part (Ha). Ha Hc 10. Open the appliance door and the kitchen furniture door at an angle of 90°. Insert the small square (Hb) into guide (Ha). Put together the appliance door and the furniture door and mark the holes.
Installation 11. Remove the brackets and mark a distance of 8 mm from the outer edge of the door where the nail must be fitted (K). 19 8 mm K Ha 12. Place the small square on the guide again and fix it with the screws supplied. Align the kitchen furniture door and the appliance door by adjusting the part Hb. Hb 13. Press the part (Hd) on the part (Hb). Do a final check to make sure that: • All screws are tightened. • The sealing strip is attached tightly to the cabinet.
Environmental concerns Reversibility of the freezer door 180˚ ENVIRONMENTAL CONCERNS The symbol on the product or on its packaging indicates that this product may not be treated as household waste. Instead it should be taken to the appropriate collection point for the recycling of electrical and electronic equipment.
www.aeg-electrolux.