
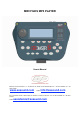
User`s manual

6
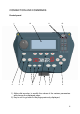
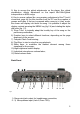
4) Audio output (to be connected to the audio system);
5) Video connectors. Output (Video out) / Input (Video in)
6) Connector for video camera power supply (optional) or external
lyrics display (optional);
7) Port MIDI In when M-Blaster22 is an Expander and Port MIDI Out
to connect an external MIDI Synth generator;
8) USB connector to connect M-Blaster2 to a PC;
9) Power Switch;
10) Connection to the supplied external power supply adapter;
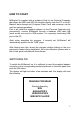
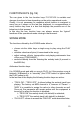
POWER SUPPLY
Connect the adapter plug (male) to the PWR IN female connector
positioned on the M-Blaster2 back panel
(Fig.2/10)
.
Finally, connect the adapter plug to the main socket.
IMPORTANT
Please use exclusively the supplied adapter. Otherwise, the
equipment can be damaged.
AUDIO CONNECTIONS
Connect the M-Blaster2 Audio Outputs (fig 2/4) to your audio equipment
(mixer line input or directly to the line inputs of an audio equipment,
inputs AUX or TAPE of your home Hi-Fi or else).
Note: in order not to damage the audio equipment, it is strongly
recommended that M-Blaster2 is turned on before the amplification set-
up.