
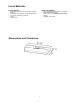
Installation Instruction


7
Installation
Installation - Ducting version
After having choosen the vent option, proceed as
follows:
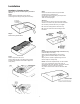
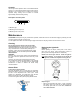
Step 2
Remove the round transition from its seat by
unscrewing the its fixing screws (save the screws).
Step 3
Remove the grease filters.
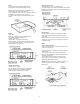
Step 4
Remove the junction box cover.
Remove either the top or the back wiring knockout
according the preference and install an approved
wiring clamp
Step 5
Remove the duct knockouts using a flat blade
screwdriver and a small hammer.
Use the screwdriver by knocking out the pannel in
similar fashion to a scalpel.
Take care of sharp edges.
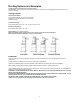
Attention!
If it is intended to use the hood in the recirculating
version do not remove any duct knockouts and order
the necessary charcoal filter from your supplier.
R1 = Remove rectangular duct knockout only.
R2 = Remove semicircular and rectangular duct
knockouts.
Step 6
For rectangular ducted discharge installations only
(otherwise skip to next step)
Attach exhaust adaptor/damper over knockout
opening with two exhaust adaptor screws. Make
sure
damper pivot is nearest to top/back edge of hood.
Remove tape from damper flap.
NOTE: The exhaust adaptor/damper can be installed
up to 1 inch on either side of the hood center to
accommodate off-center ductwork. In extreme offcenter
installations, one end of the duct connector
may need to be trimmed to clear the electrical cable
clamp.