READ AND SAVE THESE INSTRUCTIONS LISEZ CES INSTRUCTIONS ET CONSERVEZ-LES THIS MANUAL IS FOR USE ONLY IN USA AND CANADA CE MANUEL EST UNIQUEMENT VALABLE AUX USA ET AU CANADA
EN - Instruction on mounting and use READ AND SAVE THESE INSTRUCTIONS APPROVED FOR RESIDENTIAL APPLIANCES FOR RESIDENTIAL USE ONLY READ AND SAVE THESE INSTRUCTIONS device, such as a tag, to the service panel. WARNING TO REDUCE THE RISK OF FIRE, ELECTRIC SHOCK, OR INJURY TO PERSONS, OBSERVE THE FOLLOWING: A. Installation Work and Electrical Wiring Must Be Done By Qualified Person(s) In Accordance With All Applicable Codes & Standards, Including Fire-rated Construction. B.
d) Use proper pan size. Always use cookware appropriate for the size of the surface element. Electrical & Installation requirements WARNING TO REDUCE THE RISK OF INJURY TO PERSONS, IN THE EVENT OF A RANGE TOP GREASE FIRE, OBSERVE THE FOLLOWINGa: a) SMOTHER FLAMES with a close-fitting lid, cookie sheet, or other metal tray, then turn off the gas burner or the electric element. BE CAREFUL TO PREVENT BURNS. If the flames do not go out immediately, EVACUATE AND CALL THE FIRE DEPARTMENT.
Save Installation Instructions for electrical inspector’s use. Before installing the hood The range hood should be connected directly to the fused disconnect (Or circuit breaker). Wire sizes must conform to the requirements of the National Electrical Code ANSI/NFPA 70 — latest edition*, or CSA Standards C22.1-94, Canadian Electrical Code Part 1 and C22.2 No. 0-M91 - latest edition** and all local codes and ordinances. 1.
Use Hood installation height above cooktop is the users preference. The lower the hood is above the cooktop, the more efficient the capturing of cooking odors, grease and smoke. CAUTION: FOR GAS RANGES INSTALLATION: MOUNT THIS HOOD SO THAT THE BOTTOM EDGE IS AT 30" (76,2 CM) ABOVE THE COOKING SURFACE. FOR ELECTRIC RANGES INSTALLATION: MOUNT THIS HOOD SO THAT THE BOTTOM EDGE IS NOT LESS THAN 30" (76,2 CM) AND NO MORE THAN 30" (76,2 CM) ABOVE THE COOKING SURFACE. HOUSEHOLD USE.
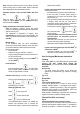
Speed 2 (medium aspiration): 15 minutes Speed 3 (high aspiration): 10 minutes maintenance. Note: Filter saturation signal is visible within the first minute after switching off the hood; within this time, the reset of saturation indicators must be performed. Control panel with 7 buttons To select the functions of the hood you simply touch the controls.
Note: Automatic operation with the hob is possible only with specific cooking hobs; for further details, please contact the authorised dealer or technical assistance centre. selection was recorded. Logical connection between the hood and the hob (if you have an Elica hob). a. Simultaneously connect the hood and Elica hob. b. the hood emits 2 acoustic signals (beeps) to indicate that it can receive the connection signal from the Elica hob. c.
water and a suitable detergent, or in a dishwasher at 65°C (if the dishwasher is used, select the full cycle function and leave dishes out). Eliminate excess water without damaging the filter, then put it in the oven for 10 minutes at 100° C to dry completely. Replace the mattress every 3 years and when the cloth is damaged. Replacing lamps The hood is equipped with a lighting system based on LED technology.
FR - Prescriptions de montage et mode d’emploi LISEZ CES INSTRUCTIONS ET CONSERVEZ-LES APPROUVÉ POUR LES APPAREILS DE TYPE RÉSIDENTIEL POUR UNE UTILISATION RÉSIDENTIELLE SEULEMENT LISEZ CES INSTRUCTIONS ET CONSERVEZ-LES permettant d’empêcher d’activer l’alimentation accidentellement. S’il n’est pas possible de verrouiller l’accès au panneau, fixez une étiquette très voyante au panneau électrique.
SUR LES CUISINIÈRES. a) Ne laissez jamais la cuisinière sans surveillance lorsqu’elle est réglée à une haute température. Les débordements par bouillonnement causent de la fumée et des débordements de gras qui peuvent s’enflammer. Faites chauffer l’huile lentement, à une température basse ou moyenne. b) Faites toujours fonctionner la hotte lorsque vous utilisez la cuisinière à une haute température ou que vous faites flamber des aliments (P. ex. : crêpes Suzette, cerises jubilées, bœuf au poivre flambé).
IMPORTANT Exigences électriques et exigences d’installation Conservez ces instructions afin de pouvoir les remettre à l’inspecteur-électricien. Il faut raccorder la hotte directement à une boîte à fusible ou à un disjoncteur. Exigences électriques IMPORTANT Le calibre de fil doit être conforme aux exigences du Code national de l’électricité, ANSI/NFPA 70 (La plus récente édition*), ou les normes C22.1-94, Code canadien de l’électricité, Partie 1 et C22.
Avant d’installer la hotte 1. Pour assurer la ventilation la plus efficace possible, installez la conduite en ligne droite ou avec le moins de coudes possibles. ATTENTION : La sortie de la conduite de ventilation doit donner sur l’extérieur. 2. Deux personnes sont nécessaires pour effectuer l’installation. Porter des gants pour se protéger des bords coupants. 3.
réseau électrique et effectuer la procédure d’affiliation dans la première minute qui suit l’alimentation. Avant de couper, assurez-vous qu’il y a un dégagement suffisant dans le plafond ou le mur pour passer la conduite de sortie. Lire les instructions fournies avec la radiocommande où figurent toutes les informations pour l’affiliation et l’utilisation correcte. Vous pouvez déterminer vous-même la hauteur à laquelle vous installez la hotte au dessus de la cuisinière.
hotte est activé télécommande). (uniquement hotte. avec Fonctionnement automatique de la hotte avec SNAP® Bouton OFF moteur (stand by) Appuyez sur la touche .(les LED sont éclairées en orange) pour indiquer que la hotte peut fonctionner automatiquement avec le SNAP® Remarque : Le SNAP® est une unité d’aspiration auxiliaire qui peut fonctionner avec la hotte.
Calibrage de la hotte Connexion logique entre la hotte et SNAP® (si vous avez un SNAP®). La connexion entre la hotte et SNAP® est automatique, il ne faut pas effectuer des réglages. , toutes Appuyez longuement sur la touche les LED de la touche clignotent pour indiquer que le calibrage a commencé; le processus durera environ 5 minutes.
Pour remplacer les lampes, contactez le centre service agréé pour pièces de rechange.
LIB0136021 Ed.