
User's Manual Part 2


73
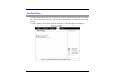
• From Start, click on the "My Computer" icon and click the "View System
Information".
• Click on the "Hardware" tab from the "System Properties" dialog window.
• Click the "Device Manager" button.
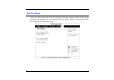
• Double click on the "Other Devices" , double click the " Network Controller "
and click on the "Driver" tab.
• Click the "Update Driver" tab and select the "Install from a list or specific
location (Advanced)" item and click "Next".
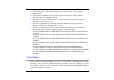
• Select the "Include this location in the search" item and click on the "Browse"
button and specify for the designate location of your CD driver
D:\Driver\MiniPCI\Intel\21003B\PROW7100\WinXP\W70N51.inf (WinXP Intel
21003B)
D:\Driver\MiniPCI\Intel\21003B\PROW7100\Win2K\W70N5.inf (Win2K Intel
21003B)
D:\Driver\MiniPCI\Intel\2200BG\PROW2200\WinXP\W22N51.inf (WinXP Intel
2200BG)
D:\Driver\MiniPCI\Intel\2200BG\PROW2200\Win2K\W22N50.inf (Win2K Intel
2200BG)
D:\Driver\MiniPCI\Billionton\WinXP\NET8180.inf (WinXP Billionton)
D:\Driver\MiniPCI\Billionton\Win2000\NET8180.inf (Win2K Billionton)
D:\Driver\MiniPCI\QCOM\802MR\WinXP\NET8180.inf (WinXP QCOM 802MR)
D:\Driver\MiniPCI\QCOM\802MR\Win2000\NET8180.inf (Win2K QCOM
802MR)
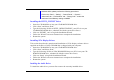
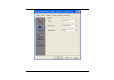
VGA Utilities
After you have restarted Windows, open the “Control Panel” and double click on the
“Display” icon. From the “Display Properties” window, select the “Settings” tab and
click on the “Advanced” tab to enter the “INTEL® 82852/82855 GM/GME Graphics
Controller Properties" window.