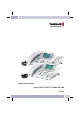
Operating instructions elmeg CS410 / CS410-U / CS400xt / IP-S400 English
Declaration of conformity and CE mark This device meets the requirements of the following EC directive R&TTE 1999/5/EG: »Directive 1999/5/EC of the European Parliament and of the Council of 9 March 1999 on radio equipment and telecommunications terminal equipment and the mutual recognition of their conformity«. You can also request this EC declaration of conformity at the following Internet URL: http://www.funkwerk-ec.com.
Contents Contents Description and installation . . . . . . . . . . . . . . . . . . . . . . . . . . . . . . 1 CS400 / CS400xt . . . . . . . . . . . . . . . . . . . . . . . . . . . . . . . . . . . . . . . . . . . . . . . . . . 1 Configuring emergency operation (PtMP and PtP connections) . . . . . . . . . . . . . . . . . . . . . . 2 Configuring emergency operation at a point-to-point (PtP) connection . . . . . . . . . . . . . . . . . .
Contents Function keys and LEDs. . . . . . . . . . . . . . . . LED call signaling and answering machine . . . . . Acknowledegement signals . . . . . . . . . . . . . . Positive acknowledgement signal (1 long tone): . . Negative acknowledgement signal (3 short beeps): Displays for programmed features. . . . . . . . . . Displays . . . . . . . . . . . . . . . . . . . . Configured function . . . . . . . . . . . . . . . . . . . . . . . . . . . . . . . . . . . . . . . . . . . . . . . . . . . . . . . . . . . . .
Contents Keypad. . . . . . . . . . . . . . . . . . . . . . . . . . . . . . . . . . . . . . . . . . . . . . . . . . . . . . . 28 Tone dialing (dtmf dialing) . . . . . . . . . . . . . . . . . . . . . . . . . . . . . . . . . . . . . . . . . . . 28 Conducting calls with several subscribers . . . . . . . . . . . . . . . . . . . . . 29 Call waiting . . . . . . . . . . . . . . . . . . . . . . . . . . . . . . . . . . . . . . . . . . . . . . . . . . 29 Inquiry Call . . . . . . . . . . . . . . . . . . . . . . . . .
Contents Error when sending or receiving an SMS . . . . . . . . . . . . . . . . . . . . . . . . . . . Error while sending an SMS . . . . . . . . . . . . . . . . . . . . . . . . . . . . . . . . . . Error while receiving an SMS. . . . . . . . . . . . . . . . . . . . . . . . . . . . . . . . . . Silent signalling . . . . . . . . . . . . . . . . . . . . . . . . . . . . . . . . . . . . . . . . . . . . . . . . . . . . . . . . . . . . . . . . . . . . . 45 . 45 . 45 . 45 Monitoring costs . . . . . . . . . .
Contents Accessing the system menu for PABX systems . . . . . . . . . . . . . . . . . . . . . . . . . . . . . . . 57 Configuring and setting up the system telephone . . . . . . . . . . . . . . . . . 59 Extended configuration . . . . . . . . . . . . . . . . . . . . . . . . . . . . . . . . . . . . . . . . . . . 59 Acoustic . . . . . . . . . . . . . . . . . . . . . . . . . . . . . . . . . . . . . . . . . . . . . . . headset . . . . . . . . . . . . . . . . . . . . . . . . . . . . . . . . . . . . . . . . . . .
Contents Configuring the IP-S400 without DHCP . . . . . . . . . . . . . . . . . . . . . . . . . . . . Programming numbers . . . . . . . . . . . . . . . . . . . . . . . . . . . . . . . . . . . . Programming function keys . . . . . . . . . . . . . . . . . . . . . . . . . . . . . . . . . . . Function keys and further entries . . . . . . . . . . . . . . . . . . . . . . . . . . . . . . . function . . . . . . . . . . . . . . . . . . . . . . . . . . . . . . . . . . . . . . . . . . . . . Displays . . . . . . . . .
Contents Index . . . . . . . . . . . . . . . . . . . . . . . . . . . . . . . . . . . . . . 113 Brief description of functions . . . . . . . . . . . . . . . . . . . . . . . . . . . .
Description and installation Description and installation You can connect the system telephone at the internal S0, Up0 or Ethernet connection of a pabx system. The telephone provides system features when connected to certain elmeg PABX systems. For example: • • • • Dialing from the pabx telephone directory Sending and receiving SMS messages Messaging and intercom calls with other system telephones connected to the pabx.
Description and installation Configuring emergency operation (PtMP and PtP connections) Emergency operation is not configured as a factory default feature. A slide switch is located on the bottom of the system telephone that can be used for configuring emergency operation. To configure the emergency operation feature, slide the switch on the left side on the bottom of the phone down. To de-activate emergency operation, slide the switch back to the top position.
Description and installation System-telephone extension modules Up0/S0-module (CS410 only) • Install the Up0/S0-module into your telephone if you wish to connect the phone to a Up0-port of a pabx. The external Up0/S0-converter is then no longer required. Answering machine module (only CS410, CS410-U) • This module provides your telephone with a multi-function digital answering machine. FOR EXAMPLE.
Description and installation • Only terminals with SELV and/or which comply with ETS 300047 may be connected to the unit. This regulation is fulfilled when approved terminal devices are used as intended. Plug-in power supply • Use only approved power plug-in units (DSA-0101F-05 UP or L15 D52 AB DDLAWO). • Do not use power plug-in units with visible defects or damage (fissures, cracks, etc.
Description and installation Connecting the telephone (connecting and handset cords) Please connect the ISDN cable and the handset cable. Otherwise you will not be able to operate the phone. 3 2 6 4 6 5 5 4 1 7 4 Figure 1 Connecting the handset connecting cord Connect the handset cord (1) as shown in figure 1. Lay the handset cord in the cord groove (4) and lock it below the two cord retainers (5).
Description and installation 2 1 3 Figure 2 Connecting and configuring a headset (not included in the scope of supply) You can connect a headset to your telephone. Ask your dealer which headset models can be used or retrieve the required information from the Internet. The telephone is equipped with an 8-pin socket for connecting a headset. Headsets with a DSHG-interface (e. g. cordless DECT-headsets) can be connected to the telephone right away. Special accessories are not required for this.
Description and installation Assignment of the headset jack pins (CS410 / CS410-U) 8 - transmitter 7 - V+ (3.3V) 6 - Microphone - (Ground) 5 - Handset (3.3 V switchable via resistor) 4 - Handset (ground) 3 - Microphone + 2 - Ground 1 - receiver Figure 3 Assignment of the headset jack pins (CS400 / CS400 /CS400xt) 4 2 3 4 - Microphone - (Ground) 3 - Handset 2 - Handset (ground) 1 - Microphone + 1 Figure 4 Further settings when using a headset You can use the handset or the headset for making calls.
Description and installation Connect the USB cord (4) as shown in figure 5 (PC-socket). Plug the USB connector (type A) into the corresponding socket of your PC and the USB connector (type B) into the USB socket on the back of the telephone (1). The telephone is automatically detected by the PC, provided that both devices (telephone and PC) are switched on. Installat ion of a device driver is started automatically the first time you connect the telephone to the PC.
Description and installation ternative B«, as defined by IEEE Std 802.3af-2003, and »Power classification 1« (up to 4 W) is supported. The PoE port is not polarity sensitive.
Description and installation • Select the display language. Press the buttons to view the available languages. Which language? Italiano Español Deutsch ®English Français Nederlands • Enter one of the MSNs that has been input to the PABX system (in the example shown here, 12) . Confirm your entry by pressing O. Programm dial number MSN-1>12 If no PIN has been entered in the system conand button figuration, press button again after being requested to do so.
Description and installation Pictographs The pictographs (symbols) described below have been used in these operating instructions to illustrate some procedures for setting and using the telephone. b Lift up the handset or start prepared dialing. a Replace handset. The telephone is idle. l A call is signaled. The ringer melody sounds. g You are conducting a call. d A three-party conference call is initiated. q You hear the positive or negative acknowledgement signal.
Description and installation Telephone display and buttons Figure 7 1 Speaker 2 Handset with connecting cord 3 Answering machine button on the telephone (optional module). With the CS400, the pabx menu will be loaded. 4 6 Softkeys 5 Seven-line backlit display 6 Menu key: This key opens the programming menu. If you are already located in a menu and thenpressthekey, eithermenu-specificfunctionsareshown,oryouaremovedbackoneprogramming step.
Description and installation 12 Asterisk key/ hash key 13 Dial buttons 14 Open listening / hands-free button 15 Ending a call 16 Redial button 17 Inquiriy button 18 Microphone 19 Eachbuttonhasaninsettwo-colorLED(level1-red/level2-yellow). TheseLEDscanbeused to indicate certain functions. CS410:The LEDs for the two bottom keys of (levels 1 and 2) have two colors. CS410-U: The LEDs of all keys have two colors (levels 1 and 2). IP-S290: The LEDs of all keys have one color (level 1).
Description and installation Special feature for displaying lists in the display Several entries are shown in the display as a list for certain settings or when using the phone. These lists are required for telephone directory or VIP memory programmings for example. <> The active entry (the one you have selected) is VIP digit to select {} highlighted. Use the menu or the OK button V0: 0123456 to display further features or select the high- V1: TONY lighted entry.
Description and installation Key assignments for entering texts The assignments for the keypad for entering letters, digits and special characters are as follows: Button Press Button 1 1 2 3 4 5 6 7 8 9 * # 1 0 2 3 4 5 6 7 A B c 2 Ä Å Æ D E F 3 G H I 4 J K L 5 M N O 6 Ö Ø P Q R S 7 ß T U V 8 Ü W X Y Z 9 $ ¥ * # Severalspecialcharactersareassignedtothebutton»!«,»+«,»-«,»=«,»(«,»)«,»@«,»$«,. .
Description and installation Function keys and LEDs You can program the five function keys on two levels with different functions via the PC configuration program for the telephone. Each key is equipped with an LED that is used to display the active function. Each color is assigned to a particular level for the function key. (level 1 - red / level 2 - yellow). Press the key two times to reach the second level for the function keys. This must be done at a short interval.
Description and installation Displays Configured function Active appointment reminder set. »D« »I« Dialing control or Call filter active, Access to telephone menus is protected. »q« Function »Silent signalling« (notice tone only) active. »Q« Function »Silent signalling« (all calls) active. (All call signals are switched off) »U« Call forwarding active. »i« Informationen on programmed function keys FOR EXAMPLE.: Message enabled / inhibited. »I« Informationen through Messages (MWI) For example.
Making Calls Making Calls Starting a call Dial number - no correction possible b t g Dial number Dial call number - correction possible a t b g Dial number To change the number or to correct a wrong entry, select the wrong figure with the arrow buttons and press C to delete it. Now enter the correct number. If you wish to conduct the call using the handset, just lift it up after dialing the number.
Making Calls Dialing from the pabx telephone directory When you use this telephone with a system telephony supporting pabx system, you can dial from the telephone directory of the pabx. R a s t O Tel. drctry Enter first letter <> O b g Select entry Dialing from the telephone directory You can store up to 250 names and numbers in the telephone directory.
Making Calls a s <> Caller list Select entry b g For more information about the caller/memo list, please refer to page 35 of these operating instructions. Accepting / rejecting a call In its initial state the telephone will accept all calls, regardless of the selected MSN. If two calls are signaled simultaneously the first one is accepted when you lift up the handset. The second call can still be signaledy a call waiting signal.
Making Calls a O t M s b g Concealed Dial number When a call is signaled, you can decide before accepting the call whether your number is to be transmitted to the caller. If your phone is the final destination of call rerouting you can use this procedure to prevent the caller from seeing the final destination phone number (i. e. yours).
Making Calls no entry You placed a call to somebody but did not reach him/her, or his/her line was busy. Deleting a telephone number from extended redialing or save as a memo W a W M s s or delete? Select entry Memo? Press the softkey below »delete?«, to delete the displayed entry immediately. Press the »Memo?« softkey to write the entry as a memo to the memo list. The entry will then be deleted from the memo list. The next telephone number is then displayed.
Making Calls If automatic redialing is active, the »Autom. repeat request« softkey is shown on the display. Press the right arrow button or the »Continue« softkey, to return to the normal idle state display. Suspending automatic redialing You can suspend automatic redialing that you have started any time using the appropriate procedure and place a normal call. To suspend automatic redialing, press the open listening/hands-free button during automatic redialing.
Making Calls Hands Free Calling The handset remains in its cradle during hands free calling. The built-in microphone and the speaker are activated. Any actions are carried out using the open listening / hands-free button only. You can switch back to normal »handset« calls at any time during hands free calling by merely lifting up the handset. You can also switch from normal »handset« calling to hands free calling when you hang up the handset after pressing the open listening / hands-free button.
Making Calls Messages can also be received even if the »Station guarding« function is active when the »Enabling messages« function key has been programmed and is activated. You can initiate a message using the procedure described below, or using a programmed function key. You can also initiate a message during an ongoing call (inquiry call) using the corresponding function key. You can only utilize this function if the messaging feature has been enabled in the pabx for your MSN extension number.
Making Calls Begin as follows: a M s > Acoustic t s Intercom Enter the telephone number, for which the in- | Speak to tercom function is to be activated, or select an entry from the telephone directory. MSN-1 Tel. drctry g L The connection is set up when the telephone | Intercom 22 00.25 has accepted the intercom function. To end the intercom function, press the open listening/hands-free key.
Making Calls If automatic redialing is active, the »Clbckbusy« softkey is shown on the display. Press the right arrow button or the »Continue« softkey, to return to the normal idle state display. Viewing and clearing call-back calls When the phone is in idle, any call-back calls that are initiated can be viewed in the display by pressing the softkey »Clbckbusy«. Press this softkey to view the call-back calls. You can then view the individual completion calls using the arrow keys.
Making Calls Identification of the caller is effected in the exchange and the number stored there with information on the number of the caller, the date and the time of the call. You can use this feature in 2 situations. Malicious call identification during ongoing call >s You want to identify a caller. g The telephone number can then be established in the exchange.
Conducting calls with several subscribers g s t DTMF Input of character strings and digit sequences Conducting calls with several subscribers Call waiting If, during an ongoing call, a second call comes in for you, the second call is signaled when „Call waiting on“ is set (see page 68 ). s call waiting (subscriber 2) g accept Call with subscriber 1 g Call with subscriber 2; Subscriber 1 is put on hold You can take a waiting caller, reject the call, or switch to a different subscriber.
Conducting calls with several subscribers Call switching When a call is transferred, the active subscriber and the subscriber for the connection previously put on hold are always connected with one another. You can initiate an inquiriy call yourself (e.g. in order to announce the call) and can then transfer the call.
Conducting calls with several subscribers To end the three-party conference, press the softkey »back_to_«. You are reconnected with the subscriber of the last previous active connection. The other subscriber is put on hold.
Telephone operation Telephone operation Telephone directory You can store up to 250 names and numbers in the telephone directory. To select a name, you can page through the directory using the arrow buttons, or enter the specific first letter(s) of the name using the push-button set. If the name of the caller is to be shown in the display instead of the caller’s number, this number must be entered in the telephone directory with that name.
Telephone operation The info text length is restricted to 42 characters. The assignments for the keypad for entering letters, digits and special characters are described on page 12. Add an entry to the telephone directory Begin as follows: a M s Program nos. t O Enter the name. In this example: »Mustermann«. Confirm your entry with OK. s s Tel. drctry New Input telephone book Name>Dean_ ¬¬¬¬¬¬¬¬¬¬¬¬¬¬¬¬¬¬¬¬¬¬¬¬¬¬ t O Enter the telephone number. In this example: »0123456«.
Telephone operation Programming special dial tones (VIP-tones) for telephone directory entries Begin as follows: a M <> O s s s <> Program nos. Tel. drctry Sp. ton. call Select entry O Press the arrow buttons to select the ringing Dean, James{} Melody tone melody. 12 Confirm your entry by pressing ok. ----------©----------- ¬¬¬¬¬¬¬¬¬¬¬¬¬¬¬¬¬¬¬¬¬¬¬¬¬¬ <> O Use the arrow buttons to set the volume. Confirm your entry with OK.
Telephone operation t O Enter the name of the VIP target. In this example: »DEAN«. Confirm your entry with OK. Program VIP name program V0>Dean_ ¬¬¬¬¬¬¬¬¬¬¬¬¬¬¬¬¬¬¬¬¬¬¬¬¬¬ t O Enter the telephone number. In this example: »012345«. Confirm your entry with OK. Program VIP number V0>012345_ ¬¬¬¬¬¬¬¬¬¬¬¬¬¬¬¬¬¬¬¬¬¬¬¬¬¬ Editing VIP entries Begin as follows: a M s Program nos. s s <> VIP List Select VIP destination O t O Change the existing name as described on Program VIP name page 12.
Telephone operation are viewing an entry in the list, that caller is then called automatically. Single entries can be selected for deletion. Caller list Calls that you do not accept, or that you specifically refuse, are stored in the caller list. When a call is made with a subscriber from the caller list (you call or you are called), the entry is automatically deleted and transferred into the redial memory. Memo list You can store a telephone number under a scratchpad memo.
Telephone operation Viewing the caller list a The telephone is idle. The softkey »Caller UUS:2 08:00 list« in the lower row of the display indiTel. drctry cates that an entry is present in the list. Press this softkey. s {} Idle VIP Caller list The bottom lines show the entries available in Call Today {} 07:21 MSN-1 the caller list. The active entry (the one you have selected with the arrow buttons) is high- 1/09:Miller office * lighted.
Telephone operation C The display now shows information about the call. If not all information fit into the screen, use the arrow keys to display more. Press the C-button to leave the menu. You can then use any one of the other options. 1/Miller office 0123456789 to MSN-1 (& MSN-2) Call today 07: 21 ( 2 x Call) »delete?« The entry is removed immediately. »info« Viewing further information about the call. FOR EXAMPLE.
Telephone operation »info« Viewing further information about the message. FOR EXAMPLE.: The MSN extension number to which the message was sent and the telephone number of the sender. »Tel. drctry« Entering the number of the caller in the phone book of the phone. »continue« Viewing the next entry in the caller list. Deleting the caller / memo list Deleting an entry a s <> Caller list Select entry M s delete? Deleting all calls You can delete all entries of the caller / memo list simultaneously.
Telephone operation The following example describes how to add a new number as a memo. Begin as follows: a t O > s s Display New Enter the number you wish to store as a Memo number create memo. In this example: »0123456«. Confirm your entry with OK. >0123456_ ¬¬¬¬¬¬¬¬¬¬¬¬¬¬¬¬¬¬¬¬¬¬¬¬¬¬ SMS and UUS1 text messages With this phone you can send and receive SMS or UUS1 messages (SMS - Short Message Service, UUS1 User to User Signalling). You can input a text message using the keypad on the phone.
Telephone operation UUS1 text messages You can send text messages from one telephone to another without having to call that particular subscriber. UUS1 text messages are limited to 31 characters. UUS1 text messages can also be sent to internal and external telephones. You can only use this feature with external telephones if »UUS1 (User to User Signaling)« has been applied for (and approved) for your ISDN connection.
Telephone operation t O s Enter the telephone number. Define targt. numb FOR EXAMPLE.: »2200«. Confirm your entry with OK. The text message is transferred to the defined recipient. >2200_ ¬¬¬¬¬¬¬¬¬¬¬¬¬¬¬¬¬¬¬¬¬¬¬¬¬¬ Finally, you can store the text message in the Save memo? appropriate list (»ok« softkey) or keep it in No the temporary memory (»No« softkey).
Telephone operation Begin as follows: > a s s s Message SMS or UUS read,Inbox or read,Outbox Example: Reading a received UUS1 message The most recently added text message is displayed first. A new, unread text message is marked with an »*«. The following information can be displayed for a text message: • • • • Nmber of the text message in the list (in this example: »01/06«). Received (»†«) or sent (»‡«) text message (in this example: »†«).
Telephone operation Begin as follows: a <> > s s s Messages UUS Specify the text Press the arrow keys to select a text message. Select text {} 1: 2: 3: ¬¬¬¬¬¬¬¬¬¬¬¬¬¬¬¬¬¬¬¬¬¬¬¬¬¬ O M Press OK to enter or change that text message. Confirm your entries by pressing OK. Press the menu key to send or delete a mes- ªªªªªªªªªªªªªªªªªªªªªª send sage. delete? ¬¬¬¬¬¬¬¬¬¬¬¬¬¬¬¬¬¬¬¬¬¬¬¬¬¬ »send« Editing and then sending the text message.
Telephone operation Begin as follows: a s > s s Message UUS > s Inhib. receiv. Press the »External« or »Internal« Inhib. receiv. / UUS softkey to enable or inhibit reception of UUS1 external messages. FOR EXAMPLE.: »external«: .Reception of external messages inhibited. internal »internal«: Reception of internal mes¬¬¬¬¬¬¬¬¬¬¬¬¬¬¬¬¬¬¬¬¬¬¬¬¬¬ sages is possible.
Monitoring costs Monitoring costs You have the option of logging the accrued communication costs for your telephone. You must apply for this feature to your network service provider. Ask your service provider on the possibilities of charge data transmission. Please note that transfer of all cost information from the exchange office to your telephone may not always be possible for technical reasons.
Monitoring costs Viewing and deleting total costs Begin as follows: > a s s Charge Total You can view the sum of the charges accrued Total: for all MSN extension numbers. To delete them, press the »delete?« softkey. } 1. 55 EUR Last conn. Total delete? ¬¬¬¬¬¬¬¬¬¬¬¬¬¬¬¬¬¬¬¬¬¬¬¬¬¬ If the sum of the costs is deleted, all MSN cost accounts are also deleted simultaneously and recognition and saving of the procedure that is used for transfer of cost information is then re-activated.
Monitoring costs »Charge« Enter the new charge factor and confirm your entry by clicking »OK«. The charge factor length is restricted to 4 characters. To enter a comma, use the asterisk key. »Currency« Enter the new currency and confirm your entry by pressing OK. The currency name is restricted to 6 characters. The assignments for the keypad for entering letters, digits and special characters are described on page 12. »delete?« All charge data stored in the telephone are deleted.
Monitoring costs Begin as follows: a > s s t inhibit MSN-1 … MSN-10 Specific PIN for the MSN extension number O A check mark displayed next to the individual softkeys indicates the current status. s To inhibit dialing of external numbers for a specific MSN press the softkey »inhibit«. To re-enable a number (MSN) for outbound calls, press the softkey »enable«.
Monitoring costs Displaying information during a call The displays during calls described below depend on your individual settings and can therefore be different for each connection. Correct charge display is shown only if you have applied at your network service provider for transmission of charges during calls. g During a call, the upper rows of the display BEATRICE show the number or the name of the other 02.43 party (»TONY«) and the duration of the entire call (»02. 43«).
Monitoring costs 51
System telephony System telephony The system telephone is designed for being connected to the internal ISDN connection of pabx systems. When operated at these pabx systems, your telephone offers you a variety of typical features. For example: • • • • Dialing from the pabx telephone directory (see page 19). Message and Intercom (see page 24, 25 ). Special function keys (see page 52). Access to the system menu of the pabx (see page 57).
System telephony Connection keys Function keys at the system telephone or expansion can be configured in addition to the softkeys »Call 1.. « for executing broker‘s calls. In this case, two to four of these keys must be configured. • No other keys may be configured between connection keys. • The number of possible connections depends on the number of connection keys that are configured.
System telephony Day/ Night modes You can configure a key so that you can switch between the call switching modes of the PABX (Day/Night modes) when that key is pressed. The pabx uses call modes for signaling team or door terminal calls, for example. Announcement (see page 24) Message enable on/off You can also explicitly inhibit or enable receiving of messages using a corresponding function key.
System telephony during telephone configuration with the PC. The auto-answer feature is activated and deactivated by means of dedicated function key. Extension key for an answering machine This key is a special line key to which the internal number for the answering machine is assigned. A DTMF sequence can also be assigned to this key. When you press this key the number of the answering machine is dialed and the stored DTMF sequence then transmitted.
System telephony LED functions Function key / LED Line key Chef-sec-Tasten Xfer secretary lit Connection Extension key Team key Trunk group button Extension key AM Connection no B-channel available Connection with AM/ Voice Box Voice Mail key Function key / LED MSN assignment Team function log-on/log-off Day/ night mode Announcement Message enable on/off Intercom intercom enable on/off Call filter Call rerouting Direct dial-in Headset on/off Status info button (01) Auto-Answer Userecall flash button k
System telephony Using the function key Press the corresponding function key. The function assigned to this key is executed. An LED associated with this particular function is switched on or off accordingly. Press the key two times to reach the second level for the function keys. This must be executed at a short interval. Important notes for LED functions The status of the LEDs is not updated permanently in the system telephone.
System telephony 58
Configuring and setting up the system telephone Configuring and setting up the system telephone Extended configuration For a full configuration the following options are available: • PC-configuration using the telephone’s USB-port • Configuration using the internal ISDN port of a PABX. • Extended configuration directly at the phoneYou must enter a code before you can access the extended configuration mode.
Configuring and setting up the system telephone Acoustic headset If a special support feature is stored in your telephone for the headset your are using, set your phone for that headset model. For example, the LED in the microphone extension for »Firefly F142 N« from Plantronics can be activated by the telephone. Begin as follows: a M s s Acoustic Headset A check mark displayed next to the individual softkeys indicates the current status.
Configuring and setting up the system telephone E PressESC inorder toreturntothenormaldisplay duringanongoingcall. Ifyouconfirmyour entrybypressingOKinsteadoftheESC,thepermanentlysetvalueisoverwrittenbythenewly set one. Call waiting If the function call waiting (see page 68) is enabled on your telephone you can set the volume of the call waiting signal. You can also select whether a waiting call is signaled only once, or several times. Begin as follows: a s M s s Acoustic Call wait.
Configuring and setting up the system telephone »Only error tn«: Acknowledgment signal active for erroneous input. Acknowledge signal active? No ok Only error tn ¬¬¬¬¬¬¬¬¬¬¬¬¬¬¬¬¬¬¬¬¬¬¬¬¬¬ Idle Notice tone volume for »Station guarding« You have various options of setting your telephone to »Station guarding« (see page 45). You can set your telephone to signal incoming calls by a brief acoustic signal while »Station guarding« is active. The volume of that idle tone is adjustable.
Configuring and setting up the system telephone handset. The bar in the display indicates the current status. Handset loudness {} - ©©− + ¬¬¬¬¬¬¬¬¬¬¬¬¬¬¬¬¬¬¬¬¬¬¬¬¬¬ E PressESC inorder toreturntothenormaldisplay duringanongoingcall. Ifyouconfirmyour entrybypressingOKinsteadoftheESC,thepermanentlysetvalueisoverwrittenbythenewly set one. Notice tone (announcement and Intercom) You can adjust the volume of the acoustic signal that is sounded at the beginning of an announcement and during intercom calls.
Configuring and setting up the system telephone Date Appointment reminder volume You can set various appointments (see page 69) for your phone for which an acoustic and optical signal is issued when the set date and time are reached. You can set the signaling volume for the appointment as follows. Begin as follows: a M s > Acoustic <> O s Date Use the arrow buttons to set the volume. The Appt. call volume{} bar in the display indicates the current status. Confirm your entry with OK.
Settings Setting the volume Begin as follows: M a s <> Acoustic < s Audio-In Use the arrow buttons to select the desired volume. Audio-In IdleVolume - ©©©−− + Settings Direct call You can program a direct call for your telephone so that when you press any key (except for ESC and the menu key) a set number will be dialed. If the automatic call function is active only one connection can be established to the set number.
Settings If you are using your telephone with a PABX system without direct exchange line access, first enter the line access digit to obtain external line access followed by the automatic dial-in number. Activating direct call a M s s s Setting Direct cal ok Direct dialing is now activated. The set direct 07:41 call number is shown on the second line of the 098765 display. Dir.
Settings »Fixed« Direct call forwarding: Allcallsforanumberforwhich„fixed“callreroutinghasbeenconfiguredarererouted. Your telephone will not ring, when this number is called. You can configure simultaneous delayed call rerouting and call rerouting on busy. If you have configured a set call rerouting, cancel this function before configuring a new (other) call rerouting function.
Settings Use with a PABX M a s s t O Configu- Service Telephone ration PIN > s s Swiss_ Var ETSI Call waiting If, during an ongoing call, a second call comes in for you, the second call is signaled when »Call wait. protect. on« is set. A caller will hear the busy signal, when you have set your telephone to »Call waiting off«. A waiting call is indicated by a brief acoustic signal in the speaker and also displayed.
Settings Display contrast You can set individual contrast levels. Begin as follows: M a <> O Use the arrow buttons to set the contrast. Confirm your entry with OK. s s Setting Contrast Display contrast {} - ©©©©--- + ¬¬¬¬¬¬¬¬¬¬¬¬¬¬¬¬¬¬¬¬¬¬¬¬¬¬ Appointment You have the option of setting three different appointments with your telephone: • The set appointment is signaled daily. • The set appointment is signaled once. • The appointment is signaled weekly at the preset date and time.
Settings t Enter an information text for appointment 1 Set appointment 1 (42 characters max). In this example: »Telephone project Explanation for appoi1 meeting«. Telephone project Confirm your entry with OK. Telephone O ¬¬¬¬¬¬¬¬¬¬¬¬¬¬¬¬¬¬¬¬¬¬¬¬¬¬ If you wish to only change the information text for an existing appointment, select that appointment using the arrow keys and then click the menu key.
Settings A check mark displayed next to the individual softkeys indicates the current status. s Press the appropriate softkey to activate or Use headset automatically deactivate automatic headset operation. ? No ok Operation This feature requires an »Extended Configuration«. It will otherwise not be displayed.
Settings t O Enter the date and press OK to confirm. Set time Date>29.05.06__ ¬¬¬¬¬¬¬¬¬¬¬¬¬¬¬¬¬¬¬¬ Call filter The call filter allows specific calls to be put through or rejected on the basis of the recognized phone number. You can enter up to five filter numbers (26 digits max. ) for the call filter. Filter numbers can be local area codes or partial or complete numbers. When you enter »****« you can include calls which do not transmit the number (caller ID) in the call filter.
Settings A check mark displayed next to the individual softkeys indicates the current status. s Press the appropriate softkey to set the call filter to the desired mode of operation.
Configuration Configuration Begin as follows: M a s Configuration The display shows you the various configuraConfiguration tion possibilities. Press the desired softkey to inhibit have the next display shown. } MSN Display Charge Call-Parking Service inhibit Begin as follows: a s M s s Configuration inhibit Actuate the softkey »Inhibit« and enter the PIN for »Inhibit« (factory default 0000). Config.
Configuration Begin as follows: a t O M s s s Configuration Inhibiting filter PIN Enter the new PIN. In this example: »1234«. Confirm your entry with OK. Change PIN >1234_ ¬¬¬¬¬¬¬¬¬¬¬¬¬¬¬¬¬¬¬¬¬¬¬¬¬¬ Attention: The PIN is also reset to (0000) after executing the service reset for restoring the initial state (see page 92). Menu Accessing a menu via the PIN: In these operating instructions, access to menus is always described without the use of a PIN.
Configuration Here, you can determine which call control function(s) you want to configure. Begin as follows: a s M s s s Configuration inhibit Outgoing List: Select »List« to enable or inhibit the numbers entered here for dialing. A checkmark shows you which list is active. inhib. outgoing calls ? unrestr. nos. Only No List ¬¬¬¬¬¬¬¬¬¬¬¬¬¬¬¬¬¬¬¬¬¬¬¬¬¬ s unrestr. nos. Only: Select »unrestr. nos. Only« if you wish to enable all unrestricted numbers for outgoing calls.
Configuration M a s s s Configuration Display MSN ext. Call-Number transfer Incoming Outgoing ¬¬¬¬¬¬¬¬¬¬¬¬¬¬¬¬¬¬¬¬¬¬¬¬¬¬ Language You can select the language of your display. Begin as follows: a <> s M s s s Configuration Display Language Press the arrow buttons to view the available Which Language? } Italiano languages. Español Press the softkey adjacent to the desired Deutsch language. The display switches to the changed language immediately.
Configuration s Duration: Setting the call duration display The following options for displaying the call duration are available: »Always«: The duration is the only information displayed during a call. »Never«: The charges are displayed during a call. The duration of a call is not displayed. »for Charge«: Charge data, if available, are displayed. If no charge data are available, the duration is displayed instead.
Configuration PABX Type-Id Tel. drctry External line Numb. length s s s s s Ln.Access Type-Id PABX-type (softkey »Type-Id«) Type 0: The PABX system does not transmit the line access digit on incoming calls. The line access digit must be entered in the phone. Type 1: The PABX system transmits a line access digit on incoming calls. No line access digit should be entered in the phone.
Configuration Begin as follows: a M s s s Configuration MSN MSN-1 Program MSN-1 } transfer Volume MSN Name Sound MSN ext. Entering or viewing an extension number (MSN) You can only enter the MSN extension numbers with the Professional Configurator supplied on the WIN-Tools CD-ROM. However, you can have the programmed number displayed at the phone. The extended configuration allows you to enter the MSN extension number after having entered a code number (see page 78).
Configuration <> O Use the arrow buttons to set the desired mel- ˆ Select melody {} ody. The bar in the display indicates the cur- MSN-1,internal rent status. Confirm your entry by pressing ok. −©−−−−−−−−−− 3 ¬¬¬¬¬¬¬¬¬¬¬¬¬¬¬¬¬¬¬¬¬ Setting the volume In the »Program MSN-1« menu press the »Volume« softkey and then the »internal« or »external« softkey. <> O Use the arrow buttons to set the volume and Select call signal the ringer melody. The bar in the display indiMSN-1 cates the current status.
Configuration ne. If you then wish to forward a call, the default number will be presented first for you to use. The default setting for such a number is made separately for each number (MSN) entered in the telephone. In the »Program MSN-1« menu press the »transfer« softkey. t O Enter the desired telephone number. To dele- Call forward. number te an existing number press the C button. In this example: »0123456«. Confirm your entry with OK.
Configuration Begin as follows: a t O M s s s s Configuration MSN MSN-1 ... MSD10 MSN ext. Enter the MSN. In this example: »12«. This MSN must already be assigned as an »internal number« for your system telephone via the »Professional Configurator«, or assigned > 12 now. This MSN is inactive until the same MSN (internal number) is entered using the »Professional Configurator«.
Configuration t Enter the »Log-in PIN«. When you press the 0 Please enter login PIN key several times in a row the possible special characters that can be used are displayed, along with their current position on the key panel. Up to 4 levels are displayed each time MSN-1> *@_ you press the 0 key. When you then press a key 0...9 the character displayed for that particular key is selected. Wait until the cursor moves Please enter forward one field before attempting to enter login PIN the next character.
Configuration s Press the appropriate softkey. Main TCP/IP and Network settings Sys-Server DHCP Server Gateway Own IP-address s s s Netmask Sys Server: If the elmeg PABX system gateway serves simultaneously as the system server you do not need to input any data here. If this is not the case you must click the Softkey »No« and then enter the system server IP address here. Gateway IP address when connecting directly to the elmeg PABX system.
Configuration 86
Programming numbers Programming function keys Begin as follows: M a s Program nos. s s direct Press the corresponding softkey to select the Program keys desired menu. T400 function New macro list The »T400« menu is only available when you have connected an additional keyboard. s function: Function keys (softkey »function«) First select a function key and then confirm by pressing OK. function new prog <> <> 1_:................. 2_:................. 3_:................. 4_:.................
s macro: Programming macro buttons (»macro« softkey) Please select a function key first. First enter a name for that macro (max. 20 characters. Then enter the separate macro commands. A macro’s command string is limited to 26 characters. Each command or button simulation consists of two characters. You can therefore only link a maximum of 13 commands together, or, for example, join 7 commands / key stroke simulations with a further 12 digits.
»TS« Testing a connection. If there is currently no connection active, or an outgoing connection can not be set up (for B. subscriber busy), execution of the macro is canceled at this point. If you wish to incorporate a telephone key into a macro, press the corresponding key during macro programming (this is indicated, for example by » s5« in the display). All keys used for operating the telephone during macro programming (e. g.
Macro programming examples: Function Macro command string Key programmed for a particular number (FOR EXAMPLE.
Service Service Name Telephone name You can assign a name (20 characters max. ) to the telephone to provide it with unique identification within a PABX system. You will need the telephone name for example for configuring the telephone through the interal ISDN connection of a connected pabx. The default name entered is the telephone’s serial number. Begin as follows: a t O M s s t s Configuration Service Telephone PIN Name Enter a name for the telephone (max.
Service For example: »0193010«. Confirm your entry with OK. Message Service Centre numbers 1:0193010 2: {} TX 3: ¬¬¬¬¬¬¬¬¬¬¬¬¬¬¬¬¬¬¬¬¬¬¬¬¬¬ Creating and sending SMS messages You can input a text message using the keypad on the system telephone. A short message is restricted to 612 characters) (iInterlaced SMS). The characters entered will be split into maximally four SMS messages.
Service s Press the softkey »ok« to reset the telephone Sure to delete all? OK, incl. AM to its initial state. If you do not wish to have No the data deleted press the softkey »no«. ok User data only When you press the corresponding softkey 29.05.03 07:41 e.g.. »ok« the telephone is reset to the default Info configuration. All data is deleted, the telephone starts new. This could take several seconds Tel. drctry to complete.
Service • In the field »Status« click »Start Download« to begin downloading the new firmware. Downloading new firmware from the server PC »Funkwerk Enterprise Communications GmbH« provides a server PC which can be used for loading new firmware into your telephone. In this case, the firmware is downloaded through the ISDN connection. Download can take 12 minutes approximately, depending on the size of the firmware file. Please note that there is a charge for loading firmware via an external ISDN connection.
Service nue?«. The firmware download is started only after you have confirmed this prompt by pressing »ok«. If the data for the telephone are not deleted during the download, the download is started without first displaying the above prompt. Telephone BIOS This telephone is equipped with a BIOS (basic functions) in English. The BIOS functions also remain available even if the firmware of the telephone does not operate properly, or if new firmware was not loaded completely (e. g.
Service Begin as follows: a M s s Configurati- Service on <> s t O > s Country Telephone PIN Press the arrow keys to view the countries, for Which country? Italy which specific settings are available. Press the softkey for the desired country. e.g. »UK«. Germany } Spain UK France Netherlands The system telephone is then restarted! All country-specific settings take effect im- 29.05.03 07:41 mediately. The telephone data will not be deleted. } Tel.
Telephone and PC Telephone and PC The CS400 / CS400xt system telephone does not have a USB port! Functions can therefore not be used via USB. CTI / TAPI using the phone’s USB port The abbreviations CTI and TAPI denote the standard interface for Windows telephony applications from Microsoft. Telephones and computers can work hand in hand via this interface.
Telephone and PC Audio applications using the phone’s audio jacks The telephone is equipped with an input (2) and an output (3) for audio signals. Both these ports have a 3. 5 mm stereo socket. When using the optional answering machine module, you can connect the telephone via these ports to the PC sound card in order to upload announcements into the phone or save recorded messages on the PC. You can also use specific telephone features with the Audio-Out output (see page 64).
Telephone and PC Integration of the telephone into the PC as a special ISDN network card e.g.Connection to the Internet via the Windows dial-up network • TAPI driver (Telephony Application Programmer’s Interface) Interfacing to programs that provide computer-aided telephony. e.g. Windows dialing assistant, CTI software (not included in the package) • USB driver (Universal Serial Bus) Recognition and control of the phone after connecting to the USB port of the PC. For g.
Telephone and PC Installation of a device driver is started automatically the first time you connect the telephone to the PC. The device driver is located in the root directory of the CD-ROM. Follow the instructions displayed on the monitor. • You can then use your phone together with the installed PC programs.
Default telephone settings • • • • • • • • • • • • • • • • • • • • • • • • • • • • • • • • • • • • The serial number is entered as the telephone name. Display language: deutsch Country-specific settings:deutsch No MSN extension numbers are stored.
• Parking code: 55 102
Menu of the Telefone Menu »Configuration« M »Configuration« Configuration inhibit } MSN Display Charge Call-Parking Service Standard call-parking Program dial number } Call-Parking>55 MSN-1 MSN-3 MSN-4 MSN-2 MSN-5 Display-Monitoring Program dial number{ MSN-8 MSN-6 MSN ext. MSN-9 Conversation MSN-7 Language MSN-10 Enter PIN Example: MSN-6 Program MSN-6 Config. inhibit filter } transfer Volume MSN Name PIN Sound MSN ext.
Menu»Acoustic« M »Acoustic« Volume, etc. Volume, etc. } Headset Ack. tones { Message Date Intercom Audio Out Call wait. tone Setting for using Audio Put Volume repeat ˜ Loudspeaker loudness {} Message ˜ Hands-free calling ˜ Signaling tones Speaker function Appt.
Menu »Settings« M »Settings« Setting Direct cal } Setting Headset { Contrast Call rerout. Date Time AUTO accept Filter Call wait. Call waiting enable? Call filter OK, extended Incoming No ˜ New ok call forwarding Use headset? No Off ok Fixed delayed busy Call forwarding delay Display-Contrast {} MSN-3 MSN-1 - ©©©©----- + MSN-4 MSN-2 MSN-5 Activate direct call? No ok MSN ext. Time until call accepted ? 5 seconds immediatly ˜ 10 seconds Select appointment {} 1: 11:11 11.11.
Menu »Program nos« M »Program nos.« Program dial number Tel. drctry VIP telephone book 237 Entries avail. Sp.ton. call Info New delete List Program VIPs New List Delete tbook data {} ···········Aaaaaaaaaa Bbbbb················ ·······Ccccccc,cccccc Ddddd, Dddd·········· ·················Eeee {} Reprogram VIP {} V0: V1: V2: V3: V4: Select name please {} Aaaaaaaaaa 0123456 Info - Info - Info Info - Info - Info V0: V1: V2: V3: V4: Input telephone book Set specl.
Technical specifications Dimensions (L x W x H): approx. 255 x 180 x 100 mm Weight: approx. 0.8 kg Temperature range Operation: Storage: +5°c … +40°c -25°C … +70°C ISDN port (CS410, CS400) Connection cord length: approx. 6 meters ISDN connection: DSS1 protocol, point-to-multipoint access Channel structure: B+B+D Power consumption: <=1 Watt Up0-Connection (CS410-U) Connection cord length: approx.
108
Index Index A B Accepting a call . . . . . . . . . . . . . . . 20 Boss/sec.-function . . . . . . . . . . . . . 54 waiting call . . . . . . . . . . . . . . . 29 Broker's call . . . . . . . . . . . . . . . . . 30 Acknowledgement signals. . . . . . . . . 16 Buttons . . . . . . . . . . . . . . . . . . . 12 setting . . . . . . . . . . . . . . . . . 61 C Acoustic . . . . . . . . . . . . . . . . . . . 60 Call Deflection . . . . . . . . . . . . . . . 20 Adding telephone book entries . . . . . .
Index CCBS (recall to busy subscriber) . . . . . 26 call switching / transfer . . . . . . . . 30 CCNR (Completion of call on no answer) 26 parking . . . . . . . . . . . . . . . . . 27 CD-ROM contents . . . . . . . . . . . . . 98 Country-specific settings . . . . . . . . . 95 Adobe Acrobat Reader . . . . . . . . 98 CS410 . . . . . . . . . . . . . . . . . . . . . 2 drivers. . . . . . . . . . . . . . . . . . 98 CS410-U . . . . . . . . . . . . . . . . . . . 2 setting up the telephone . . . . . . .
Index direct dial / DTMF-/ keypad sequences . . . . . . . . . . . . . . . . . . . . . . 52 E Editing telephone book entries . . . . . . 33 direct dial-in . . . . . . . . . . . . . . 54 Editing VIP entries . . . . . . . . . . . . . 35 extension key. . . . . . . . . . . . . . 52 Electrostatic charges. . . . . . . . . . . . . 4 Headset on/off . . . . . . . . . . . . . 54 Entering a memo . . . . . . . . . . . . . . 39 intercom . . . . . . . . . . . . . . . . 54 Entering a name for an extension number .
Index Inquiry Call . . . . . . . . . . . . . . . . . 29 Message inhibiting filter. . . . . . . . . . 54 Installation sequence from the CD ROM 99 Microphone on/off . . . . . . . . . . . . . 23 Intercom . . . . . . . . . . . . . . . . . 25,54 Monitoring charges Intercom inhibiting filter . . . . . . . . . 54 charge limitation. . . . . . . . . . . . 48 Intercom notice tone . . . . . . . . . . 24,25 Monitoring costs . . . . . 46,47,48,49,50,51 Internet access . . . . . . . . . . . . . . .
Index P Reset . . . . . . . . . . . . . . . . . . . . . 92 PABX . . . . . . . . . . . . . . . . . . . . 78 Router button. . . . . . . . . . . . . . . . 55 function keys . . . . . . . . . . . . . . 52 S system menu . . . . . . . . . . . . . . 57 Safety notes. . . . . . . . . . . . . . . . . . 3 Parking a call . . . . . . . . . . . . . . . . 27 Sec.-function . . . . . . . . . . . . . . . . 54 PC-requirements . . . . . . . . . . . . . . 99 Send/ receive faxes . . . . . . . . . . . . .
Index SMS text message Team keys . . . . . . . . . . . . . . . . . . 53 error during transmission . . . . . . 45 Team log-on/log-off . . . . . . . . . . . . 53 error while receiving . . . . . . . . . 45 Team log-on/off . . . . . . . . . . . . . . 53 SMS text messages Technical specifications . . . . . . . . . 110 creating and sending . . . . . . . 41,92 Telephone BIOS . . . . . . . . . . . . . . 95 creatng and sending . . . . . . . . . 92 Telephone directory . . . . . . . . . . . . 32 Software .
Index viewing . . . . . . . . . . . . . . . . . 42 total costs . . . . . . . . . . . . . . . 47 UUS1 text messages . . . . . . . . . . . . 40 VIP-Memory . . . . . . . . . . . . . . . . 34 configuring the reception mode . . . 44 dial call number . . . . . . . . . . . . 19 creating and sending . . . . . . . . . 41 editing an entry . . . . . . . . . . . . 35 automatic sending (UUS1 only) . . . 44 programming an entry . . . . . . . . 34 save . . . . . . . . . . . . . . . . . . . 43 Voice Mail. . . .
Index 116
Brief description of functions Brief description of functions Room inquiriy b R g t g Dial call number Broker`s call b R g t > g s Connection-1...
Brief description of functions Activate call forwarding M s a s Setting Call rerout. Deactivating call rerouting a M s s delayed busy Fixed MSN-1... MSN-10 t O Dial call number s s s s Setting Call rerout. Off MSN-1... MSN-10 O Silent signalling a s s Quiet No/ok/Ringing signal off Dialing from caller list, telephone directory or short dialing memory a 118 s <> Caller list Tel.
Funkwerk Enterprise Communications GmbH Südwestpark 94 D-90449 Nuremberg For support and service information visit the Service / Support section of our Website at www.funkwerk-ec.