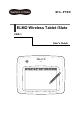
ELMO Wireless Tablet /Slate CRA-1 User's Guide
IMPORTANT SAFETY INSTRUCTIONS 1) Read these instructions. 2) Keep these instructions. 3) Heed all warnings. 4) Follow all instructions. 5) Do not use this apparatus near water. 6) Clean only with dry cloth. 7) Do not block any ventilation openings, Install in accordance with the manufacturer’s instructions. 8) Do not install near any heat sources such as radiators, heat registers, stoves, or other apparatus (including amplifiers) that produce heat.
WARNING: TO REDUCE THE RISK OF FIRE OR ELECTRIC SHOCK, DO NOT EXPOSE THIS PRODUCT TO RAIN OR MOISTURE. WARNING: Handling the cord on this product or cords associated with accessories sold with this product, will expose you to lead, a chemical known to the State of California to cause birth defects or other reproductive harm. Wash hands after handling. This device complies with Part 15 of the FCC Rules and with RSS-210 of Industry Canada. Operation is subject to the following two conditions.
Contents 1. USAGE PRECAUTIONS .................................................................................................. 6 About electric waves used by this product ...................................................................... 11 About wireless equipment used on the 2.4 GHz band .................................................... 11 About lithium-ion batteries ...............................................................................................
Using the whiteboard ....................................................................................................... 38 Setting the whiteboard ............................................................................................. 38 Changing the background ....................................................................................... 38 Setting the computer image as the background ...................................................... 38 Saving the contents of a lesson on video .....
1. USAGE PRECAUTIONS Follow these guidelines to use the product safely. These “USAGE PRECAUTIONS” indicate important points that should be followed to use this product safely and correctly and prevent damage to the product or other property, and injury to you and others. Read carefully before operating the product and retain for future reference. Read the manual after making sure that you understand the meaning of the following displays and symbols.
Warning If smoke comes out of the product, or you notice any unusual odors or sounds, remove the lithium-ion battery from the main unit immediately. Continuing to use the product in this condition could result in a fire or electric shock. Check that smoke is no longer coming out of the product, and then contact your local dealer to request maintenance. Do not attempt to service this product yourself.
Warning Do not touch the main unit or the cord, etc., during a thunderstorm.This could result in an electric shock. If there is dust stuck to the cord plug or the plug insertion section, disconnect the cord plug and clean the dust.The reduced insulation of the cord's plug could result in a fire. Do not set up the main unit or wireless adapter in a location where it could trip someone up.It could result in a fall, causing injuries and damage. Do not disassemble or modify the lithium-ion battery.
Warning For use with this device only.Otherwise, the lithium-ion battery could be degraded and equipment could be damaged, which could result in leaks, excessive heat, smoke, explosions, or fire. If liquid leaks from the lithium-ion battery and comes into contact with any part of your body, wash thoroughly with clean water and then contact your doctor.If left, it could cause injury.
Attention Do not place the product in a damp or dusty location.This could result in a fire or electric shock. Do not place the product in a location where it could be exposed to smoke, steam, or water droplets such as on a kitchen counter or near a humidifier.This could result in a fire or electric shock. Do not leave the cord close to a heater.The cord covering could melt and result in a fire or electric shock. Do not connect or disconnect the cord plug with wet hands.
About electric waves used by this product This product uses electric waves on the 2.4 GHz band. When using this product, a radio station license is not necessary. However, please note the following cautions. Do not use near the following: Microwave ovens/industrial, scientific or medical equipment, such as pacemakers In-factory radio stations for mobile unit identification systems (radio stations that require a license) used in production lines of factories.
For unneeded lithium-ion batteries, cover the metallic sections with insulating tape such as Scotch Tape, and recycle them in accordance with your local regulations or contact our nearest branch office or sales office. Replacing the lithium-ion battery If the unit can only be used for an extremely short time or the power does not come on, the lithium-ion battery has reached the end of its service life.
2. BEFORE USE Please note that screens and figures used in this manual may differ from the actual views. Thank you very much for purchasing this product. Please read this manual carefully to make suitable use of this product. Also, please be sure to refer to any supplemental information included with this product. Main functions This product is an educational tool for making lessons using ELMO's Document Camera more enjoyable and easier to understand.
System requirements The following requirements must be satisfied for the application software to operate.
3. SUPPLIED ITEMS The product's package has the following contents. Contact your dealer if any of the following items are not included in the package you purchased.
Preparations Software installation and uninstallation ▪ Installation To use this product, you need to install Drawing Mate and the tablet driver on the computer you are using. When you install Drawing Mate, the tablet driver is also installed. Use the following procedure to install the software. 1. Insert the supplied CD in the computer's CD drive. 2. Select "Install Drawing Mate" from the menu. Depending on your environment, the menu may not be displayed automatically. Run Win → setup.
Connections Items to prepare • Document Camera (L-1n, L-1ex, P10S, P30S, P10ex, i-Pochette) • Computer • Projector or monitor • RGB cable or DVI cable • RGB / USB composite cable* • Tablet* • Wireless adapter* *: This product, and items supplied with this product ➊ Arrange the parts and connect the cables as shown in the figure. For more details about the installation and operation of each device, see the corresponding User's Guide.
4. PART NAMES Tablet Power button USB connector Turns the tablet ON or OFF. Press the button for 3 seconds or more to turn the tablet OFF. When the power is ON, it is lit blue. When the battery charge is low, it flashes. Status LED Indicates the wireless and battery charge status. Function keys Enables quick Drawing Mate operations. See "Operating the tablet" for more details. Tablet base Pen slot Holds the pen.
Charging the tablet ➊ Install the lithium-ion battery in the tablet. Install the supplied lithium-ion battery in the battery box on the base of the tablet. Note the insertion direction of the lithium-ion battery. ➋ Connect the computer and the tablet via a USB cable. When charging starts: The "Status LED" in the center of the main unit is lit. When charging is complete: The "Status LED" turns off. Charging time: Approx. 4 hours Disconnect the USB cable from the computer as soon as charging is complete.
Using the dedicated pen ▪ Installing the dry cell battery Install the dry cell battery in the pen before use. • Pay attention to the polarity (+/-) of the battery. • Remove the battery if it will not be used for a long time. • Do not try to recharge or short-circuit the batteries. • Use an AAA alkali dry cell battery. Do not use a rechargeable battery (such as Ni-cd). • The supplied dry cell battery is for an initial operation check. Its operating life is not guaranteed.
▪ Setting the side buttons and pen The pen is equipped with "side buttons" to provide assistance with pen operations. If your OS is Windows XP, you can change the settings from the tablet driver. • If your OS is not Windows XP, you cannot change the side button settings. ➊ Place the cursor on the "Tablet driver" icon that is displayed on the taskbar, click side button 2 (for the initial setting) or right-click, and then select "Setting" in the menu that appears.
The settings that can be performed with the tablet driver are described below. Setting items Side button Setting contents You can set the operations for the pen side buttons. You can select different settings for side button 1 and side button 2. Setting Operation None Not enabled. Right button Acts as a mouse's right-click. Middle button Acts as a mouse's middle-click. Double-click Acts as a mouse's left double-click. While Drawing Mate is used, the Drawing Mate functions are enabled.
Operating the tablet ▪ Moving the cursor The operation area of the tablet and the screen of the computer are synchronized. Desktop When you move the pen on the tablet’s operating area, the cursor on your desktop moves and the operation status is active. The pen cannot be used if it is moved away from the tablet's operating area. ▪ Clicking Tap the pen once within the operating area.
▪ Double-clicking Tap the pen twice within the operating area. ▪ Dragging Move the pen with the tip pressed against the tablet within the operating area. ▪ Function keys Activate a Drawing Mate function by tapping the function key that you want. The following function keys are available. Go to Document Camera mode. Go to whiteboard mode. Go to teaching material mode. Go to teaching material creation mode. Go to the settings screen. Quit Drawing Mate.
• If the pen is not used for a while, it enters power-saving mode. To reactivate and use the pen, tap the pen tip once. Storing the wireless adapter and pen You can store the pen and wireless adapter in the tablet. Tablet base When storing the wireless adapter, make sure it is securely stored in the main unit, and be careful not to drop it while carrying it around. Tablet preparations ➊ Connect the wireless adapter to the computer's USB port. ➋ Turn on the tablet.
If this product is used as described below, the communication range between the tablet and wireless adapter may be shortened, or communication may become unstable.
About the LEDs Tablet LEDs ▪ Power LED LED status Operation Power is OFF. OFF Press the power button to turn the power ON. Power is ON. Lit Press the power button for 3 seconds to turn the power OFF. Flashing The lithium-ion battery is low. Charge the battery. ▪ Status LED LED status Operation When the power is ON, communication with the wireless adapter is OFF being performed correctly. High-speed flashing (Turns ON and OFF The wireless settings button is pressed. every 0.
Using Drawing Mate Starting Drawing Mate To start Drawing Mate, double-click If you cannot find on the computer. , start Drawing Mate by clicking and then clicking All Programs→ELMO→Drawing Mate. Screen configuration ① Drawing area This area is for displaying the Document Camera image and drawing. The entire monitor is the drawing area. ② Status display area The current operation is indicated with an icon. ③ Drawing menu area You can select the pen to use for drawing, or delete all drawings.
Mode descriptions When using Drawing Mate, change the mode to suit your objective. The following four modes are available. ▪ Document Camera mode This mode is for using a Document Camera in a lesson. It displays the image of the Document Camera. ▪ Whiteboard mode This mode is for using the product as a whiteboard in a lesson. You can use pre-prepared images as the background. ▪ Teaching material mode This mode is for using teaching materials in a lesson.
Drawing ➊ Select the pen to use from ➋ Drag to draw. and on the right of the screen. Deleting ➊ If you only want to delete part of the drawings, align the cursor with the area that you want to delete and press side button 2, or tap while pressing side button 1. ➋ To delete all the drawings on a screen, press 30 .
Document Camera mode You can use Drawing Mate to display an image from a Document Camera and operate the camera, and draw on the displayed image. When connecting the devices, refer to "Connections" if necessary. Displaying the Document Camera image ➊ Turn on the Document Camera. ➋ Start Drawing Mate. When Drawing Mate starts, the image from the Document Camera is displayed. When the Document Camera is connected for the first time, the driver may start to install.
Operating the Document Camera ➊ Operate by pressing , and on the right of the screen. Using the mask ➊ Press ➋ The entire screen is masked. Drag the mask to move it. ➌ To cancel the mask, press 32 on the bottom left of the screen. on the bottom left of the screen.
Using the highlight ➊ Press ➋ The highlighted area is displayed on the screen. Drag the highlighted area to move it. ➌ To cancel the highlight, press on the bottom left of the screen. on the bottom left of the screen. Using the scroll ➊ Press ➋ An electronically magnified image is displayed on the screen. Drag the electronically magnified area to move it. ➌ To cancel the scroll, press on the bottom left of the screen. on the bottom left of the screen.
Using compare pictures ➊ Press ➋ The screen is split, with the picture shot when the button is pressed displayed on the left, and the current Document Camera image displayed on the right. Drag the displayed area to move it. ➌ To cancel compare pictures, press on the bottom left of the screen. on the bottom left of the screen. Setting the computer image as the background ➊ Tap on the right of the screen, and then press . The computer screen is displayed.
➋ Tap on the right of the screen and select to stop the recording. video, and select to start recording on • When the mode is changed to "Teaching material creation mode", the recording stops. • To check the created video, refer to "Viewing pictures and videos". Saving the contents of a lesson as a picture ➊ Display the image that you want to save as a picture. ➋ Tap on the right of the screen, and select to save a picture. - To check the created picture, refer to "Viewing pictures and videos".
previous condition. Start/stop lesson recording Saves the currently displayed contents as a video. Elements such as the Document Camera image that is displayed on the background, the background image and the drawn lines are recorded, but elements such as the buttons and pointer are not recorded. Teaching The saved videos can be played back in " material mode". Capture Saves the currently displayed contents as a picture.
▪ Sub menu buttons Mask This function hides part or all of the Document Camera image that is displayed. You can move the mask range by dragging it. In one operation, you can only move the range up or down or to the left or right. When the mask range touches the edge of the screen, the movement stops. You can drag the range again to move it. Highlight This function brings attention to a part of the Document Camera image. You can move the highlighted area by dragging it.
Using the whiteboard With Drawing Mate, in addition to displaying the Document Camera, you can select a pre-prepared background. Setting the whiteboard ➊ Start Drawing Mate. ➋ When Drawing Mate has started, tap the function key on the tablet. Changing the background ➊ Select the background to use from lines), (graph paper), (vertical lines), (musical score) and (horizontal (whiteboard).
▪ Menu buttons Pen 1 Selects pen 1. The initial setting is a red pen. You can change the settings for this pen in "Settings". Pen 2 Selects pen 2. The initial setting is a black pen. You can change the settings for this pen in "Settings". Delete all Deletes all the lines, stamps and images that are drawn on the screen. If you only want to delete part of the drawings, align the cursor with the area that you want to delete and press side button 2, or tap while pressing side button 1.
Settings You can perform settings for the pen or Drawing Mate. Quit Quit Drawing Mate. Next menu Displayed when the whole menu cannot be displayed on one screen. Use this button to go to the next menu. When the final menu is displayed, tap this button to return to the first menu. Undo Enables you to redo the last drawing edit that you performed (such as drawing with a pen or deleting with the eraser). Select You can select a line that you drew with a pen to move it or change its size.
Teaching material mode You can use Drawing Mate to save lesson contents, examples or other materials onto a computer and play them back later. When teaching material mode is entered, a screen for selecting the teaching material to view is displayed. In teaching material mode, the menu differs depending on the teaching material that is retrieved.
➌ The teaching material selection screen is displayed. Select the picture or video that you want to view. Pictures, videos and teaching materials created in teaching material creation mode can be selected in the teaching material selection screen. The teaching materials are displayed from the latest update date, but favorite teaching materials are displayed first regardless of their update dates. Filter File dialog box Page Sets a condition for the teaching materials to be displayed.
Operating a video ➊ In the teaching material selection screen, select a video or a teaching material that contains a video. ➋ Operate the video with the buttons displayed below. Playback speed Play/pause Changes the playback speed of the video. The playback speed changes each time you tap the button. Pauses or starts the video playback. Changes the playback position of the video. Sequence bar Adjusts the volume of videos that have audio. Volume Only displayed if your computer has a sound device.
▪ Menu buttons Pen 1 Selects pen 1. The initial setting is a red pen. You can change the settings for this pen in "Settings". Pen 2 Selects pen 2. The initial setting is a black pen. You can change the settings for this pen in "Settings". Delete all Deletes all the lines, stamps and images that are drawn on the screen. If you only want to delete part of the drawings, align the cursor with the area that you want to delete and press side button 2, or tap while pressing side button 1.
Select You can select a line that you drew with a pen to move it or change its size. Stamp You can insert stamps that you have pre-prepared. Document Camera mode Go to Document Camera mode. Whiteboard mode Go to whiteboard mode. Teaching material mode Go to teaching material mode. Teaching material Go to teaching material creation mode. creation mode The grayed items can be used in expert mode. See "Button list" for more details.
Areas that are not displayed can be scrolled by dragging. Use it to compare a picture with an image.
Teaching material creation mode You can use Drawing Mate to prepare teaching materials in advance for use in a lesson. ➊ Start Drawing Mate. ➋ When Drawing Mate has started, tap the function key on the tablet. Creating a new teaching material ➊ ➋ Press . The teaching material currently being created is erased and a new teaching material is created. Be careful because a teaching material that has not been saved will be lost. Opening a teaching material ➊ Press .
Saving a teaching material Create new Create a new teaching material. When teaching material creation mode is entered for the first time after starting Drawing Mate, the create new status is entered. Open Edit existing teaching material creation data. When this button is pressed, the teaching material selection screen is displayed. Select the data to edit. Save Save by overwriting the teaching material creation data that is currently being edited.
➌ Press and perform the record settings. The following types of recording are available for creating a Document Camera video. The details of the recording differ depending on the mode or application, so select a type that is suitable for your objective. Name Description Normal recording Saves the image of the Document Camera in a video. Elements such as drawn lines, buttons, pointers and audio are not saved. The video can be played back in "Teaching material mode".
When the mode is changed to a mode other than "Teaching material creation mode", the recording stops.
Changing the background When creating teaching materials using a Document Camera, you can select a background from the pictures and videos created with Drawing Mate. ➊ Press , and select the picture or video to use as the background in the BACKGROUND SELECT screen. Pictures, videos and teaching materials created in teaching material creation mode can be selected in the teaching material selection screen.
Select an image that is saved on the computer. File selection Cancels the teaching material selection and returns to the previous mode. Cancel ➍ Depending on the image type, it may not be possible to use some of the images that are saved on your computer. The selected image is displayed as the background. Inserting pictures When creating teaching materials, you can insert pictures that are saved on your computer. ➊ Press ➋ Select an image that is saved on the computer.
Using stamps When creating teaching materials, you can insert stamps that you have pre-prepared. ➊ Press ➋ In the stamp selection screen, select a stamp to use. ➌ Click on the screen to insert the selected stamp. on the right of the screen.
Entering text When creating teaching materials, you can enter text using the computer's keyboard. ➊ Press ➋ Tap on the screen to enable keyboard input. on the right of the screen. Selecting a line or picture ➊ Press ➋ Drag on the screen to select a line or picture within the range of dragging. The selected line or picture can be moved by dragging it. on the right of the screen. Setting the computer image as the background See "Setting the computer image as the background".
Changing the pen settings ➊ on the right of the screen to display the pen settings screen. Press / Pen 1/pen 2 Select the pen that you want to set. Select the type for the selected pen. / / Pencil/pen/fountain pen Pencil Draws lines with the set thickness regardless of the pen pressure. The color transparency is 0%. Pen Draws lines with the set thickness regardless of the pen pressure. The color transparency is 50%. Fountain Changes the thickness according to the pen pen pressure.
Changing a line or picture ➊ Press on the right of the screen to display the edit drawing screen. In the edit drawing screen, you can change the selected line, picture or text. Bring to front/ send to back Copy/paste Moves the position of the selected line or picture to the front or back of other lines or pictures. This changes the positions of overlapping lines or pictures. Copies or pastes the selected line or picture. Use to duplicate the same line or picture.
Change background Insert image Stamp Enter text Select Select a background from vertical lines, horizontal lines, graph paper, copy paper, musical score, whiteboard, previously recorded videos, previously shot pictures, and images that are saved on the computer. Insert an image that is saved on the computer. Insert a stamp that you have pre-prepared. Enter text with a keyboard. You can select an element such as a line, stamp or inserted image to move it or change its size. Use to operate the computer.
▪ Sub menu buttons 58 Create new Create a new teaching material. When teaching material creation mode is entered for the first time after starting Drawing Mate, the create new status is entered. Open Edit existing teaching material creation data. When this button is pressed, the teaching material selection screen is displayed. Select the data to edit. Save Save by overwriting the teaching material creation data that is currently being edited.
Setting mode This mode is for setting Drawing Mate operations. ➊ Start Drawing Mate. ➋ When Drawing Mate has started, tap the Display version function key on the tablet. Displays the version of Drawing Mate, the version of the tablet, and the version of the wireless adapter. Electric wave strength Displays the electric wave strength of the tablet and wireless adapter. When the electric wave strength is low, correct operation may not be possible.
Button list The displayed buttons vary depending on the mode. Also, when "Expert" is set, a menu is displayed that is not normally displayed. ▪ Expert setting When expert is selected with the "Expert" setting in "Settings", the operations change as described below. - The number of menu items displayed in each mode increases. - The highlight range of the highlight function can be changed. Mastering these functions will enable more flexible operations. ▪ Button list ○・・・Can always be used.
Undo ○ Select ○ Stop/restart screen - - ○ Enter text - - - ○ Pen settings - - - ○ Edit drawing - - - ○ Document Camera mode ○ Whiteboard mode ○ Teaching material mode ○ Teaching material creation mode ○ Mask ○ - - Highlight ○ - - Scroll ○ - - Compare pictures ○ - - Playback speed - - Play/pause - - Change volume - - Create new - - - ○ Open - - - ○ Save - - - ○ 61
6. TROUBLESHOOTING Tablet power does not turn ON Is the lithium-ion battery installed? Check that the lithium-ion battery is inserted correctly. Is the lithium-ion battery charged? Refer to "Charging the tablet" and charge the lithium-ion battery. Cannot use the tablet / The cursor does not move Is the tablet driver operating correctly? The tablet driver's installation may not have been completed correctly. Refer to "Using the tablet driver" and install the tablet driver.
adapter. Stop using the wireless device or electronic equipment, or move to a location with no interference.
7. PRODUCT SPECIFICATIONS Operating Temperature 0 to 40°C Reading Range 7.84 x 5.92 inches (199.1 x 150.3 mm) Reading Resolution 0.0127 mm Reading Accuracy 0.42 mm Reading Speed 120 rps Pen Pressure Level 1024 Level Wireless Band Used 2.4 GHz Communication Range Approx. 15 m (differs depending on the usage conditions) Power Supply Lithium-ion battery Continuous Operation Time Approx. 16 hours (differs depending on the usage conditions) Auto Power Off Time Approx. 1.
8. ABOUT TRADEMARKS is a registered trademark of ELMO Co., Ltd. and Drawing Mate are trademarks of ELMO Co., Ltd. The full title for Windows® XP is the Microsoft® Windows® XP operating system. The shortened form of the OS name is used in the text. The full title for Windows® VISTA is the Microsoft® Windows® VISTA operating system. The shortened form of the OS name is used in the text. The full title for Windows® 7 is the Microsoft® Windows® 7 operating system.
ABOUT THE WARRANTY ▪ About the warranty certificate Your dealer will give you the warranty certificate. Be sure to check the details on the certificate, such as the dealer name and date of purchase. Read the contents of the warranty carefully and store it in a safe place. Warranty period: 1 year from purchase ▪ To order a repair during the warranty period, contact the dealer where you purchased the product. The dealer will perform the repair in accordance with the conditions in the warranty certificate.
ELMO CO., LTD. 6-14, Meizen-cho, Mizuho-ku Nagoya, 467-8567, Japan OVERSEAS SUBSIDIARY COMPANIES ELMO USA CORP. Headquarters 1478 Old Country Road Plainview, NY 11803-5034, U.S.A. Tel. (516) 501-1400 Fax. (516) 501-0429 E-mail:elmo@elmousa.com Web:http://www.elmousa.com West Coast Branch Cypress Pointe Business Park 5676 Corporate Avenue Cypress, CA 90630, U.S.A. Tel. (714) 828-8457 Fax. (714) 828-8429 ELMO (Europe) G.m.b.H. Neanderstr. 18, 40233 Düsseldorf, Germany Tel. (0211) 386470 Fax.