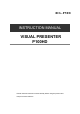
INSTRUCTION MANUAL VISUAL PRESENTER P100HD Please read this instruction manual carefully before using this product and keep it for future reference
IMPORTANT SAFEGUARDS ■ Read Instructions All the safety and operating instructions should be read before the appliance is operated. ■ Retain Instructions The safety and operating instructions should be retained for future reference. ■ Heed Warnings All warnings on the product and in the operating instructions should be adhered to. ■ Follow Instructions All operating and use instructions should be followed. ■ Cleaning Unplug this product from the wall outlet before cleaning.
■ Power Sources This product should be operated only from the type of power source indicated on the marking label. If you are not sure of the type of power supply to your home consult your appliance dealer or local power company. For products intended to operate from battery power, or other sources, refer to the operating instructions.
■ Damage Requiring Service Unplug this product from the wall outlet and refer servicing to qualified service personnel under the following conditions: • When the power-supply cord or plug is damaged. • If liquid has been spilled, or objects have fallen into the product. • If the product has been exposed to rain or water. • If the product does not operate normally by following the operating instructions.
The lightning flash with arrowhead symbol, within an equilateral triangle, is intended to alert the user to the presence of uninsulated “dangerous voltage” within the product’s enclosure that may be of sufficient magnitude SA 1965 to constitute a risk of electric shock to persons.
WARNING: TO REDUCE THE RISK OF FIRE OR ELECTRIC SHOCK, DO NOT EXPOSE THIS PRODUCT TO RAIN OR MOISTURE. The connection of a non-shielded equipment interface cable to this equipment will invalidate the FCC Certification or Declaration of this device and may cause interference levels which exceed the limits established by the FCC for this equipment. It is the responsibility of the user to obtain and use a shielded equipment interface cable with this device.
BEFORE YOU USE ■ The power cord and AC adapter that come with this product are for this product only. Do not use them with another product. ■ Be sure to use the power cord applicable to your local power specifications. ■ When storing the product, do not leave it under direct sunlight or by heaters. It may become discolored, deformed, or damaged. ■ Do not place this product in any humid, dusty, salt bearing wind, or vibrating locations.
■ Transfer the data from the SD card onto a device such as a PC to save a backup copy. Malfunction of the product or repairs to it may cause the data saved in the SD card to be deleted. ■ If this product is used for longer than the warranty period, its performance and quality may deteriorate due to the lifetime of its parts. To purchase replacement parts, consult the dealer from whom you purchased this product or our branch/office near your location.
■ Record/Play • Before recording an important scene, make sure to do a test recording to confirm that the camera is working properly. • The maximum file size of the continuous recording is 2GB. (The maximum recording length varies depending on other factors such as resolution and recording quality.) • Movie files that are recorded with this camera or converted by the proprietary software can only be played with this camera.
CONTENTS IMPORTANT SAFEGUARDS ................................................................................................................................ 2 BEFORE YOU USE................................................................................................................................................ 7 CONTENTS .......................................................................................................................................................... 11 1 BUNDLED ITEMS........
■Writing to camera images .............................................................................................................................................93 ■Using as a whiteboard ..................................................................................................................................................97 ■Using the SD card........................................................................................................................................................
1 1 BUNDLED ITEMS The items below are included with this product. If any item is missing, contact the dealer from whom you purchased this product.
2 2 2-1 BASIC OPERATIONS Document Camera ■Part Names Operation of the main unit: P21 ① ④ ② ② ⑧ ⑤ Front ③ ⑥ ⑦ Rear/Side Name ① Upper light P34 ② Remote control sensor P22 ③ Side panel P20 ④ Built-in mic ⑤ Touch panel P29 ⑥ Main switch P28 ⑦ Rear panel P16 ⑧ Base light P34 14
■Touch panel Name ① Touch panel Function Output image and icons are displayed. With these icons, various settings can be made. CAUTION • Do not press the panel strongly by finger or sharp objects. This can cause damage or malfunction. • To prevent damage during transport, a protection sheet has been put on the touch panel screen. Please be sure to remove it before use. The touch panel is made of glass. Pay attention to the followings to avoid glass breakage and injury.
■Rear panel and cable connection ① ⑪ ⑩ ② ③ ② ⑨ ⑧ ⑦ Name ① ② ③ ③ ④ ⑥ ⑤ Function HDMI IN 1 To input HDMI images and audio. (HDMI cable is not supplied HDMI IN 2 with the product.) RGB IN 1 RGB IN 2 To input RGB image. (RGB cable is supplied with this product.) In the stand-by mode, the image input to the [RGB IN 1] terminal is output from the [RGB OUT] terminal. AUDIO IN 1 To input audio line .(An audio cable is not supplied with this AUDIO IN 2 product.
Name ⑥ USB ⑦ RS-232C ⑧ AUDIO OUT ⑨ RGB OUT ⑩ HDMI OUT ⑪ DC IN 12V Function To connect to a PC. (USB cable is supplied with this product.) To control the unit from a PC through an RS-232C cable. (RS-232C cable is not supplied with this product.) To output audio line. (Audio cable is not supplied with this product.) To output analog RGB images. (Analog RGB cable is supplied with this product.) To output digital images. (HDMI cable is not supplied with this product.) Plug-in for the AC adapter.
Pin No. Name Pin No. Name Pin No. Name 1 Video signal (Red) 6 GND (Red) 11 GND 2 Video signal (Green) 7 GND (Green) 12 N.C 3 Video signal (Blue) 8 GND (Blue) 13 4 N.C 9 N.C 14 5 GND 10 GND 15 Horizontal synchronized signal Vertical synchronized signal N.C ③ To connect the unit to a device (audio amplifier etc) with an audio line output terminal. Connect a commercially available audio cable to the [AUDIO IN] terminal on the rear panel. ④ To switch the output image type.
⑩ To connect the unit to a device with an HDMI input terminal. Connect a commercially available HDMI cable to the [HDMI OUT] terminal on the rear panel. Note • Please use the monitor corresponding to the input of the image (resolution) or 720p or more. It will not operate with a cable that doesn’t conform to the HDMI standard. • Elmo does not guarantee operation for all HDMI-compatible monitors. ⑪ To connect the AC adapter.
■Side panel ① ② ③ ④ Mark Function To insert an SD card (commercially available). ① Push the card again to remove the SD card. To connect a wireless pen Tablet (commercially available) ② USB flash drive (commercially available). P89 or a P62 To connect an audio line-output device after looping the cable 3 times ③ MIC IN around the ferrite core that is supplied with this product. Audio input is a dual purpose port (microphone/line-in).
■Moving Parts of the Document Camera This unit can be moved as shown below.
2-2 Supplied Accessories ■Remote Control Preparation of Remote Control Remove the battery case cover at the back of the remote control and install 2 batteries. (TYPE AAA) Children may ingest small batteries; always keep batteries safe and out of reach. If a battery is swallowed, consult WARNING a doctor immediately as this could result in asphyxiation or be an obstacle to digestion, etc.
■Remote Control Strap The strap can be fastened to the remote control as shown below. ■Image Mate CD-ROM The CD-ROM contains the software for connecting to a PC and the Instruction Manual. For software installation, follow the instructions of the Image Mate Installation Manual.
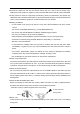
■Preparation Setting Up ① Release the camera column lock by turning the security lock knob. Locked Unlock ② As shown in the right figure, hold the setup grip and raise the camera column. At this time, the camera head slides up in conjunction with the rise of the camera column. The lamp column will also rise. Setup grip ③ If necessary, move the lamp column and the lamp head to an appropriate position as shown in the right figure.
Note If the camera column is pulled or pushed forcedly, the camera might be pushed out of position, and the camera image might be displaced from the display center. In this case, initialize the camera position as follows: (1) Fold the camera column on the stage. When the camera column is folded in the storage position, the camera position is initialized. (2)Then, raise the camera column.
STORING ①Return the lamp to the original position. Then, hold the setup grip of the camera column and fold the camera column. At this time, the camera head slides down and the lamp column also folds. Note Turn OFF the power switch before the storing. ②Lock the camera column and the lamp column by ② turning the security lock. Locked Unlocked Note Note Do not force down the camera column Do not fold the camera column when the and the lamp column when folding them.
2-3 Shooting Images AC cord AC adapter Camera Power button P28 Cable ■Setting up the main unit Set up the main unit as shown in the figure above. Then connect the main unit to a projector or a PC monitor, and turn on the power of the main unit. P28 Connecting the AC cord Connect the AC cord and the AC adapter. Then connect the AC adapter to the [ DC IN 12V ] terminal at the rear panel of the document camera, and insert the AC cord into an outlet.
Connecting the video cable Connect the document camera to the display device with a video cable corresponding to the display device. CAUTION Before connecting the main unit to other devices, be sure to turn OFF the power for all of the devices. Set the resolution corresponding to the display device. ■Turning the power ON/OFF • Press the [ ] button on the main unit or the [ ] button on the remote control to turn the power ON. (After the [ ] button flashes blue, it is illuminated a few seconds later.
■Operating the touch panel You can control the unit with the touch panel.. Startup screen The startup screen will appear on the touch panel when the product is turned on. Main menu The main menu is displayed by tapping the menu icon at the top right of the startup screen How to operate the touch panel ① Tap By tapping an icon on the touch panel, you can select a function and operate.
② Drag By sliding your finger across the touch panel surface while touching the item, you can move it. When the Presentation features (Highlight, Mask, Scroll) are in use, you can move the area. Note The touch panel in the P100HD is a “Resistive Touchscreen” which is different than “Capacitive Touchscreen” typically found in consumer tablets. To operate, firmly press a selected icon or drag a selected area to initiate a command.
■Adjusting the size To adjust the display area of the document, tap [Startup screen] > [ panel or press the [ / / ] on the touch ] button on the remote control. ZOOM-IN : The object can be shown in large size. ZOOM-OUT : The object can be shown in small size. Note • Zoom ratio: Optical 16x, Digital 8x • When the optical zoom reaches 16x, it automatically shifts to digital zoom. • Within the digital zoom range, the image quality is degraded.
■Adjusting the brightness To adjust the brightness of the image, tap [ panel or press the [ / (Main menu)] > [ ] on the touch ] buttons on the remote control. The following two adjustment modes are available for this adjustment. Each mode can be set by tapping [ (Setting) ] > [ ] on the touch panel.
Manual brightness adjustment ([ (Setting)] > [ (Brightness)] > [ To change the brightness manually, tap [ [ / ] on the touch panel ) (Main menu)] > [ ] or press the ] buttons on the remote control. The image brightness does not automatically change in response to the brightness of the shooting environment. Note Brightness of the screen is different • Factory setting is set to [Auto]. •To return to the factory settings, tap [ (Main menu)] > [ ] on the touch panel.
■Turning the illumination ON/OFF Upper light Base light The upper light and the base light can be turned ON/OFF by tapping [ [ ][ (Main menu)] > ] on the touch panel. CAUTION • When you take a picture of a person, turn off the upper light. • Make sure that the light from the upper light does not shine directly into your eyes. • This product is equipped with a high-brightness LED light. You can safely use the light to light up objects, however its brightness will gradually diminish with long-term use.
■Image selection You can switch the input source either with the remote control or from the Signal select screen displayed by tapping [ (Main menu)] > [ ] on the touch panel. Camera image: [ (Signal select)] > [ ] on the touch panel [ ] button on the remote control Image input from the RGB IN1、RGB IN2、HDMI IN1、HDMI IN2 terminal: [ (Signal select)] > [ [ ] on the touch panel ] button on the remote control.(Only RGB IN1 is selected.
The following image signals can be input to the RGB input terminal. The image signals specified as "Video" in the following table can be input to the HDMI input terminal. (dot) Polarity of synchronized signal (P: Positive, N: Negative) Frequency Resolution Standard Horizontal (kHz) Vertical (Hz) HS/VS 640×480 31.469 59.940 N/N VESA 800×600 37.879 60.317 P/P VESA 1024×768 48.363 60.004 N/N VESA 1280×800 49.702 59.810 N/P VESA 1280×1024 63.981 60.020 P/P VESA 480p 31.
■Details of Each Function Highlight Function This is a function to highlight a particular section of the image. Use this function to draw attention to a section. Highlight operations When you tap [ or the [ (Presentation)] > [ ] on the touch panel ] button on the remote control while the camera image、 the external input or the still image is displayed, the highlight function works with the darkness and size set previously.
Setting operations You can change the darkness of the highlighted area by tapping [Highlight] > [ ][ ] while the highlight function is activated. Also, by dragging the edge of the highlighted area on the touch panel, you can change the size of the highlighted area.
Mask Function This is a function to mask a section of an image. Mask operations When you tap [ or the [ (Presentation)] > [ ] on the touch panel ] button on the remote control while the camera image or the external input or the still image is displayed, the mask effect is applied with the darkness set previously. You can move the masked area by dragging it on the touch panel or with [ ] buttons on the remote control.
Scroll Function The image expands to the digital zoom set previously, and the enlarged screen can be scrolled. Scroll operations When you tap [ or the [ (Presentation)] > [ ] on the touch panel ] button on the remote control while the camera image or the still image is displayed, the digital zoom works with the magnification set previously. You can scroll the enlarged image by dragging the scroll area on the touch panel or with [ ] buttons on the remote control.
Compare Picture Function To display the live camera image and a picture stored on the SD card/USB flash drive together. Compare Picture operations When operating by the touch panel Tap the touch panel [ [ (Presentation)] > ] to display the Input signal select screen. Tap the [ ] to display the input source.
Operating the camera image When you tap [Compare picture] > [ on the touch panel or the [ / ] / ] button on the remote control while the Compare picture function is working, you can adjust the display area of the document. When setting manual in the AF mode, tap the part except the icon on the screen left side to adjust the focus.
Mosaic Function To apply a mosaic effect to the image. You can change the extent of mosaic. Mosaic Operations When you tap [ (Presentation)] > [ ] on the touch panel while the camera image, the external input or the still image is displayed, the mosaic effect is applied. The mosaic effect is released by tapping [Mosaic] > [ ] on the touch panel. Mosaic setting Operations You can change the degree of mosaic by tapping [Mosaic] > [ ][ ] on the touch panel while the mosaic function is working.
■Icon descriptions Startup screen Icon Name Function Zoom In Object can be shown in larger size. Zoom Out Object can be shown in smaller size. Focus on the image when tapped while the AF mode is set to Screen manual. Menu Move to Main menu. Main menu Icon Name Function Main menu Display the operation menu for camera image. Presentation Display the Presentation screen. Signal select Setting Display the Signal select screen. ※ Normal settings and Advanced settings are available.
Capture Save the still image on the SD card/USB flash drive. Rec Save the video on the SD card/USB flash drive. Pause Pause the camera image. Press this button again to restart. Adjust Brightness Adjust brightness the camera image. Reset Brightness Return to the factory settings of brightness. Lighting switch Preview Turn ON/OFF of the material illumination or the base illumination . Return to the Start-up screen when tapped.
Mosaic Apply mosaic effect to the image. Image Rotation Rotate camera image by 180°. Color/B&W Display an image in color or black & white. Posi / Nega Output a positive or negative image. Presentation Settings Highlight ② ② ① ② ② Icon Name ① Highlighted area ② Around the Highlighted area Function Move the Highlighted area by dragging. Change the size of the Highlighted area by dragging the outside of the highlighted area.
Mask ① Icon・Area ① Name Function Mask area Move the Mask area by dragging. Exit Return to the Presentation screen. Scroll ① Icon・Area ① Name Function Enlargement Scroll the enlarged area by dragging. Magnification setting Set the digital zoom magnification to ×2 ,×3 or ×4. Exit Return to the Presentation screen.
Compare Picture Input Settings Icon Name Function Camera image/External Compare the camera image and the image from the input external input. Camera image/still image Compare the camera image and the still image. External input selection Exit Select the external input to compare with the camera image. Return to the Presentation screen. Compare Picture Icon /Area Name Function Zoom In Object can be shown in large size. Zoom Out Object can be shown in small size.
Mosaic Icon Name Function Coarse Make the mosaic pattern coarser. Fine Make the mosaic pattern finer. Exit Return to the Presentation screen. Image Rotation Icon Name Function Image Rotation Rotate a camera image by 180°. Exit Return to the Presentation screen. Color/B&W Icon Name Function Color/B&W Display an image in color or black & white. Exit Return to the Presentation screen. Posi/Nega Icon Name Function Posi/Nega Output a positive or negative image.
Signal select (Normal) Icon Name Function Advance mode Move to the Advance mode. Camera Select the camera image. Thumbnail Select the thumbnail. Select the external input. Same image is output to RGB External input output and HDMI output. You can not select the Advance mode while selecting the external input. Signal select (Advance) Icon Name Function Normal Return to the normal mode. External input Select the external input that you want to output from RGB output.
Setting Tap the icon that want to set. Icon Name Function Prev Page Move to the previous page. Next Page Move to the next page. Brightness Icon Name Default Function Maintain constant brightness of the image, the brightness of the image changes automatically according to the brightness of the Auto レ shooting environment. Tap [ the touch panel or press the [ (Main menu)] > [ / ] on ] buttons on the remote control to change the level of the automatic brightness adjustment.
★ What is AF? A function to automatically focus the camera. AF Mode Icon Name Default Function Focus automatically. You do not need to tap the touch panel or press Auto the [ ] button on the remote control. The focus changes automatically as the object changes. レ Manual De-activate the auto focus once when tapped or the [ ] button on the remote control is pressed. Zoom Sync Auto focus only once after zooming. Exit Return to the Setting screen.
R-Gain Icon Name Function Up To adjust the R-Gain of the camera image when the white balance is set to Manual. Use [Up] or [Down] to increase or decrease the red color. Down Exit Return to the Setting screen. B-Gain Icon Name Function Up To adjust the B-Gain of the camera image when the white balance is set to Manual. Use [Up] or [Down] to increase or decrease the blue color. Down Exit Return to the Setting screen.
★ What is Image Mode? A special effect to project a clear image. Image Mode Icon Name Text1 Default Function レ Clearly reproduce black & white documents including such features as Text2 characters and lines. The effect intensifies as the number increases. Text3 Graphic1 Clearly reproduce photographs and color documents. Image could be improved if used with a DLP projector. Graphic2 (The effect depends on the projector used.) Exit Return to the Setting screen.
★ What is Gamma? An image characteristic unique to image I/O devices. Gamma Icon Name Default Function Low Change the characteristics of the image. レ Medium Enabled only when [Graphic1] is selected for the Image Mode. High Exit Return to the Setting screen. Flicker Rate Icon Name Default Function 50Hz Others 60Hz Japan/U.S. Exit Reduce fluorescent light flickering due to the power supply frequency. Select the same value as used for the power supply frequency.
★What is USB Mode? Functions described below can be used by connecting the document camera to a PC with the USB cable. USB Mode Icon Name Default Mass Storage Function Send the data on the SD card loaded in the device to the PC. レ Application Exit Control this device from a PC using special software. Return to the Setting screen. Select Memory Icon Name SD Card Default レ Function Select where to save still images/movies, when both SD card and USB fl ash drive are inserted.
Volume Icon Name Function Up Set the volume of the audio line output and the HDMI output. Down Exit Return to the Setting screen. Audio Selector Icon Name Built-in mic Default Function レ Select the source of the audio input. Mic-in Line-in Exit Return to the Setting screen. Mic Mixer Icon Name Default ON OFF Exit Function Mix MIC IN with AUDIO IN of the back panel to output AUDIO OUT. レ Output the signal input from AUDIO IN in the back panel from AUDIO OUT.
Reset All Icon Name Function Yes Reset various settings to factory settings. Exit Return to the Setting screen. Save Presets Icon ★Saved Items Zoom, Brightness, Mode, Brightness Level, White Balance, R-Gain, B-Gain, Name Function 1 Save the current setting as the preset setting of the selected number. 2 3 Exit Return to the Setting screen. Load Presets Icon Name Function 1 2 Call the setting saved for the selected number. 3 Exit Return to the Setting screen.
Guide Icon Name Default レ ON Function Display device’s operating status and an explanation of the icons on the screen. Turn off OFF display of device’s operating status and an explanation of icons on the screen. Exit Return to the Setting screen. Clock Set Icon Name Function Move the arrow by tapping just above year, month, day, hour, minute or second that you want to change. Then tap the arrow to change the value.. Exit Return to the setting screen after setting the date and time.
Startup menu display Icon Name ON Default レ Function Display the menu on the startup screen. OFF Display the Main menu icon only on the startup screen. Exit Return to the Setting screen.
3 3 3-1 ADVANCED OPERATIONS Using an SD card/USB flash drive With this equipment, you can save a camera image as a picture or movie on an SD card or USB flash drive. You can also display the data stored on the SD card or USB flash drive on the screen. Before you begin, insert a commercially available SD card or USB flash drive into the corresponding slot on the side panel. Note • SD card - A SDXC card cannot be used. - Formatting the SD card with this product before you use is recommended.
Note • Formatting the SD card/USB flash drive. When you need to format the SD card/USBfl ash drive, insert it into this product and excute formatting. ①Tap [ (Signal select)] > [ ] on the touch panel to switch the output image to the Playback image. ②Tap [ [ ③Tap [ ] located in the right of the menu to change the thumbnail icon. Then select ]. ]to start formatting. If you do not want to format, select [ 63 ].
■Saving images Picture Basic operations When operating by the touch panel ① Tap the [ [ (Main menu)] > ] on the touch panel. ② Saving begins when [ ] appears on the preview screen of the touch panel.
When operating by the remote control ① Press the [ ② Press the [ ] button on the remote control. ] button on the remote control. ③ Saving begins when [ ] appears on the screen.
Movie Basic operations When operating by the touch panel ① Tap [ (Main menu)] > [ ] to switch to the recording screen. ② Tap [Recording] > [ ] to stop the recording. When operating by the remote control ① Press the [ ② Press the [ ] button on the remote control. ] button on the remote control.
③ Recording begins when [ ] appears at the top left of the screen. When you press the [ ] button again on the remote control, recording stops and [ ] disappear. - Recording - Note • Even if the output image is set to HDMI and the resolution is set to 1080p, video is recorded in 720p. • To prevent deterioration of image quality , use a memory card with a faster read/write speed (SD card: Class 6 or better). • How to select the destination to save when both SD card and USB flash drive are inserted.
Recording display Icon Name Zoom In Zoom Out Screen Adjust Brightness Stop Function Object can be shown in large size. This icon is not shown when selecting the external input in the Signal select. Object can be shown in small size. This icon is not shown when selecting the external input in the Signal select. Focus on the image when tapped while the AF mode is set to manual. This icon is not shown when selecting the external input in the Signal select. Adjust brightness the camera image.
■Displaying the stored data Thumbnail display (list of pictures/movies) Basic operations When operating by the touch panel ①Tap [ (Signal select)] > [ ] on the touch panel to display the thumbnails. Thumbnail icon In the thumbnail icon, If [ ] is selected, the list of pictures. If [ ] is selected, the list of recorded movies appears. ② Select the picture/movie you want to display full-screen. (1)Tap the thumbnail of the touch panel to move the cursor.
Picture Movie (3) Tap [Thumbnails] > [ ][ ] to move between thumbnail pages. ③To return to the thumbnail display, tap the [ ] on the touch panel. When operating by the remote control ①Press the [ ] button on the remote control to display the thumbnails (list of pictures/movies). The current selection is displayed in the right bottom of the screen. SD/Picture 001/003 < Thumbnail images > Press the [ ] button on the remote control to navigate the list of pictures and movies.
②Select the picture/movie you want to display full-screen. Press the [ ] button on the remote control to move the cursor. SD/Picture 001/003 < Thumbnail images > ③Select the picture/movie to display full-screen. Press the [ ] button on the remote control to display the selected picture/movie full-screen. The movie automatically starts to play. Press the [ ] button on the remote control to display another image in the thumbnail list.
Changing settings Tap the thumbnail icon to change the settings. Thumbnail icon If you tap [ ] [ ] , the next set of icons appears. Thumbnail icon CAUTION You can not operate the menu from the remote control.
Icon descriptions Thumbnail display1 Icon Name Function Prev Page Move to the previous thumbnail page. Next Page Move to the next thumbnail page. Thumbnail cursor Thumbnail SD Card USB Flash Drive Picture Movie Move the cursor by tapping the thumbnail which you want to choose. Move to the Picture display / Movie play screen when the thumbnail of the selected picture / movie is tapped. Switch between the memory from which images are displayed.
Thumbnail display2 Icon Name Function Lock (set as protected) or unlock (set as unprotected) the selected Lock/Unlock image. Can be switched with the [ ] button on the remote control as well. Lock All Lock (set as protected) all thumbnail images. Unlock All Unlock (set as unprotected) all thumbnail images. Delete Move to Delete screen. Format Move to Format screen. Prev Menu Move to the previous menu page. Exit Return to Signal select.
Format Icon Name Function Yes Format the USB flash drive or SD card. Exit Return to thumbnail display. Picture Display Menu Note The icons disappear after about ten seconds from showing the display. If you want to operate the icons, you will tap any place on the screen. The icons show again. Icon Name Function Prev Picture Move to the next picture page. Next Picture Move to the prev picture page. Thumbnail Return to thumbnail display. Delete Move to Delete screen.
Movie Play Menu Note The icons disappear after about ten seconds from showing the display. If you want to operate the icons, you will tap any place on the screen. The icons show again. Icon Name Function Play Pause Play/stop/cue the movie. Cueing Repeat On Play the movie on loop. Repeat Off Up Set the output audio volume. Down Thumbnail Return to thumbnail display.
Icon Name Function Highlight Highlight and draw attention to a particular section of the image. Mask Mask a section of the image. Scroll Expand to a set size and allow scrolling of the enlarged section. Compare Picture Display a still image and live image together. Mosaic Apply a mosaic effect to the image. Image Rotation Rotate the image by 0°、90°、180°、270°. Exit Return to Picture display.
3-2 Outputting a different image to RGB OUT and HDMI OUT This unit can output a different image to RGB_OUT and HDMI_OUT. While outputting a camera image to HDMI output terminal, this unit can output the image of one of either HDMI IN1, HDMI IN2, RGB IN1, or RGB IN2 to RGB output terminal. ①Tap the [ (Signal select)] > [ ] on the touch panel,and tap [ ②Tap the [ (Signal select)] > [ ] on the touch panel. ].
3-3 Saving data stored on an SD card to PC via USB cable CAUTION • Tap [ (Settings)] > [ ] on the touch panel to set to [Mass Storage]. • Insert the SD card with the label facing up. Forcing it into the slot with the wrong side up may cause a malfunction. By connecting this equipment to a PC via USB, you can save the image data stored on the SD card to the PC. The operating system (OS) for the connected PC should be Microsoft Windows XP (SP2 or later), Windows Vista, Windows 7 or Windows 8.
③ The equipment is recognized as a removable disk. You can view the image data on the SD card with the viewer software of the PC. • The image data is stored as JPEG files or MP4 files in the following folders: My Computer Removable Disk CAUTION • You can not save, delete, lock, unlock, or format the images from the PC. • The image files are saved with the correct date and time from [Clock setting] .
3-4 Presentation using a USB-connected PC with the supplied software Note • Tap [ (Settings)] > [ ] on the touch panel to set to [Application]. “Image Mate” is available from the supplied CD-ROM.
CAUTION • Do not connect/disconnect the USB cable while operating the equipment using the touch panel or remote control. This may cause a malfunction. • We recommend using a USB 2.0-compliant USB cable. Note • Depending on the USB environment used by the PC or any peripheral device, image transfer may be disrupted. • Operation is not guaranteed for all environments. • Make sure to disconnect the USB cable before switching [USB Mode] from the touch panel.
3-5 Displaying the Video Image through Network Connection When connection is made to http://192.168.0.100 on the browser, the device’s top page opens. When [50%], [75%] or [100%] of [Live] is clicked, the video image is displayed. When [CAPTURE] is clicked, the still image is displayed. Top page Name ① ② ③ LIVE (Video image display) CAPTURE SETUP (Ethernet setting) Function To display the video image at 50%, 75% or 100% scale. To display the still image. To display the configurations page.
Live Name CONTROL ① (WEB remote control) Function To display the WEB remote control when this item is clicked. CAUTION • The Live and Capture can not be displayed during the recording. • The Live and Capture can not be displayed during the playing movie. • The Live and Capture can not be displayed while the Compare Picture function is in operation. WEB remote control Name ① ② ZOOM Function (One-click operation) TELE To zoom in. WIDE To zoom out.
Toggle between base illumination and → material illumination → both LAMP ③ illuminations go out in this order. NORMAL Return the automatic brightness adjustment level to the standard level. OPEN Brighten the camera image. ⑥ CLOSE Darken the camera image. ⑦ NEAR Move the focus near. FAR Move the focus far. AF Focus the camera automatically. ④ BRIGHTNESS ⑤ FOCUS ⑧ ⑨ CONFIGURATIONS ① ② ③ Name Function Display the network configuration page.
Network Configuration ① ② ③ ④ ⑤ ⑥ ⑧ ⑦ ⑨ Name ① IP address ② Subnet mask ③ Default gateway Function (< IP address information >: Factory settings) set in this camera system. <192.168.0.100> <255.255.255.0> Router IP address. <0.0.0.0> Port number for displaying the Live image. ④ Port number This port number is entered from TCP:49152 to TCP:65535. ⑤ Root password Password for the Network configuration. Up to 15 alphanumeric characters can be entered.
Note • To enable the access to this camera system on the web browser, the PC environment should be as follows: - Windows XP (SP2 or later) / Vista / 7 / 8 has been installed. - JRE (Java Runtime Environment) 1.6.0_29 or later has been installed, and Java (Sun) is valid. - Internet Explorer6 or later has been installed. • This camera system does not guarantee normal access operation on all web browsers.
3-6 Using [MIC IN] and [AUDIO IN] The microphone input and the audio input are mixed and output from [AUDIO OUT]. The microphone input level alone can be adjusted on the touch panel. Note Only the microphone for PCs (electret condenser microphone) can be connected to [MIC IN]. If a microphone other than that for PCs is connected to [MIC IN], this camera system could malfunction. Before connection, carefully check the specifications of the microphone.
3-7 Using the ELMO Wireless Slate/Tablet (CRA-1) with the equipment By using the separately sold wireless pen tablet with this equipment, you can add comments or draw on camera images directly. You can also directly perform such operations as zooming in/out. ELMO Wireless Slate / Tablet CRA-1 CODE:1307 ■Connecting the ELMO Wireless Slate/Tablet (CRA-1) ① Set up the equipment as shown in the figure above and connect to the projector. Then turn on the equipment.
■Basic operations 2. Move the cursor 1. Draw Touch the tablet and move ● Lift from the tablet and move 3. Select a menu button Touch the menu button Drawing lines Touch the tip of the pen to the surface of the tablet and move the pen. If [ ] or [ ] has been selected, the pen will draw a line. Use this function to draw/erase lines. Keep pressed down ● Moving the cursor Move the pen slightly above the surface of the tablet. The cursor on the screen moves as the pen moves.
● Selecting a menu button Move the pen slightly above the surface of the tablet to move the cursor and then touch the pen within the working area on the tablet. Use this function to select a menu button. Touch once CAUTION Press the tablet lightly with the pen; do not press hard. Note • Hold the pen as upright as possible; holding the pen at an angle may result in a failure of the tablet to recognize the pen. • If the pen is not used for a while, the power saving mode is activated.
■Selecting how to use the pen tablet from the tablet menu To use the pen tablet, touch a function key at the top of the tablet and select a mode according to the situation described in the table below: Icon Name Function Write to/work with Display an image on the document camera as a background, and camera images draw on it with the pen tablet. (Camera Mode) Write on a white screen Display a white image as a background, and draw on it using the (Whiteboard Mode) pen tablet.
■Writing to camera images You can draw on camera images. Next Menu descriptions Pressing [ ] or [ ] switches the menu pages.
Main Menu 1 Icon Name Function Select Pen1. The initial color setting is Red. You can change the settings for the pen in the Setting menu. Select Pen2. The initial color setting is Black. You can change the settings for the pen in the Setting menu. Pen1 Pen2 Clear Screen Capture Rec Erase everything drawn on the screen. If you need to erase a part of a drawing, move the cursor to the section to be erased, and touch the section with the pen while pressing the pen Erase button.
Setting Menu Icon Name Selection Item Default Red Pen1 Color Pen1 Thickness Pen2 Color レ Set the pen color to blue. Black Set the pen color to black. Thin Decrease the pen thickness. Medium レ Set the pen thickness to medium width. Thick Increase the pen thickness. Red Set the pen color to red. Blue Set the pen color to blue. レ Thin Erase Area Set the pen color to red. Blue Black Pen2 Thickness Function Set the pen color to black. Decrease the pen thickness.
Support Function Menu Icon Name Function Show Show/hide the Support Function Menu. Hide Menu Change Support Function Menu. Next Picture Move to the next picture page. Prev Picture Move to the prev picture page. Scroll Enlarge the image to the size you specify, allowing you to move within the enlarged area. Mask Mask part of the image. Highlight Highlight part of the image you want to emphasize. Image Rotation Rotate a Camera image by 180° in Camera mode.
■Using as a whiteboard You can draw on any blank white images or areas used as a background. Next Menu descriptions Main Menu Icon Name Pen 1 Pen 2 Clear Screen Capture Setting Function Select Pen 1. The initial color setting is Red. You can change the settings for the pen in the Setting menu. Select Pen 2. The initial color setting is Black. You can change the settings for the pen in the Setting menu. Erase everything drawn on the screen.
Setting Menu Icon Name Selection Item Default Red Pen1 Color Pen1 Thickness Pen2 Color レ Set the pen color to blue. Black Set the pen color to black. Thin Decrease the pen thickness. Medium レ Set the pen thickness to medium width. Thick Increase the pen thickness. Red Set the pen color to red. Blue Set the pen color to blue. レ Thin Erase Area Set the pen color to red. Blue Black Pen2 Thickness Function Set the pen color to black. Decrease the pen thickness.
■Using the SD card You can display a picture or movie stored on the SD card and use the tablet to draw or write on it. Picture • Thumbnail display Picture When you select an image from the thumbnails, the selected image is displayed on the screen.
Menu descriptions Thumbnail display Menu Icon Name Selection Item Function Prev Page Move to the previous thumbnail page. Next Page Move to the next thumbnail page. Next Menu Move to the next menu page. USB Flash Drive Picture Switch the data displayed as thumbnails between movies and pictures. Movie Lock/Unlock Memory Lock Lock (set as protected) or unlock (set as unprotected) the selected image. Lock All Lock (set as protected) all thumbnail images.
Single Mode Picture Display Menu 1 Icon Name Function Select Pen 1. The initial color setting is Red. You can change the settings for the pen in the Setting menu. Pen 1 Pen 2 Clear Screen Capture Select Pen 2. The initial color setting is Black. You can change the settings for the pen in the Setting menu. To erase anything drawn on the screen. If you need to erase a part of a drawing, move the cursor to the section to be erased, and touch the section with the pen while pressing the pen Erase button.
Setting Menu (when Setting Menu is selected) Icon Name Selection Item Default Red Pen1 Color Pen1 Thickness Pen2 Color レ Set the pen color to blue. Black Set the pen color to black. Thin Decrease the pen thickness. Medium レ Set the pen thickness to medium width. Thick Increase the pen thickness. Red Set the pen color to red. Blue Set the pen color to blue. レ Thin Erase Area Set the pen color to red. Blue Black Pen2 Thickness Function Set the pen color to black.
Support Function Menu Icon Name Function Show Show/hide the Support Function Menu. Hide Menu Change Support Function Menu. Next Picture Move to the next picture page. Prev Picture Move to the prev picture page. Scroll Enlarge the image to the size you specify, allowing you to move within the enlarged area. Mask Mask part of the image. Highlight Highlight part of the image you want to emphasize. Image Rotation Rotate a Camera image by 180° in Camera mode.
Movie Play Menu Icon Name Function Show Show/hide the Support Function Menu. Hide Menu Change Support Function Menu. Play Pause Play/stop/cue the movie. Cueing Up Set the output audio volume. Down Repeat ON Play the movie on loop.
3-8 Shooting off the stage For shooting forward and backward from the camera ① Set the camera head in the horizontal direction. The camera head is adjusted automatically so that the camera image will not be inverted. Note • The camera image can be rotated manually by tapping [ (Presentation)] > [ on the touch panel. For shooting wall or landscape ① Open the close-up lens holder.
3-9 About RS-232C Connection via RS-232C When the RS-232C port is connected to a PC, the unit can be controlled from a PC. Note For the information of RS-232C command, etc., contact the sales outlet from which you have purchased this camera system or the nearest branch office or sales office of ours.
4 4 4-1 TROUBLE SHOOTING Symptoms and Confirmation Check the following items. If any abnormality is found, consult the dealer from whom you purchased this product or our nearest branch/office. Symptom No image is displayed. Possible cause/ remedy • The cable is not correctly connected. • The AC adapter is disconnected from the wall outlet. • The AC adapter is disconnected from the power supply socket of the unit. • The power is not ON.
Symptom Possible cause/ remedy The image is striped. • This may be interference fringes between dots of printed matter and TV scanning lines or CMOS pixels. Changing the shooting range may help the problem. • Vertical stripes may appear on an LCD projector image. Manually adjusting the dot clock at the projector side may help the problem. Images on the SD card/ USB flash drive are not displayed. The image does not move. • Remove the SD card/USB flash drive, wait a few seconds and reinsert.
Symptom Possible cause/ remedy The LAN cable cannot be connected. • The LAN connector (RJ45) is located on the back side of main unit. The LAN connector link • Power is not supplied to this camera system or the unit to be lamp (green LED) cannot connected to this camera system. Check whether the cable is light up. connected firmly, and then turn ON the power supply. • The cable is disconnected. Check the connection between the cable terminals. • The cable used is wrong.
About the lamp (LED lamp) The brightness of the lamp will diminish with long-term use. If its brightness has significantly diminished, consult the dealer from whom you purchased the product or our nearest branch/office for replacement. About long-term usage of this product Due to the lifetime of its parts, if the product is used for longer than the warranty period, its performance and quality may deteriorate. In this case, we will replace the parts for a charge.
5 5 SPECIFICATIONS 5-1 General Item Specifications Power source 12VDC (AC adapter AC100 - 240V) Power consumption 26.4W Outside dimensions W457×D519×H587mm(W18.0 x D20.5 x H23.2 in)(When setup) W457×D567×H137mm(W18.0 x D22.4 x H5.4 in)(When folded) Weight Approx. 7.9kg(15.7 lbs) (Main body only) Input selection Main / External × 4 Output terminal RGB output Mini Dsub 15P connector, female × 1 HDMI output terminal Type A × 1 Line Out terminal Φ3.
5-2 Main Camera Item Specifications Lens f=4.9mm ~ 78.4mm(16x zoom) F2.7 Frame rate 30fps Shooting area Max. Min.
720p: 1280x720@60Hz Horizontal frequency: 45.00kHz Vertical frequency: 60.00Hz HDMI output Image output 1080p 720p Audio output PCM 44.
5-4 Trademarks and License and Image Mate are registered trademarks of ELMO Co., Ltd. SD、SDHC、 (SD logo) and (SDHC logo) are trademarks of SD-3C, LLC. HDMI, logo and High-Definition Multimedia interface are trademarks or registered trademarks of HDMI Licensing LLC. This product is based on the work of the Independent JPEG Group. All other company/ product names described in this manual are trademarks or registered trademarks of their respective companies.
6-14, Meizen-cho, Mizuho-ku, Nagoya, 467-8567, Japan OVERSEAS SUBSIDIARY COMPANIES ELMO USA CORP. Headquarters 1478 Old Country Road Plainview, NY 11803, U.S.A. Tel. (516) 501-1400 Fax.(516) 501-0429 E-mail: elmo@elmousa.com Web: http://www.elmousa.com West Coast Branch 5676 Corporate Avenue Cypress, CA 90630, U.S.A. Tel. (714) 828-8457 Fax. (714) 823-8429 ELMO Europe SAS Headquarters Immeuble Elysées La Défense, 7C, Place du Dôme, 92056 Paris La Défense, France Tel. 33 (0) 1 73 02 67 06 Fax.