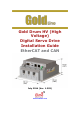
Gold Drum HV (High Voltage) Digital Servo Drive Installation Guide EtherCAT and CAN July 2014 (Ver. 1.202) www.elmomc.
Notice This guide is delivered subject to the following conditions and restrictions: • This guide contains proprietary information belonging to Elmo Motion Control Ltd. Such information is supplied solely for the purpose of assisting users of the Gold Drum HV (High Voltage) servo drive in its installation. • The text and graphics included in this manual are for the purpose of illustration and reference only. The specifications on which they are based are subject to change without notice.
Revision History Version Details 1.0 Initial release 1.100 EtherCAT and CAN merged in one document. 1.101 General document updates 1.102 Organized how the Gold Drum HV features are presented in the document. 1.103 Addition of EtherCAT switches 1.104 Added a caution and recommendation on the type of cleaning solution to use for the Elmo unit. Updated the supply output (VDD) voltage range value of the Digital Output Interface for PLC and TTL modes. 1.
Elmo Worldwide Head Office Elmo Motion Control Ltd. 60 Amal St., POB 3078, Petach Tikva 49516 Israel Tel: +972 (3) 929-2300 • Fax: +972 (3) 929-2322 • info-il@elmomc.com North America Elmo Motion Control Inc. 42 Technology Way, Nashua, NH 03060 USA Tel: +1 (603) 821-9979 • Fax: +1 (603) 821-9943 • info-us@elmomc.com Europe Elmo Motion Control GmbH Hermann-Schwer-Strasse 3, 78048 VS-Villingen Germany Tel: +49 (0) 7721-944 7120 • Fax: +49 (0) 7721-944 7130 • info-de@elmomc.
Gold Drum HV Installation Guide (EtherCAT and CAN) MAN-G-DRUMHVIG-EC (Ver. 1.202) Table of Contents Chapter 1: 1.1. 1.2. 1.3. 1.4. 1.5. Warnings......................................................................................................................... 9 Cautions .......................................................................................................................... 9 Directives and Standards ...................................................................................
Gold Drum HV Installation Guide (EtherCAT and CAN) Table of Contents MAN-G-DRUMHVIG-EC (Ver. 1.202) 4.3.2.1. Motor Power Connector ............................................................... 28 4.3.2.2. Main Power Connector ................................................................. 29 4.3.2.3. Auxiliary Power Connector ........................................................... 30 4.3.2.4. Port A Connector .......................................................................... 31 4.3.2.5.
Gold Drum HV Installation Guide (EtherCAT and CAN) Table of Contents MAN-G-DRUMHVIG-EC (Ver. 1.202) 4.11.1. USB 2.0 Communication ................................................................................ 79 4.11.2. EtherCAT Communication ............................................................................. 80 4.11.2.1. Ethernet Communication ............................................................. 82 4.11.3. CAN Communication Version ...................................................
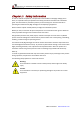
Gold Drum HV Installation Guide (EtherCAT and CAN) MAN-G-DRUMHVIG-EC (Ver. 1.202) Chapter 1: Safety I nform ation In order to achieve the optimum, safe operation of the Gold Drum HV (High Voltage) servo drive, it is imperative that you implement the safety procedures included in this installation guide. This information is provided to protect you and to keep your work area safe when operating the Gold Drum HV (High Voltage) and accompanying equipment.
Gold Drum HV Installation Guide (EtherCAT and CAN) Safety Information MAN-G-DRUMHVIG-EC (Ver. 1.202) 1.1. Warnings • To avoid electric arcing and hazards to personnel and electrical contacts, never connect/disconnect the servo drive while the power source is on. • Power cables can carry a high voltage, even when the motor is not in motion. Disconnect the Gold Drum HV (High Voltage) from all voltage sources before it is opened for servicing.
Gold Drum HV Installation Guide (EtherCAT and CAN) Safety Information MAN-G-DRUMHVIG-EC (Ver. 1.202) 1.3.
Gold Drum HV Installation Guide (EtherCAT and CAN) MAN-G-DRUMHVIG-EC (Ver. 1.202) Chapter 2: Product Description This installation guide describes the Gold Drum HV (High Voltage) servo drive and the steps for its wiring, installation and power-up. Following these guidelines ensures optimal performance of the drive and the system to which it is connected. 2.1.
Gold Drum HV Installation Guide (EtherCAT and CAN) Product Description MAN-G-DRUMHVIG-EC (Ver. 1.202) 2.2. Product Features Note: The features described in this chapter relate to the range of Gold Drum HV (High Voltage) models. Depending on the model you have purchased, not all features are available.
Gold Drum HV Installation Guide (EtherCAT and CAN) Product Description MAN-G-DRUMHVIG-EC (Ver. 1.202) 2.2.2.
Gold Drum HV Installation Guide (EtherCAT and CAN) Product Description MAN-G-DRUMHVIG-EC (Ver. 1.202) 2.2.5. Feedback Ports Options There are Port A and Port B feedback input ports that are flexible and configurable.
Gold Drum HV Installation Guide (EtherCAT and CAN) Product Description MAN-G-DRUMHVIG-EC (Ver. 1.202) 2.2.6.
Gold Drum HV Installation Guide (EtherCAT and CAN) Product Description MAN-G-DRUMHVIG-EC (Ver. 1.202) • Ethernet TCP/IP • UDP Telnet USB 2.0 2.2.8. Safe Torque Off (STO) • IEC 61800-5-2, Safe Torque Off (STO) • Two STO inputs PLC level which can be configured to 5 V logic (dependent on Part Number) • One STO output indication (optional, see Part Number on Section 4.2) • Opto-isolated 2.2.9.
Gold Drum HV Installation Guide (EtherCAT and CAN) Product Description MAN-G-DRUMHVIG-EC (Ver. 1.202) 2.2.10. • Differential Outputs Three additional differential outputs can be configured through Port C: EIA-422 differential output line transmitters Response time < 1μs Output current: ± 15 mA 2.2.11. Digital Inputs • Six separate programmable digital Inputs, optically isolated, PLC compatible, can be configured to TTL Level, and APAC mode depending on the part number definition.
Gold Drum HV Installation Guide (EtherCAT and CAN) Product Description MAN-G-DRUMHVIG-EC (Ver. 1.202) • Shorts between motor power outputs and power return Failure of internal power supplies Over-heating Over temperature Over/under voltage Motor current i2t motor current Continuous temperature measurement. Temperature can be read on-the-fly; a warning can be initiated x degrees before temperature disable is activated. Loss of feedback Following error Current limits STO 2.2.15.
Product Description Gold Drum HV Installation Guide (EtherCAT and CAN) MAN-G-DRUMHVIG-EC (Ver. 1.202) 2.3.
Gold Drum HV Installation Guide (EtherCAT and CAN) Product Description MAN-G-DRUMHVIG-EC (Ver. 1.202) 2.4. How to Use this Guide In order to install and operate your Elmo Gold Drum HV (High Voltage) servo drive, you will use this manual in conjunction with a set of Elmo documentation.
Gold Drum HV Installation Guide (EtherCAT and CAN) 21 MAN-G-DRUMHVIG-EC (Ver. 1.202) Chapter 3: Technical I nform ation 3.1.
Technical Information Gold Drum HV Installation Guide (EtherCAT and CAN) MAN-G-DRUMHVIG-EC (Ver. 1.202) 3.2.
Gold Drum HV Installation Guide (EtherCAT and CAN) Technical Information MAN-G-DRUMHVIG-EC (Ver. 1.202) 3.2.1. Auxiliary Supply Feature Details Auxiliary power supply Isolated DC source only Auxiliary supply input voltage 18 VDC to 30 VDC Auxiliary supply input power < 5 VA (this includes the 5 V/200 mA load for the main encoder only) <7 VA (this includes the 5 V/400 mA load on the main encoder and feedback B) Table of Contents |www.elmomc.
Gold Drum HV Installation Guide (EtherCAT and CAN) MAN-G-DRUMHVIG-EC (Ver. 1.202) Chapter 4: I nstallation The Gold Drum HV (High Voltage) must be installed in a suitable environment and properly connected to its voltage supplies and the motor. 4.1. Site Requirements You can guarantee the safe operation of the Gold Drum HV (High Voltage) by ensuring that it is installed in an appropriate environment.
Gold Drum HV Installation Guide (EtherCAT and CAN) Installation MAN-G-DRUMHVIG-EC (Ver. 1.202) 3. To ensure that the Gold Drum HV (High Voltage) you have unpacked is the appropriate type for your requirements, locate the part number sticker on the side of the Gold Drum HV (High Voltage). It looks like this: 4. Verify that the Gold Drum HV (High Voltage) type is the one that you ordered, and ensure that the voltage meets your specific requirements.
Gold Drum HV Installation Guide (EtherCAT and CAN) Installation MAN-G-DRUMHVIG-EC (Ver. 1.202) 4.3. Connectors and Indicators The Gold Drum HV (High Voltage) has ten connector types. 4.3.1.
Installation Gold Drum HV Installation Guide (EtherCAT and CAN) MAN-G-DRUMHVIG-EC (Ver. 1.202) Pins Type Function Front Connectors Front Connectors – EtherCAT Front Connectors – CAN 15 Pin High Density D-Type I/O 4 USB Device Type Mini B USB communication 2 3.
Installation Gold Drum HV Installation Guide (EtherCAT and CAN) MAN-G-DRUMHVIG-EC (Ver. 1.202) 4.3.2. Pinouts The pinouts in this section describe the function of each pin in the Gold Drum HV (High Voltage) connectors. 4.3.2.1. Motor Power Connector See Section 4.7.1 for full details. Pin Function Cable Brushless Motor Brushed DC Motor M3 Motor phase Motor Motor M2 Motor phase Motor Motor M1 Motor phase Motor N/C PE Protective Earth Motor Motor Table of Contents |www.elmomc.
Gold Drum HV Installation Guide (EtherCAT and CAN) Installation MAN-G-DRUMHVIG-EC (Ver. 1.202) 4.3.2.2. Main Power Connector See Section 4.7.2 for full details. Pin Function Cable PE Protective Earth DC Power VN- DC Negative Power input DC Power Not in use DC Power DC Positive Power input DC Power N VP+ Table of Contents |www.elmomc.
Installation Gold Drum HV Installation Guide (EtherCAT and CAN) MAN-G-DRUMHVIG-EC (Ver. 1.202) 4.3.2.3. Auxiliary Power Connector See Section 4.7.3 for full details. Optional Backup Supply in S, T, or A option drives. Pin Function Cable S, T, or A option type VL+ +24 V Auxiliary Supply Input Positive DC Power VL- 24 V RET Auxiliary Supply Input Return DC Power 2-Pin Phoenix Plug-in Connector 2-Pin Pluggable 3.81 mm Phoenix High Current Table of Contents |www.elmomc.
Gold Drum HV Installation Guide (EtherCAT and CAN) Installation MAN-G-DRUMHVIG-EC (Ver. 1.202) 4.3.2.4. Port A Connector See Section 4.9.1 for full details.
Gold Drum HV Installation Guide (EtherCAT and CAN) Installation MAN-G-DRUMHVIG-EC (Ver. 1.202) 4.3.2.5. Port B Connector See Section 4.9.2 or full details.
Installation Gold Drum HV Installation Guide (EtherCAT and CAN) MAN-G-DRUMHVIG-EC (Ver. 1.202) 4.3.2.6. Port C Connector The Port C connector includes the following functions: • Port C: For full details, see Section 4.9.3. • STO: For full details, see Section 4.8. • Analog input: For full details, see Section 4.10.2.
Gold Drum HV Installation Guide (EtherCAT and CAN) Installation MAN-G-DRUMHVIG-EC (Ver. 1.202) 4.3.2.7. I/O Connector The following table lists the digital input pin assignments. See Section 4.10.1 for full details on I/O.
Installation Gold Drum HV Installation Guide (EtherCAT and CAN) MAN-G-DRUMHVIG-EC (Ver. 1.202) I/O Pins Signal Function Pin Positions 15-Pin High Density D-Type Female Connector 15-Pin High Density D-Type Male Connector Table 4: I/O Connector Pin Assignments Table of Contents |www.elmomc.
Installation Gold Drum HV Installation Guide (EtherCAT and CAN) MAN-G-DRUMHVIG-EC (Ver. 1.202) 4.3.2.8. USB See Section 4.11.1 for the electrical diagram. Pin on USB Signal Function 1 USB VBUS USB VBUS 5V 2 USBD- USB _N line 3 USBD+ USB _P line 5 USB COMRET USB communication return Pin Positions USB Device Mini B Plug Table 5: USB 2.0 Pin Assignments Table of Contents |www.elmomc.
Gold Drum HV Installation Guide (EtherCAT and CAN) Installation MAN-G-DRUMHVIG-EC (Ver. 1.202) 4.3.3. EtherCAT Communications Version The Gold Drum HV (High Voltage) supports EtherCAT fieldbus industrial network protocol. Fieldbus Type Product Number EtherCAT G-DRU XXX/YYYEXXX 4.3.3.1. EtherCAT IN/Ethernet See Section 4.11.2 for the electrical diagram.
Installation Gold Drum HV Installation Guide (EtherCAT and CAN) MAN-G-DRUMHVIG-EC (Ver. 1.202) 4.3.3.2. EtherCAT OUT See Section 4.11.2 for the electrical diagram. Pin on EtherCAT OUT Signal Function 1 EtherCAT_OUT_TX+ EtherCAT out transmit + 2 EtherCAT_OUT_TX- EtherCAT out transmit - 3 EtherCAT_OUT_RX+ EtherCAT out receive + 4/5 N/A 6 EtherCAT_OUT_RX- 7/8 EtherCAT out receive - N/A Pin Positions Standard CAT5e Ethernet Cable Table 7: EtherCAT Out Connector Pin Assignments 4.3.3.3.
Installation Gold Drum HV Installation Guide (EtherCAT and CAN) MAN-G-DRUMHVIG-EC (Ver. 1.202) The amber LED is the speed indicator. It shows the speed of the connection on the Ethernet line. The possible states of these LEDs are summarized in Table 8. LED State Meaning Link /Activity Off No link is established. On A link is established. Blinking There is data transmission activity. On The connection speed is 100 Mbps. Speed The speed of the EtherCAT line must be 100 Mbps.
Installation Gold Drum HV Installation Guide (EtherCAT and CAN) MAN-G-DRUMHVIG-EC (Ver. 1.202) Figure 4: Position of EtherCAT Address Switches on G-Drum HV The position of the switches on the drive are shown in Figure 5. Use a screwdriver to set the low and high bytes values of the drive EtherCAT address. This address is only retrieved after power-up. Table of Contents |www.elmomc.
Gold Drum HV Installation Guide (EtherCAT and CAN) Installation MAN-G-DRUMHVIG-EC (Ver. 1.202) 4.3.4. CAN Communications Version The Gold Drum HV (High Voltage) supports CAN fieldbus industrial network protocol. Fieldbus Type Product Number CAN G-DRU XXX/YYYSXXX See Section 4.11.2 for the electrical diagram.
Installation Gold Drum HV Installation Guide (EtherCAT and CAN) MAN-G-DRUMHVIG-EC (Ver. 1.202) 4.4. Mounting the Gold Drum HV (High Voltage) The Gold Drum HV (High Voltage) has been designed for two standard mounting options: • Wall Mount along the back (can also be mounted horizontally on a metal surface) • Book Shelf along the side M6 round head screws, one through each opening in the heat sink, are used to mount the Gold Drum HV (High Voltage) (see the diagram below).
Gold Drum HV Installation Guide (EtherCAT and CAN) Installation MAN-G-DRUMHVIG-EC (Ver. 1.202) 4.5. Wiring the Gold Drum HV (High Voltage) Once the Gold Drum HV (High Voltage) is mounted, you are ready to wire the device. Proper wiring, grounding and shielding are essential for ensuring safe, immune and optimal servo performance of the Gold Drum HV (High Voltage). Caution: Perform the following instructions to ensure safe and proper wiring.
Gold Drum HV Installation Guide (EtherCAT and CAN) Installation MAN-G-DRUMHVIG-EC (Ver. 1.202) 4.6.1. Connection Diagrams for EtherCAT Version The following describes the connection diagrams for the EtherCAT version. Figure 6: Gold Drum HV (High Voltage) Connection Diagram for EtherCAT – with Power Supply Backup Functionality (S, T, or A Option) Table of Contents |www.elmomc.
Gold Drum HV Installation Guide (EtherCAT and CAN) Installation MAN-G-DRUMHVIG-EC (Ver. 1.202) Figure 7: Gold Drum HV (High Voltage) Connection Diagram for EtherCAT – 400 V without Power Supply Backup Functionality for 0 or 1 Options Table of Contents |www.elmomc.
Gold Drum HV Installation Guide (EtherCAT and CAN) Installation MAN-G-DRUMHVIG-EC (Ver. 1.202) 4.6.2. Connection Diagrams for CAN Version The following describes the connection diagrams for the CAN version. Figure 8: Gold Drum HV (High Voltage) Connection Diagram for CAN – with Power Supply Backup Functionality (S, T, or A Option) Table of Contents |www.elmomc.
Gold Drum HV Installation Guide (EtherCAT and CAN) Installation MAN-G-DRUMHVIG-EC (Ver. 1.202) Figure 9: Gold Drum HV (High Voltage) Connection Diagram for CAN – 400 V without Power Supply Backup Functionality for Model Drives with 0 or 1 Option Table of Contents |www.elmomc.
Installation Gold Drum HV Installation Guide (EtherCAT and CAN) MAN-G-DRUMHVIG-EC (Ver. 1.202) 4.7. Main Power, Auxiliary Power and Motor Power The Gold Drum HV (High Voltage) receives power from main and auxiliary supplies and delivers power to the motor. 4.7.1.
Installation Gold Drum HV Installation Guide (EtherCAT and CAN) MAN-G-DRUMHVIG-EC (Ver. 1.202) Step 1: PE Connection M6 screw M6 spring washer Terminal Lug M6 flat washer Table 11: Connecting the PE Cables Step 2: Power and Motor Connection M6 nut (available with the drive M6 spring washer Terminal Lug Table 12: Connecting the Main Power and Motor Cables Table of Contents |www.elmomc.
Installation Gold Drum HV Installation Guide (EtherCAT and CAN) MAN-G-DRUMHVIG-EC (Ver. 1.202) Connect the M1, M2, M3 and PE pins on the Gold Drum HV (High Voltage). The phase connection is arbitrary as Elmo Application Studio (EAS) will establish the proper commutation automatically during setup. When tuning a number of drives, you can copy the setup file to the other drives and thus avoid tuning each drive separately. In this case the motor-phase order must be the same as on the first drive.
Gold Drum HV Installation Guide (EtherCAT and CAN) Installation MAN-G-DRUMHVIG-EC (Ver. 1.202) 4.7.2. Pin Main Power Function Cable PE Protective Earth DC Power VN- DC Negative Power input DC Power Not in use DC Power DC Positive Power input DC Power N VP+ Table 13: Connectors for Main Power The DC power for the Gold Drum HV (High Voltage) is delivered from a separated rectifying unit (supplied by the user).
Gold Drum HV Installation Guide (EtherCAT and CAN) Installation MAN-G-DRUMHVIG-EC (Ver. 1.202) However, as well as operating from a non-isolated/direct-to-mains DC power supply, the Gold Drum HV (High Voltage) can also operate from an isolated power supply or batteries.
Installation Gold Drum HV Installation Guide (EtherCAT and CAN) MAN-G-DRUMHVIG-EC (Ver. 1.202) 4.7.2.1.a Three-Phase Direct-to-Mains Connection Topology Figure 12: Non-Isolated Three-Phase Connection Topology Caution: • Do not connect VN- to PE. In a direct-to-mains connection the VN- must not be connected to the PE, as this will cause irreparable damage to the system. • Take care and note that in a direct-to-mains connection the Neutral point is not the most negative voltage level.
Gold Drum HV Installation Guide (EtherCAT and CAN) Installation MAN-G-DRUMHVIG-EC (Ver. 1.202) 4.7.2.1.b Multiple Connections Topology In a multi-axis application it is likely that a single power supply can feed several drives in parallel. The power supply is connected directly to the mains AC line and it feeds more than one drive. This topology is efficient and cost saving, by reducing the number of power supplies and the amount of wiring.
Installation Gold Drum HV Installation Guide (EtherCAT and CAN) MAN-G-DRUMHVIG-EC (Ver. 1.202) 4.7.2.2. Battery Power Supply Figure 14: Battery Connection Topology Caution: When using batteries, it is recommended to connect the negative pole to the PE. When doing so, the charger of the battery must be isolated from the mains by an isolation transformer. 4.7.3.
Installation Gold Drum HV Installation Guide (EtherCAT and CAN) MAN-G-DRUMHVIG-EC (Ver. 1.202) 5. Before applying power, first verify that the polarity of the connection is correct. Figure 15: Auxiliary 24 VDC Backup Supply Connection Diagram 4.7.3.1. Optional Backup Supply For the S, T, or A option drives.
Installation Gold Drum HV Installation Guide (EtherCAT and CAN) MAN-G-DRUMHVIG-EC (Ver. 1.202) 4.8. STO (Safe Torque Off) Inputs Activation of Safe Torque Off causes the drive to stop providing power that can cause rotation (or motion in the case of a linear motor) to the motor. This function may be used to prevent unexpected motor rotation (of brushless DC motors) without disconnecting the drive from the power supply.
Installation Gold Drum HV Installation Guide (EtherCAT and CAN) MAN-G-DRUMHVIG-EC (Ver. 1.202) Pin on Port C Signal Function 6 STO1 STO 1 input (default 24 V) 11 STO2 STO 2 input (default 24 V) STO_RET STO signal return 7, 12 Pin Positions Table 16: STO Input Pin Assignments for S, T, 0, 1, option (Non-A option) See the diagrams below for the PLC option connection and the TTL option connection for the non-A version.
Installation Gold Drum HV Installation Guide (EtherCAT and CAN) MAN-G-DRUMHVIG-EC (Ver. 1.202) Figure 17: STO Input Connection – TTL Option for T or 1 Option Table of Contents |www.elmomc.
Installation Gold Drum HV Installation Guide (EtherCAT and CAN) MAN-G-DRUMHVIG-EC (Ver. 1.202) Pin on Port C Signal Function 6 STO1 STO 1 input return 11 STO2 STO 2 input return STO_RET STO input (default 24 V) 7, 12 Pin Positions Table 17: STO Input Pin Assignments for the A Option See the diagrams below for the PLC option connection for the A version. Figure 18: STO Input Connection – PLC Option for the A Option Table of Contents |www.elmomc.
Gold Drum HV Installation Guide (EtherCAT and CAN) Installation MAN-G-DRUMHVIG-EC (Ver. 1.202) 4.9. Feedback The Gold Drum HV (High Voltage) has two configurable motion sensor input ports; Port A and port B, and one emulated buffered output port; port C. Motion sensors from the controlled motor and from other sources can be connected to any of the available inputs on either port A or B. Software configuration designates each input a role, e.g.
Gold Drum HV Installation Guide (EtherCAT and CAN) Installation MAN-G-DRUMHVIG-EC (Ver. 1.202) 4.9.1. Feedback Port A Port A supports the following sensor inputs: • Digital Hall sensors • Incremental encoder or absolute serial encoder, depending on the specific model Differential pulse-width modulation (PWM) signal input can be connected to port A in the models that support input from an incremental encoder.
Gold Drum HV Installation Guide (EtherCAT and CAN) Installation MAN-G-DRUMHVIG-EC (Ver. 1.202) 4.9.1.1. Incremental Encoder Figure 20: Port A Incremental Encoder Input – Recommended Connection Diagram 4.9.1.2. Absolute Serial Encoder Figure 21: Absolute Serial Encoder – Recommended Connection Diagram for Sensors Supporting Data/Clock(e.g., Biss/SSI/EnDAT, etc.) Table of Contents |www.elmomc.
Gold Drum HV Installation Guide (EtherCAT and CAN) Installation MAN-G-DRUMHVIG-EC (Ver. 1.202) Figure 22: Absolute Serial Encoder – Recommended Connection Diagram for Sensors Supporting Data Line Only (NRZ types, e.g., Panasonic/Mitutoyo/etc.) 4.9.1.3. Hall Sensors Figure 23: Hall Sensors Connection Diagram Table of Contents |www.elmomc.
Installation Gold Drum HV Installation Guide (EtherCAT and CAN) MAN-G-DRUMHVIG-EC (Ver. 1.202) 4.9.2. 65 Feedback Port B Port B supports any of the following sensors: • Incremental encoder, interpolated analog encoder or analog Hall sensors, Or • Resolver (separate hardware option) Differential PWM signal input can be connected to port B in the models that support input from an incremental encoder.
Gold Drum HV Installation Guide (EtherCAT and CAN) Installation MAN-G-DRUMHVIG-EC (Ver. 1.202) 4.9.2.1. Incremental Encoder Figure 24: Port B Incremental Encoder Input – Recommended Connection Diagram 4.9.2.2. Interpolated Analog Encoder Figure 25: Port B - Interpolated Analog Encoder Connection Diagram Table of Contents |www.elmomc.
Gold Drum HV Installation Guide (EtherCAT and CAN) Installation MAN-G-DRUMHVIG-EC (Ver. 1.202) 4.9.2.3. Resolver Figure 26: Port B – Resolver Connection Diagram Table of Contents |www.elmomc.
Installation Gold Drum HV Installation Guide (EtherCAT and CAN) MAN-G-DRUMHVIG-EC (Ver. 1.202) 4.9.3. Port C – Emulated Encoder Output Port C provides emulated encoder output derived from port A or port B feedback inputs, or from internal variables. The output options are: • Port A/B daisy chain (1:1) for incremental encoder • Encoder emulation: Emulate any input sensor, digital or analog, or use to emulate an internal variable such as virtual profiler.
Gold Drum HV Installation Guide (EtherCAT and CAN) Installation MAN-G-DRUMHVIG-EC (Ver. 1.202) Figure 27: Emulated Encoder Differential Output – Recommended Connection Diagram Table of Contents |www.elmomc.
Installation Gold Drum HV Installation Guide (EtherCAT and CAN) MAN-G-DRUMHVIG-EC (Ver. 1.202) 4.10. Inputs/Outputs The Gold Drum HV (High Voltage) has six programmable digital inputs, four digital outputs and one analog input: I/O I/O Connector Digital Input 6 Digital Output 4 Port C & STO & Analog Analog Input 4.10.1. 1 I/O Connector Pinout Each of the pins below can function as an independent input.
Gold Drum HV Installation Guide (EtherCAT and CAN) Installation MAN-G-DRUMHVIG-EC (Ver. 1.202) Pin (I/O) Signal Function Pin Positions Table 21: Digital Input and Output Pin Assignments Table of Contents |www.elmomc.
Gold Drum HV Installation Guide (EtherCAT and CAN) Installation MAN-G-DRUMHVIG-EC (Ver. 1.202) 4.10.1.1. Digital Input Each of the pins above below can function as an independent input. Figure 28: Digital Input PLC Mode Connection Diagram – for S or 0 Option Table of Contents |www.elmomc.
Gold Drum HV Installation Guide (EtherCAT and CAN) Installation MAN-G-DRUMHVIG-EC (Ver. 1.202) Figure 29: Digital Input TTL Mode Connection Diagram, for T or 1 Option Table of Contents |www.elmomc.
Gold Drum HV Installation Guide (EtherCAT and CAN) Installation MAN-G-DRUMHVIG-EC (Ver. 1.202) Figure 30: Digital Input A Option Connection Diagram Table of Contents |www.elmomc.
Gold Drum HV Installation Guide (EtherCAT and CAN) Installation MAN-G-DRUMHVIG-EC (Ver. 1.202) 4.10.1.2. Digital Output Figure 31: Digital Output Connection Diagram – PLC option, for S or 0 Option Table of Contents |www.elmomc.
Gold Drum HV Installation Guide (EtherCAT and CAN) Installation MAN-G-DRUMHVIG-EC (Ver. 1.202) Figure 32: Digital Output Connection Diagram – TTL Option, for T or 1 Option Table of Contents |www.elmomc.
Installation Gold Drum HV Installation Guide (EtherCAT and CAN) MAN-G-DRUMHVIG-EC (Ver. 1.202) Figure 33: Digital Output Connection Diagram – A Option Table of Contents |www.elmomc.
Installation Gold Drum HV Installation Guide (EtherCAT and CAN) MAN-G-DRUMHVIG-EC (Ver. 1.202) 4.10.2. Analog Input Note: The Analog Input pins are located on the Port C connector – see Section 4.9.3. Pin on Port C Signal Function 15 ANALOG1+ Analog input 1+ 14 ANALOG1- Analog input 1- 13 ANLRET Analog ground Pin Positions Figure 34: Analog Input with Single-Ended Source Table of Contents |www.elmomc.
Installation Gold Drum HV Installation Guide (EtherCAT and CAN) MAN-G-DRUMHVIG-EC (Ver. 1.202) 4.11. Communications The EtherCAT version of Gold Drum HV (High Voltage) supports EtherCAT and USB 2.0 communications. The CAN version of Gold Drum HV (High Voltage) supports CAN and USB 2.0 communications. NOTE: When the EtherCAT is connected, and FoE in operation, the USB cable connection must be disconnected. 4.11.1. USB 2.0 Communication The USB network consists of Host controller and multiple devices.
Gold Drum HV Installation Guide (EtherCAT and CAN) Installation MAN-G-DRUMHVIG-EC (Ver. 1.202) Figure 35: USB Network Diagram 4.11.2. EtherCAT Communication Notes: • The EtherCAT IN port can be configured as an Ethernet port for TCP/IP – see the EtherCAT Manual. • It is recommended to use CAT5e (or higher) cable. Category 5e cable is a high signal integrity cable with four twisted pairs.
Gold Drum HV Installation Guide (EtherCAT and CAN) Installation MAN-G-DRUMHVIG-EC (Ver. 1.202) Pin Signal Function 1 EtherCAT_OUT_TX+ EtherCAT out transmit + 2 EtherCAT_OUT_TX- EtherCAT out transmit - 3 EtherCAT_OUT_RX+ EtherCAT out receive + 4/5 6 7/8 N/A EtherCAT_OUT_RX- EtherCAT out receive - N/A Pin Positions Table 24: EtherCAT Out Connector When connecting several EtherCAT devices in a network, the EtherCAT master must always be the first device in the network.
Gold Drum HV Installation Guide (EtherCAT and CAN) Installation MAN-G-DRUMHVIG-EC (Ver. 1.202) 4.11.2.1. Ethernet Communication To connect the Ethernet communication cable: 1. The EtherCAT IN port can be configured as an Ethernet port for TCP/IP – see the EtherCAT Manual. 2. It is recommended to use CAT5e (or higher) cable. Category 5e cable is a high signal integrity cable with four twisted pairs.
Gold Drum HV Installation Guide (EtherCAT and CAN) Installation MAN-G-DRUMHVIG-EC (Ver. 1.202) 4.11.3. CAN Communication Version Notes for connecting the CAN communication cable: • Use 26 or 28 AWG twisted pair shielded cables. For best results, the shield should have aluminum foil and covered by copper braid with a drain wire • Connect the shield to the ground of the host (PC). Usually, this connection is soldered internally inside the connector at the PC end.
Installation Gold Drum HV Installation Guide (EtherCAT and CAN) MAN-G-DRUMHVIG-EC (Ver. 1.202) 4.12. Powering Up After the Gold Drum HV (High Voltage) has been mounted, check that the cables are intact. The Gold Drum HV (High Voltage) servo drive is then ready to be powered up. Caution: Before applying power, ensure that: 1. The DC supply is within the specified range. 2. The proper plus-minus connections are in order 3.
Installation Gold Drum HV Installation Guide (EtherCAT and CAN) MAN-G-DRUMHVIG-EC (Ver. 1.202) 4.13.2. Heat Dissipation Data Heat Dissipation is shown graphically below: Figure 38: Dissipation versus Current Graph for 560 and 680 VDC Figure 39: Dissipation versus Current Graph for 330 VDC Table of Contents |www.elmomc.
Installation Gold Drum HV Installation Guide (EtherCAT and CAN) MAN-G-DRUMHVIG-EC (Ver. 1.202) 4.13.3. How to Use the Charts The power dissipation in the chart includes the losses of the rectifying bridge. Regarding Figure 38 and Figure 39, the following should be noted: DC Bus Voltage (VDC) Rectified Voltage (VAC) 560 3X400 680 3X480 330 3X230 The charts above are based upon theoretical worst-case conditions. Actual test results show 30% to 50% better power dissipation.
Gold Drum HV Installation Guide (EtherCAT and CAN) MAN-G-DRUMHVIG-EC (Ver. 1.202) Chapter 5: Technical Specifications This chapter provides detailed technical information regarding the Gold Drum HV (High Voltage). This includes its dimensions, power ratings, the environmental conditions under which it can be used, the standards to which it complies and other specifications. 5.1. Gold Drum HV (High Voltage) Dimensions Table of Contents |www.elmomc.
Gold Drum HV Installation Guide (EtherCAT and CAN) Technical Specifications MAN-G-DRUMHVIG-EC (Ver. 1.202) 5.2. Environmental Conditions Feature Details Ambient operating temperature 0 °C to 40 °C (32 °F to104°F) Storage temperature -20 °C to 85 °C (-4 °F to 185 °F) Maximum Altitude 2,000 m (6562 feet) Maximum non-condensing humidity 90% Protection level IP32 5.3. Control Specifications 5.3.1.
Gold Drum HV Installation Guide (EtherCAT and CAN) Technical Specifications MAN-G-DRUMHVIG-EC (Ver. 1.202) 5.3.2. Velocity Loop Feature Details Controller type PI + Four advanced filters + Two advanced gain scheduling filters Velocity control • Fully digital • Programmable PI and feed forward control filters • On-the-fly gain scheduling according to either speed or position command or feedback.
Gold Drum HV Installation Guide (EtherCAT and CAN) Technical Specifications MAN-G-DRUMHVIG-EC (Ver. 1.202) 5.4. Feedbacks 5.4.1. Feedback Supply Voltage The Gold Drum HV (High Voltage) has two feedback ports (Main and Auxiliary). The Gold Drum HV (High Voltage) supplies voltage only to the main feedback device and to the auxiliary feedback device if needed. Feature Details Encoder supply voltage 5 V ± 5% @ 2 x 200 mA (maximum) 5.4.2.
Gold Drum HV Installation Guide (EtherCAT and CAN) Technical Specifications MAN-G-DRUMHVIG-EC (Ver. 1.202) 5.4.2.2. Digital Halls Feature Details Hall inputs • HA, HB, HC • Single ended inputs • Built in hysteresis of 1 V for noise immunity Input voltage Nominal operating range: 0 V < VIn_Hall < 5 V Maximum absolute: -1 V < VIn_Hall < 15 V High level input voltage: V InHigh > 2.
Gold Drum HV Installation Guide (EtherCAT and CAN) Technical Specifications MAN-G-DRUMHVIG-EC (Ver. 1.202) 5.4.2.4. Resolver Feature Details Resolver format • Sine/Cosine • Differential Input resistance Differential 2.49 kΩ Resolution Programmable: 10 to 15 bits Maximum electrical frequency (RPS) 512 revolutions/sec Resolver transfer ratio 0.
Gold Drum HV Installation Guide (EtherCAT and CAN) Technical Specifications MAN-G-DRUMHVIG-EC (Ver. 1.202) 5.4.3. Port C Feedback Output Feature Emulated output Details • A, B, Index • Differential Interface RS422 Output current capability Maximum output current: IOH (max) = 2 mA High level output voltage: VOH > 3.0 V Minimum output current: IOL = 2 mA Low level output voltage: VOL < 0.
Gold Drum HV Installation Guide (EtherCAT and CAN) Technical Specifications MAN-G-DRUMHVIG-EC (Ver. 1.202) 5.5. I/Os The Gold Drum HV (High Voltage) has: • 6 Digital Inputs • 4 Digital Outputs • 1 Analog Input 5.5.1. Digital Input Interfaces – TTL Mode Feature Details Option applicable T or 1 Type of input Optically isolated Input current for all inputs Iin = 3.8 mA @ Vin = 5 V High-level input voltage 2.4 V < Vin < 15 V, 5 V typical Low-level input voltage 0 V < Vin < 0.
Gold Drum HV Installation Guide (EtherCAT and CAN) Technical Specifications MAN-G-DRUMHVIG-EC (Ver. 1.202) 5.5.2.
Gold Drum HV Installation Guide (EtherCAT and CAN) Technical Specifications MAN-G-DRUMHVIG-EC (Ver. 1.202) 5.5.3. Digital Output Interface – PLC Mode Feature Details Option applicable S or 0 Type of output Optically isolated source Supply output (VDD) 12 V to 30 V Max. output current Iout (max) (Vout = Low) Iout (max) ≤ 500 mA for Output 1 Iout (max) ≤ 250 mA for Outputs 2 to 4 VOL at maximum output voltage (low level) Vout (on) ≤ 0.
Gold Drum HV Installation Guide (EtherCAT and CAN) Technical Specifications MAN-G-DRUMHVIG-EC (Ver. 1.202) 5.5.4. Digital Output Interface – TTL Mode Feature Details Option applicable T or 1 Type of output • Optically isolated • Source/Sink Supply output (VDD) 5 V to 15 V Max. output current Iout (max) (Vout = Low) 7 mA VOL at maximum output voltage (low level) Vout (on) ≤ 0.4 V Executable time 0< T< 250 µsec Figure 45: Digital Output Schematic, for T or 1 Option Table of Contents |www.
Gold Drum HV Installation Guide (EtherCAT and CAN) Technical Specifications MAN-G-DRUMHVIG-EC (Ver. 1.202) 5.5.5. Digital Output Interface – A Mode Feature Details Option applicable A Type of output Optically isolated Sink Maximum supply output (VDD) 30 V Max. output current Iout (max) (Vout = Low) Iout (max) ≤ 300 mA for Output 1 Iout (max) ≤ 150 mA for Outputs 2 to 4 VOL at maximum output voltage (low level) Vout (on) ≤ 0.
Gold Drum HV Installation Guide (EtherCAT and CAN) Technical Specifications MAN-G-DRUMHVIG-EC (Ver. 1.202) 5.6. Safe Torque Off (STO) The Gold Drum HV (High Voltage) has two STO (Safe Torque Off) inputs. 5.6.1.
Gold Drum HV Installation Guide (EtherCAT and CAN) Technical Specifications MAN-G-DRUMHVIG-EC (Ver. 1.202) 5.6.2. STO Input Interfaces – TTL Mode Feature Details Option applicable T or 1 Type of input Optically isolated Input current for all inputs Iin = 3.8 mA @ Vin = 5 V High-level input voltage 2.4 V < Vin < 15 V, 5 V typical Low-level input voltage 0 V < Vin < 0.8 V Minimum pulse width >3 ms Figure 49: STO Input Schematic, for T or 1 Option 5.7.
Gold Drum HV Installation Guide (EtherCAT and CAN) Technical Specifications MAN-G-DRUMHVIG-EC (Ver. 1.202) 5.8. CAN Communications Version Specification Details CAN CAN-bus Signals: • CAN_H, CAN_L, CAN_RET • Maximum Baud Rate of 1 Mbit/sec. Version: • DS 301 v4.01 Layer Setting Service and Protocol Support: • DS 305 Device Profile (drive and motion control): • DS 402 Mini USB 5.9. • USB 2.
Gold Drum HV Installation Guide (EtherCAT and CAN) Technical Specifications MAN-G-DRUMHVIG-EC (Ver. 1.