eXcellence 720 Instruction Manual | Mode d’emploi | Gebrauchsanleitung
IMPORTANT SAFETY INSTRUCTIONS Your sewing machine is designed and constructed for HOUSEHOLD use only. Read all instructions before using this machine. DANGER – To reduce the risk of electric shock: 1. Your sewing machine should never be left unattended when plugged in. Always unplug the machine from the electrical outlet immediately after using and before cleaning. 2. Always unplug before replacing light bulb. Replace bulb with same type rated 12 Volts, 5 watts. 3.
INSTRUCTIONS DE SÉCURITÉ IMPORTANTES Votre machine à coudre a été conçue et construite uniquement pour un usage DOMESTIQUE. Lire toutes les instructions avant d’utiliser cette machine. DANGER – Pour réduire le risque de choc électrique : 1. Ne jamais laisser votre machine à coudre sans surveillance lorsqu’elle est branchée. Toujours débrancher la machine de la prise de courant, immédiatement après son utilisation et avant de procéder au nettoyage. 2.
WICHTIGE SICHERHEITSHINWEISE Ihre Nähmaschine eignet sich nur für den HAUSGEBRAUCH. Lesen Sie vor Inbetriebnahme dieser Maschine alle Anweisungen. GEFAHR 1. 2. 3. 4. – Befolgen Sie die nachstehenden Anweisungen, um das Risiko eines Stromschlags zu mindern: Lassen Sie Ihre Nähmaschine niemals unbeaufsichtigt, wenn sie an den Netzstrom angeschlossen ist. Trennen Sie die Maschine nach der Benutzung und vor der Reinigung immer vom Netzstrom.
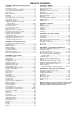
TABLE OF CONTENTS SECTION I – Machine Parts and Functions SECTION IV - Quilting Part Names .............................................................................. 2 Standard Accessories ............................................................. 4 Presser Foot and Accessory Definitions .............................. 6-8 How to Attach Stitch Chart Brackets ..................................... 10 Stitch Chart ............................................................................
TABLE DES MATIÈRES SECTION I – Composants et fonctions de la machine Dénomination des composants .................................... 3 Accessoires standard ................................................... 5 Définition des pieds presseurs et accessoires ......... 7-9 Comment fixer les supports pour tableau de points .... 11 Tableau de points ........................................................ 11 Tablette d’écriture ....................................................... 11 Table à matelasser .......
INHALTSVERZEICHNIS TEIL I – Maschinenteile und Funktionen Teilebezeichnungen ...................................................... 3 Serienmäßiges Zubehör ............................................... 5 Definition für Nähfuß und Zubehör ........................... 7-9 Anbringen von Stichtabellenhaltern ............................ 11 Stichtabelle ................................................................. 11 Write ‘n clip Board ....................................................... 11 Quilttisch .
r t y u i SECTION I Machine Parts and Functions o e Part Names !0 !1 w 1. Stitch chart brackets (to attach, see page 10) 2. Foot pressure dial 3. Thread take-up lever 4. Thread guide plate 5. Stitch chart 6. LCD screen brightness control 7. Retractable thread guide (pull up) 8. Bobbin winder spindle 9. Bobbin winder stop 10. LCD screen 11. Selection keys (see pages 18–22) 12. Speed control lever 13. Centimeter/inch quick measurements 14. Feed dog lever 15. Knee lifter insert channel 16.
SECTION I Composants et fonctions de la machine TEIL I Dénomination des composants Teilebezeichnungen 1. Supports pour tableau de points (pour la fixation, voir en page 11) 2. Sélecteur de pression du pied 3. Levier releveur de fil 4. Plaque guide-fil 5. Tableau de points 6. Réglage de luminosité de l’écran à cristaux liquides 7. Guide-fil escamotable (relevable) 8. Axe de bobineur de canette 9. Butée du bobineur de canette 10. Écran à cristaux liquides 11.
1 2 3 4 5 6 7 8 9 10 11 12 13 14 15 16 17 18 19 20 21 22 23 Standard Accessories 1. A: Standard metal foot (attached to machine) 2. B: Buttonhole foot (4-step) 3. C: Overlock foot 4. D: Hemmer foot 5. E: Zipper foot 6. F: Satin stitch foot 7. F-2:Open toe satin stitch foot 8. G: Blind hem foot 9. H: Multi-cord foot 10. Scant 1/4˝ foot 11. P-2:Open toe embroidery/darning foot 12. R: Automatic buttonhole foot 13. Dual feed foot 14. Quilt guide 15. Straight stitch needle plate 16.
Accessoires standard Serienmäßiges Zubehör 1. 2. 3. 4. 5. 6. 7. 8. 9. 10. 11. 12. 13. 14. 15. 16. 17. 18. 19. 20. 21. 22. 23. 24. 25. 26. 27. 28. 29. 30. 1. 2. 3. 4. 5. 6. 7. 8. 9. 10. 11. 12. 13. 14. 15. 16. 17. 18. 19. 20. 21. 22. 23. 24. 25. 26. 27. 28. 29. 30.
Presser Foot and Accessory Definitions A: Standard Metal Foot This foot comes attached to your machine. It is mainly used for straight stitches and zigzag stitches longer than 1.0. The button locks the foot in a horizontal position helping to sew over multiple layered seams. B: Buttonhole Foot Sew oversized buttonholes for novelty buttons or a decorative accent. The two cutout grooves on the underside of the foot ensure that the buttonhole sides lie parallel to each other.
Définition des pieds presseurs et accessoires Definitionen für Nähfuß und Zubehör A : Pied métallique standard Ce pied est livré fixé sur votre machine. Il sert principalement à réaliser les points droits et zigzag d’une longueur de plus de 1,0. Le bouton verrouille le pied en position horizontale, ce qui permet de coudre plus facilement sur des épaisseurs multiples. A: Standard-Metallfuß Dieser Fuß wird an Ihrer Maschine befestigt geliefert.
H: Multi-Cord Foot Design your own braids or trims. Place one to three cords in the foot and sew over cord(s) for a simple couching method. Or sew over one cord with a zigzag to gather heavier weight fabrics. Scant 1/4˝ Foot Accuracy is the key to successful patchwork/quilt sewing. Sewn from 3.5 needle position; the edge of the foot provides a perfect 1/4˝ seam guide. Or use 4.5 needle position and achieve the desirable scant 1/4˝ often requested by quilters.
H : Pied pour cordonnets multiples Pour confectionner vos propres galons et passementeries. Placer un à trois cordonnets dans le pied et coudre sur le ou les cordonnets - une méthode simple de broderie sur fils couchés. Ou coudre sur un cordonnet en zigzag pour froncer des tissus plus épais. H: Kordelfuß Gestalten Sie Ihre eigenen Borten oder Einfassungen. Legen Sie eine bis drei Kordeln in den Fuß und nähen Sie über die Kordel(n). So schaffen Sie eine einfache Legetechnik.
How to Attach Stitch Chart Brackets Align the screws with the holes on the backside of the machine. Firmly tighten screws with screwdriver. Stitch Chart w q The stitch chart can be placed in two positions on the chart bracket, store or view. w q e Store Position The back slots q on the bracket are for store position e. Slide stitch chart down between the back slots until the stitch chart rests against machine bed. r View Position The front slots w on the brackets are for view position r.
Comment fixer les supports pour tableau de points Anbringen von Stichtabellenhaltern Aligner les vis sur les trous situés derrière la machine. Serrer fermement les vis à l’aide du tournevis. Richten Sie die Schrauben auf die Löcher in der Rückseite der Maschine aus. Ziehen Sie die Schrauben mit dem Schraubenzieher fest an. Tableau de points Stichtabelle Le tableau de points dispose de deux positions sur ses supports : rangement ou lecture.
Quilt Table The table provides more sewing surface to support large fabric pieces to make sewing easier. Assemble table by attaching six legs to underside of quilt table with screws. Attaching Table to Machine Fit the table around the machine, as shown in the illustration. If necessary, adjust height of legs to level table with machine bed by tightening or loosening leg screws. Knee Lifter The knee lifter allows you to raise or lower the presser foot without using your hands.
Table à matelasser Quilttisch Cette table agrandit la surface de travail. Elle permet de poser de grandes pièces de tissu, ce qui facilite la couture. Dieser Tisch bietet eine zusätzliche Nähauflage für leichteres Nähen von großen Stoffstücken. Monter la table à matelasser en fixant les six pieds situés en sous-face avec les vis. Montieren Sie den Tisch, indem Sie die sechs Beine auf der Unterseite des Quilttisches mit Schrauben befestigen.
Connecting Machine To Power Supply Before connecting the power cord, make sure the voltage and frequency shown on the machine are identical to your electrical power. q To connect machine to power supply, turn off the power switch q. Insert the foot control plug w and machine plug e into the machine and the power supply plug r into the wall socket. e Your machine may come equipped with a polarized plug (one prong wider than the other). A polarized plug reduces the risk of electrical shock.
Branchement de la machine sur l’alimentation électrique Avant de brancher le cordon d’alimentation, vérifier que la tension et la fréquence indiquées sur la machine correspondent à l’alimentation électrique de votre installation. Avant de brancher la machine sur secteur, placer l’interrupteur d’alimentation q en position “O”. Insérer la fiche de la pédale w dans la machine et la fiche d’alimentation e dans la prise murale.
Main Function of Keys q Start/Stop Key (changes color to indicate function) t Press this (green) key to start the machine. The first few stitches will be sewn at a slow speed and then machine sews at the speed set by the speed control lever. Press (red) key again to stop machine. Press and continue to hold key down to sew at slow speed, release key to sew at set speed. Press key again to stop. r e w q NOTE: The foot control must be detached to use this key.
Fonction des touches principales Wichtigste Tastenfunktionen q Touche marche/arrêt “Start/Stop” (la touche change de couleur pour indiquer sa fonction) q Start-/Stopptaste (Farbe verändert sich, um Funktion anzuzeigen) Appuyer sur cette touche (verte) pour démarrer la machine. Les quelques premiers points sont cousus à vitesse réduite, puis la machine va coudre à la vitesse réglée au moyen du curseur de réglage de vitesse. Appuyer de nouveau sur la touche (rouge) pour arrêter la machine.
Keyboard Selection Keys !9 q e r t y u i o !0 w 1. !1 !2 !3 !4 !5 !6 !7 LCD Screen Brightness Control Lighten or darken the screen with this dial. !8 2. Stitch Width and Needle Position Key Press “–” or “+” side of key to change setting. Press “–” or “+” to move needle position left or right. Straight stitches (1, 6, 011, 012, 061, 062 and 063) can be sewn from many needle positions by pressing the “–” or “+” side of the key. Center needle position is 3.5. 3.
Touche de sélection Tastaturauswahl-Tasten 1. Réglage de luminosité de l’écran à cristaux liquides Eclaircir ou assombrir l’écran avec cette molette. 1. Helligkeitseinstellung der Flüssigkristallanzeige Regulieren Sie die Helligkeit des Bildschirms mit dieser Einstellscheibe. 2. Touche de largeur de point et position d’aiguille Appuyer sur le côté “–” ou “+” de la touche pour modifier le réglage. Appuyer sur “–” ou “+” pour déplacer l’aiguille vers la gauche ou vers la droite.
8. Memory Save/Recall Key The 3 Digit Mode has four separate memories for saving a sequence of stitches. Press this key to activate memory 1 (M1). Press key again to activate M2. Continue to press this key to access M3, M4 or to exit memory. Once a memory is activated, press the “ENTER” key to save the sequence. To recall a saved memory, press “M” key until desired memory appears. To activate the saved sequence, press “Mirror Image” key. 9.
8. Touche sauvegarde/rappel mémoire Le mode 3 chiffres dispose de quatre mémoires indépendantes pour sauvegarder une séquence de points. Appuyer sur cette touche pour activer la mémoire 1 (M1). Appuyer une nouvelle fois sur la touche pour activer M2. Continuer à appuyer sur cette touche pour accéder à M3 puis à M4 ou quitter la mémoire. Une fois la mémoire activée, appuyer sur la touche “ENTER” pour sauvegarder la séquence. 8.
16. Review Memory Right Key Use this key to review stitches in a memorized sequence when all stitches do not appear on the screen. OR Press this key to move the cursor right until it is under the stitch that will be edited. 17. Memory Auto Thread Cut Key Press this key after selecting a stitch and when the Auto-Lock key is pressed the machine will automatically cut threads after lockstitching is completed.
16.Touche Lecture mémoire droite Utiliser cette touche pour revoir les points d’une séquence mise en mémoire lorsqu'ils n’apparaissent pas tous à l’écran. 16.Speicherübersichtstaste - Rechts Benutzen Sie diese Taste, um Stiche in einer gespeicherten Abfolge zu betrachten, wenn nicht alle Stiche auf dem Bildschirm erscheinen. OU BIEN ODER Appuyer sur cette touche pour déplacer le curseur sur la droite jusqu’au point à modifier. 17.
Setting Quick Resumption, Sound and Language Modes These three modes/functions can be set according to your preferences. Each new setting requires you to turn OFF the power switch. Turn ON the power switch while pressing “ENTER” key. Message screen appears. Press “1” key to change quick resumption or “2” key to change sound or “3” key to change language. z x Quick Resumption – The last stitch or memorized sequence of stitches that were sewn will appear when machine is switched on. z Press “1” key.
Réglage des modes Reprise rapide, Son et Langue Einstellung der Modi für Schnelle Nähwiederaufnahme, Ton und Sprache Vous pourrez programmer ces trois modes ou réglages selon vos préférences : Pour activer chaque nouveau réglage, vous devez mettre la machine hors tension. Mettre la machine sous tension tout en appuyant sur la touche ”ENTER”. Des messages apparaissent à l’écran.
Reset to Factory Default It is possible to reset the machine to the factory defaults with English language as default. Turn OFF the power switch. Press “ENTER” key while turning power switch ON. Message screen appears. Press “0” key. Message screen appears. Press “ENTER” key to confirm and reset to factory default. OR Turn off power switch to cancel the reset. Controlling Sewing Speed Sewing speed can be varied with the foot control. The harder you press on the foot control, the faster the machine runs.
Réinitialiser les réglages par défaut d’usine Rückstellen auf werkseitige Vorgabeeinstellungen Il est possible de rétablir les réglages par défaut d’usine avec l’anglais comme langue par défaut. Die Maschine kann auf die werkseitigen Vorgabeeinstellungen zurückgestellt werden, wobei Englisch die vorgegebene Sprache ist. Mettre l’interrupteur d’alimentation en position d’arrêt. Appuyer sur la touche “ENTER” tout en mettant la machine sous tension. Des messages apparaissent à l’écran.
How To Drop the Feed Dog The feed dog can be dropped out of position for special sewing techniques: free motion embroidery, stippling, button sewing, etc. q The feed dog must always be up for regular sewing. The machine will run with the feed dog down if the following stitches are selected: 1, 2, 3, 4, 011, 014, 015, 016, 017, 042, 061 and 062. The machine will not sew with the feed dog down if any other stitches are selected.
Comment abaisser la griffe d’entraînement Versenken des Transporteurs Il est possible de déplacer la griffe d’entraînement et de l’abaisser pour des techniques particulières de couture : broderie en mouvement libre, pointillé, pose de boutons, etc. Der Transporteur kann für spezielle Nähtechniken (freihändiges Sticken, Stippeln, Aufnähen von Knöpfen, usw.) versenkt werden. La griffe d’entraînement doit toujours se trouver en position relevée pour la couture normale.
Attaching and Removing Presser Feet Press the “Up/Down Needle” key until the needle is in the raised position. Turn OFF the power switch. Raise the presser foot and press the red button q on back of the shank. The presser foot will drop off. q w e Place the selected presser foot so the pin e on the foot lies just under the groove w of the shank. Lower the presser bar and attach the foot. Attaching and Removing Shank Turn OFF the power switch. Raise the presser bar.
Installation et retrait des pieds presseurs Entfernen und Anbringen der Nähfüße Appuyer sur la touche de montée/descente d’aiguille jusqu’à ce que l’aiguille soit en position haute. Drücken Sie die Taste zum Hochstellen / Senken der Nadel, bis die Nadel in der hochgestellten Position ist. Mettre l’interrupteur d’alimentation en position d’arrêt. Relever le pied presseur et appuyer sur le bouton rouge q à l'arrière du talon. Le pied presseur tombe alors automatiquement.
Setting for Dual Feed Sewing q When you use the Dual feed, attach the Dual feed as follows. The attaching and detaching Dual feed procedures will be reviewed in LCD screen accordingly as you press the key when stitch 1 is selected. Press the key to exit the reviewing Dual feed procedure. To attach the Dual feed foot: Raise the needle and presser foot q. Loosen the thumbscrew w and remove the foot holder e. Attach the Dual feed foot r to the pressure bar t, and tighten thumbscrew lightly.
Mise en place du transport intégré ajustable Einstellungen für das Nähen mit Doppeltransport Si vous utilisez le transport intégré ajustable, installez-le comme suit. Les procédures d’installation et de retrait du transport intégré ajustable défilent au fur et à mesure sur l'écran à cristaux liquides lorsque vous appuyer sur la touche après avoir sélectionné le point 1. Appuyer sur la touche pour quitter le passage en revue de la procédure relative au double entraînement.
To disengage the Dual Feed Device z z Raise the needle and the presser foot lifter q q to its extra lift position. x x Pull down the Dual feed device w and swing it to the rear to disengage. Push up the Dual feed device until the notch of the Dual feed device catches the pin e. w e z Detaching the Dual Feed Foot z Set the presser foot lifter to normal position. q x Loosen the thumb screw r and remove the Dual feed foot t. x r c Attach the presser foot holder y to the presser bar u.
Pour désengager le dispositif de transport intégré ajustable z Lever l’aiguille et le relève-presseur q en position de levage supplémentaire. Deaktivieren des Doppeltransports z Heben Sie die Nadel und den Nähfußhebel q in ihre höchste Position. x Tirer le dispositif de transport intégré ajustable w vers le bas et le faire pivoter vers l’arrière pour le désengager. Pousser le dispositif de transport intégré ajustable vers le haut jusqu’à ce que son encoche s'engage sur l'ergot e.
Seam Allowance Lines The lines on the needle plate and bobbin cover plate help you measure seam width. q e The numbers indicate the distance (in millimeters and inches) between the center needle position 3.5 q and the seam allowance line w. Use the seam allowance line as a guide for the fabric edge e. w Centimeter/Inch Quick Measurements Use this handy tool located on the machine base for quick measurements.
Lignes de guidage Nahtzugabelinien Les lignes tracées sur la plaque à aiguille et le couvercle de canette vous permettent de mesurer la largeur de couture. Die Linien auf der Stichplatte und Greiferplatte erleichtern das Messen der Nahtbreite. Les chiffres indiquent la distance (en millimètres et en pouces) entre la position centrale d’aiguille 3,5 q et la ligne de guidage w. Utiliser la ligne de guidage pour guider le bord du tissu e.
Adjusting the Needle Thread Tension w Choosing the Correct Tension - Straight Stitch The ideal straight stitch will have threads locked between the two layers of fabric. According to the LCD screen, needle thread tension can range from 2 – 6 q and is normally set on 4. Align the number 4 on the tension dial with the setting mark w. q If you look at the needle thread e (top thread) and bobbin thread r (bottom thread), you will notice that there are no gaps. Each stitch is smooth and even.
Réglage de la tension du fil d’aiguille Einstellen der Oberfadenspannung Choix de la bonne tension – Point droit Auswahl der richtigen Spannung - Geradstich Les points droits sont parfaits lorsque les fils se bloquent entre les deux épaisseurs du tissu. Beim idealen Geradstich sind Fäden zwischen zwei Stofflagen miteinander verschlungen. Selon l’écran à cristaux liquides, la tension du fil d’aiguille peut aller de 2 à 6 q et se règle normalement sur 4.
Using the Fine Adjustment Screw Choice of fabrics and threads may affect the stitch formation when sewing decorative stitches, letters and numbers or classic 4 step memory buttonhole (071). The fine adjustment screw can be used to either lengthen or shorten the stitch. q Fine adjustment screw w Standard mark e Setting mark w To fine tune, use a screwdriver to move the setting mark. q e r t • If stitches are too short r, correct by turning the screw in the direction of “+”.
Utilisation de la vis de réglage fin Verwendung der Feineinstellungsschraube Le choix des tissus et des fils peut avoir un impact sur la formation du point lorsque l’on réalise des points décoratifs, des lettres ou des chiffres ou une boutonnière classique en mémoire à 4 étapes (071). La vis de réglage fin permet d’allonger ou de raccourcir le point.
Weight Fabric Needle Type Very Light Light Universal Ball Point Stretch Chiffon, Fine Lace, Organdy Batiste, Lawn, Crepe de Chine, Challis, Handkerchief Linen, Crepe, Taffeta, Satin Universal Single Knits, Jersey, Swimwear, Tricot Leather, Suede Medium Flannel, Velour, Velvet, Velveteen, Corduroy, Linen, Gabardine, Wool, Terry, Burlap Double Knits, Stretch Velour, Stretch Terry, Sweater Knits Leather, Vinyl, Suede Heavy Denim, Sailcloth, Ticking Coating, Polar Fleece, Drapery, and Upholstery Fabrics L
SECTION II TEIL II Préparation des travaux de couture Vorbereitungen zum Nähen Sélection de l’aiguille adaptée au tissu Auswahl der korrekten Nadel für den jeweiligen Stoff Il existe de nombreux types de tissus, de fils et d’aiguilles. Il est important de bien des associer. Achetez toujours du fil de bonne qualité. Il doit être solide, lisse et d’épaisseur uniforme. Utiliser le même fil pour l’aiguille et la canette. Toujours tester le fil et la taille de l’aiguille sur une chute de tissu.
Needle Definitions The illustration identifies the main parts of a sewing machine needle. q Body w Shaft e Long groove (round side of needle) r Short groove (flat side of needle) t Eye y Point q w e r t y A A: Universal – an all-purpose needle that handles most woven and knit fabrics. B B: Ball point – the point spreads the fibers, preventing tears and is especially suited for loose knits and interlock knits. Not recommended for embroidery.
Définitions d’aiguille Nadeldefinitionen L’illustration identifie les parties principales d’une aiguille de machine à coudre. q Corps w Tige e Grande rainure (côté rond de l’aiguille) r Petite rainure (côté plat de l’aiguille) t Chas y Pointe In der Abbildung werden die wichtigsten Teile einer Nähmaschinennadel gezeigt.
Winding a Bobbin To remove bobbin, slide bobbin cover plate release button q to the right and lift away the bobbin cover plate w. q w Lift out the bobbin e. Turn ON the power switch. e Always use bobbin type supplied with machine. Pull up the retractable thread guide r. r y u Place the spool of thread t on the right side spool pin y with the thread coming off the spool as shown. Attach the spool holder u and press it firmly against the spool of thread.
Bobinage d’une canette Spulen Pour retirer la canette, faire coulisser le bouton d’ouverture du couvercle de canette q vers la droite et enlever le couvercle de canette w. Zum Entnehmen der Spule schieben Sie den Knopf zum Freistellen der Greiferplatte q nach rechts und heben die Greiferplatte w heraus. Soulever et sortir la canette e. Nehmen Sie die Spule e heraus. Mettre l'interrupteur d'alimentation en position de marche. Schalten Sie den Netzschalter ein.
Pull the thread up and through the right retractable thread guide q from behind. q Pull the thread under and around the bobbin winding tension disc w. w Pass the thread through the hole in the bobbin e from inside to the outside. Place the bobbin on the bobbin winder spindle r. e r Push bobbin winder stop t to the left. t y Holding the free end of the thread, press the “Bobbin Winding” key y. (A separate motor winds the bobbin, allowing you to sew at the same time bobbin winding occurs.
Dérouler le fil vers le haut et l’enfiler dans le crochet droit du guide-fil escamotable q par derrière. Führen Sie den Faden nach oben und von hinten durch die einziehbare Fadenführung q. Dérouler le fil sous le disque de tension de bobinage de canette w et autour. Ziehen Sie den Faden um und unter die Spulerspannungsscheibe w. Faire passer le fil par l’orifice de la canette e en l’enfilant de l’intérieur vers l’extérieur. Placer la canette sur l’axe du bobineur r.
Inserting the Bobbin Place the bobbin in the bobbin case with the thread running counterclockwise. Guide the thread into notch q on the front side of the bobbin case. q Hold the bobbin with your right hand and pull the thread to the left, through the tension spring blades w. w Continue pulling the thread lightly until the thread slips into notch e. Pull out about 15 cm (6˝) of thread. e Replace the bobbin cover plate. Refer to the chart shown on the bobbin cover plate to check the threading.
Insertion de la canette Einsetzen der Spule Placer la canette dans la boîte à canette de telle sorte que le fil puisse se dérouler dans le sens contraire des aiguilles d’une montre. Legen Sie die Spule in die Spulenkapsel ein, wobei das Garn gegen den Uhrzeigersinn abläuft. Guider le fil dans l’encoche q à l’avant de la boîte à canette. Führen Sie den Faden durch die Kerbe q an der Vorderseite der Spulenkapsel.
Threading the Machine r e Raise the presser foot. Press the “Up/down Needle” key until the needle is in an up position. q Place the spool of thread on the left spool pin with the thread coming off the spool as shown and attach the spool holder. w Pull the thread up and through the left retractable thread guide q from behind. Pull the thread under the upper thread guide w. Using both hands, firmly insert the thread under the thread guide plate e. e Pull thread forward under the left thread guide r.
Montage du fil sur la machine Einfädeln der Maschine Relever le pied presseur. Appuyer sur la touche de montée/ descente d’aiguille jusqu’à ce que l’aiguille soit en position haute. Stellen Sie den Nähfuß hoch. Drücken Sie die Taste zum Hochstellen / Senken der Nadel, bis die Nadel in der hochgestellten Position ist. Placer la bobine de fil sur la broche porte-bobine de gauche, le fil sortant de la bobine comme illustré, et fixer le disque fixe-bobine.
r u e t y i o Continue to pull the thread down into the right channel and around the tension dial from right to left. Pull up on the thread until it is inserted between the tension discs and under the loop of the check spring t. Check that the thread is coming out over the notch y of the disc. y t Pull thread up the left channel to the take-up lever. Pass thread from right to left side down into eye of take-up lever u. u i Proceed down to the lower thread guide i and pull thread left.
Continuer en acheminant le fil vers le bas dans le canal droit et autour de la molette de tension, de la droite vers la gauche. Ziehen Sie den Faden weiter nach unten in den rechten Kanal und von rechts nach links um den Fadenspannungsregler. Faire remonter le fil pour l’insérer entre les disques de tension et sous la boucle du ressort d’arrêt t. Vérifier que le fil ressort au-dessus de l’encoche y du disque.
Built-in Needle Threader Press the “Up/Down Needle” key q until the needle is in an up position. Turn OFF the power switch. Lower the presser foot. q Lower the needle threader lever w as far as it will go. Hook e is automatically inserted into the needle eye. w e Draw the thread from the guide r to the guide t. The thread is caught under the hook e. t r e Slowly release the lever while holding the thread end and let the needle threader return to its original position.
Enfile-aiguille intégré Eingebauter Einfädler Appuyer sur la touche de montée/descente d’aiguille q jusqu’à ce que l’aiguille soit en position haute. Mettre l’interrupteur d’alimentation en position d’arrêt. Abaisser le pied presseur. Drücken Sie die Taste zum Hochstellen / Senken der Nadel q, bis die Nadel in der hochgestellten Position ist. Schalten Sie den Netzschalter AUS. Senken Sie den Nähfuß. Abaisser à fond le levier d’enfilage de l’aiguille w.
Drawing Up the Bobbin Thread Turn ON the power switch. Raise the presser foot and hold the needle thread lightly with your left hand. Press the “Up/Down Needle” key q twice to pick up the bobbin thread. q Draw up the needle thread together with a loop of bobbin thread. Slide 10 cm (4˝) of both threads to the back under the presser foot.
Installation du fil de canette Heraufholen des Unterfadens Mettre l'interrupteur d'alimentation en position de marche. Relever le pied presseur et tenir le fil d’aiguille de la main gauche sans forcer. Schalten Sie den Netzschalter ein. Heben Sie den Nähfuß an und halten Sie den Oberfaden leicht in der linken Hand. Appuyer à deux reprises sur le bouton de montée/descente d'aguille q pour accrocher le fil de canette.
SECTION III Basic Sewing z How to Select a Stitch z Select stitches 1 – 0 in Direct Select Mode by touching the corresponding key. x Select stitches in the 3 Digit Mode by pressing “MODE” key and then the 3 corresponding keys. x Set-up your machine according to the LCD screen. See page 22. Straight Stitch When the machine is turned on, it is automatically set to sew a straight stitch in the center needle position (Exception: Quick Resumption Mode. See page 24).
SECTION III TEIL III Couture classique Einfaches Nähen Comment choisir un point Auswahl der Stiche z Sélectionner les points 1 à 0 en mode de sélection directe en appuyant sur la touche correspondante. x Sélectionner les points en mode 3 chiffres en appuyant sur la touche “MODE” puis sur les 3 touches correspondantes. z Wählen Sie die Stiche 1 – 0 im Direktauswahlmodus durch Berühren der entsprechenden Taste.
Cutting the Threads After sewing is stopped, press the “Auto Thread Cut” key q (LED signal turns on). (Needle should be in down position before using auto thread cutting mechanism to avoid extra needle penetrations.) q Raise the presser foot and remove the fabric. Pull both threads to the back under the presser foot so they are ready for sewing again. w OR Specialty or heavy decorative threads: Press the “Up/Down Needle” key to raise the needle. Raise the presser foot.
Couper les fils Abschneiden von Fäden Après avoir arrêté la couture, appuyer sur la touche “Coupe-fil automatique” q (le voyant DEL s’allume). (L’aiguille doit être en position basse lorsque l’on s’apprête à utiliser le coupe-file automatique, afin d’éviter de nouvelles pénétrations de l’aiguille dans le tissu.) Drücken Sie die Automatische Fadenabschneidertaste q nach dem Beenden des Nähens (LED-Signal leuchtet auf).
Adjusting Stitch Length When you press the “Stitch Length” key, the stitch length can be set at 0.00 or between 1.0 and 5.0. Press the top “–” side of the key to shorten the stitch length. Press the bottom “+” side of the key to lengthen the stitch length. 1.0 2.5 5.0 Programming My Personal Settings Stitches 1-126 can be programmed to override the factory default settings. z z Change stitch length to 2.6. x x Press “My Personal Setting” key. Message screen appears.
Réglage de la longueur du point Einstellen der Stichlänge Appuyer sur la touche “Longueur de point” permet de régler la longueur de point à 0,00 ou entre 1,0 et 5,0. Wenn Sie die Taste für Stichlänge und Nadelposition drücken, kann die Stichlänge auf 0,00 oder zwischen 1,0 und 5,0 eingestellt werden. Appuyer en haut de la touche du côté du signe “–” pour réduire la longueur de point. Appuyer en bas de la touche du côté du signe “+” pour augmenter la longueur de point.
Reset Stitch To Factory Default Settings z It is possible to reset the machine so personal settings for an individual stitch revert to the factory default settings. z Display the stitch you want to reset in the LCD screen. x Press “My Personal Setting” key. Message screen appears. x c Press “C” key. PS symbol disappears and factory default settings are displayed.
Réinitialiser le point aux réglages par défaut d’usine Rückstellung eines Stiches auf werkseitige Vorgabeeinstellungen Il est possible de réinitialiser la machine de façon à remplacer les réglages personnels effectués sur un point individuel par les réglages par défaut d’usine. Die Maschine kann rückgestellt werden, so dass die persönlichen Einstellungen für einen einzelnen Stich auf die werkseitigen Vorgabeeinstellungen zurückkehren. z Afficher le point à réinitialiser sur l'écran à cristaux liquides.
Sewing on Heavy Fabrics The black button on presser foot “A” locks the foot in a horizontal position when pushed in before lowering the presser foot. This ensures even feeding at the beginning of seams and helps when sewing many layers of fabric such as welt seams used to hem jeans. When the point of an increased thickness is reached, lower the needle and raise the presser foot. Press in the black button. Lower the foot and continue sewing.
Couture de tissus épais Nähen schwerer Stoffe Le bouton noir situé sur le pied presseur “A” verrouille le pied en position horizontale si on l’actionne avant d’abaisser le pied presseur. Ceci assure un entraînement régulier au début des coutures et facilite la couture de plusieurs épaisseurs de tissus, pour les coutures rabattues des ourlets de jeans par exemple. Der schwarze Knopf am Nähfuß A stellt den Fuß in einer horizontalen Position fest, wenn Sie ihn vor Herabsenken des Nähfußes drücken.
Zipper Insertion Lapped Application Lapped zippers are usually inserted into a side seam of skirts or pants, for example. Use zipper foot E instead of standard metal foot A. Attach the pin on zipper foot E to the groove on the shank. • To sew the left side of the zipper, attach the zipper foot on the right-hand side. • To sew the right side of the zipper, attach the zipper foot on the left-hand side. Fabric Preparation Add 1 cm (3/8˝) to the zipper size.
Pose de fermetures à glissière Einnähen von Reißverschlüssen Pose à rabat Einnähen von überlappten Reißverschlüssen Les fermetures à glissière à rabat se posent généralement dans la couture latérale des jupes ou pantalons, par exemple. Überlappte Reißverschlüsse werden üblicherweise in die Seitennaht von Röcken oder Hosen eingenäht. Utiliser le pied à semelle étroite E à la place du pied métallique classique A. Fixer la tige du pied à semelle étroite E dans la rainure du talon.
Close zipper. Turn zipper face up (right seam allowance forms a small fold at basting line) and smooth zipper teeth away from seam. Attach foot with right side pin. Reset straight stitch length to 2.5. Starting at the bottom, sew through the folded seam allowance and zipper tape. Stop just before the zipper foot reaches the slider on the zipper tape. Lower the needle slightly into the fabric. Raise the zipper foot and open the zipper. Lower the foot and stitch the remainder of the seam.
Fermer la fermeture à glissière. Retourner la fermeture face en haut (la réserve de couture de droite forme un petit pli sur la ligne de bâti) et dégager les dents de la couture. Fixer le pied avec la tige de droite. Rétablir la longueur de point droit à 2,5. En commençant par le bas, coudre en piquant le pli de la réserve de couture et le ruban de la fermeture éclair. Schließen Sie den Reißverschluss.
Rolled Hem An easy, professional way to sew hems. The spiral on the hemmer foot guides the fabric edge to create a rolled hem. Recommended for fine, sheer fabrics used in bridal wear. Attach hemmer foot D. Trim about 6.5 mm (1/4˝) from corners to reduce bulk. Make a double 3 mm (1/8˝) fold approximately 8 cm (3˝) in length. Align fabric hem edge with the inside of right extension of foot q. Use this placement on foot as guide. Lower presser foot. Sew 3 or 4 stitches while holding needle and bobbin threads.
Rouleauté Rollsaum Une manière aisée et professionnelle de coudre les ourlets. La spirale du pied ourleur guide le bord du tissu de façon à réaliser un rouleauté. Recommandé pour les tissus fins et fragiles des vêtements de mariée. Eine leichte und professionelle Methode zum Nähen von Säumen. Die Spirale am Saumfuß leitet die Stoffkante, um einen Rollsaum zu bilden. Empfohlen für feine, durchsichtige Stoffe wie z.B. für Brautbekleidung. Fixer le pied ourleur D. Bringen Sie den Saumfuß D an.
Zigzag Stitch The zigzag stitch is a very versatile stitch. Simply change its width and length. Use the zigzag to finish raw seam edges, sew narrow hems, sew satin stitch appliques and create beautiful monograms. Select 2. q w e r Adjusting Stitch Width and Length Press the “–” or “+” side of the keys to change the stitch width and length.
Point zigzag Zickzackstich Le point zigzag est un point très polyvalent. Il suffit d’en modifier la largeur et la longueur. Utiliser le point zigzag pour finir les bords cousus vifs, coudre des ourlets étroits, réaliser des appliqués au point passé et créer de beaux monogrammes. Der Zickzackstich ist sehr vielseitig. Ändern Sie einfach die Breite und Länge des Stichs.
Satin Stitch Appliqué The zigzag stitch is commonly used for appliqué, monogramming, stems of flowers and petals. (A short zigzag stitch length creates the satin stitch.) Threads of 100% cotton, rayon or silk provide the best results. • Apply stabilizer to the fabric for the stitch to form correctly. Select 2. Attach satin stitch foot F. Decrease stitch width to 3.5 and stitch length to 0.40. Appliqué Preparation 1. Press fusible webbing to the wrong side of a lightweight fabric. 2. Cut out design shape.
Appliqué au point de bourdon Federstichapplikation On utilise couramment le point zigzag pour réaliser des appliqués, des monogrammes, des tiges et pétales de fleurs. (Le point de bourdon est réalisé à partir d’un point zigzag court.) Les fils 100 % coton, rayonne ou soie procurent les meilleurs résultats. Der Zickzackstich wird häufig für das Nähen von Applikationen, Monogrammen, Blumenstielen und Blütenblättern verwendet. (Eine kurze Zickzackstichlänge erzeugt den Federstich.
Mending a Tear Pull torn edges together and fuse a piece of interfacing slightly larger than the tear to the wrong side of the garment. Select 3. Decrease stitch length to 0.20 – 0.50. Begin sewing above the tear. Stitch down the middle, pulling edges together. Stop sewing just beyond end of tear. Depending on the tear, you might need to stitch area 2 or 3 times. Serpentine Stitch A delicate curve that is great for topstitching or for applying elastic directly to fabric without making an elastic casing.
Raccommodage d’une déchirure Stopfen eines Risses Rapprocher les bords déchirés et coller au fer sur l’envers du vêtement une pièce d’entoilage légèrement plus grande que la déchirure. Ziehen Sie die Risskanten zusammen und bügeln Sie ein Stück Einlagematerial, das etwas größer als der Riss ist, auf die linke Seite des Kleidungsstücks. Sélectionner 3. Réduire la longueur de point pour la ramener entre 0,20 et 0,50. Wählen Sie 3. Reduzieren Sie die Stichbreite auf 0,20 - 0,50.
Blind Hem Stitches The stretch blind hem (5) is a great method for finishing a hemline or sleeve. Use the woven blind hem (064) on non-stretch fabrics. Finish the raw hem edge with a zigzag or 3 step zigzag q before sewing the blind hem. Select 5 or press “MODE” key and select 064. Fold up the hem allowance and press. Fold under the hem toward right side of garment. Leave a 6.5 – 10 mm (1/4˝ to 3/8˝) extension e at the right.
Points d'ourlet invisible Blindsäumen L’ourlet extensible invisible (5) est une excellente méthode pour finir un ourlet ou une manche. Der Stretchblindsaum (5) ist eine ideale Methode für die Fertigstellung eines Saums oder Ärmels. Utiliser l’ourlet tissé invisible (064) sur les tissus non extensibles. Finir le bord vif de l’ourlet par un point zigzag ou zigzag en 3 étapes q avant de coudre l’ourlet invisible. Verwenden Sie den Webblindsaum (064) für Stoffe, die nicht dehnbar sind.
Buttonhole Variations All buttonholes should use interfacing that is the same weight as the fabric. Interfacing is especially important when sewing on stretch fabrics. 0 or 071 072 073 074 075 076 Classic Buttonhole (Sensor or 4 Step Memory) The most common buttonhole, found on blouses, shirts, pants, etc. It consists of a bartack at each end and a compact zigzag stitch along each side. Classic Keyhole Buttonhole Accommodates the shank found on large buttons used on heavy coats and jackets.
Variantes de boutonnière Verschiedene Knopflöcher Toutes les boutonnières doivent être réalisées avec un entoilage de même poids que le tissu. L’entoilage est particulièrement important pour coudre sur les tissus extensibles. Für alle Knopflöcher sollte Einlagematerial verwendet werden, das gleich schwer wie der Stoff ist. Beim Nähen auf Stretchstoffen ist die Verwendung einer Einlage besonders wichtig.
Sensor Buttonholes (Totally Automated Buttonholes) Select a buttonhole - 0, 072 thru 075. The LCD screen will briefly show a message advising that the buttonhole lever must be lowered. Alter the buttonhole width to match the fabric and thread. See page 92. When attaching buttonhole foot (R), make sure the button opening is at the back of the foot. Extend the buttonholder q to the back and place the button in it. Push the holder together tightly around the button.
Boutonnières avec détecteur (boutonnières entièrement automatisées) Sensor-Knopflöcher (völlig automatische Knopflöcher) Sélectionner une boutonnière - 0, 072 à 075. Wählen Sie ein Knopfloch - von 0, 072 bis 075. L’écran à cristaux liquides affiche brièvement un message conseillant d’abaisser le levier de boutonnière. Modifier la largeur de la boutonnière pour la faire correspondre au tissu et au fil. Voir en page 93.
Mark the buttonhole area on the fabric. Place both threads to the left under the foot. Insert the garment under the foot and hand turn the flywheel to lower the needle at the starting point. Lower the buttonhole foot. q Memory Auto Thread Cut Key w It is possible to program the machine to automatically cut the threads when a buttonhole is completed. To program - press the “Memory Auto Thread Cut” key q after selecting the buttonhole and before sewing begins; the LED light w will turn on. Begin sewing.
Tracer l’emplacement de la boutonnière sur le tissu. Placer les deux fils à gauche sous le pied. Introduire le vêtement sous le pied et tourner le volant à la main de façon à abaisser l’aiguille au point de départ. Abaisser le pied de boutonnière. Markieren Sie den Knopflochbereich auf dem Stoff. Ziehen Sie beide Fäden nach links unter den Fuß. Legen Sie den Stoff unter den Fuß und drehen Sie das Handrad, um die Nadel am Ausgangspunkt abzusenken. Stellen Sie den Knopflochfuß herab.
q w Press “MODE” key to access 3 Digit Mode for Buttonholes 072 – 076.
Appuyer sur la touche “MODE” pour accéder au mode 3 chiffres pour les boutonnières 072 à 076. Drücken Sie die Modustaste, um den Dreistellenmodus für Knopflöcher 072 - 076 aufzurufen. 072 Boutonnière tailleur classique La couture de la boutonnière se fait automatiquement: q Moitié avant gauche de l’œillet, zigzag en arrière sur le côté gauche et point droit sur le côté droit vers l’avant w Moitié avant droite de l’œillet et zigzag en arrière sur le côté droit e Bride d’arrêt arrière et arrêt.
Cutting Open Buttonhole Place a pin just inside the bartack at each end to prevent accidentally cutting bartacks. Cut buttonhole open with the seam ripper. Troubleshooting Tips If the button is extremely thick and difficult to fit through the test buttonhole, you can lengthen the buttonhole by pulling the buttonholder on the foot back a little extra. The length of the hole will increase by that same amount. q Make sure there is not a gap between the slider and the spring holder.
Ouverture de la boutonnière Aufschneiden von Knopflöchern Placer une épingle sur le bord intérieur de chacune des brides d’arrêt pour éviter de les couper accidentellement. Ouvrir la fente à l’aide du découseur. Bringen Sie an jedem Ende knapp innerhalb des Riegels eine Stecknadel an, damit die Riegel nicht versehentlich eingeschnitten werden. Schneiden Sie das Knopfloch mit einem Nahttrenner auf.
Corded Buttonhole Corded buttonholes are found on coats and other garments that require extra strong buttonholes. The cording reinforces and accentuates the buttonhole. Sew a corded buttonhole using the same procedure as described for a classic buttonhole. • Set the stitch width to match the thickness of the cording. w q With the buttonhole foot raised, hook the filler cord q on the spur w at the back of the buttonhole foot. Bring the ends forward under the buttonhole foot.
Boutonnière cordonnet Knopflöcher mit Einlauffaden Les boutonnières cordonnet s’utilisent sur les manteaux et autres vêtements qui nécessitent des boutonnières ultrarésistantes. Le cordonnet renforce et accentue la boutonnière. Knopflöcher mit Einlauffaden finden sich in Mänteln und anderen Kleidungsstücken, die besonders starke Knopflöcher erfordern. Durch den Einlauffaden wird das Knopfloch verstärkt und betont.
071 Classic Buttonhole (4 Step Memory) The classic buttonhole is especially suited for oversized novelty buttons or larger decorative openings for weaving curtain rods and scarves, for example. All buttonholes should use interfacing suitable for the fabric weight. Test sew the buttonhole on sample swatch. Select 071. The LCD will briefly show two messages. Use either the R or B buttonhole foot. If you use the R foot, fully extend open the buttonholder q (maximum buttonhole size with this foot is 3.
071 Boutonnière classique (mémoire 4 étapes) 071 Klassisches Knopfloch (4Schrittspeicher) La boutonnière classique convient particulièrement bien aux gros boutons fantaisie ou pour réaliser des ouvertures décoratives plus grandes, pour réaliser des passants de tringle à rideaux et des écharpes par exemple. Toutes les boutonnières doivent utiliser un entoilage adapté au poids du tissu. Das klassische Knopfloch eignet sich besonders für besonders große Modeknöpfe oder größere dekorative Öffnungen z.B.
Start sewing – front bartack, lockstitch. Machine will automatically stop when buttonhole is completed. Sewing Additional Buttonholes To sew another buttonhole the same size - raise foot, move fabric, lower foot and sew. Reset Buttonhole Size To sew a buttonhole a different size (or to adjust stitch length), reset the machine by pressing “ENTER” key or reselect buttonhole. Sew new buttonhole size using same method.
Commencer à coudre - bride d’arrêt avant, points d’arrêt. Une fois la boutonnière terminée, la machine s’arrête automatiquement. Beginnen Sie zu nähen - vorderer Riegel, Vernähstich. Die Maschine hält automatisch an, wenn das Knopfloch fertiggestellt ist. Couture d’autres boutonnières Nähen weiterer Knopflöcher Pour coudre une autre boutonnière de la même dimension – relever le pied, déplacer le tissu, abaisser le pied et coudre.
076 Bound Buttonhole (4 Step Memory) Great for oversized buttons requiring tailored buttonholes, welt pockets or larger decorative openings. All buttonholes should use interfacing suitable for the fabric weight. Test sew the buttonhole on sample swatch. Select 076. The LCD screen will briefly show two messages. Increase stitch length so it is appropriate for your fabric weight. Attach buttonhole foot B. (You could use the R buttonhole foot. If you use R foot, fully extend the buttonholder open.
076 Boutonnière passepoilée (mémoire 4 étapes) 076 Paspeliertes Knopfloch (4Schrittspeicher) Ce point convient parfaitement aux gros boutons qui nécessitent des boutonnières sur mesure, aux poches passepoilées ou aux ouvertures décoratives plus grandes. Toutes les boutonnières doivent utiliser un entoilage adapté au poids du tissu. Faire un essai de boutonnière sur un coupon.
, , Start sewing – straight stitch front edge, lockstitch. Machine will automatically stop when buttonhole is completed. . . Cut down center of sewn rectangle, snipping into each corner. ⁄0 ⁄0 Pass the bias square through slit and pull to wrong side of garment to form the lips of buttonhole. ⁄1 ⁄1 From wrong side, press lips into center and fold bias fabric over lips forming a tuck at each end. ⁄2 ⁄2 From right side, align lips. Baste and press.
, Commencer à coudre - point droit sur le bord avant, points d’arrêt. Une fois la boutonnière terminée, la machine s’arrête automatiquement. , Beginnen Sie zu nähen – Geradstich vordere Kante, Vernähstich. Die Maschine hält automatisch an, wenn das Knopfloch fertiggestellt ist. . Découper le centre du rectangle cousu, en faisant une entaille dans chaque coin. . Schneiden Sie in der Mitte des genähten Stoffquadrats ein und schneiden Sie die Ecken ein.
How to Sew on a Button Hand sewing buttons to a garment is very timeconsuming. Sew them on in one quick, easy step. Select 2. Attach satin stitch foot F. Drop the feed dog. See page 28. • Set the stitch width according to the position of the holes in the button. Mark button placement on fabric. Use washable glue or transparent tape to temporarily secure the button. Place the button and fabric under the presser foot. Match the holes in the button to the horizontal slot on the presser foot.
Comment coudre un bouton Annähen von Knöpfen Coudre les boutons à la main sur un vêtement prend beaucoup de temps. Vous pouvez les coudre rapidement et facilement en une seule opération. Sélectionner 2. Installer le pied de point bourdon F. Abaisser la griffe d’entraînement. Voir en page 29. Das manuelle Annähen von Knöpfen an einem Kleidungsstück ist sehr zeitaufwendig. Nähen Sie Knöpfe schnell und einfach in einem Schritt an. Wählen Sie 2. Bringen Sie den Federstichfuß F an.
Triple Seam This strong, durable stitch is recommended where both elasticity and strength are needed. Because of its durability, once in place, this stitch is not easily removed. Use it to reinforce areas such as crotch and armhole seams or to construct items such as backpacks. This stitch can also be used for topstitching. Elna invented this stitch in 1952. Using a straight stitch (stitch length 4.0), baste a seam together. Verify the fit. Select 063. Sew final seam.
Triple couture Dreifachnaht Ce point robuste est recommandé pour réaliser des coutures exigeant à la fois élasticité et solidité. Très résistant, ce point est difficile à enlever. Il peut servir à renforcer des zones telles que les coutures d'entrejambes et d'emmanchures ou pour bâtir des articles tels que des sacs à dos. Ce point permet également de réaliser les surpiqûres. Dieser starke, haltbare Stich ist zu empfehlen, wenn Elastizität und Stabilität erforderlich sind.
Super Overlock Stitch This industrial inspired overlock stitch is excellent for assembling and finishing fabrics together in one step. Apply ribbing to knits and garment retains its shape. Elna invented this stitch in 1982. Select 067. Attach satin stitch foot F. Place the fabric edges together under the presser foot next to the right side edge of the presser foot.
Point Super Overlock Super-Overlock-Stich Inspiré des points Overlock industriels, ce point est parfait pour assembler et finir les tissus en une seule opération. Il permet de réaliser des côtelés sur les tricots sans déformer le vêtement. Dieser industriell inspirierte Oberlock-Stich eignet sich ausgezeichnet für das Zusammenfügen und Versäubern von Stoffen in einem einzigen Schritt. Versehen Sie Strickstoffe mit Rippenware und Ihr Kleidungsstück behält die Form. Elna a inventé ce point en 1982.
Overcast Stitch A reinforced straight stitch and zigzag are sewn simultaneously. If your seam does not need to be opened flat, this stitch will sew the seam and overcast the edge in one operation. Select 070. Attach overlock foot C. NOTE: Do not set the stitch width lower than 5.0 when using overlock foot C because the needle could hit wires on the foot. Place the fabric edge against the black guide on the foot. Sew seam. Arrowtack This stitch is used to reinforce the corners of pockets and pleats.
Point de surfilage Überwendlichstich La machine coud simultanément un point droit renforcé et un point zigzag. S'il n’est pas nécessaire d’ouvrir la couture à plat, ce point permettra de coudre et surfiler le bord en une seule opération. Ein verstärkter Stich, bei dem gleichzeitig ein Geradstich und Zickzackstich genäht werden. Wenn Ihre Naht nicht flach auseinander gelegt werden muss, näht dieser Stich die Naht und versäubert die Kante in einem Schritt. Sélectionner 070. Wählen Sie 070.
Bartacks A bartack is a reinforced stitch used on garment areas that receive extra stress like pockets, belt loops and zippers. Select 078. The LCD screen will briefly show a message. Attach satin stitch foot F. Automatic Bartack Place the fabric under presser foot. Lower presser foot. Sew until the machine automatically stops. A 1.5 cm (5/8˝) bartack is sewn. Press the “Stitch Width/Needle Position” or “Stitch Length” key to adjust bartack.
Brides d’arrêt Riegel Une bride d’arrêt est un point renforcé utilisé aux endroits du vêtement qui subissent les contraintes les plus fortes, tels que les poches, les passants de ceinture et les fermetures à glissière. Ein Riegel ist ein verstärkter Stich, der in stark beanspruchten Bereichen eines Kleidungsstücks wie z.B. Taschen, Gürtelschlaufen und Reißverschlüssen verwendet wird. Sélectionner 078. L'écran à cristaux liquides affiche brièvement un message. Wählen Sie 078.
Darning Darning with a sewing machine saves a lot of time. It is used for repairing very worn areas (not holes) in fabric. Select 079. The LCD screen will briefly show two messages. Attach automatic buttonhole foot R. Automatic Darning Extend the buttonholder q completely open. Place both threads to the left under the foot. Insert fabric under the foot and lower the needle at the starting point w. Lower the foot. Sew. e q r The size of one darning cycle is variable.
Reprises Stopfen Repriser avec une machine à coudre permet de gagner beaucoup de temps. Cette technique permet de réparer les zones très usées du tissu (pas les trous). Stopfen mit einer Nähmaschine spart eine Menge Zeit. Damit werden stark abgenutzte Stellen (jedoch keine Löcher) in einem Stoff ausgebessert. Sélectionner 079. L'écran à cristaux liquides affiche brièvement deux messages. Wählen Sie 079. Auf der Flüssigkristallanzeige erscheinen kurz zwei Meldungen.
Eyelets Small eyelets may be sewn on belts, used for lacing cords or simply used for a decorative effect. Select 080. Attach satin stitch foot F. The machine will sew an eyelet and automatically stop. Cut open the eyelet with a seam ripper, pointed scissors or an awl.
Œillets Ösen Vous pouvez coudre de petits œillets sur des ceintures, les utiliser pour passer des lacets ou simplement pour obtenir un effet décoratif. Kleine Ösen können in Gürtel genäht, zum Durchziehen von Kordeln oder einfach als Verzierung verwendet werden. Wählen Sie 080. Sélectionner 080. Bringen Sie den Federstichfuß F an. Installer le pied de point bourdon F. La machine coud un œillet, puis s’arrête automatiquement. Ouvrir l’œillet avec un découseur, des ciseaux pointus ou un poinçon.
SECTION IV Quilting Piecing Fabrics Together Accuracy is the key when sewing together fabric pieces for a quilt. Be sure to precisely cut your fabric pieces with 6.5 cm (1/4") seam allowances. Select 1. Attach scant 1/4” foot. q The bar on the foot is a perfect 1/4˝ seam guide from center needle position (3.5). Place fabric edges (right sides together) under foot against the guide q and sew a perfect 1/4˝ seam. OR Use 4.5 needle position for a scant 1/4˝ seam.
SECTION IV TEIL IV Matelassage Quilten Assemblage des tissus Zusammensetzen von Stoffstücken L’assemblage de pièces de tissu pour réaliser un matelassage exige une grande exactitude. Veiller à découper avec précision vos pièces de tissu en prévoyant des réserves de couture de 6,5 cm. Genauigkeit ist beim Zusammennähen von Stoffstücken für ein Quilt von größter Bedeutung Achten Sie darauf, dass Sie Ihre Stoffstücke präzise mit einer Nahtzugabe von 6,5 cm zurecht schneiden. Sélectionner 1.
Straight Stitch (Dual Feed Foot: AD) The Dual Feed foot is extremely effective for sewing with hard to feed materials such as vinyl or leather. It also eliminates layer slippage. See page 32-34 for how to attach the Dual Feed foot and to engage the Dual Feed device. To sew Raise the presser foot and position the fabric next to a seam guide line on the needle plate. Lower the needle to the point where you wish to start. Pull the needle and bobbin threads toward the rear. Lower the presser foot. Select 1.
Point droit (pied de transport intégré ajustable : AD) Geradstich (Doppeltransport-Nähfuß: AD) Le pied de transport intégré ajustable est extrêmement efficace pour coudre les matériaux difficiles à entraîner tels que le vinyle ou le cuir. Il empêche également les différentes épaisseurs de glisser. Voir en page 33-35 comment fixer le pied de transport intégré ajustable et engager le dispositif de transport intégré ajustable.
Quilt Guide The quilt guide is helpful when sewing parallel, evenly spaced rows of stitching. Loosen the quilt guide holding screw q, slide the quilt guide in the opening w until the desired width is set and tighten the screw. q Use a washable marker to draw the first line for stitching. Sew over line. When sewing subsequent rows of stitching, the quilt guide will rest on the previous row of stitching.
Guide de matelassage Quiltführung Le guide de matelassage est très utile pour coudre des rangées de points parallèles et uniformément espacées. Die Quiltführung erleichtert das Nähen paralleler Nahtreihen in gleichen Abständen voneinander. Desserrer la vis de maintien du support de guide de matelassage q, faire glisser le guide de matelassage dans l’ouverture w de façon à le régler à la largeur voulue, puis serrer la vis.
Buttonhole Appliqué A favorite method of applying small pieces of fabric to quilts for decoration. Select 7 or 019- 024. Attach satin stitch foot F. z Use fine embroidery thread (50 weight or finer) and needle appropriate to fabric. You may need to set the foot pressure dial to 2. z In this type of appliqué, raw edges are folded under. To prepare raw edge, first cut appliqué design out of paper. x c x Press fusible webbing to wrong side of appliqué fabric.
Appliqué au point de boutonnière Knopfloch-Applikation Une méthode bien adaptée à la pose de petites pièces de tissu décoratif sur les ouvrages matelassés. Eine beliebte Methode zum Anbringen kleiner, dekorativer Stoffstücke an Quilts. Sélectionner 7 ou 019 à 024. Installer le pied de point passé F. Wählen Sie 7 oder 019- 024. Bringen Sie den Federstichfuß F an. Utiliser du fil à broder fin (n° 50 ou plus fin) et une aiguille adaptée au tissu.
Patchwork A fun method of decorating your quilt (often called “Crazy Quilting”) is to sew a patchwork stitch over the opened seam. Select 1. Attach satin stitch foot F. Sew a straight stitch seam and press seam allowance open. Select a patchwork stitch: 8, 013, 014 and 025 – 040. Sew with stitching centered over the seam. Free Motion Quilting or Stippling Add dimension to your quilt by stitching down the surrounding background fabric around larger designs, like hearts or flowers.
Patchwork Patchwork Une méthode amusante pour décorer votre ouvrage matelassé (souvent appelé “pointe folle” ou “centon”) consiste à coudre un point de patchwork sur la couture ouverte. Eine attraktive Methode zum Aufpeppen Ihres Quilts (auch oft als "Crazy Quilting" bezeichnet) ist das Übernähen der geöffneten Naht mit einem Patchwork-Stich. Wählen Sie 1. Bringen Sie den Federstichfuß F an. Nähen Sie den Saum mit Geradstichen und bügeln Sie die Nahtzugabe auseinander. Sélectionner 1.
Stippling Stitches A pre-programmed stippling stitch is a fast and easy method to quilt small areas. Select 9, 015 or 016. Attach satin stitch foot F. Place batting (wadding) between quilt top and backing fabric. Basting Stitch The basting stitch can be used to temporarily hold together two or more layers of fabric. Use a fine needle to avoid leaving permanent needle marks. Select 011. Attach open toe embroidery/darning foot P-2. Lower the feed dog. Set foot pressure dial to 2 or 1.
Point de pointillé Stippelstiche Ce point de pointillé préprogrammé est une méthode rapide et aisée pour matelasser de petites surfaces. Ein vorprogrammierter Stippelstich ist eine schnelle und einfache Methode zum Quilten kleiner Bereiche. Sélectionner 9, 015 ou 016. Installer le pied de point passé F. Wählen Sie 9, 015 oder 016. Bringen Sie den Federstichfuß F an. Intercaler le rembourrage (ouate) entre le dessus du matelassage et le tissu de doublure.
SECTION V Heirloom Pintucks A beautiful accent to any project. Pintucks should be added to your fabric before cutting out the pattern piece. Select 1. Attach blind hem foot G. Use a washable marker to draw parallel lines for pintucks on fabric right side. Fold fabric on first line with wrong sides together. Place fold under foot and use foot edge as guide. Move needle position to determine the width of the pintuck. Sew pintuck. Sew remaining pintucks using same method. Remove marking lines.
SECTION V Couture à l’ancienne TEIL V Nervures Haarbiesen Un bel effet quel que soit l’ouvrage. Il convient d’ajouter les nervures au tissu avant de découper les pièces du patron. Ein Stich, mit dem Sie Ihren Nähprojekten wunderschöne Akzente verleihen können. Haarbiesen sollten vor dem Ausschneiden des Musterstücks auf dem Stoff angebracht werden. Antikstiche Sélectionner 1. Fixer le pied pour ourlet invisible G.
Hemstitches Hemstitching, also known as French hand sewing, was traditionally only a hand sewn art. There are several stitches to choose from that will add an “old world charm”. Best results require the use of linen, cotton or a blend of linen/cotton. Thread machine, needle and bobbin with a fine cotton embroidery thread (50 weight or finer). Insert a universal needle size #100, #110 or a wing needle (see cautions below). Use spray starch and press to stabilize fabric. Attach satin stitch foot F.
Points à jour Saumstiche Les points à jour, également connus sous le nom de travaux d’aiguille à la française, étaient traditionnellement cousus uniquement à la main. Il existe un choix de plusieurs points permettant de donner aux ouvrages un charme d’antan. Pour obtenir les meilleurs résultats, il est impératif d’utiliser du lin, du coton ou un mélange de lin et coton. Saumstiche, manchmal auch als französische Handarbeit bezeichnet, waren traditionell eine ausschließlich handgenähte Kunst.
Fringing Fringing adds a special touch on table linens and shawls. Choose a firm, woven fabric like linen where threads can be removed easily. z Select 052 (Mirror Image) or 020. Attach satin stitch foot F. z Carefully cut the fabric on grain. Remove a single yarn or thread where the fringing is to begin. x x Sew down the left side so the right hand stitches fall in the open space. c c Remove all excess yarn located to the right of stitching and create fringe.
Franges Fransen Les franges donnent aux linges de table et aux châles une touche particulière. Choisir une étoffe tissée fermée, lin par exemple, dont on peut enlever facilement les fils. Fransen verleihen Tischwäsche und Schultertüchern einen besonderen Reiz. Verwenden Sie dazu einen festen Webstoff wie z.B. Leinen, aus dem Fäden leicht entfernt werden können. Sélectionner 052 (Image miroir) ou 020. Installer le pied de point passé F. Wählen Sie 052 (Spiegelbild) oder 020.
Smocking Smocking is a delicate, decorative treatment on children’s clothing or women’s blouses. Choose a soft, lightweight fabric such as batiste, gingham or challis. Cut the fabric three times the finished width. Select 1. Increase stitch length to 5.0. Sew rows of straight stitches about 10-13mm (3/8"1/2˝) apart, across the area to be smocked. (A looser needle thread tension will make gathering easier.) Tie the threads along one edge. Pull the bobbin threads to distribute the gathers evenly.
Smocks Smoken La confection de smocks est un travail délicat de décoration effectué sur les vêtements pour enfant ou les chemisiers pour femmes. Choisir un tissu doux et léger, comme la batiste, le guingan ou le challis. Coupez une largeur de tissu trois fois plus grande que la largeur de l’ouvrage fini. Smoken ist eine feine Verzierung von Kinderkleidung oder Damenblusen. Wählen Sie dazu einen weichen, leichten Stoff wie Batist, Gingham oder Challis aus.
SECTION VI Decorative Sewing French Knots Why spend time sewing French Knots by hand? Select 060. Tighten needle tension 5-8. Attach satin stitch foot F. #060 #062 Place fabric under foot and sew one French Knot. Lift up presser foot, move fabric, lower presser foot and sew next French Knot. NOTE: If you want to sew a row of evenly spaced French Knots, you must program straight stitches after the French Knot. See Combining a Sequence on page 150.
SECTION VI TEIL VI Couture décorative Zierstiche Points de nœud Französische Knotenstiche Pourquoi perdre du temps à faire les nœuds à la main ? Nähen Sie französische Knotenstiche noch von Hand? Sélectionner 060. Régler la tension du fil d’aiguille entre 5 et 8. Installer le pied de point passé F. Wählen Sie 060. Erhöhen Sie die Oberfadenspannung auf 5-8. Bringen Sie den Federstichfuß F an. Placer le tissu sous le pied presseur et coudre un point de nœud.
Corded Trim Sew over three strands of cording to create unique borders and trims. Pearl cotton, knitting yarn, embroidery floss, lace thread, fine wool or lily yarn may be used as cording. Select 089. Attach multi-cord foot H. Slide the sewing threads to the left and insert three strands of cording into the slots of H cording foot with 5 cm (2˝) extending behind the foot. Knot together the strand ends. (The slots on H foot will hold the lengths of cording while stitches form over them.
Passementerie gansée Kordelborten Coudre sur trois brins de cordonnet pour créer des bordures et passementeries uniques. Coton perlé, fil à tricoter, fil floche, fil de dentelle, laine fine ou fil de lis peuvent être utilisés comme cordonnet. Nähen Sie über drei Biesenstränge, um Randeinfassungen zu erstellen. Für Kordelborten können Perlgarn, Strickgarn, weichgedrehte Stickfäden, Spitzengarn oder feine Wollfäden benutzt werden. Sélectionner 089. Installer le pied pour cordonnets multiples H.
Twin Needle Sewing As the name implies, the twin needle results in two identical parallel rows of stitches – utility or decorative. w The “Twin Needle” key should be pressed whenever using a twin needle. Be sure to test the stitch before sewing because twin needles are available in a variety of widths. The maximum stitch width available with the “Twin Needle” key activated is 3.0 and that maximum width is based on a standard 2 mm wide twin needle. Turn OFF the power switch and insert a twin needle.
Couture avec une aiguille jumelée Nähen mit der Zwillingsnadel Comme son nom l’indique, l’aiguille jumelée permet de réaliser deux rangées de points parallèles et identiques, à des fins utilitaires ou décoratives. Die Zwillingsnadel näht zwei identische, parallel liegende Zier- oder Nutzstichreihen. Il convient d’appuyer sur la touche “Aiguille jumelée” chaque fois que l’on utilise l’aiguille jumelée.
Twin Needle Hem A twin needle hem is quick and easy. This is an excellent hemming method for knit fabrics because the bobbin thread zigzags, allowing the hem to stretch with the fabric. Be sure to use a stretch twin needle when sewing knit fabrics. Select 1. Press the “Twin Needle” key. Attach satin stitch foot F. Fold the hem up desired amount and topstitch with the twin needle. Carefully trim away excess fabric using sharp scissors.
Ourlet à l’aiguille jumelée Zwillingsnadelsaum L’ourlet à l’aiguille jumelée s’effectue rapidement et facilement. C’est une excellente méthode pour réaliser des ourlets sur les tricots car le zigzag effectué par le fil de canette permet à l’ourlet de s’étirer en même temps que l’étoffe. Veiller à utiliser une aiguille jumelée pour tissus extensibles pour coudre les tricots. Das Nähen eines Zwillingsnadelsaums ist schnell und einfach.
Satin Stitches – Elongation Satin stitches 081 - 089 can be lengthened up to five times their original size without the stitch length varying. X1 X2 X3 X4 X5 Select 087. Attach satin stitch foot F. Press “Elongation” key. (Each touch changes readout to next elongation.) Place fabric and stabilizer under foot and sew. Press “Auto-Lock” key while sewing and machine will complete the design, lockstitch and automatically stop. Press “Auto Thread Cut” key.
Points passés – Allongement Federstiche - Verlängerung Il est possible d’allonger les points passés 081 à 089 jusqu’à cinq fois leur taille initiale sans faire varier la longueur de point. Federstiche 081 bis 089 können bis um das Fünffache ihrer ursprünglichen Länge ohne Abweichung der Stichlänge gedehnt werden Sélectionner 087. Installer le pied de point passé F. Appuyer sur la touche “Allongement”. (Chaque appui sur la touche affiche l’allongement suivant.) Wählen Sie 087.
SECTION VII Programming Combinations (Must have 3 Digit Mode Activated) Single Repeat with Memory Auto-Lock z z Select 081. Machine automatically converts to show selected stitch image and information after third digit is pressed. x x Press “Mirror Image” key. c c Press “Elongation” key. v v Press “Stitch Length” key and change stitch length to 0.30. b b Press “ENTER” key to memorize.
SECTION VII TEIL VII Programmation de combinaisons (le mode 3 chiffres doit être activé) Programmieren von Kombinationen (Dreistellenmodus muss aktiviert sein) Répétition simple avec arrêt automatique mémorisé Einfaches Wiederholen mit Speicher Auto-Verriegelung z Sélectionner 081. z Wählen Sie 081. Dès que l’on appuie sur le troisième chiffre, la machine passe automatiquement à l’affichage de l’image et des informations du point sélectionné.
Combining Sequence z z Select 091. (Press “Mirror Image” key and change stitch width or length if desired.) x x Press “ENTER” key to memorize. A blinking cursor will appear to indicate where next selected and entered stitch will be memorized within the sequence. c c Select 087. (Press “Elongation” key and change stitch width or length if desired.) v v Press “ENTER” key. b b Press “ENTER” key. n n Place fabric and stabilizer under foot and sew memorized sequence repeatedly.
Combinaison d’une séquence Kombinieren einer Abfolge z Sélectionner 091. z Wählen Sie 091. (Appuyer sur la touche “Image miroir” et modifier la largeur ou la longueur de point si nécessaire.) (Drücken Sie die Spiegelbildtaste und ändern Sie auf Wunsch die Stichbreite oder -länge.) x Appuyer sur la touche “ENTER” pour mémoriser les réglages. Un curseur clignotant apparaît afin d’indiquer l’endroit où le prochain point sélectionné et saisi va être mémorisé dans la séquence.
b Change thread color. b n n Select 104. Press “ENTER” key. m m Press “Memory Auto-Lock” key. , . , Place fabric and stabilizer under foot and sew over straight stitch, placing flower between leaves. . Cut connecting threads. z c Reset Combined Sequence to Beginning It is possible to partially sew the combined sequence and restart the machine at the beginning. z Combine a sequence. v x x Begin sewing. Stop sewing. c Press “ENTER” key. v Reposition fabric and stabilizer under foot and sew.
b Installer un fil d’une autre couleur. b Ändern einer Garnfarbe n Sélectionner 104. Appuyer sur la touche “ENTER”. n Wählen Sie 104. Drücken Sie die Eingabetaste. m Appuyer sur la touche “Arrêt automatique mémorisé”. m Drücken Sie die Speicher Auto-Vernähtaste. , Placer le tissu et le stabilisateur sous le pied et coudre et coudre sur le point droit en plaçant la fleur entre les feuilles.
Combining Letters There are 2 font styles: z Block letters (300 stitch numbers) Script or Monogram letters (500 stitch numbers) x z Select 327. x Press “ENTER” key. c c Select 357. v v Press “ENTER” key. b b Select 345. n n Press “ENTER” key. m m Select 348. , , Press “ENTER” key. . . Select 356. ⁄0 Press “ENTER” key. ⁄1 Place fabric and stabilizer under foot and sew. Cut connecting threads. ⁄0 NOTE: Total capacity of one sequence is 50.
Combinaison de caractères Kombinieren von Buchstaben Il existe deux styles d'écriture : Es stehen 2 Schriftarten zur Auswahl: Capitales (points numéros 300) Caractères en script ou monogrammes (points numéros 500) Blockbuchstaben (Stichnummern 300) Skript- oder Monogrammbuchstaben (Stichnummern 500) z Sélectionner 327. x Appuyer sur la touche “ENTER”. z Wählen Sie 327. x Drücken Sie die Eingabetaste. c Sélectionner 357. c Wählen Sie 357. v Appuyer sur la touche “ENTER”.
How to Preview the Combined Sequence (Utility, Satin, Decorative or Letters) q Program the following stitches using the “ENTER” key: 519, 094, 523, 535, 327, 357, 345, 348 and 356. The LCD screen will show a maximum of 8 stitches at one time. The ARROW symbol q located under the sequence indicates that there are more stitches off screen in that direction. Press “Review Memory Left” key (or “Review Memory Right” key) to move cursor and preview the entire sequence.
Comment visualiser de la séquence combinée (points utilitaires, passés, décoratifs ou caractères) Vorschau der kombinierten Abfolge (Nutz-, Feder-, Zierstiche oder Buchstaben) Programmen Sie die folgenden Stiche unter Verwendung der Eingabetaste: 519, 094, 523, 535, 327, 357, 345, 348 und 356. Programmer les points suivants en appuyant sur la touche “ENTER” : 519, 094, 523, 535, 327, 357, 345, 348 et 356. L’écran à cristaux liquides affiche au maximum 8 points à la fois.
Uniformly Adjusting Stitch Width or Length z If the cursor is positioned to the right of the last stitch in the programmed sequence, the stitch width or length adjustment is applied to the entire sequence. x Stitch Width: z Program 083, 094 and 083. (Cursor must be to the right of last stitch in sequence.) c x Press “–” on “Stitch Width/Needle Position” key. c Place fabric and stabilizer under foot and sew. All stitches within the sequence will have the same stitch width.
Réglage uniforme de la largeur ou de la longueur des points Einheitliche Einstellung der Stichbreite oder länge Si le curseur est positionné à droite du dernier point de la séquence programmée, l’ajustement de la largeur ou de la longueur de point s’applique à toute la séquence. Wenn der Cursor rechts vom letzten Stich in der programmierten Abfolge steht, wird die Veränderung der Stichbreite oder -länge für die gesamte Abfolge angewandt. Largeur de point: Stichbreite: z Programmer 083, 094 et 083.
Individually Adjusting Stitch Width or Length z If the cursor is positioned under a stitch in the programmed sequence, the stitch width or length adjustment is applied only to that stitch. z Program 088 two times. x x Press “Review Memory Left” key to move cursor. c c Press “–” on “Stitch Width/Needle Position” key. v v Press “–” on “Stitch Length” key. b b Place fabric and stabilizer under foot and sew.
Réglage individuel de la largeur ou de la longueur des points Individuelle Einstellung der Stichbreite oder länge Si le curseur est positionné sous un point dans la séquence programmée, l’ajustement de la largeur ou de la longueur s’applique uniquement à ce point. Wenn der Cursor unter einem Stich in der programmierten Abfolge steht, wird die Veränderung der Stichbreite oder länge nur für diesen Stich angewandt. z Programmer 088 deux fois. z Programmieren Sie 088 zweimal.
Permanent Memory z It is possible to retain a sequence for future use even if the machine is turned off. Simply save the sequence in one of the four permanent memories. Each memory has a capacity of 50 stitches. Saving Memory x z Program 112 (Face to Face), 091 and 112. x Press “M” key 1 time to activate Memory 1 (M1). c Press “ENTER” key to store. (An hourglass will briefly appear.) c NOTE: Activate Memory 2 (M2) by pressing “M” key 2 times. Activate Memory 3 (M3) by pressing “M” key 3 times.
Mémoire permanente Permanenter Speicher Il est possible de conserver une séquence pour un usage ultérieur même si la machine est mise hors tension. Il suffit d’enregistrer la séquence dans l’une des quatre mémoires permanentes. Chaque mémoire peut contenir 50 points. Es ist möglich, eine Abfolge zur späteren Verwendung zu speichern, selbst wenn die Nähmaschine ausgeschaltet wird. Speichern Sie die Abfolge einfach in einem der vier permanenten Speicher. Jeder Speicher hat eine Kapazität von 50 Stichen.
Recalling Memory z z Press “M” key. x x Press “Mirror Image” key. (An hourglass will briefly appear.) Deleting an Individual Memory z z Press “M” key. x x Press “C” key to delete.
Rappel mémoire Aufrufen des Speichers z Appuyer sur la touche “M”. z Drücken Sie die Taste M. x Appuyer sur la touche “Image miroir”. (Un sablier apparaît brièvement.) x Drücken Sie die Spiegelbild-Taste. (Ein Sanduhrsymbol erscheint kurz auf der Anzeige.) Effacement d’une mémoire individuelle Löschen eines einzelnen Speichers z Appuyer sur la touche “M”. z Drücken Sie die Taste M. x Appuyer sur la touche “C” pour en effacer le contenu. x Drücken Sie die Taste C, um zu löschen.
SECTION VIII q w w e Taking Care of Your Machine Your machine has been meticulously designed and manufactured to give you a lifetime of sewing pleasure. Do not store the machine in a high humidity area, near a heat radiator or in direct sunlight. The machine is self-lubricating, however, the area around the bobbin and hook must be cleaned each time the machine has had extensive use. Do not dismantle the machine further than explained on these pages.
SECTION VIII TEIL VIII Entretien de votre machine Pflege und Wartung Ihrer Maschine Votre machine a été méticuleusement conçue et fabriquée pour vous procurer le plaisir de coudre toute une vie. Ne pas ranger la machine dans un endroit où l’humidité est élevée, près d’un radiateur ou à la lumière directe du soleil. La machine s’auto-lubrifie. Cependant, la zone qui entoure la canette et le crochet doit être nettoyée après chaque séance d’utilisation intensive de la machine.
Replacing the Bobbin Case e w Insert the bobbin case so the knob q fits next to the stopper w in the hook area. The red triangle marks e on the bobbin case and stopper must align with each other. Attach the needle plate and tighten the screws. After cleaning, be sure to replace the needle, presser foot and bobbin. q Changing the Light Bulb Turn OFF the power switch. Unplug the machine. Wait until the bulb has cooled before touching it. Remove screw q. Pull away face plate w.
Remise en place de la boîte à canette Austausch der Spulenkapsel Insérer la boîte à canette de façon à ce que le bouton q se trouve près de la butée w dans la zone du crochet. Les marques triangulaires rouges e de la boîte à canette et de la butée doivent s’aligner. Setzen Sie die Spulenkapsel so ein, dass der Knopf q sich neben Anschlag w im Greiferbereich befindet. Die roten Dreieckmarkierungen e auf der Spulenkapsel und dem Anschlag müssen aufeinander ausgerichtet sein.
Stitch Chart / Diagranme de point / Heftung Diagramm NOTE: Stitches 001, 061, 062 and 063 have a number to the right of the stitch illustration. This number indicates how many stitches will be sewn if programmed into a sequence. Stitches that are compatible with the Face to Face key are identified on the stitch chart with an “F” directly following the stitch number. Buttonholes 010 and 071 are both the classic buttonhole style but are sewn using 2 different methods.
REMARQUE : Les points 001, 061, 062 et 063 portent un chiffre sur la droite de l’illustration. Ce chiffre indique le nombre de points que la machine va coudre en cas de programmation dans une séquence. Les points compatibles avec la touche face à face sont identifiés sur le tableau de points par un “F” placé juste après le numéro du point. Les boutonnières 010 et 071 correspondent toutes les deux aux style classique mais sont cousues selon deux méthodes différentes.
Optional Accessories We are pleased to offer the following optional accessories for your machine. This listing is current at time of printing but we are always developing new accessories to make sewing easier. Contact your authorized dealer or service center to learn more about the latest innovations OR visit us at our website: www.elna.com.
Accessoires en option Nous avons le plaisir de vous proposer les accessoires en option ci-dessous pour votre machine. La liste est exacte à l'heure de la mise sous presse mais nous élaborons sans cesse de nouveaux accessoires pour rendre la couture plus facile. Prenez contact avec votre revendeur ou votre centre technique agréé pour en savoir plus sur les dernières innovations, OU visitez notre site Web : www.elna.com.
Zusätzlich erhältliches Zubehör Wir freuen uns folgendes, zusätzlich erhältliches Zubehör für Ihre Maschine anbieten zu können. Diese Liste ist zum Zeitpunkt der Drucklegung aktuell, aber wir entwickeln laufend neues Zubehör, um das Nähen zu erleichtern. Kontaktieren Sie Ihren Händler oder ein Kundendienstzentrum, um mehr über die neuesten Innovationen zu erfahren ODER besuchen Sie unsere Website: .
Warning Messages Three beep sounds will alert you to machine problems. The LCD screen will show one of these messages. Message Reason What to Do Power switch is turned on while foot control is pressed. Release the foot control. Power switch is turned on with the needle in the down position. Press the “Up/Down Needle” key. (A) (A):The machine is started without lowering the presser foot. Lower the presser foot and start the machine. (B) (B): The presser foot lifter at its extra highest position.
Message Reason What to Do Machine will not sew with the Start/Stop key because the foot control is connected. Unplug the foot control. The Twin Needle Key has been pressed after selecting a stitch that is not compatible with a twin needle inserted. Select a different stitch or sew with a single needle. The Elongation Key has been pressed after selecting a stitch that cannot be elongated. Elongation can only be used with satin stitches 081 – 090.
Messages d’avertissement En cas de problèmes de fonctionnement, la machine émet trois bips sonores. L’écran à cristaux liquides affiche l’un des messages suivants. Message Cause La machine a été mise sous tension tout en appuyant sur la pédale. La machine a été mise sous tension alors que l'aiguille était en position abaissée. Solution Relâcher la pédale. Appuyer sur la touche de montée/ descente d’aiguille. (A) (A) : La machine a été mise en route sans que le pied soit abaissé.
Message Cause Solution La machine ne coud pas avec la touche marche/ arrêt parce que la pédale est branchée. Débrancher la pédale. La touche “Aiguille jumelée” a été actionnée après avoir sélectionné un point non compatible avec l'aiguille jumelée installée sur la machine. Sélectionner un autre point ou coudre avec une seule aiguille. La touche d’allongement a été actionnée après avoir sélectionné un point qu’il n’est pas possible d’allonger.
Warnhinweise Im Falle von Funktionsproblemen, gibt die Maschine drei Pieptöne von sich. Auf dem Bildschirm erscheint eine der nachstehenden Meldungen. Anzeige Grund Der Schalter ist eingeschaltet, wenn auf den Fußanlasser getreten wird. Behebung Nehmen Sie den Fuß vom Fußanlasser. Der Schalter ist eingeschaltet, wenn die Nadel herabgesenkt ist. Drücken Sie die Taste zum Hochstellen / Senken der Nadel. (A) (A): Die Maschine wird gestartet, ohne dass der Nähfuß gesenkt ist.
Anzeige Grund Behebung Die Maschine näht nicht mit der Start-/Stopptaste, denn der Fußanlasser ist anschlossen. Nehmen Sie den Fußanlasser ab. Die Zwillingsnadeltaste wurde nach Auswahl eines Stiches gedrückt, der nicht mit einer eingelegten Zwillingsnadel kompatibel ist. Wählen Sie einen anderen Stich oder nähen Sie mit einer Einzelnadel. Die Dehnungstaste wurde gedrückt, nachdem ein Stich ausgewählt wurde, der nicht gedehnt werden kann.
Troubleshooting Condition Cause Needle thread breaks 1. 2. 3. 4. 5. See page(s) The needle is not threaded properly. The needle thread tension is too tight. The needle is bent or blunt. The needle is not inserted correctly. The needle thread and bobbin thread are not properly under (drawn to the back of) the presser foot when starting to sew. 6. The fabric is not moved to the back when sewing is finished. 7. The thread is either too heavy or too fine for the needle. 8.
Résolution des problèmes Cause Anomalie Le fil d’aiguille casse. 1. 2. 3. 4. 5. L’aiguille n’est pas correctement enfilée. Le fil d’aiguille est trop tendu. L’aiguille est tordue ou émoussée. L’aiguille est mal insérée. Le fil de l’aiguille et le fil de la canette ne sont pas correctement placés sous le pied presseur (tirés vers l’arrière du pied presseur) au début de la couture. 6. Le tissu n'est pas tiré vers l'arrière une fois la couture terminée. 7. Le fil est trop épais ou trop fin pour l’aiguille.
Problemlösungen Ursache Problem Oberfaden reißt 1. 2. 3. 4. 5. Nadel nicht richtig eingefädelt. Oberfadenspannung zu stark. Nadel verbogen oder stumpf. Nadel nicht richtig eingesetzt. Ober- und Unterfaden bei Nähbeginn nicht unter Nähfuß gelegt (nicht zur Rückseite des Nähfußes gezogen). 6. Stoff wurde nach Abschluss des Nähens nicht nach hinten gezogen. 7. Faden zu dick oder dünn für die Nadel. 8. Faden um die Spule verheddert. Unterfaden reißt 1. Unterfaden falsch in Spulenhalter gefädelt. 2.
INDEX A Accessories .......................................................... 4, 172 Accessory Definitions ................................................ 6-8 Accessory Storage ....................................................... 4 Alignment of Stitches within a Sequence ................. 160 Alphabets .......................................................... 154, 170 Angle Lines ............................................................... 118 Appliqué ..............................................
N Needle Plate ................................................... 2, 4, 8, 36 Needle Position ................................................ 16, 18, 62 Needle Threader ...................................................... 2, 56 Needles .................................................. 42-44, 132, 142 Numbers/Letters ................................................ 154, 170 O Optional Accessories ................................................. 172 Overcast Stitch ......................................
INDEX 0~9 1/4 pouces ............................................................. 5, 9, 119 A Accessoires ............................................................... 5, 173 Accessoires en option ................................................... 173 Aiguille ........................................................ 43-45, 133, 143 Aiguille à ailettes ............................................................ 133 Aiguille jumelée ..........................................
N Nettoyage ............................................................... 167-169 Numéros/Caractères ............................................. 155, 171 O Ourlets ...................................................................... 75, 83 P Passementerie gansée .................................................. 141 Patchwork ...................................................................... 127 Pâquerette ..................................................................... 133 Pédale ...........
INDEX A Abdeckplatte ............................................................... 3, 167 Abfolge mit einfacher Wiederholung ............................... 149 Änderung ........................................................................ 157 Annähen von Knöpfen ..................................................... 105 Anschluss der Maschine an den Netzstrom ...................... 15 Applikation ................................................................ 79, 125 Aufrufen des Speichers ...........
Rollsaum ........................................................................... 75 Rückwärtstaste ............................................................. 3, 17 Rundes Knopfloch ....................................................... 85, 91 Rüschen ........................................................ 9, 69, 137, 141 S Säume ........................................................................ 75, 83 Saumstich .......................................................................
Elna International Corp.SA Geneva, Switzerland www.elna.