Elo Entuitive Touchmonitor User Guide 17" LCD Desktop Touchmonitor 1725L Series Revision A P/N 008541 Elo TouchSystems, Inc. 1-800-ELOTOUCH www.elotouch.
Copyright © 2001 Elo TouchSystems Inc. All Rights Reserved. No part of this publication may be reproduced, transmitted, transcribed, stored in a retrieval system, or translated into any language or computer language, in any form or by any means, including, but not limited to, electronic, magnetic, optical, chemical, manual, or otherwise without prior written permission of Elo TouchSystems. Disclaimer The information in this document is subject to change without notice.
ii
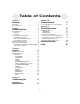
Table of Contents Chapter 1 Appendix B Introduction 1 Touchmonitor Safety 21 Precautions . . . . . . . . . . . . . . . . . . . . 1 About the Product . . . . . . . . . . . . . . . . . 1 Care and Handling of Your Touchmonitor. . . . 23 Chapter 2 Technical Specifications Installation and Setup Appendix C 3 Compatibility Modes . . . . . . . . . . . . VESA Modes . . . . . . . . . . . . . . Display Timing . . . . . . . . . . . . . . Touchmonitor Specifications . . . . . . . .
iv
C H A P T E R 1 INTRODUCTION CHAPTER 1 Congratulations on your purchase of an Elo TouchSystems Entuitive LCD desktop touchmonitor. Your new high-resolution industrial touchmonitor combines the reliable performance of Elo’s touch technology with the latest advances in LCD display design. This combination of features creates a natural flow of information between you and your touchmonitor.
• Plug & Play • High quality full screen re-scaling • VESA DDC 1/2B data communication • VESA DPMS power saving • Worldwide agency approvals that include UL, CUL, TÜV- Bauart, FCC, CE, C-Tick, VCCI • IntelliTouch or AccuTouch Technology For full Product Specifications refer to Appendix C.
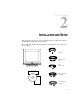
C H A P T E R 2 INSTALLATION AND SETUP CHAPTER2 This chapter discusses how to setup your LCD desktop touchmonitor and how to install Elo TouchSystems driver software. Please make sure that the following items are included in the carton and are in good condition.
Product Overview Main Unit LCD Display Rear View 2-4 Elo Entuitive Touchmonitor User Guide
Connecting Your Touchmonitor Before connecting the cables to your touchmonitor and computer, be sure that the touchmonitor and computer are off. Video cable Serial touchscreen cable Brick power supply Female 9-pin Serial touchscreen connector Female 15-pin video connector Monitor power cable (US/Canada) Power European monitor power cable Connections on underside Figure 2.
Video Cable Connection Connections on underside Female 15-pin video connector Video cable Video port Ferrite bead 1 Set the touchmonitor on a solid horizontal surface, such as a table or desk. 2 Connect the female end of the video cable connector to the back of the LCD monitor, and connect the other end to the back of the computer. 3 Secure the cable to your touchmonitor and computer by tightening the screws on the connector clockwise.
Touchscreen Cable Connection Connections on underside Female 9-pin serial touchscreen connector Serial touchscreen cable 1 Connect the female end of the 9-pin touchscreen cable to the serial port on the back of your computer. 2 Connect the male end of the cable to the serial touchscreen connector on your touchmonitor. 3 Secure the cable to your touchmonitor and computer by tightening the screws on the connector clockwise.
Power Cable Connection Connections on underside Brick power cable port Serial touchscreen cable Brick power supply Power cable 1 Depending on where you live, you will use either the European or US/Canadian power cable. Connect the female end of the power cable to the Brick power supply. 2 Connect the Brick power supply into the power port on the touchmonitor.
Video Input Pin Assignment This section describes the pin assignment of the LCD’s 15 Pin Mini D-sub (video cable) connector. Pin No. Signal Connector 1 2 3 4 5 6 7 8 9 10 11 12 13 14 15 Red Video Signal Green Video Signal Blue Video Signal N.C. Ground Ground for red video signal Ground for green video signal Ground for blue video signal N.C. Ground N.C.
Installing the Driver Software Elo TouchSystems provides driver software that allows your touchmonitor to work with your computer. Drivers are located on the enclosed CD-ROM for the following operating systems: • Windows 2000 • Windows Me • Windows 98 • Windows 95 • Windows NT 4.0 Additional drivers and driver information for other operating systems (including MS DOS, Windows 3.x, OS/2, Macintosh and Linux) are available on the Elo TouchSystems web site at www.elotouch.com.
C H A P T E R 3 OPERATION CHAPTER3 Variations in video output and application will likely require you to adjust your touchmonitor to optimize the quality of the display. For best performance, your monitor should be operating in native resolution; that is, 1280 x 1024 at 75 Hz. Use the Display control panel in Windows to choose 1280 x 1024 resolution. Operating in other resolutions will degrade video performance. For further information, please refer to Appendix A.
Touchmonitor Controls All adjustments are made using the on-screen display (OSD) controls. Figure 3.1 Touchmonitor Controls Control Function Power Press the power key to turn the monitor on. Press it again to turn the monitor off. Enable or disable the OSD adjustment menu. Move from the submenu back to the previous menu. To select the adjustment items from the OSD menu. Menu Select Adjust Adjust Power LED 3-12 To scroll up in the menu or to increase the value of the selected item.
Screen Adjustments The setting switches are normally in stand-by mode. 1 Push the MENU button once to display the main menu of the screen adjustment. The adjustable items will be displayed in the main menu. 2 Use the ADJUST and ADJUST buttons to select the desired setting icon. 3 Push the SELECT button to enter the sub-menu. 4 Once the sub-menu appears, use the ADJUST and ADJUST buttons to change the setting values. 5 After making the adjustment, push the SELECT button to memorize the setting.
H-POSITION H-Position is used to adjust the horizontal image position. A slider with the current value is displayed. V-POSITION V-Position is used to adjust the vertical image position manually. A slider with the current value is displayed. CLOCK Reduce vertical stripes in the screen image. PHASE Reduce horizontal stripes in the screen image. AUTO CONFIG Adjustment This function will automatically set the parameters of PHASE, CLOCK, H-POSITION, and V-POSITION.
Use the ADJUST and ADJUST key to scroll up and down in menu, then press the SELECT key to start this function. If the MENU key is pressed, the main menu is re-displayed and no changes have been made. Control Function AUTO ADJUST Used to perform automatic configuration of the phase, clock, vertical, and horizontal positioning. It can tune the clock & phase to the best condition automatically. AUTO TRACKING AUTO POSITION AUTO COLOR RETURN It is used to center the image automatically.
OSD ADJUST Control Function OSD H POSITION OSD V POSITION OSD BLENDING RETURN Used to setup the OSD menu H position. Used to setup the OSD menu V position. Adjusts the blending of the OSD menu. Return to the Main menu. CONTRAST Contrast allows you to adjust the difference between black and white shades for image sharpness. BRIGHTNESS Allows you to set the brightness of the panel. EXIT Exit the OSD functions.
C H A P T E R 4 TROUBLESHOOTING TIPS CHAPTER4 If you are experiencing trouble with your touchmonitor, refer to the following table. If the problem persists, please contact your reseller or our technical support at 1-800-557-1458.
Problem Suggestion(s) No image appears on screen. Check that the video cable and power connectors are properly connected as described in Chapter 2. Make sure the pins of the connectors are not crooked or broken. Check that power switch of the touchmonitor has been pressed and LED on the front of touchmonitor is lit. Test the power supply by trying different cables, or a different wall outlet or plug another appliance into the outlet.
A P P E N D I X A NATIVE RESOLUTION CHAPTER4 The native resolution of a monitor is the resolution at which the LCD panel is designed to perform best. In almost all cases, screen images look best when viewed at their native resolution. You can lower the resolution setting of a monitor but not increase it. For the Elo LCD touchmonitor, SXGA-17 inch, the native resolution is 1280 x 1024.
For example, a SVGA resolution LCD panel displays 800 pixels horizontally and 600 pixels vertically. Input video is also represented by the same terms. XGA input video has a format of 1280 pixels horizontally by 1024 pixels vertically. When the input pixels contained in the video input format match the native resolution of the panel, there is a one-to-one correspondence of mapping of input video pixels to LCD pixels.
A P P E N D I X B TOUCHMONITOR SAFETY CHAPTER 4 This manual contains information that is important for the proper setup and maintenance of your touchmonitor. Before setting up and powering on your new touchmonitor, read through this manual, especially Chapter 2 (Installation), and Chapter 3 (Operation). &$87,21 5,6. 2) (/(&75,& 6+2&.
3 This display should be installed on a solid horizontal base. 4 Adequate ventilation must be maintained to ensure reliable and continued operation and to protect the display from overheating. Do not block ventilation slots and openings with objects or install the display in a place where ventilation may be hindered. 5 This display should be operated from the type of power source indicated on the AC/DC adapter. 6 Do not install this display near a motor or transformer where strong magnetism is generated.
Care and Handling of Your Touchmonitor The following tips will help keep your Elo Entuitive touchmonitor functioning at the optimal level. • To avoid risk of electric shock, do not disassemble the brick supply or display unit cabinet. The unit is not user serviceable. Remember to unplug the display unit from the power outlet before cleaning. • Do not use alcohol (methyl, ethyl or isopropyl) or any strong dissolvent. Do not use thinner or benzene, abrasive cleaners or compressed air.
B-24 Elo Entuitive Touchmonitor User Guide
A P P E N D I X C TECHNICAL SPECIFICATIONS CHAPTER4 Compatibility Modes Your Elo Entuitive touchmonitor is compatible with the following standard video modes. All specifications are typical and subject to change. VESA Modes Horizontal Vertical Mode Resolution Total Nominal Freq. +/- 0.5 kHz Nominal Freq. +/- 1 Hz Nominal Pixel Clock (MHz) DOS VGA 720 x 400@70Hz 900 x 449 31.469 70.087 28.322 640 x 480@60Hz 800 x 525 31.469 59.940 25.175 640 x 480@72Hz 832 x 520 37.861 72.809 31.
Display Timing IBM MODES Mode Resolution Total Horizontal Nominal Freq. +/- 0.5 kHz Vertical Nominal Freq. +/- 1 Hz Nominal Pixel Clock (MHz) EGA CGA DOS VGA XGA 640 x 350@70Hz 800 x 449 31.469 70.086 25.175 640 x 400@70Hz 800 x 449 31.469 70.086 25.175 720 x 400@70Hz 900 x 449 31.469 70.087 28.322 640 x 480@60Hz 800 x 525 31.469 59.940 25.175 1024 x 768@72Hz 1304 x 798 57.515 72.1 75.000 MAC MODES Mode Resolution Total Horizontal Nominal Freq. +/- 0.
Touchmonitor Specifications Display Type 17” TFT Resolution SXGA 1280 x 1024 Max. Pixel dimension 0.264 mm (H) x 0.264 mm (V) LCD display color 16.7M Colors max. OSD controls Manual controls H/V Position, Clock, Phase, Auto Config, Input, Information, Recall, Sharpness, Color, OSD Adjust, Contrast, Brightness, Exit Menu, Select, Adjust (3,4), Power. Viewing angle H: ± 60× max. V: ± 60× max. Tilt +30°, -5° Contrast ratio 400:1Typ.
AccuTouch Touchscreen Specifications Mechanical Positional Accuracy Touchpoint Density Touch Activation Force Surface Durability Expected Life Performance Sealing Standard deviation of error is less than 0.080 in. (2.03 mm). Equates to less than ±1%. More than 100,000 touchpoints/in2 (15,500 touchpoints/cm2). Typically less than 4 ounces (113 grams). Surface durability is that of glass, Mohs’ hardness rating of 7.
IntelliTouch Touchscreen Specifications Mechanical Positional Accuracy Touchpoint Density Touch Activation Force Surface Durability Expected Life Performance Sealing Standard deviation of error is less than 0.080 in. (2.03 mm). Equates to less than ±1%. More than 100,000 touchpoints/in2 (15,500 touchpoints/cm2). Typically less than 3 ounces (85 grams). Surface durability is that of glass, Mohs’ hardness rating of 7. No known wear-out mechanism, as there are no layers, coatings, or moving parts.
17" LCD Desktop Touchmonitor (ET1725L-XSWA-1) Dimensions NOTE: C-30 Dimensions in millimeters [inches] Elo Entuitive Touchmonitor User Guide
REGULATORY INFORMATION CHAPTER4 I. Electrical Safety Information: A) Compliance is required with respect to the voltage, frequency, and current requirements indicated on the manufacturer’s label. Connection to a different power source than those specified herein will likely result in improper operation, damage to the equipment or pose a fire hazard if the limitations are not followed. B) There are no operator serviceable parts inside this equipment.
This equipment has been tested to the requirements for the CE Mark as required by EMC Directive 89/336/EEC indicated in European Standard EN 55 022 Class B and the Low Voltage Directive 73/23/EEC as indicated in European Standard EN 60 950. D) General Information to all Users: This equipment generates, uses and can radiate radio frequency energy. If not installed and used according to this manual the equipment may cause interference with radio and television communications.
33
34 Elo Entuitive Touchmonitor User Guide
INDEX A I About the Product, 1 AccuTouch Touchscreen Specifications, 28 AUTO ADJUST, 15 AUTO COLOR, 15 AUTO CONFIG Adjustment, 14 AUTO POSITION, 15 AUTO TRACKING, 15 IBM MODES, 26 Installation and Setup, 3 Installing the Driver Software, 10 Installing the Touch Driver for Windows 2000, Me, 95/98 and NT 4.
S Screen Adjustments, 13 Sealing, Accutouch, 28 Sealing, IntelliTouch, 29 Select, 12 SHARPNESS, 15 Surface Durability, AccuTouch, 28 Surface Durability, IntelliTouch, 29 SVGA, 19, 25 SVGA, Mac Mode, 26 SXGA, 25 SYSTEM INFORMATION, 15 T Technical Specifications, 25 Touch Activation Force, AccuTouch, 28 Touch Activation Force, IntelliTouch, 29 Touchmonitor Controls, 12 Touchmonitor Safety, 21 Touchmonitor Specifications, 27 Touchpoint Density, AccuTouch, 28 Touchpoint Density, IntelliTouch, 29 Touchscreen C