INTERNET TABLET User Manual version 1.5 www.elocitynow.
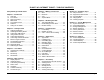
ELOCITY A7+ INTERNET TABLET – TABLE OF CONTENTS Safety Warnings & Notifications Chapter 1 – Introduction 1.1 Overview ……………………………....1 1.2 Front Panel …………………………….1 1.3 Right / Left Panel ……………………...1 1.4 Back Panel …………………………….1 1.5 Top / Bottom Panel ……………………2 1.6 Features ………………………………..2 1.7 Caring for the Tablet ………………….2 Chapter 2 – Getting Started 2.1 Charging the Battery …………………..2 2.2 Checking the Battery Status ………….3 2.3 Connecting USB Devices …………….3 2.4 Using a Micro SD card ………………..4 2.
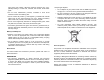
Safety Instructions Use the following safety guidelines to help protect yourself and your Tablet. General Warnings • Do not operate your Tablet for long periods of time while it has direct contact with your body or other surface that might completely cover the bottom of the unit. This may cause overheating. • Do not attempt to disassemble the Tablet yourself. Always follow installation instructions closely.
high current and voltage, abnormal chemical reactions may occur, possibly leading it to leak acid, overheat, emit smoke, burst and/or ignite. • Do not crush, disassemble, puncture, incinerate or short circuit external contacts of the battery pack. • Do not connect the positive (+) and negative (-) terminals with a metal object such as wire. Short-circuiting may occur, leading the battery pack to leak acid, overheat, emit smoke, burst and/or ignite.
Federal Communications Commission (FCC) Statement Operating System Notice You are cautioned that changes or modifications not expressly approved by the party responsible for compliance could void the user’s authority to operate the equipment. This A7+ unit ships with the Android 2.2 "Froyo" operating system preinstalled. The OS software cannot be upgraded. Stream TV Networks provides regular firmware updates on its website at www.elocitynow.com.
Chapter 1 – Introduction 1.1 Overview 1.2 Front Panel 1.3 Right / Left Panel 1.4 Back Panel 1.5 Top / Bottom Panel 1.6 Features 1.7 Caring for the Tablet 1.3 Right / Left Panel 1.1 Overview Congratulations on the purchase of your new advanced Tablet. You’re about to discover so many things about your Tablet that will help you maximize the experience of its usage.
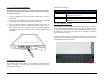
1.5 Top / Bottom Panel Chapter 2 – Getting Started 2.1 Charging the Battery 2.2 Checking the Battery Status 2.3 Connecting USB Devices 2.4 Using a Micro SD card 2.5 Connecting Earphones 2.6 Connecting an External Monitor 2.7 Mouse / Finger Functions 2.8 The Software Keyboard 2.9 The Power Switch 2.10 Suspense Mode 2.11 Rebooting the Tablet 1.6 Features The Tablet is optimized for rich internet and entertainment experiences as well as daily business and productivity needs.
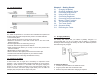
Battery Charging Time 2.3 Connecting USB Devices It takes approximately 3.5 hours to fully charge the battery while the power is off. With the USB 2.0 host port, you can connect USB flash drives to your Tablet to access external files. The Tablet supports drives up to 64GB in size. Please note that some older USB 1.1 devices may have compatibility issues. 2.
Plug and Play Devices To Remove a Micro SD Card A Plug and Play (PnP) device does not require installation or drivers after being connected. Plug the device, then “play” or use it at once. You can remove the PnP device from the Tablet at any time. 1. Before removing the Micro SD Card, you should unmount it. 2.4 Using a Micro SD Card The Tablet supports Micro SD cards up to 32GB in size. The cards must be formatted in FAT16 or FAT32. NTSF format is not supported.
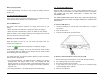
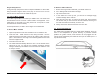
2.6 Connecting an External Monitor Mouse/Finger Functions: Even though the screen resolution of the Tablet is 1024x600, the Tablet is capable of playing back true 1080p HD video through the HDMI output to an external monitor. Finger Single-tap Tap and hold 1. Locate the HDMI port on the left side of the Tablet (see “1.3 Right / Left Panel”). Drag Flick 2. Plug one end of a standard full-size HDMI cable into the Tablet and the other into the HDMI input port of the external monitor. 3.
2.9 The Power Switch 2.10 Suspense Mode The Power Switch is located on the left side panel of the Tablet. It is used to power on/off the Tablet. To conserve battery power, your Tablet will automatically enter Suspense Mode if there is no activity for a defined period of time (see 4.1 Display Options to see how to change Screen Timeout).
Chapter 3 – Your Tablet 3.1 Home Screen / Desktop 3.2 Status Bar 3.3 Smart Keys 3.4 Smart Menu 3.2 Status Bar The Status Bar appears as a thin white band across the top of the Tablet Screen. A variety of small icons indicates relevant information at a glance: current time, alarm clock, battery status, Wi-Fi status, Bluetooth Status and more. Icons Description 3.
3.3 Smart Keys 3.4 Smart Menu The Smart Keys are located on the black bezel, just to the right side of the front Tablet screen.
2. Tap this to open the Gallery. You can watch videos, browse pictures or take photos by pressing the camera icon on the top right corner as shown below. 3. 4. Tap this to open the Web Browser. You can browse the web by typing in the web address at the top of the screen (see Chapter 6 for details). Tap this to display the Master List of Apps. You can browse the list and choose the app you need by tapping the icon. A7+ Internet Tablet – User Manual v1.5 5. Tap this to open the Email utility.
Chapter 4 – Basic Settings 4.1 Display Options 4.2 Volume & Sound 4.3 Customizing the Desktop 4.4 Date & Time 4.5 Language 4.6 Location & Security 4.7 Accounts & Sync 2. Launch Settings>Display>Brightness and adjust the slider bar. 4.1 Display Options The A7+ offers easy flexibility in setting the screen brightness level, animation options and screen timeout settings.
Changing the Animation Preferences 4.2 Volume & Sound To set your preferences for what animations are displayed on the Tablet, launch Settings>Display>Animation and make your selection from the popup menu as shown below. The Tablet has user-defined audio settings that include ringtones, silent mode (vibrate), and separate volume options for media, alarm and notifications. To access these settings, launch Settings>Sound.
To adjust separate volume levels for media, alarm and notifications separately, launch Settings>Sound>Volume. In the popup menu as shown below, set the sliders to the desired levels. Notification Ringtones Although the Tablet is not a phone, you can select a ringtone to be used for audible notifications. Launch Settings>Sound>Notification ringtone and make your selection. Selecting Silent Mode To put the Tablet into Silent mode, launch Settings>Sound and tap the check box as shown below.
4.3 Customizing the Desktop The Tablet desktop is fully customizable, allowing you to select the desktop wallpaper and add shortcuts for widgets, folders and apps. 2. As shown below, the Select wallpaper from menu will pop up, allowing you to choose the source of your new wallpaper: Gallery (for images you have imported), Live wallpapers (for animated background that are attractive but consume more battery power) or Wallpaper (for non-moving pre-loaded images).
If you want to select a static background, choose Wallpapers from the Select wallpaper from menu and you will see a variety of still images to choose from. Move the scroll through the bar near the bottom until the image you want is shown big at the top. Press the Set wallpaper button at the bottom to make your selection. Organizing and Removing Shortcuts If you want to organize the shortcuts on a page, you can rearrange them easily.
2. Tap on the widget you want, and it will be added to the desktop. 2. Tap the kind of folder you want, and it will be added to the desktop. Adding Folders To help you stay organized, you can also add Folders to your desktop pages: 1. Tap and hold a blank spot on the Home Screen to bring up the Add to Home screen popup menu, then select Folders A7+ Internet Tablet – User Manual v1.5 4.4 Date and Time To Open the Date and Time Application Launch Settings>Date and time to see the master menu.
To Set the Time If you would like to have the time automatically updated, go to Settings>Time and date. You must select your time zone, but the time zone selector will be greyed out unless you uncheck the box for Automatic at the top. If there is a green check, tap the box to uncheck it. Then tap Select time zone and scroll through the list to find your time zone. To manually set the time, make sure the box for Automatic is not checked, then tap Set time.
To Set the Date 4.5 Language Launch Settings>Time and date>Set date to access the adjustable popup window. Using the +/- buttons, you can adjust the month, day and year as desired, then tap Set. The Tablet has a default language of English, but there are more than 20 additional languages to choose from. If you would like to change the language, launch Settings>Language and keyboard>Select language. Displays the year.
User Dictionary My Location Launch Settings>Language & Keyboard>User dictionary to access your user-defined dictionary. When you open it the first time, there are no words in it. To add words, tap the Menu Smart Key on the black bezel and an Add button will appear at the bottom of the screen. Tap Add to get in Add to dictionary field as shown below. Type in the word you want to add, then select OK to save the addition.
2. Enter a PIN number with at least 4 numbers, then tap OK at the bottom. 3. Draw your own personal unlock pattern. Do not tap the dots; you must drag your finger from one to the next so that you are drawing one long line that passes through at least 4 dots. 3. Enter your PIN number again to confirm it, then tap OK. 4. If you are not happy with the pattern, tap Retry on the left and draw again. If you like the pattern, tap Continue on the left. Creating a Password 5.
Credential Storage Background Data Your Tablet allows applications to access secure certificates and other credentials. To enable this, you must enter a password (at least 8 characters). Enter the password twice for confirmation, then tap OK. The Tablet is set with a default that allows applications to sync data in the background while you are engaged in other activities. By tapping the check box next to Use secure credentials, you activate this feature.
Chapter 5 – Making a Connection 5.1 Wi-Fi 5.2 Bluetooth 5.3 VPN 5.4 Airplane Mode Wireless Connection Settings The internet is a gateway for knowledge, entertainment and business. Practically every piece of information you want to know can be found there. The Tablet features wireless connection for your internet needs. Use Wi-Fi when you are in range of a hotspot.
5. After a Wi-Fi connection is made, the Wireless signal will appear on the Status Bar and the network status will indicate Connected. not support printers, scanners, bar code readers or most other peripheral devices even though the Tablet will detect and “pair” with such devices. The necessary “connection” can only be made with proper drivers.
5.3 VPN Launch Settings>Wireless & networks and tap VPN settings to set up and manage Virtual Private Networks (VPN’s). Tap Add VPN to add a PPTP, L2TP, L2TP/IPSec PSK or L2TP/IPSec CRT network. Chapter 6 – Browsing the Web 6.1 The Default Browser 6.2 Bookmarking Favorite Sites 6.3 Browser History Use your Tablet to make internet connections and the web browser opens the entire online world for you. To access the internet, your Tablet must be setup properly (see Chapter 5 Making a Connection). 6.
5. Type the address of the site you want to visit, then tap Go. It’s that simple. With the Tegra 2 process and Flash 10.3 pre-installed, you’ll reach your destination with lightning speed and watch web video with quality normally reserved for high-end desktop computers. 4. Tap the Add button, then edit the top data field in the popup screen to name the page whatever you like.
6.2 Browser History Most Visited Pages The Browser keep track of the pages you visit most often, and you can easily review and return to a popular page even if you have not bookmarked it. 1. Tap Chapter 7 – Communication 7.1 E-mail Setup 7.2 Multiple Accounts 7.3 VoIP – Internet Phone Calling to open the bookmark window. 2. Tap the Most visited tab at the top of the screen to display a list of pages you’ve been to most often.
2. Enter your email address and password in the data fields, then press the Manual setup button at the lower left. Security pull-down menu: Mail deletion pull-down menu: 3. Choose POP3, IMAP or Exchange depending on the type of mail server you have. 4. Enter the information for your incoming mail server – username, password, server name, port # (if applicable), security type (if applicable), and how often you want the mail removed from the server.
6. Enter the information for your outgoing mail server – server name, port # (if applicable), security type (if applicable), username, and password. Make sure you check/uncheck the box depending on whether or not your outgoing server requires sign-in. 8. If the outgoing server check is good, you will be asked how often the Tablet should check for mail, whether this account should be the default account, and whether you want notifications when new mail arrives.
At the account level, you can see your main Inbox as well as a Combined Inbox (but since there is only a single account, the contents are the same). To add an additional email account, go to the Combined Inbox, then tap the Menu Smart Key on the black bezel to get the popup menu at the bottom. Select Add account. From here you can compose, refresh or add additional accounts. Follow all steps in Chapter 7.1. When you are done, you can see both email accounts.
Chapter 8 – Applications 8.1 App Stores 8.2 Installing Apps 8.3 Uninstalling Apps 8.4 Managing Apps 8.5 Notifications 8.6 Camera 8.7 Sound Recorder 8.8 Contact Manager 8.9 OI File Manager 8.10 Calculator 8.11 Alarm Clock 8.12 Aldiko e-Book Reader 1. Launch Settings>Applications. 2. Tap Unknown sources at the top to allow installation of non-Android Market apps. 3. This will bring up a warning screen informing you that third party apps may make your Tablet vulnerable to attack.
Downloading Applications Directly to the Tablet You can access thousands of apps at Stores like Appoke, Getjar, Soc.io Mall and other third party sites. 1. Use the web browser to visit the download location, then find the appropriate download link. In the upper left corner of the Status Bar you will see an animated down arrow icon indicating the download is in progress. When the arrow stops its animation and becomes solid white, the download is complete. 5.
8.3 Uninstalling Apps 8.5 Developing Apps Removing applications can be done very simply in just a few steps: The A7+ has some system tools to assist app developers. Launch Settings>Applications>Development to access the following screen: 1. Launch Settings>Applications>Manage applications. 2. A list of currently installed applications will be displayed. Select the application you wish to uninstall and tap it. 3. Application info will be displayed, including program version and disk usage.
8.7 Camera Still Photo Settings Your Tablet comes with a built-in front-facing webcam for taking photos and recording video clips. There is no rear-facing camera on the A7+. The Camera app offers several settings that can be adjusted for still photo capture, including exposure, picture quality, white balance and zoom. On the right edge of the picture area are 3 small icons that open groups of options to select from: Activating the Camera There are three ways to activate the camera: 1.
Recording a Video Clip Video Camera Settings Toggle the camera from photo mode to video mode by sliding the selector switch on the right. The Camera app offers some settings that can be adjusted for video recording, including color effect, white balance and video quality. On the right edge of the picture area are 3 small icons that open groups of options to select from: 1. Focus your camera on the subject you want to record. 2. Tap the record button at the bottom right to begin recording. 3.
8.8 Sound Recorder To Play Back a Recording The Sound Recorder allows you to record your voice. Use the Music Player app for playback of recorded voice clips (see Chapter 10). Activating the Sound Recorder 8.9 Contact Manager There are two ways to activate the sound recorder: 1. Tap the Master Apps key on the Smart Menu shortcut for the Sound Recorder app. then tap the 2. Add a shortcut to the desktop for the Sound Recorder app (see Chapter 4.
Press the New Contact button to open the data entry screen for a new contact. Tapping the data fields will open the virtual keyboard so you can type in the information. 8.10 OI File Manager The OI File Manager works like Windows Explorer or the Mac Finder, allowing you to you browse and manage the contents of your Tablet. Activating the File Manager There are two ways to activate the File Manger: 3. Tap the Master Apps key on the Smart Menu shortcut for the File Manager app. then tap the 4.
Managing Files The standard functions are the same as any basic calculator, but if you swipe the screen to the right, there are additional mathematical options. You can use the File Manager to Send, Move, Copy, Rename or Delete files. Just browse through your folders until the file you want to work with, then press and hold the file until a popup menu appears. 8.12 Alarm Clock The File Manager is optimized for working with individual files but has limitations for working with folders.
Tap Add Alarm to input additional alarm settings. After inputting the hour and minute settings for the new alarm, you will see a screen that allows you to set On/Off, Repeat, Ringtone and Vibrate functions. The Bookshelf The bookshelf gives a visual representation of the books in your library (you can also get a list view by tapping the home icon in the left corner and selecting List View).
¾ When you stop reading, the application will remember which page you were reading and bring you right back to that page the next time you open the book. ¾ Some books include links embedded in the text. Select a link by long pressing and holding the link. If the link is a webpage, it will open in your browser. If the link points to another book, that book will download and import into your library. ¾ From any screen, you can quickly get back to the home screen by selecting the Home menu option.
Additional Settings As shown below, another button on the popup submenu at the bottom allows you to adjust several additional settings: font size, margins, colors, text alignment, line spacing and screen timeout. Chapter 9 – The Gallery 9.1 Supported Photo & Video Formats 9.2 Viewing Photos 9.3 Editing Photos 9.4 Sharing Photos 9.4 Deleting Photos 9.5 Viewing Video Clips 9.1 Supported Photo & Video Formats The Tablet supports 4 photo file formats: JPEG, BMP, GIF and PNG.
Tapping on a folder group will open that folder to display thumbnails of the individual photos: 9.4 Sharing Photos The bottom menu has an option to Share your photos. Facebook, Bluetooth and Twitter are default options, and if you have set up your Tablet with an email account (see Chapter 7) there is also an option to share via email.
9.6 Viewing Video Clips When you open the Gallery, you will see a folder of Video Clips in addition to the various photo folders. Tap the Video Clips folder to display thumbnail images of the video clips. Chapter 10 – The Music Player 10.1 Player Features 10.2 Supported Audio Formats 10.3 Importing Music 10.4 Playing Music 10.5 Creating Playlists 10.
In addition to viewing songs by Artist, you can view them by Album: Tapping the Album title above reveals a detailed screen that shows the song titles and running times for all tracks within the album. Or you can view them by Song Title: Tapping a song title above reveals a detailed screen that shows the song titles and running times for all tracks within the album. A7+ Internet Tablet – User Manual v1.
10.4 Playing Music Once you navigate down to an individual song, you will see the player control panel. Just tap on the play button to begin. Note: you can also automatically launch the Music Player and begin playing a song by tapping it in OI File Manager or other explorer app that allows you to access individual files. If you don’t want to navigate down to a specific song, you can tap the Menu Smart Key on the black bezel to reveal a menu at the bottom that allows for Party Shuffle or Shuffle All.
If you are building a new playlist, tap New; if you are adding to a playlist you are currently building, tap Current Playlist. Tap on the name of the playlist to reveal all songs that are included. If you are creating a new playlist, give it a name. Press and hold any of the song titles in the playlist to open a popup menu that allows you to play, remove from playlist, or delete completely.
Chapter 11 – System Management 11.1 System Information 11.2 Power Management 11.3 Storage Management 11.4 Backup & Restore 11.5 Factory Data Reset 11.6 Search Function 11.7 Firmware Updates 11.1 System Information To view key system information, launch Settings>About device. There you can access items such as System Updates, System Status, Battery use, Model number, Firmware version, Serial Number and more. 11.
11.4 Backup & Restore If you would like to backup or restore the data on your tablet, the Backup/Restore utility can be accessed by launching Settings>Privacy> Backup/restore settings and applications. Backing up Your Tablet To backup your Tablet, tap the top selection Backup settings and applications. The restore process will begin automatically and you will see a notification that reads, “System is doing restore settings and applications process. It may take a long time to finish.
A warning screen will inform you that all data will be erased. Tap the Reset device button to continue. Tap on Searchable items to determine which items shall be open to the search: A second warning asks you to confirm if you want to erase all of your personal information. Tap the Erase everything button to continue. Note: You can escape the reset procedure at any point by tapping the Previous Smart Key on the black bezel.
Note: Since the files stored in the Tablet may be deleted or overwritten during the update process (including the pre-installed movie trailers), please copy any files which you have stored in the Tablet before updating. Update Procedure Chapter 12 – Support 12.1 Product Registration 12.2 Technical Support 12.3 Limited Warranty 12.
12.4 Product Specifications Model Number Form Factor & Case CPU Graphics Operating System Memory Storage LCD Display Touch Screen Audio Communication Camera Keyboard I/O Ports A7‐004 Tablet Type NVIDIA® Tegra™ II T‐250, 1~1.2GHz, 1MB L2 Cache NVIDIA® ULP GeForce® Android™ 2.2 Froyo 512MB On‐Board Memory, Supports 1.