
User manual


A7+InternetTablet–UserManualv1.5 Page25
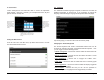
6.2 Browser History
Most Visited Pages
The Browser keep track of the pages you visit most often, and you can
easily review and return to a popular page even if you have not
bookmarked it.
1. Tap to open the bookmark window.
2. Tap the Most visited tab at the top of the screen to display a list of
pages you’ve been to most often.
3. Tap on any page in the list and you’ll be directed to that page right
away.
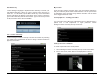
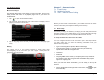
History
The History tool is a nice feature because it tracks page visits
chronologically, not by how often you visit a page. History lists are
grouped by days and weeks:
Chapter 7 – Communication
7.1 E-mail Setup
7.2 Multiple Accounts
7.3 VoIP – Internet Phone Calling
Before you start online communication, your Tablet must have an active
internet connection (see Chapter 5 Making a Connection).
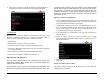
7.1 Email Setup
E-mail lets you enjoy the efficiency of staying in touch with personal and
business contacts. Your Tablet allows you to access webmail from large
providers like Gmail or your own POP and IMAP domain servers.
To Setup an Email Account for the First Time
You can configure Email for most accounts in just a few steps. Before
you start, make sure you have the following information from your
internet service provider:
¾ Type of Incoming Server (POP3, IMAP or Exchange)
¾ Incoming server name (i.e. pop.att.yahoo.com) as well as any
specific Port # and SSL encryption info
¾ Username
¾ Password
¾ Outgoing SMTP server name (i.e. smtp.att.yahoo.com) as well as
any specific Port #, SSL encryption info and whether they require
sign-in for outgoing mail
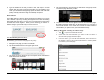
Once you have the above information, you are ready to set up the
account.
1. On the Smart Menu at the right side of the screen, Tap to open
the Email utility.