
User manual


A7+InternetTablet–UserManualv1.5 Page4
Plug and Play Devices
A Plug and Play (PnP) device does not require installation or drivers after
being connected. Plug the device, then “play” or use it at once. You can
remove the PnP device from the Tablet at any time.
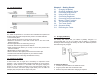
2.4 Using a Micro SD Card
The Tablet supports Micro SD cards up to 32GB in size. The cards must
be formatted in FAT16 or FAT32. NTSF format is not supported. If the
Tablet does not recognize your card, please use a computer to check
and reformat the card if necessary.
For best performance, a class 4 card or higher is recommended.
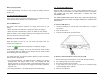
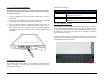
To Insert a Micro SD Card
1. Open the protective cover door and slide it over to reveal the slot.
2. Insert the card – metal contacts in first, facing the back – into the
small slot closest to the back of the unit by pushing until it clicks into
place. Note that there is a larger non-functioning SIM Card slot that
has been capped inside.
3. Close the card cover door.
4. The Tablet will automatically detect the card. On the left side of the
status bar on top, you will see the message “Preparing external
storage” followed by the addition of the SD Card icon when the card
is ready to access.
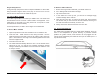
To Remove a Micro SD Card
1. Before removing the Micro SD Card, you should unmount it.
2. Go to Settings>SD card & device storage>
3. Tap Unmount SD card.
4. In the status bar at the top left, you will see a message saying
“External storage safe to remove”.
5. Open the slot cover door. To remove the micro card, push it deeper
into the slot until you hear a click as the lock releases, then let go of
the card and it will come half way out of the slot.
6. Gently remove the card and close the slot cover door.
2.5 Connecting Earphones
The Tablet comes equipped with two 0.5-watt stereo speakers, but if you
wish to use headphones for private listening or powered external
speakers for greater volume, these devices can be plugged into the
3.5mm stereo headphone jack located at the top of the Tablet (see “1.5
Top / Bottom Panel”).