Instruction Manual DV-153 DVD-Player Downloaded from www.Manualslib.
Content Content Safety Precautions Important Safety Instructions Caution Features Front and Rear Panel Connection to a TV Set Connection to an Analog AV Receiver Connection a Digital AV Receiver Remote Control Preparation Remote Control Remote Control Operation The Setup Menu MPEG4 and MP3 Playback USB Input and card reader Playing a JPEG file Troubleshooting Specifications 2 3 4 6 7 8 9 10 11 12 13 15 21 34 35 36 37 38 2 Downloaded from www.Manualslib.
Safety Precautions A triangle with a lightning symbol draws the user's attention to “dangerous voltage” without insulation in the housing which may be high enough to entail a risk of electric shock. A triangle with an exclamation mark draws the user's attention to important instructions for use and maintenance in the accompanying manual which should be studied. Symbol for Class II (double insulation). WARNING: TO MINIMISE THE RISK OF FIRE AND ELECTRIC SHOCK,DO NOT EXPOSE DEVICE TO RAIN OR MOISTURE.
Important Safety Instructions WARNING: IT IS IMPORTANT THAT YOU STUDY AND OBSERVE BOTH THE INSTRUCTIONS IN THIS MANUAL AND THE INSTRUCTIONS ON THE DEVICE. KEEP THIS MANUAL FOR FUTURE USE. This device was developed and made with a view to providing maximum safety for the user. Incorrect use of the device may cause electric shock or fire. The protection built into this device will protect the user if the procedure below is observed in connection with installation, use and repair.
Important Safety Instructions Lightning Unplug the device for additional protection during thunder or when the device is not used for prolonged periods. This will prevent damage to the device from lightning and surges. Discs Do not use scratched, deformed or repaired discs. Such discs will break easily and may cause serious injury and damage to the device.
Caution Handling instructions Condensation Condensation may occur in the following cases: The DVD player's top and back panel may become warm after prolonged use. This is not due to a defect. When the DVD player is moved directly from a cold to a warm place. When the DVD player is not used, remove the disc and turn off the device. When the DVD player is used in a room where the radiator has just been switched on or where the cold air from the air condition plant is directed at the device.
Features !Full compatibility with DIVX(MPEG4),DVD, CD, MP3, Kodak Picture CD, CDR and CD-R W ( f i n a l i z e d ) Multiple playback modes: Program, Search !Coaxial digital audio output !S-video, composite video and component (Y, Pb, Pr) video outputs Disc formats supported by this player: MPEG4 files on discs 9 Dolby Digital 32 KODAK picture CD 8 MP3 files on CD-R/CD-RW DVD video Multi-angle Subtitle choices Audio choices 16:9 LB TV Aspect Ratio modes R RESTRICTED Parental Lock This product
Front and Rear Panel 3 6 DV-153 ON OFF DVD-PLAYER 1 2 1 2 4 3 4 6 7 8 9 10 5 11 1 POWER 5 DISPLAY 9 STOP BUTTON 2 DVD TRAY 6 PLAY/PAUSE BUTTON 10 CARD READER 3 OPEN/CLOSE BUTTON 7 PREV BUTTON 4 IR RECEIVER 8 NEXT BUTTON DVD-PLAYER VIDEO Y Pb Pr S-VIDEO L R COAXIAL (Only in DV-252) 11 USB PORT MODEL: DV-153 POWER SOURCE: 110-240V 50~60Hz POWER CONSUMPTION: 15W 11032.01 ITEM NO.: SERIAL NO.
Connecting to a TV set SCART input NOTE: There are 4 ways of connecting the DVD player to a TV set: !Use a Scart cable !Use a S-VIDEO cable along with the stereo RCA outputs (Remember to set the video output to S-Video) !Use a Composite video cable along with the stereo RCA outputs !Use a Component video cable along with the stereo RCA outputs (Remember to set the video output to YPbPr) 9 Downloaded from www.Manualslib.
Connecting to an Analog AV amplifier (This function is only available in DV-251 and DV-252) YELLOW RED WHITE VIDEO VIDEO IN Amplifier VOLUME INPUT SELECTOR POWER BYPASS PRO LOGIC 3 STEREO MODE TEST CHANNEL KARAOKE MUTE UP DOWN BASS 1 MIC 2 1 MIC VOL 2 MIC TREBLE ECHO EXCITE DVD IN FRONT-R SUR-R SW FRONT-L SUR-L CENT Note: 1. Set the TV to the AV input connected to the DVD player. 2. Set the Amplifier to the AV input connected to the DVD player.
Connecting to a Digital AV amplifier Coaxial cable Coaxial Digital Amplifier VOLUME INPUT SELECTOR POWER BYPASS PRO LOGIC 3 STEREO MODE TEST CHANNEL KARAOKE MUTE UP DOWN BASS 1 MIC 2 1 MIC VOL 2 MIC TREBLE ECHO EXCITE Notes: 1. Set the SPDIF Audio out to Raw or PCM in the DVD players setup menu 2. Set the digital Amplifier to the coaixial input connected to the DVD player. 11 Downloaded from www.Manualslib.
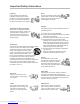
Remote Control Preparation Using the remote control Insert batteries 1 1. Open the cover. Point the remote control at the remote sensor. 2 2. Insert batteries.
Remote Control Remote Control for DV-153 AUDIO SUBTITLE OPEN/CLOSE STANDBY POWER SUBTITLE AUDIO OPEN/CLOSE TITLE ANGLE TITLE ANGLE MENU MENU PROGRAM SETUP MOVE( VOL+ VOL- PROG PLAY/PAUSE SETUP 0-10+ DIGITS FAST FORWARD FAST REVERSE PBC DISPLAY PLAY/PAUSE ENTER ENTER ) L/R INCREASE VOLUME DECREASE VOLUME STOP L/R 1 STOP 2 3 GOTO GOTO 4 5 6 10+ 7 8 9 0 REV FWD PREV NEXT PBC DISPLAY ZOOM SLOW MUTE A-B REPEAT VIDEO/ MODE PREVIOUS NEXT SLOW ZOOM VIDEO MODE MUTE
Remote Control Remote Control for DV-251 and DV-252 OPEN/CLOSE OPEN/CLOSE 0-10+ DIGITS SUBTITLE 1 2 3 4 5 6 SUBTITLE TITLE 7 SLOW 8 9 TIME PAUSE MENU 10+ 0 ZOOM SLOW VOL PLAY PAUSE ) ANGLE STOP DISPLAY MENU SETUP SETUP GOTO REV FWD PREV NEXT REPEAT A-B REPEAT MUTE RETURN PROG P/N PBC RANDOM DIGEST L/R MODE PSCAN/ NORMAL P/N 36 DIGEST 37 L/R TIME VOL+ VOL- PLAY DISPLAY A-B REPEAT 35 ANGLE ENTER FWD PROG AUDIO TITLE STOP REV 34 OPEN/CLOSE AUDIO
Remote Control Operation POWER During playback, press POWER to stop the player and return to standby mode. When the player is in standby, press STANDBY button on the remote to turn the player on. OPEN/ CLOSE To open the disc tray, press OPEN/CLOSE. To close the disc tray, press OPEN/CLOSE again. 0-10+ keys These keys are used to input the time, as well as title, chapter and track numbers.
Remote Control Operation PREV Press PREV to skip to previous chapter or track. NEXT Press NEXT to skip to the next chapter or track. STOP Press STOP once during playback to stop and hold playback. Press PLAY to resume playback from the point you pressed STOP. Press STOP twice to stop playback completely. PLAY Press PLAY from stop mode to start play. PAUSE Press PAUSE during playback to pause playback. Press PLAY to resume normal playback.
Remote Control Operation VOL+ VOL- MUTE ZOOM Press Volume < VOL+> button to increase Volume. Press < VOL-> button to reduce Volume till to no volume output. Press MUTE to mute the Audio output. Press MUTE again to resume normal Audio output. During DVD playback, press ZOOM to magnify the image as follows: Q2 Q3 Q4 Q1/2 Q1/3 Q1/4 QOFF ANGLE During DVD playback Press ANGLE to view scenes from different camera angles. Press ANGLE repeatedly to change from one camera angle to another.
Remote Control Operation PROG When [PROGRAM] is on, press ENTER to display the [Program] submenu: CD Others Program Input 1__ 4__ 7__ 2__ 5__ 8__ 11__ 3__ 6__ 9__ 12__ Play Program 10__ Clear All Input the track numbers in the order you would like them to play. When finished, select[Play Program] and then press ENTER to play the tracks in the new programmed order. Select [Clear All] and press ENTER to clear all the numbers you have input.
Remote Control Operation DISPLAY During playback,press DISPLAY to show the current time counter position. Disc type Current title Total title Play time of the current title Total Chapter Current Chapter Press DISPLAY to show the Audio and Subtitle message menu. Language Audio type Angle Subtitle TIME During playback,press TIME to show the TIME SEARCH menu . Disc type Current title Total title Play time of the current title Total Chapter Current Chapter 19 Downloaded from www.Manualslib.
Remote Control Operation Press Time again to show the remain play time . Current title Total title Remain play time Total Chapter Current Chapter GOTO During playback,press GOTO show the current time counter position. Enter number to choose the Play time. Enter number to choose the title Total Chapter Enter number to choose the Chapter. Use the number keys to input the desired Time, Title or Chapter, then press ENTER to confirm. 20 Downloaded from www.Manualslib.
The Setup Menu 1. General Steps of setup menu A) Press the setup button, the main setup menu appears. SYSTEM SETUP SOURCE TV SYSTEM VIDEO TV TYPE PASSWORD RATING DEFAULT EXIT SETUP B) Press the Left and Right arrow buttons to highlight the icon of the desired page, then press the Down or Right arrow button to activate that page; For example, if you want to setup the video page, press Right to highlight the video icon, the video page will be displayed on the screen.
The Setup Menu AUDIO SETUP AUDIO OUT KEY +4 +2 0 -2 -4 PRO LOGIC EXIT SETUP A) Press the Arrow buttons to highlight the Exit Setup option,then press Enter or Setup again to exit Setup Menu . 2. Setup Items Introduction 2.1 SYSTEM SETUP The system setup options are illustrated below: 2.1.1 SOURCE There are 2 kinds of sources illustrated below.
The Setup Menu 2.1.2 TV SYSTEM According to the Color System of the TV, you can choose the TV System. Note: NTSC is primarily used in the United States SYSTEM SETUP SOURCE TV SYSTEM PAL VIDEO NTSC TV TYPE AUTO PASSWORD RATING DEFAULT EXIT SETUP 2.1.3 VIDEO According to the output jack of TV set, you can chooseS-VIDEO, YUV,RGB, P-SCAN YPBPR. Note: Only choose PSCAN if your DVD player is connected to a Progressive scan TV with Y, Pb, Pr cables.
The Setup Menu 2.1.4 TV TYPE According to the TV type,you can choose 16:9,4:3LB or 4:3PS. SYSTEM SETUP SOURCE TV SYSTEM VIDEO TV TYPE 4:3PS PASSWORD 4:3LB RATING 16:9 DEFAULT EXIT SETUP 2.1.5 PASSWORD The password option is initialized locked, and you can not set the ratings limit or change the password. In order for the Ratings feature to work, the password mode must be turned on. If you want to set the ratings limit , you will need to enter the default password.
The Setup Menu 2.1.6 RATING The Rating feature is a rating limit system, like movie ratings. It works with DVD discs that have been assigned a rating. This helps you control the types for DVDs that your family watches. SYSTEM SETUP SOURCE 1G TV SYSTEM 2 VIDEO 3 PG TV TYPE 4 PG13 PASSWORD 5 RATING 6R DEFAULT 7 NC-17 EXIT SETUP 8 2.1.7 DEFAULT The DEFAULT setup options are RESTORE factory setup. Let your player work on best state.
The Setup Menu LANGUAGE SETUP OSD LANGUAGE ENGLISH AUDIO LANG GERMAN SUBTITLE LANG SPANISH MENU LANG FRENCH DUTCH DANISH EXIT SETUP 2.2.2 AUDIO LANG Highlight the AUDIO LANG option,and press the Arrow buttons to choose the audio language you prefer.Press Enter to confirm.If the disc you are playing has that language available,it will output that language.
The Setup Menu Notes: If your preferred language is not availabel, the disc s default language will be played. LANGUAGE SETUP OSD LANGUAGE ENGLISH AUDIO LANG GERMAN SUBTITLE LANG SPANISH MENU LANG FRENCH DUTCH ITALIAN DANISH EXIT SETUP PORTUGUESE 2.3 AUDIO SETUP The audio setup options are illustrated below: 2.3.1 AUDIO OUT Highlight the AUDIO OUT option, and press the Arrow buttons to choose the audiooutput mode you prefer.
The Setup Menu 2.3.3 PROLOGIC There are 3 optional PROLOGIC: MOVIE MODE, MUSIC MODE, OFF. (This function is only available on DV-251 and DV-252) AUDIO SETUP AUDIO OUT OFF KEY MOVIE MODE PRO LOGIC MUSIC MODE EXIT SETUP 2.4 VIDEO SETUP The video setup options are illustrated below: VIDEO SETUP BRIGHTNESS CONTRAST HUE SATURATION EXIT SETUP 2.4.
The Setup Menu 2.4.2 CONTRAST Use the Up and Down arrow buttons to move the scroll and adjust the contrast. VIDEO SETUP BRIGHTNESS 12 10 8 6 4 2 0 CONTRAST HUE SATURATION EXIT SETUP 2.4.3 HUE Use the Up and Down arrow buttons to move the scroll and adjust the hue. VIDEO SETUP BRIGHTNESS +6 +4 +2 0 -2 -4 -6 CONTRAST HUE SATURATION EXIT SETUP 2.4.4 SATURATION Use the Up and Down arrow buttons to move the scroll and adjust the saturation.
The Setup Menu 2.5 SPEAKER SETUP The speaker setup options are illustrated below: (This function is only available on DV-251 and DV-252) 2.5.1 DOWNMIX A) LT / RT Choose this setting when you are connected to a 2 Channel Analog Audio Input. B) STEREO Choose this setting when the DVD player is connected to a TV or therefore modulator. D) 5.1CH Choose this setting when the DVD player is connected to a 5.1Channel Surround Sound System.
The Setup Menu 2.5.3 BASS MODE There are Two settings in this option: ALL LG SPK and ALL SM SPK (This function is only available on DV-251 and DV-252) SPEAKER SETUP DOWNMIX SUBWOOFER BASS MODE ALL LG SPK CENTER DELAY ALL SM SPK REAR DELAY EXIT SETUP 2.5.4 CENTER You can adjust the center by using the Up and Down buttons to move the scroll the scroll bar.
The Setup Menu 2.5.5 REAR DELAY You can adjust the Center and the Rear delay by using the Up and Down buttons to move the scroll bar. (This function is only available on DV-251 and DV-252) SPEAKER SETUP DOWNMIX SUBWOOFER BASS MODE CENTER DELAY REAR DELAY + 12 MS 6 MS 0 MS EXIT SETUP 2.6 DIGITAL SETUP The DIGITAL SETUP options are illustrated below: 2.6.
The Setup Menu 2.6.2 DUAL MONO (LEFT + RIGHT) Choose to setup the L and R mono output mode. There are four modes in this option: STEREO, MONO L, MONO R,and MIX MONO. DIGITAL SETUP DYNAMIC RANGE DUAL MONO STEREO MONO L MONO R MIXED MONO EXIT SETUP REFERENCE: 1. To protect your DVD player, the interval between turning the unit on and off, via the Main Power button, should be more than 30 seconds. 2.
MPEG4 and MP3 Playback When a MPEG and a Mp3 disc is loaded, the screen will display as follows: Current MP3/JPEG file name. If a JPEG file is playing, the name should have a JPEG extension. Current directory name File Switch Region: Displays the file typa of the playing and the switching. The playing file is a Mp3 audio file. The playing file is a JPEG picture file. Current MP3 file name. If a JPEG file is playing, the name should have a JPEG extension.
USB Input and card reader USB input This unit have a USB jack,when no disc in the player, you can insert a USB DISC or a Mp3 Player with USB Interface to play the Mp3 music and JPEG files. All the operating functions are the same as playing JPEG- or Mp3 discs. See the instructions on the previous side. Card reader This unit have a 5 in1 card reader, that is available when there is no disc loaded in the player. You can insert the five kind of cards in the card reader to play mp3 music and JPEG files.
Playing a JPEG file 1. When a JPEG disc is loaded in the DVD-player, an automatic slide show will be launched. Each picture will be displayed and scaled to fit the screen. Press STOP to enter the file library. Use the SCROLL key to navigate the pictures, and press PLAY to display a picture. When the a picture has been chosen, the slide show will resume with the next picture in the library. 2. Press SCROLL to rotate the picture.
Troubleshooting This troubleshooting guide may help you find a possible cause of and solution to a problem. If there are still problems, please contact the local service centre or distributor. PROBLEMS AND POSSIBLE SOLUTIONS Common sympton Possible cause Remedy No function Mains power is not connected Power is OFF Connect to mains power outlet Turn the power ON. No playback No disc is inserted ("no disc" will be shown on screen). Disc is upside down. ("no disc" will be shown on screen).
Specifications DV-153 Power requirements: AC 100-240 Volt, 50/60Hz Power consumption: 15W Video standard: NTSC/PAL/AUTO Unit Weight: 1.4kg Video out Video out: 1.0V(p-p)/75 , sync, negative polarity, RCA pin jack x 1 S-video output connector(separate Y¡C signal output connector): Y output: 1.0V(p-p)/75 , sync, negative polarity C output: 0.286V(p-p)/75 Audio out 2 channel out: RCA pin jack(L,R) x 2 Coaxial out: 0.
Specifications DV-251 and DV-252 Power requirements: AC 100-240 Volt, 50/60Hz Power consumption: 15W Video standard: NTSC/PAL/AUTO Unit Weight: 2,1kg) Video out Video out: 1.0V(p-p)/75 , sync, negative polarity, RCA pin jack x 1 S-video output connector(separate Y¡C signal output connector): Y output: 1.0V(p-p)/75 , sync, negative polarity C output: 0.286V(p-p)/75 Audio out 5.1 channel out: RCA pin jackx6 Coaxial out: 0.
For further information please visit our website: www.eltax.com Downloaded from www.Manualslib.com manuals search engine Item no.