HALO System User Manual V2.
Page 2 of 39 Contents Declaration of Conformity Page 3 1.0 - Introduction Page 4 2.0 - The HALO System Page 5 3.0 - Connections, Processor & Amplifier Selection Page 6 4.0 - Flying HALO Systems Page 9 4.1 - Assembling Flown Arrays with subwoofers Page 12 4.2 - Assembling Flown Arrays without subwoofers Page 22 4.3 - Assembling Flown Arrays with the FG-HALO grid Page 28 5.0 - Ground Stacked Systems Page 29 6.
Page 3 of 39 DECLARATION OF CONFORMITY The products contained within this manual conform to the requirements of the EMC Directive 89/336/EEC, amended by 92/31/EEC and to the requirements of the Low Voltage Directive 73/23/EEC amended by 93/68/EEC. EMC Emission EN55103-1:1996 Immunity EN55103-2:1996 Electrical Safety EN60065:1993 RECYCLING This product and its packaging constitute the applicable product according to the WEEE directive.
Page 4 of 39 1.0 - Introduction Thank you for purchasing the revolutionary HALO compact line array system from EM Acoustics. The entire HALO system family has been designed and rigorously tested to give you the utmost in sonic performance and many years of reliable, trouble-free operation. Please take the time to read this user manual thoroughly to ensure you get the best performance from your system and to ensure you set it up correctly and safely.
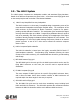
Page 5 of 39 2.0 - The HALO System The HALO system comprises two loudspeaker models and associated flying hardware. Details of the different components are given below – all enclosures and flying grids work on the same principles and use similar if not identical hardware. a) HALO 3-way biamplified line array loudspeaker The HALO enclosure is a three-way, bi-amplified design incorporating some of the most advanced loudspeaker technologies available today.
Page 6 of 39 3.0 - Connections, Processor and Amplifier Selection Connecting your loudspeakers HALO enclosures are bi-amplified and use Neutrik Speakon TM NL4 connectors - as such they require 4-core cable to function correctly. Standard pin connections are LF/MF on pins 1+/1- and HF on pins 2+/2-. HALO-S subwoofers are wired pins 1+/1- with pins 2+/2- connected as a link-through.
Page 7 of 39 These amplifier powers can be scaled up – for example for running four HALO enclosures in parallel from the same amplifier (ch 1 LF/MF, ch 2 HF) we would recommend an amplifier capable of delivering 2500-3000 watts into a 2-ohm load. NOTE: A small amplifier working too hard is much more likely to damage your loudspeakers than a large amplifier working well within its limits! HALO system User Manual V2.
Page 8 of 39 Processor Selection & DSP Settings The HALO system requires a suitable DSP loudspeaker management system to allow for crossover points, system EQ and delay. EM Acoustics recommends either XTA 4-series processors or Lake processing – either stand-alone units or incorporated into the LabGruppen PLM series of amplifier products. The DSP program detailed below is based around a 12-HALO system flown with a single HALO-S subwoofer at the top of the array.
Page 9 of 39 4.0 - Flying HALO systems System Overview The flying system for the HALO system has been specifically designed to be flexible, intuitive and reliable. Please read this section of the user manual extremely carefully as the rigging of loudspeakers is a very serious matter with potentially fatal consequences should anything go wrong. If you are in ANY DOUBT WHATSOEVER, contact a reputable rigging company or your local EM Acoustics representative.
Page 10 of 39 Walls, floors and ceilings must be capable of supporting the actual load placed upon them. The rigging hardware must be safely and securely fixed to both the loudspeaker system and the supporting structure. When mounting components on walls, floors or ceilings ensure that all fixings and fasteners used are of an appropriate size and load rating.
Page 11 of 39 Safety Factors The HALO system is designed to work within the following safety factors: MFG-HALO – Safety factor of 4 22 x HALO enclosure OR 20 x HALO enclosure 1 x SLG-HALO grid 1 x HALO-S enclosure OR 16 x HALO enclosure 1 x SLG-HALO grid 2 x HALO-S enclosures MFG-HALO – Safety factor of 6 16 x HALO enclosure OR 12 x HALO enclosure 1 x SLG-HALO grid 1 x HALO-S enclosure SLG-HALO – safety factor of 4 20 x HALO enclosure SLG-HALO – safety factor of 6 14 x HALO enclosure SLG-HALO – safety fact
Page 12 of 39 4.1 - Assembling Flown Arrays with Subwoofers HALO system User Manual V2.
Page 13 of 39 This section describes setting up of a HALO array similar to that shown above, comprising HALO-S subwoofers and HALO elements. Step One – MFG-HALO grid preparation The drop links for the MFG-HALO grid are stored inside the chassis of the flying grid for transport. The first step is to prepare these links ready to fly the system. The MFG-HALO grid has five link positions: Front Drop Links – these are removable and are used for flying both HALO-S and HALO enclosures.
Page 14 of 39 Should you need to change the links, the alternative links are stored on the sides of the MFG grid and are held in place by ball-lock pins. Release the pins as shown below and remove the alternate links. When fitting the new links, the link pivots on the upper ball-lock pin and is locked in place for use by the lower pin. Ensure when fitting the new link into the grid that the thicker steel boss faces to the inside of the MFG-HALO grid.
Page 15 of 39 This process should now be repeated for the rear links – however the rear links are pivoted permanently on a bolt. As such, simply release the ball-lock pin to allow the link to sit into the usage position, replace the ball-lock pin and the link is now ready for use. IMPORTANT NOTE: For both front & rear links, the locking ball-lock pin MUST be in position prior to attempting to fly the system.
Page 16 of 39 Fit the links into the groove down the central spine on the MFG grid, and slide the link along to the desired position. The different pairs of holes for the 3/8” pins along the length of the spine allow for a variety of different positions for the pick-up link, with complete flexibility. Repeat this process for the second pick-up link. IMPORTANT NOTE: Both 3/8” ball-lock pins MUST be secured on each pick-up link being used. 3.
Page 17 of 39 them. An example of this procedure is shown in the photo below. These additional points can also be used to attach secondary safeties to the system. Ensure with whichever method you use for pick-up, that you have the MFG-HALO grid facing the right direction – indicated by the “FRONT” arrows on each side of the grid.
Page 18 of 39 Raise the MFG-HALO grid up, lifting the HALO-S subwoofer with it. Once clear of the ground, undo the four countersunk socket-head bolts which secure the base board to the HALO-S. Remove the board and retain for array disassembly. If adding a second subwoofer, repeat the procedure above. If you are only using one subwoofer, proceed to step 4 below.
Page 19 of 39 Firstly, ensure you have the SLG-HALO grid in the correct orientation by observing the “FRONT” labels on the sides of the grid. Release the four ¼” ball-lock pins on the corners of the grid, to allow the bottom of the HALO-S rigging hardware to mate with the grid.
Page 20 of 39 Step 5 – Attaching HALO enclosures This procedure is made much quicker by the use of flightcases or the WB-HALO wheelboard (shown below) as groups of HALO enclosures can be pre-assembled, resulting in much faster array assembly. As shown below, position your HALO enclosures beneath the array. Release the ball-lock pins on both sides of the front rigging, and also the lock position on the rear splay rigging. HALO system User Manual V2.
Page 21 of 39 Repeat the above procedure to attach additional HALO enclosures. With the attachment of each set, ensure the splay links between enclosures are locked in position and set at the “zero” mark. Once you have all of your HALO enclosures securely attached, lift the array clear of the ground to allow you to change inter-enclosure splay angles.
Page 22 of 39 4.2 - Assembling Flown Arrays without Subwoofers The procedure to assemble the HALO system without subwoofers is largely identical to that described above. Step One – MFG-HALO grid preparation The drop links for the MFG-HALO grid are stored inside the chassis of the flying grid for transport. The first step is to prepare these links ready to fly the system. The MFG-HALO grid has five link positions: Front Drop Links – these removable and are used for flying both HALO-S and HALO enclosures.
Page 23 of 39 Should you need to change the links, the alternative links are stored on the sides of the MFG grid and are held in place by ball-lock pins. Release the pins as shown below and remove the alternate links. When fitting the new links, the link pivots on the upper ball-lock pin and is locked in place for use by the lower pin. Ensure when fitting the new link into the grid that the thicker steel boss faces to the inside of the MFG-HALO grid.
Page 24 of 39 IMPORTANT NOTE: For both front & rear links, the locking ball-lock pin MUST be in position prior to attempting to fly the system. Step Two – Selecting & fitting pick-up links The MFG-HALO grid provides two means of attaching the grid to your chosen primary mounting point. The first, and most common is by using the movable pick-up links which allow for both single point and dual point pick-up.
Page 25 of 39 3.25 ton bow shackles can then be used to select the appropriate connection hole in each pick-up link as shown above. The second means of securing pick-up points on the MFG-HALO grid is to use the four holes located front & rear on the grid to attach 3.25 ton bow shackles, and bridle between them. An example of this procedure is shown in the photo below. These additional points can also be used to attach secondary safeties to the system.
Page 26 of 39 Step 5 – Attaching HALO enclosures This procedure is made much quicker by the use of flightcases or the WB-HALO wheelboard (shown below) as groups of HALO enclosures can be pre-assembled, resulting in much faster array assembly. As shown below, position your HALO enclosures beneath the array. Release the ball-lock pins on both sides of the front rigging, and also the lock position on the rear splay rigging. HALO system User Manual V2.
Page 27 of 39 Repeat the above procedure to attach additional HALO enclosures. With the attachment of each set, ensure the splay links between enclosures are locked in position and set at the “zero” mark. Once you have all of your HALO enclosures securely attached, lift the array clear of the ground to allow you to change inter-enclosure splay angles.
Page 28 of 39 Splay Angles – Above 10 degree It should be noted that the angles 10-15 degrees have been made accessible in order to allow „breaking‟ of the system. This is used in situations such as balcony coverage in theatres. In order to avoid reflections from balcony fronts (especially in relatively short throw applications) it can be helpful to employ large array angles to keep some of the energy off the balcony front before resuming coverage.
Page 29 of 39 5.0 - Ground Stacking a HALO System The HALO system can be easily ground-stacked where necessary. The methods described below describe ground-stacking the system both with & without subwoofers. Method A – With HALO-S subwoofers The best way to imagine a ground-stacked HALO system is simply a flown system upside down. So, the first step is to move the base board from the HALO-S enclosure due to go on the bottom of the stack.
Page 30 of 39 6.0 - Servicing Information All HALO components can be removed for service purposes if required, using the minimum of tools. Removing LF Drive Units 1. Place the enclosure on its back and remove the two screws on each side securing the grille in place. Gently lift the grille off and set to one side. 2. Remove the four socket-head machine screws holding the LF drive units in place.
Page 31 of 39 4. Lie the enclosure on its side, and remove the screws holding the side grille in place. Place this to one side. Gently ease the HF drive unit out of its chamber, being aware to ease the cables through the connection hole as they are delicate. Note the three acoustic absorption foam blocks behind the drive unit. 5. To re-instate the HF drive unit, position the drive unit above the chamber and thread the cables through the holes. 6.
Page 32 of 39 4. To reinstate the drive unit, reconnect the cables and carefully seat the drive unit in the mounting hole. Ensure the bolt holes line up. It is advisable to ensure each bolt has started in its thread before tightening any. Once the position is correct, tighten all six bolts but be careful not to overtighten. HALO system User Manual V2.
Page 33 of 39 Appendix A – Technical Specifications HALO 3-way compact line array element Frequency Response (+/- 3dB)1: 75Hz – 18KHz Sensitivity (1W/1m)2: LF/MF HF 99dB 101dB Dispersion3: Horizontal (-6dB) Vertical (-6dB) 90 degrees Dependant on array settings Enclosure Splay: Up to 15 degrees between enclosures Maximum SPL (continuous): 124dB (one HALO enclosure) 130dB (two HALO enclosures) 136dB (four HALO enclosures) Power Handling: HF LF/MF 375W RMS, 750W program 500W RMS, 750W program
Page 34 of 39 HALO-S dual 15” quasi-bandpass subwoofer Frequency Response (+/- 3dB)1: 45Hz – 160Hz Sensitivity (1W/1m)2: 100dB Dispersion3: Omnidirectional Maximum SPL: 131dB continuous, 137dB peak Power Handling: 1000W RMS, 2000W program Drive Units: 2 x 15” (381mm) neodymium LF cone drive units Impedance (nominal): 4 ohms Crossover: Active, recommended below 150Hz (24dB/Octave L-R) Flying: Integrated HALO flying system Enclosure: 15/18mm Baltic Birch plywood – rebated, screwed & glued.
Page 35 of 39 Appendix B – Technical Drawings HALO 3-way compact line array enclosure HALO system User Manual V2.
Page 36 of 39 HALO-S dual 15” flyable subwoofer HALO system User Manual V2.
Page 37 of 39 Appendix C – Spare Parts List 01A015 01A016 01B017 01C013 01C014 01D007 05A019 DU-601 DU-602 HALO-AMT RK-601 RK-602 RD-AMT HALO_PIN 6.5” neodymium LF drive unit, 8 ohms 6.5 neodymium MF flat-radiator drive unit, 16 ohms AMT drive unit 8 ohm recone kit for DU-601 16 ohm recone kit for DU-602 (factory service only) Replacement AMT diaphragm ¼” x ½” ball-lock flying pin with 4” lanyard HALO system User Manual V2.
Page 38 of 39 Appendix D – Warranty Information Limited Warranty This EM Acoustics loudspeaker product is warranted to the original end-user purchaser and all subsequent owners for a period of three years from the original date of purchase. Warranty Coverage This warranty covers defects in materials and workmanship. It does not include: Damage or failure caused by accident, misuse, neglect, abuse or modification by any person other than an authorised EM Acoustics representative.
Page 39 of 39 EM Acoustics‟ liability is to the replacement or repair (at our discretion) of any defective components, and as such are not liable for any incidental and consequential damages including (without limitation) injury to persons, damage to property or loss of use. This warranty is exclusive and no other warranty is expressed or implied. This warranty is also in addition to – and in no way detracts from – your statutory rights as a consumer. HALO system User Manual V2.