Flat Panel Monitor User Guide
Contents Using Your eMachines Flat-Panel Monitor . . . . . . . . . . . . . . . . . . . . . . . . . . . 1 Unpacking the monitor . . . . . . . . . . . . . . . . . . . . . . . . . . . . . . . . . . . . . . . . . . . . . . . . . . . . . 2 Connecting the monitor . . . . . . . . . . . . . . . . . . . . . . . . . . . . . . . . . . . . . . . . . . . . . . . . . . . . 3 Attaching the base . . . . . . . . . . . . . . . . . . . . . . . . . . . . . . . . . . . . . . . . . . . . . . . . . . 3 Connecting video inputs . .
Contents ii
Using Your eMachines Flat-Panel Monitor • • • • • • • • • Connecting the monitor Setting up the optional stand Setting up the optional speaker bar Starting the monitor Adjusting monitor settings Power management Maintaining Troubleshooting Specifications 1
Using Your eMachines Flat-Panel Monitor Unpacking the monitor Your monitor box should contain the following items: • Monitor (with neck attached) • Base • This User Guide • VGA cable • Power cord If you are missing any items, call Customer Care. For telephone numbers, see the label on the back of your monitor.
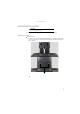
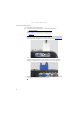
www.emachines.com Connecting the monitor Important To attach the optional USB stand instead of the base, complete the instructions in “Setting up the optional stand” on page 6. To set up the monitor, first attach the base, then make your cable connections. Attaching the base To attach the base: • Place the monitor base on a table top, then slide the monitor neck down onto the base until it clicks into place. You may need to press the two buttons on the base to let the monitor slide on smoothly.
Using Your eMachines Flat-Panel Monitor Connecting video inputs To connect video sources to your monitor: 1 Position your computer and the monitor so you can reach the back of each. Tip (19-inch model) When using the optional speaker bar (described in “Setting up the optional speaker bar” on page 11), we recommend that you use the included right-angle VGA cable for the video connection so the speaker bar does not obstruct the cable.
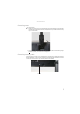
www.emachines.com Connecting power To connect power: 1 Position your monitor so you can reach the back, then connect the power cord to the power connector under the back of the monitor. (The appearance of your cable and connector may vary from that shown.) 2 Plug the power cord into a correctly grounded power outlet. We recommend using a surge protector to protect your monitor from voltage spikes.
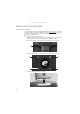
Using Your eMachines Flat-Panel Monitor Setting up the optional stand Attaching the USB stand In the United States, you can buy an adjustable USB stand from www.gateway.com. You can adjust the stand for height, tilt, and screen rotation. When the stand is connected to your computer’s USB port, you can connect up to four USB devices to the USB 2.0 ports on the stand. To attach the adjustable stand: 1 Make sure that the monitor is turned off.
www.emachines.com 6 Tighten the thumbscrew under the base with your fingers (or a flat screwdriver) to secure the neck into place. Thumbscrew 7 With the stand facing you, press the mounting bracket lever to the left and hold it, then remove the bracket from the stand. 8 Attach the bracket to the LCD panel using the four screws you removed previously.
Using Your eMachines Flat-Panel Monitor 9 Slide the neck’s bracket slot onto the bracket’s mounting tab. 10 Press the bracket lever to the right and hold it, then lower the neck into place and release the lever. Adjusting monitor height tension The stand is factory adjusted to maintain the height for your monitor. However, if it does not stay in place when you let go, you need to change the stand’s height tension.
www.emachines.com 2 Insert a Phillips screwdriver through the access hole in the base and onto the height tension screw (on the back of the stand, in the slot above the USB In port). Height tension screw 3 Adjust the height tension screw so the monitor stays in place when you let go. If the monitor lowers by itself when you let go, turn the screw clockwise several complete turns. If the monitor rises when you let go, turn the screw counter-clockwise several complete turns.
Using Your eMachines Flat-Panel Monitor Ergonomic guidelines The recommended screen positioning is based upon the following guidelines. These guidelines are based on available scientific literature and published standards. Screen height The recommended screen height for displays (except in special circumstances, such as for bifocal use) is that the top of the display should be set at or slightly below (about 1 inch or 25 mm) your eye level while you are sitting in a comfortable working posture.
www.emachines.com Setting up the optional speaker bar Power/Volume control Kensington lock slot Power indicator Headphone jack Bass port (for bass sound. Do not block.) Microphone jack Headphone jack Bass port (for bass sound. Do not block.) Installing the speaker bar To install the speaker bar: Tip (19-inch model) When using the optional speaker bar, we recommend that you use the included right-angle VGA cable for the video connection so the speaker bar does not obstruct the cable.
Using Your eMachines Flat-Panel Monitor 6 Turn on the speaker bar by rotating the power/volume knob clockwise. The green LED to the left of the power button is lit when power has been correctly connected and the speaker bar has been turned on. Starting the monitor To start the monitor: 1 Press the power button on the front of your monitor. The power LED on the power button turns on. (The appearance of your monitor may vary from that shown.) Power button 2 Turn on your computer.
www.emachines.com Adjusting monitor settings Use the monitor controls (located on the monitor itself) and computer controls (accessible through Windows) to adjust the display image. For more information about computer controls, see “Changing Windows screen settings” on page 17. Monitor buttons This monitor features an on-screen display (OSD) that lets you adjust contrast, brightness, and other settings for the monitor. The monitor saves changes you make to the settings, even if you turn off the monitor.
Using Your eMachines Flat-Panel Monitor On-screen display options Adjusting OSD settings To adjust the OSD settings: Tip While the OSD is active, on-screen labels appear next to the buttons to help you identify them. 1 Press the Auto button. The display image is automatically adjusted to the ideal settings for your current screen resolution. 2 Press the Menu button. The OSD opens.
www.emachines.com OSD menus OSD Menu Description Main menu Main Menu Auto Auto—Automatically adjusts your monitor to its optimum settings. Picture—Opens the Picture menu, where you can adjust brightness, contrast, and gamma. Geometry—Opens the Geometry menu, where you can adjust image size and minimize distortions. Advanced—Opens the Advanced menu, where you can adjust color balance, change the OSD language, and display information about current monitor settings.
Using Your eMachines Flat-Panel Monitor OSD Menu Description Geometry menu Geometry H-Position V-Position H-Position—Moves the display image left and right. You can also press the Auto button to configure the horizontal position automatically. V-Position—Moves the display image up and down. You can also press the Auto button to configure the vertical position automatically. Clock—Minimizes any vertical bars or stripes visible on the screen background. The horizontal screen size will also change.
www.emachines.com Changing Windows screen settings Color depth and screen resolution are two of the most basic monitor settings you may need to change to suit your needs. Color depth is the number of colors your computer uses to display images on your monitor. Most images look best displayed with the maximum number of colors available.
Using Your eMachines Flat-Panel Monitor Video modes Your monitor supports several video modes. If you do not use the best mode for the monitor, the display image may look slightly “fuzzy.” 18 Mode Mode name and resolution Horizontal frequency (kHz) Vertical frequency (Hz) Available in DVI mode (19-inch model) 1 VGA 640 × 350 31.469 70.087 No 2 VGA 640 × 480 31.469 59.941 Yes 3 VESA 640 × 480 37.861 72.810 Yes 4 VESA 640 × 480 37.500 75.000 Yes 5 VGA 720 × 400 31.469 70.
www.emachines.com Power management ENERGY STAR As an ENERGY STAR® Partner, eMachines has determined that this product meets the ENERGY STAR guidelines for energy efficiency. This monitor complies with the EPA’s International ENERGY STAR Program, which is a program designed to encourage manufacturers of computer equipment to build circuitry into their products to reduce energy consumption during time of non-use.
Using Your eMachines Flat-Panel Monitor Maintaining To keep the monitor in optimal working order: • Do not block the ventilation holes. • Do not expose the monitor to rain or use near water. • Keep the monitor away from radiators or heat vents. • Keep the monitor out of direct sunlight. Caution Do not use any type of abrasive pad or glass cleaner. You will permanently scratch the screen. • To clean the monitor, use a soft cloth slightly moistened with water only. Wipe the cabinet, screen, and controls.
www.emachines.com • If the power LED is orange: • Make sure that your computer is turned on. • Move the mouse or press any key on the keyboard to bring the monitor out of sleep mode. • Restart your computer with the monitor turned on. • Make sure that the video cable is not damaged. • Check the end of the video cable for any pins that might be bent or pushed in. • Turn off the monitor and unplug the video cable from the back of your computer. Turn the monitor back on and wait for ten seconds.
Using Your eMachines Flat-Panel Monitor • If the image looks stretched or fuzzy, you must adjust the operating system’s display settings • to match the monitor’s optimal (native) 1440 × 900 setting. For information on adjusting settings, see “Changing Windows screen settings” on page 17. If you are trying to select 1440 × 900 but it is not available in the Windows display control panel: • Make sure that your video card can display at 1440 × 900 resolution.
www.emachines.com All connections are made correctly and the speaker bar is on, but there is still no sound. • Your headphone/speaker jack may have been muted using Windows sound controls. To check your headphone/speaker mute settings, click the speaker icon in the Windows taskbar, or click (Start), Control Panel, Sounds and Audio Devices, the Volume tab, then click Advanced.
Using Your eMachines Flat-Panel Monitor Specifications Specifications are subject to change without notice or obligation. Many products for eMachines are custom engineered by our suppliers to eMachines specifications and may vary from similarly marketed products.
Safety, Regulatory, and Legal Notices • • • • Important safety information Environmental information Regulatory compliance statements Notices 25
Safety, Regulatory, and Legal Notices Important safety information Warning Always follow these instructions to help guard against personal injury and damage to your Gateway product. Warning Do not use Gateway products in areas classified as hazardous locations. Such areas include patient care areas of medical and dental facilities, oxygen-laden environments, or industrial facilities. Your Gateway product is designed and tested to meet the latest standards for safety of information technology equipment.
www.emachines.com Environmental information Recycling Mercury Warning The lamp(s) in this display contain mercury. Dispose according to local, state and federal law. Hg The product you have purchased contains extracted natural resources that have been used in the manufacturing process. This product may contain substances known to be hazardous to the environment or to human health.
Safety, Regulatory, and Legal Notices FCC declaration of conformity Responsible party: Gateway, Inc. 7565 Irvine Center Drive Irvine, CA 92618 USA This device complies with Part 15 of the FCC Rules. Operation of this device is subject to the following two conditions: (1) this device may not cause harmful interference, and (2) this device must accept any interference received, including interference that may cause undesired operation.
MAN E17T6W/E19T6W GDE R2 10/07