
User guide


Table Of Contents
- Using Your eMachines Flat-Panel Monitor
- Unpacking the monitor
- Connecting the monitor
- Starting the monitor
- Adjusting monitor settings
- Power management
- Maintaining
- Troubleshooting
- No power
- No picture
- Display colors are wrong
- Picture has shadows or “ghosts”
- Color is not uniform
- Image is not sized or centered correctly
- The image remains after switching off the monitor
- The image is unstable
- The message “No Input Signal” appears on the screen
- The monitor has pixels that are always dark or too bright
- Specifications
- Safety, Regulatory, and Legal Notices
www.emachines.com
3
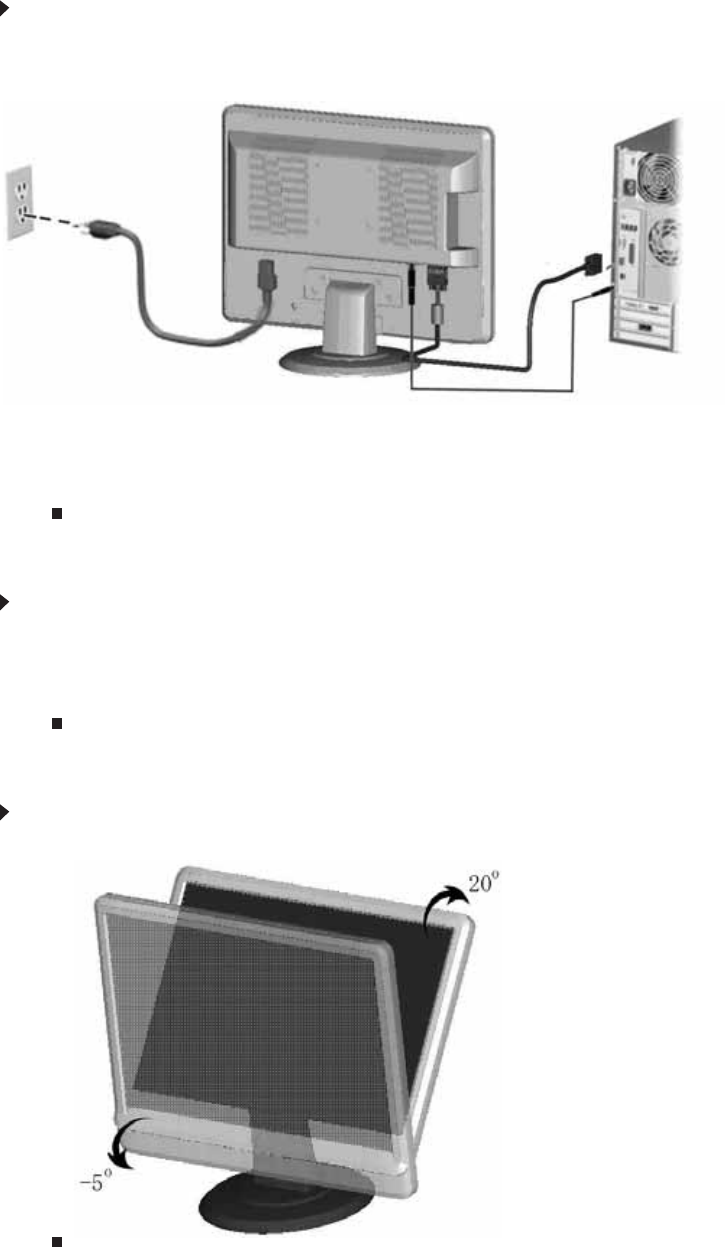
Connecting video and audio inputs
To connect video and audio inputs to your monitor:
1 Position your computer and the monitor so you can reach the back of each.
2 Connect the VGA video cable to the VGA video connector under the back of the display.
3 Make sure that your computer is turned off, then connect the other end of the video cable
to the matching video port on the back of your computer.
4 Connect the speaker (green) cable from the speaker jack on the monitor to your computer’s
audio out jack.
Connecting power
To connect power:
1 Position your monitor so you can reach the back, then connect the power cord to the power
connector under the back of the monitor.
2 Plug the power cord into a correctly grounded power outlet. We recommend using a surge
protector to protect your monitor from voltage spikes.
Adjusting monitor tilt
To adjust your monitor’s tilt:
• Adjust the tilt of the monitor for your viewing comfort.
Video cable
Audio cable
Power outlet
Power cable