User’s Manual Ematic SportsCam – EVH528
Care Please read the this user manual before using this video camera for proper and safe operation, and for optimum performance and to extend its service life. Do not expose the video camera to sunshine directly. Aiming the lens directly into sunshine may damage the sensor. Do not allow water or sand particles from entering the video camera when it is used on the beach or near water. Water, sand particles, dust or component containing salt may damage the video camera.
Do not touch the lens surface with fingers. Please back up the data if the memory card inside this digital camera is used for the first time. After that, format the memory card of this video camera at one time. The external SD memory card is made of precision electronic components. The following situations may cause loss or damage of your data: 1. Improper use of the memory card 2. The memory card is bent, dropped or collided. 3.
30FPS). The photo mode supports four sizes, i.e. 12M, 10M. 8M and 5M. Support high-speed USB2.0 It supports a MicroSD card with a capacity expansion up to 32G. This product supports video output and live playback functions. Videos can be output to high-definition TVs for playing clear and sharp pictures.
Hard Disk Others Free space of more than 500MB One standard USB1.1 or USB2.
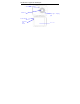
Introduction to Appearance and Keypad Infrared light Camera lens Busy light / charging light Screen - off light Screen - off light switch TFT 5 LCD
Microphone Tripod nut Power key S hutter Key HDMI interface MicroSD slot USB interface Reset key 6
Usage __ _____ 1. Charge the built-in lithium battery USB Cable Indicator Light for charging is on. To charge the camera, connect it to the computer. Then, the charge indicator light (red) will be on. After the camera is fully charged, the charge indicator light will be off. In general, it can be fully charged after 2-4 hours.
2. Use of Memory Card 1. Push the Micro SD card into the card slot according to the concave lettering beside the slot of memory card till it is completely inserted. 2. To take out the Micro SD card, gently press the end of the memory card inward and it will pop up. MicroSD card Note: No built-in memory is available in this video camera. Make sure to insert a memory card before using.
3. Startup/Shutdown 3.1 Startup: Press and hold the POWER button for 2 seconds. The screen of the display is activated and the camera is turned on. 3.2 Shut down: Press the POWER Key once under idle condition, and the camera will be shut down. . 3.3 Auto Screen-off: When the idle time of the camera reaches the automatic screen-off time, it will automatically turn off the screen to save power. After turning off the screen, the screen-off light will beon.3.4.
4. Conversion Between Function Modes The camera has three modes: video recording mode, photo mode and playback mode. These modes can be switched over by tapping the icon in the upper left corner of the LCD display after startup. Video recording mode Photo mode Vehicle mode Playback mode 5. Indicator light Busy indicator light (blue): When the camera is working (e.g.: recording videos, shooting pictures, automatic screen-off, etc.), the busy indicator light will blink.
6. Video recording mode After turning on the DV camera, it will directly get to the video recording mode. You can start recording videos by pressing the shutter button in the preview state. To stop video recording, just press this shutter button again. When the memory card is full or the battery drops to a low level, the camera will also automatically stop video recording: 1 Mode icon: indicating currently in the AVI mode. 2 Video size: available in FHD/HD(60FPS)/HD(30FPS)/VGA.
7. Photo mode: After turning on the DV camera, it will directly get to the video recording mode. To switch to the photo mode, click the mode icon in the upper left corner of the LCD display. You can shoot a photo by pressing the shutter button in the preview state. 1 Mode icon: indicating currently in the photo mode. 2 Photo size: available in 5M/8M/10M/12M. 3 Counter: Indicating the number of photos to be taken. 4 Indicating the face detection function is activated. 5 Icon for setting the time and date.
8. Vehicle mode: 1 Mode icon: indicating currently in the vehicle mode. 2 Video size: available in FHD/HD(60FPS)/HD(30FPS)/VGA 3 Recording time: indicating the length of remaining time to be recorded. 1 2 3 4 Icon of setting time and date. 5 click this icon, the camera can be flipped 180 degrees to take video normally. 6 Battery icon: indicating the current capacity of the battery. 7 Playback icon: to activate the corresponding menu by clicking it.
9. Playback mode: 9.1 After turning on the camera and enabling the Preview state, press the Playback icon ( right corner of the LCD display to activate the menu ( ). Tap the list mode. Then you can playback video clips by clicking a file name in the list.
9.2 Playback movie clips: In the playback mode, tap to fast rewind. Click STOP to pause. After selecting the fast playback function to exit the playback mode to return to the list mode. , click it 9.3 Playback photos: After turning on the camera and enabling the Preview state, press the Playback icon ( right corner of the LCD display to activate the menu ( ). Click the playback mode. Then you can view photos by clicking the icon "◄" or "►".
9.4 File deletion: After clicking the Delete File icon , the screen will appear as shown in the right figure: Click YES to delete the current file immediately, or click NO to cancel the deletion operation.
Connecting the camera to a high-definition TV: Connect the camera to a high-definition TV with a HD cable (as shown below). Then video signals from the camera will be automatically output to the high-definition TV, and you can enjoy HD videos and photos that you have recorded on the high-definition TV.
Application ____ on the personal computer___ Connect the camera to a PC The camera is provided with the plug and play function . Connect the device to the computer with USB line under turning-on state, then it will be switched into the movable hard disk mode. Icon of movable disk will appear on the window of “my computer”. The photos you have taken can be saved in the removable disk under the file folder I:\jpg (“I” is the removable disk of the camera).
2 Use of remote control: Using the remote control will help you start video recording, shoot photos and turn off the camera without operating the camera itself. While using the remote control, place its signal transmitter port toward the infrared signal receiver light of the camera. Then you can record videos, take photos or shut down the camera by pressing the corresponding buttons.
Remember to put the Mode Switch in your desired recording position before inserting the camera in the waterproof case. There is no external button for the Mode Switch. After every use in salt water you will need to rinse the outside of the housing with non-salt water and dry. Not doing this can eventually cause corrosion of the hinge pin and salt buildup in the seal, which can cause failure.
Video AVI Photo JPEG MicroSD card (Supporting up to 32GB),( without build-in flash memory) High-speed USB 2.0 interface Built-in 3.7V rechargeable lithium File formats Storage medium USB interface Power Supply Dimension (length width × height) Weight × 74*52*33mm Approx.