
User's Manual


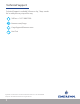

4
Note that each logger is sealed in a waterproof plastic pouch. Emerson GO Wireless Loggers can
be used in almost any environment, including fully emerged in liquid.
DO NOT COMPROMISE INTEGRITY OF PLASTIC POUCH.
1. “This End Up” Arrow - This arrow indicates the correct orientation of the label for optimal data
transmission.
2. Temperature Range – Preprogrammed temperature alert ranges are displayed. If no alerts are
programed “Data Logger” is listed.
3. LEDs/Visual Indicators – A green LED will ash to indicate the logger is on and actively monitoring
time and temperature. A amber LED will ash to indicate wireless transmission is off.
4. Start Button – Press and hold for a minimum of 3 seconds to activate; LEDs will ash in a sequence
to indicate successful activation. Loggers should be activated when the product is ready to be
monitored.
5. Duration – Indicates how many days, under normal conditions, the logger will collect data after it is
activated.
6. Part Number– A unique alphanumeric identier used to reference the type of logger and
preprograming combination.
7. Logger Unique Identier and Barcode – Each logger has a unique alpha numeric identier which
differentiates it from other Emerson Loggers. When information is downloaded from the logger, this
serial number will appear as the name of the saved data le and will also appear at the top of the
graph.
Understanding the GO Wireless Logger
5. Duration
6. Part Number
3. LEDs/Visual Indicators
4. Start/Mark Button
1. “This End Up” Arrows
7. Logger Unique Identier & Barcode
2. Temperature Range