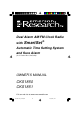
Dual Alarm AM/FM Clock Radio with SmartSet ® Automatic Time Setting System and Sure Alarm (U.S. Patent No. 6,567,344) OWNER’S MANUAL CKS1850 CKS1851 Visit our web site at www.emersonradio.com CKS1850-1851_072706.
CAUT I ON TO PREVENT FIRE OR SHOCK HAZARD, DO NOT USE THIS PLUG WITH AN EXTENSION CORD, RECEPTACLE OR OTHER OUTLET UNLESS THE BLADES CAN BE FULLY INSERTED TO PREVENT BLADE EXPOSURE. TO PREVENT FIRE OR SHOCK HAZARD, DO NOT EXPOSE THIS APPLIANCE TO RAIN OR MOISTURE.
Congratulations! And thank you for purchasing the SmartSet® Clock Radio from Emerson Research. SmartSet® is the world’s first and only LED clock radio that will automatically set itself to the correct ‘Year’, ‘Month’, ‘Date’, ‘Day’, and ‘Time’as soon as you plug it in. The only thing you have to do is tell the SmartSet® what time zone you are in, and the built in computer does everything else for you immediately. And not only the first time, but every time the power is interrupted as well.
I M P O R TAN T N O T E S • Avoid installing this unit in places • Operate controls and switches as exposed to direct sunlight or close to described in the manual. heat radiating appliances such as • Before turning on the power, make electric heaters, on top of other stereo certain that the power cord is properly equipment that radiates too much installed.
P R E PAR AT I O N F O R U S E UNPACKING AND SET UP • Remove the radio from the carton and remove all packing material from the radio. We suggest that you save the packing material, if possible, in the unlikely event that your radio ever needs to be returned for service. The original carton and packing material is the only safe way to pack your radio to protect it from damage in transit. • Remove any descriptive labels or stickers on the front or top of the cabinet.
POWER SOURCE This radio is designed to operate on normal 120V 60Hz AC power only. Do not attempt to operate the radio on any other power source. You could cause damage to the radio that is not covered by your warranty. This radio should be connected to an AC outlet that is always ‘live’. Do not connect it to an outlet that is controlled by a wall switch. When the power to the radio is interrupted, the built in lithium battery takes over to maintain the time and alarm settings.
L O C AT I O N O F C O N T R O L S AN D I N D I C AT O R S 4 FRONT VIEW 5 6 3 2 1 7 TOP VIEW 16 15 14 17 13 12 10 18 11 19 9 8 20 21 23 LEFT SIDE VIEW 24 22 RIGHT SIDE VIEW 26 27 25 6 CKS1850-1851_072706.
1.) Day LED Indicators. 2.) ALM 1 ‘On’Indicator. 3.) AM indicator. 4.) Time/Date Display. 5.) ALM 2 ‘On’Indicator. 6.) Lighted Dial Pointer. 7.) LOW BATT. LED Indicator. 8.) MONTH/DATE Setting Button. 9.) RADIO ON/OFF Button. 10.) SLEEP Button (Sleep To Music Timer). 11.) ALARM 1 setting Button. 12.) ALARM 2 setting Button. 13.) ALM (Alarm) MODE (Weekdays/Weekends/Everyday Alarm) Button. 14.) Speaker (Top Cabinet). 15.) AC Power Cord (Back Cabinet). 16.) Back Up Battery Compartment (Bottom Cabinet). 17.
O P E R AT I N G I N S T R U C T I O N S SETTING THE TIME, THE FIRST TIME IMPORTANT: The first time you connect your new SmartSet® clock radio to the AC outlet the internal computer will automatically set the time correctly for the Eastern Time Zone, which is the initial default setting. The display will scan for a few seconds and then show the correct Day and Time in the Eastern zone. If you live in the Eastern Time zone, there’s nothing else to do. Your clock is set correctly and running.
DATE DISPLAY To see the correct date at any time, depress the MONTH/DATE button. The display changes from time to month and date (MM/DD). For example, May 21st will appear as “5 21”. When you release the MONTH/DATE button the display returns to the correct time. YEAR DISPLAY To see the correct year, depress the MONTH/DATE and TIME buttons together. The display changes from time to year. When you release the MONTH/DATE and TIME buttons the display returns to the correct time.
MANUAL TIME ADJUSTMENTS Some people like to set their clocks 5 to 10 minutes fast to make sure that they will always be on time. Even though the SmartSet® sets the time by itself, you still have the option of adjusting the time manually if you wish. To manually adjust the time display depress and hold the TIME button, and press either the UP or DOWN buttons to adjust the time display ahead or back as desired. Each press of the UP or DOWN buttons will change the display by one minute.
SELECTING THE ALARM MODE Your SmartSet® clock radio allows you to select from among three different alarm operation modes for either alarm. The alarm modes are: • Everyday – the alarm will turn on all 7 days. • Weekdays only – the alarm will only turn on Monday through Friday; • Weekends only – the alarm will only turn on Saturday and Sunday. To check the Alarm Mode setting for Alarm 1, depress the ALARM 1 setting button.
LISTENING TO THE RADIO 1.) Set the BAND selector to the desired band, AM or FM. 2.) Set the VOLUME control to a low setting. 3.) Press the RADIO ON/OFF button to turn the radio ‘On’. The radio dial pointer will light. 4.) Select your desired station with the TUNING control. 5.) Adjust the VOLUME control to the desired setting. 6.) When you are finished listening, press the RADIO ON/OFF button to turn the radio ‘Off’. The radio dial pointer light goes off.
WAKE TO RADIO 1.) Turn the radio ‘On’and select the band, station, and volume level that you wish to hear when the alarm comes on, then turn the radio ‘Off’again. 2.) Reconfirm the wake up time and alarm mode settings for the alarm you are using, Alarm 1, Alarm 2, or both alarms. 3.) Set the ALARM selector switch for one or both alarms to the “RADIO” position. The appropriate ALM 1 and/or ALM 2 indicators will light up to confirm that the alarms are set. 4.
WAKE TO BUZZER (Crescendo Alarm) NOTE: Alarm 1 and Alarm 2 have different buzzer sounds. • Alarm 1 is a “Single beep” sound. • Alarm 2 is a “Double beep” sound. You will be able to tell which alarm is going off by the sound that it makes. 1.) Reconfirm the wake up time and alarm mode settings for the alarm you are using, Alarm 1, Alarm 2, or both alarms. 2.) Set the ALARM selector switch for one or both alarms to the “BUZZ” position.
SLEEP TO MUSIC TIMER You can program the sleep timer to play the radio for up to 90 minutes and then shut off automatically. 1.) Press the SLEEP button. The display will briefly show “10” and the radio will begin to play. After 10 minutes the radio will shut off automatically. Each time you press the SLEEP button the sleep timer will start at 10 minutes. This is the sleep timer default setting. 2.
CHANGING THE LITHIUM BATTERY Like all batteries, eventually the built in lithium battery will need to be replaced. A number of factors, such as, the length of time between the date the radio was manufactured and the date you plugged it in for the first time determine the amount of time before replacement. During this initial storage period, the lithium battery is supplying power to the SmartSet® computer memory.
RESETTING THE CLOCK AFTER A TOTAL MEMORY LOSS If you do not change the built in lithium battery within a reasonable period of time after you see the ‘flashing’LOW BATT. warning indicator, the lithium battery may become exhausted and will no longer be able to supply back up power to the SmartSet ® internal computer.
5.) Depress the TIME button and the UP button to set the display to the correct time. Be sure to confirm that you have set the time correctly to ‘AM’or ‘PM’by observing the AM indicator. 6.) After you set the time, reconfirm that the Day, and Month/Date displays are still correct. Make final adjustments if necessary. The SmartSet® clock memory is now reset and the new lithium battery will maintain it for the next 5 to 8 years, depending on the number and duration of the power outages you experience.
C AR E AN D M AI N T E N AN C E If the cabinet becomes dusty, wipe it with a soft cloth. If the cabinet becomes smudged or dirty, clean it with a soft, slightly dampened cloth. Never allow water or any liquid to get inside the cabinet. Never use any abrasive cleaners or cleaning pads as these will damage the finish of your radio. LITHIUM BATTERY PRECAUTIONS • Dispose of the old battery properly. Do not leave it lying around where a young child or pet could play with, or swallow it.
LIMITED WARRANTY Emerson Radio Corp. warrants manufacturing defects in original material, including original parts and workmanship, under normal use and conditions, for a period of ninety (90) days from the date of original purchase in the U.S. With your dated proof of purchase, we will provide repair service at no charge for labor and parts at an authorized Depot Repair Facility, or replace the product in our discretion.
EMERSON Part No. 16-2921 607-05 CKS1850-1851_072706.