AM/FM STEREO CLOCK RADIO with COMPACT DISC PLAYER POWER PANEL LOADING SYSTEM and REMOTE CONTROL (Model CKD2330 only) OWNER’S MANUAL CKD2328 (Without Remote Control) CKD2330 (With Remote Control) Visit our web site at www.emersonradio.com CKD2328_2330_B0901103.
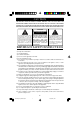
CAUT I ON TO PREVENT FIRE OR SHOCK HAZARD, DO NOT USE THIS PLUG WITH AN EXTENSION CORD, RECEPTACLE OR OTHER OUTLET UNLESS THE BLADES CAN BE FULLY INSERTED TO PREVENT BLADE EXPOSURE. TO PREVENT FIRE OR SHOCK HAZARD, DO NOT EXPOSE THIS APPLIANCE TO RAIN OR MOISTURE.
Thank you… … … … … … for purchasing this Emerson stereo clock radio with CD player and Power Panel CD loading system. The motorized front panel rotates 90 degrees at the touch of a button to make loading and unloading your CDs simple and easy. The Power Panel loading system also means that this radio takes up less space on the bedside table than other radios with drawer type CD loading systems.
IMPORTANT NOTES • Avoid installing this unit in places exposed to direct sunlight or close to heat radiating appliances such as electric heaters, on top of other stereo equipment that radiates too much heat, places lacking ventilation or dusty areas, places subject to constant vibration and/ or humid or moist areas. • Operate controls and switches as described in the manual. • Before turning ‘On’ the power, make certain that power cord is properly installed.
PREPARATION FOR USE UNPACKING AND SETUP • Carefully remove the main unit and the accessories from the display carton. Remove all the packing material from the unit and verify that you have the following items: Main unit, external AM antenna, and remote control (for model CKD2330 only). • Carefully remove any small strips of tape that may have been used to prevent the Power Panel from moving in transit. • Unwind the AC power cord and extend it to its full length.
External AM Antenna This unit utilizes an external AM loop antenna instead of a built in ferrite bar antenna. 1.) Insert the small white plug from the AM loop antenna into the AM antenna jack on the back of the radio. The plug can only be inserted one way. 2.) Attach the AM loop antenna to the antenna bracket on the back of the radio as shown. 5 CKD2328_2330_B091103.
3.) Adjust the angle of the loop antenna until you find the position that provides the best AM reception. Note: If you find that AM reception is still unsatisfactory you can remove the loop antenna from the antenna mounting bracket and attach it to the wall with a thumbtack or small nail through the “keyhole” opening on the antenna frame. Hanging Screw Key Hole 6 CKD2328_2330_B091103.
Battery Back Up System This model includes a battery back up circuit that will maintain the clock and alarm settings in the event of a temporary power interruption. The battery back up system requires two “AA” batteries, not included. The battery compartment is located on the bottom of the cabinet. 1.) Turn the radio upside down. Slide the battery door in the direction of the arrow and remove the door. 2.) Insert two fresh “AA” alkaline batteries in the compartment.
Remote Control (Model CKD2330 Only) Model CKD2330 includes a credit card size 10-button remote control that allows you to operate the CD player, control the volume, and switch the system ‘On’and ‘Off’from across the room. The remote control operates on one, button-style lithium battery (Type CR2032 or equivalent), included. We have placed a clear plastic spacer between the battery and the battery contact plate so that the battery will remain fresh until you are ready to use the remote.
IMPORTANT BATTERY PRECAUTIONS: • Do not leave the exhausted battery lying around where a child or pet might play with or swallow it. • If the battery is swallowed contact a physician immediately. • Do not attempt to open the battery and do not dispose of the battery in a fire. PROTECT YOUR FURNITURE !! This model is equipped with non-skid rubber 'feet' to prevent the product from moving when you operate the controls.
POWER SOURCE This radio is designed to operate on 120V 60Hz AC only. Attempting to operate this radio on any other power source could cause damage to the unit and such damage is not covered by your warranty. Make sure the radio is connected to an AC outlet that is always “live”. Do not connect the radio to an outlet that is controlled by a wall switch. NOTE: This unit has a polarized AC plug with one wide blade and one narrow blade. This plug will only fit into a matching polarized AC outlet.
LOCATION OF CONTROLS AND INDICATORS 3 FRONT PANEL 5 7 4 6 8 9 2 11 13 14 15 16 17 1 18 23 21 19 22 BACK PANEL 20 27 28 29 30 26 25 31 24 32 33 RIGHT SIDE PANEL 9 36 35 34 11 CKD2328_2330_B091103.
1.) CD Power Panel (Flashing Blue Light When Opening). 2.) Mute Indicator (Red). 3.) ALARM SET Button. 4.) Snooze Sensor. 5.) CLOCK SET Button. 6.) Display AUTO DIMMER. 7.) PROGRAM Button. 8.) LCD Display. 9.) TUNING Control. 10.) Remote Sensor. 11.) Reverse SKIP/Search Button. 12.) PLAY/PAUSE 13.) Forward SKIP/Search 14.) STOP Button. Button. Button. 15.) REPEAT Button. 16.) OPEN/CLOSE Button. 17.) Standby LED Indicator. 18.) STANDBY/ON Button. 19.) SLEEP Button. 20.) MINUTE Button. 21.
REMOTE CONTROL (Model CKD2330 Only) 5 6 4 7 3 8 9 2 1 10 11 1.) VOLUME – Button. 2.) MUTE Button. 3.) Reverse SKIP/SEARCH 4.) STOP Button. Button. 5.) STANDBY/ON Button. 6.) PLAY/PAUSE Button. 7.) OPEN/CLOSE Button. 8.) RANDOM Button. 9.) Forward SKIP/SEARCH Button. 10.) VOLUME + Button. 11.) Battery Compartment (Back Cabinet) 13 CKD2328_2330_B091103.
OPERATING INSTRUCTIONS • Make sure you have installed the back up batteries in the battery compartment. • Make sure you have installed the AM loop antenna and extended the FM lead wire antenna to its full length. • Make sure you have removed the remote control battery spacer from the remote handset (Model CKD2330 only). • Connect the AC power cord plug to a 120V 60Hz AC outlet.
SETTING THE WAKE-UP TIME 1.) Depress and hold the ALARM SET button. The display will change from clock time to wake-up time and show “7:00 ”. Repeatedly press the HOUR button to adjust the display to the correct wake-up hour, AM or PM. 2.) Continue to depress the ALARM SET button and repeatedly press the MINUTE button to adjust the display to the correct wake-up minute. 3.) When the display shows the desired wake-up time release all the buttons.
LISTENING TO THE RADIO 1.) Slide the CD/RADIO selector switch, located on the top cabinet, to the RADIO position. 2.) Press the STANDBY/ON button on the front panel or the remote control (model CKD2330 only) to turn the system ‘On’. The Standby indicator goes off and an AM or FM radio frequency appears on the display. 3.) Select the desired band – AM, FM, or FM ST. – by sliding the Band selector, located on the right side, to the appropriate position. 4.
Hints For Better Reception FM – Adjust the position and direction of the FM lead wire antenna until you find the position and direction that provides the best reception. AM Loop Antenna FM Wire Antenna AM – Adjust the direction of the AM loop antenna that you connected to the back of the radio. If this does not provide sufficient improvement try removing the loop from the antenna bracket and moving it further away from the radio cabinet (as far as the wire will allow).
PLAYING COMPACT DISCS NOTE: Although this CD player can read CD-R and CD-RW discs, in addition to normal CDs, the playability of CD-R and CD-RW discs may be effected by the type of software that was used to create the discs, as well as the quality and condition of the blank media you are using. 100% playability cannot be guaranteed. This is not an indication of a problem with the player. IMPORTANT: THIS MODEL HAS A MOTORIZED ELECTRONIC CD DOOR. DO NOT ATTEMPT TO OPEN THE DOOR MANUALLY.
4.) The Power Panel will rotate 90 degrees to allow you to load your disc in the CD player. Before loading your own disc be sure to remove the dummy CD transit card from the player and discard it. 5.) Place your disc on the center spindle with the printed label side facing you. Gently press on the disc near the center hole to insure that the disc is properly ‘seated’on the spindle. 6.) Press the OPEN/CLOSE button on the front panel or on the remote control (Model CKD2330 only).
7.) Press the PLAY/PAUSE button on the front panel or on the remote control (Model CKD2330 only). Playback begins on track 1 and the PLAY indicator appears in the display. PLAY Adjust the VOLUME controls to the desired level. 8.) Playback will continue until the last track has played then the disc stops, the PLAY indicator disappears, and the display again shows the total number of tracks on the disc.
PAUSE Control To pause momentarily during CD playback press the PLAY/PAUSE button on the front panel or on the remote control (Model CKD2330 only) again. The sound stops and the PLAY indicator flashes but the disc continues to spin. PLAY button again to cancel the Pause mode and resume Press the PLAY/PAUSE normal playback. The sound resumes at the same point on the disc and the PLAY indicator stops flashing.
SPECIAL PLAYBACK MODES REPEAT Playback You can program the player to continuously repeat a single track or the entire disc. The Repeat mode can be selected while the disc is playing or while the disc is stopped. Single Track Repeat Select the track to be repeated and then press the REPEAT button on the front panel once. The REPEAT indicator begins flashing in the display. If necessary, press the PLAY/PAUSE button to begin playback. The selected track will be repeated continuously.
RANDOM Playback (Model CKD2330 Only) When the Random Playback mode is selected all the tracks on the disc will be played in random order. Random Playback mode can be selected while the disc is playing or while the disc is stopped. Press the RANDOM button on the remote control (Model CKD2330 Only). There is no Random button on the front panel. The RANDOM indicator appears in the display. If necessary, press the PLAY/PAUSE PLAY button to begin playback.
PROGRAMMED PLAYBACK Use the Programmed Playback feature to play up to 20 tracks on a disc in any desired order. You may also program a particular track to play several times within a programmed sequence if desired. NOTES: (A.) You cannot program a disc while it is playing. Press the STOP stop playback and then follow the programming steps below. button to (B.) Programming is only possible with the front panel control. There is no PROGRAM button on the remote control. 1.
3.) Press the SKIP Forward or SKIP Reverse buttons to select the first track number to be programmed. Example: Track number 7. PROGRAM When the desired track number appears in the display press the PROGRAM button again. Track 7 is now entered in Program Memory number “01”. The program memory number now advances to number “02”and continues flashing. PROGRAM 4.) Repeat step 3, selecting a different track number each time until you have entered up to 20 tracks in the program memory.
6.) When the program is completed the player stops and the display again shows the total tracks on the disc. However the PROGRAM indicator remains in the display and the player remains in the Programmed Playback mode. PROGRAM If you press the PLAY/PAUSE button the programmed sequence will play again. To cancel the Programmed Playback mode press the STOP button while the player is stopped. The PROGRAM indicator goes off.
ALARM Function You can use the alarm function to wake you to an electronic buzzer tone, the radio, or your favorite CD. First press the ALARM SET button on the front panel to check the Wake Up time setting. Adjust the Wake Up time if necessary. Then press the ALARM ON/OFF button on the top panel. The Alarm “On” indicator appears in the display.. Wake To Buzzer Press the STANDBY/ON mode.
Wake To CD Load the desired CD, begin playback and adjust the volume to the desired level. button to put the system in the Standby (Power ‘Off’) Press the STANDBY/ON mode. Set the MUSIC /BUZZER switch on the top panel to the MUSIC position. At the selected wake up time the CD will begin to play. It will continue for one hour, or until the end of the disc, and then shut off automatically. To stop the CD sooner, press the ALARM ON/OFF button once or STANDBY/ON button on the front panel.
SNOOZE Function After the alarm turns on in the morning you can use the Snooze function to grab a few more minutes sleep before the alarm sounds again. To activate the Snooze function you can press the SNOOZE button on the top cabinet, or you can simply wave your hand in front of the Snooze Sensor on the front panel. The effective operating range of the Snooze Sensor is approximately 2 inches. The Snooze function will stop the alarm for 5 minutes and then turn the alarm on again.
SLEEP TIMER (Front Panel Only) This system includes a programmable Sleep Timer that allows you to fall asleep from 59 minutes of music and then shuts the power ‘Off’automatically. To Operate The Sleep Timer: 1.) Turn the system ‘On’and operate either the Radio or CD function as usual. 2.) Adjust the Volume level controls to the desired level. Remember that the level you select for the sleep to music function is the same level you will hear when the timer turns the system on in the morning. 3.
NOTES: • You can shut the unit off manually before the Sleep Timer counts down to “00” by pressing the STANDBY/ON button at any time. Or just cancel the Sleep Timer by pressing the SNOOZE button. • Remember that if you are falling asleep to CD you will also wake to CD, and if you fall asleep to the radio you will also wake to the radio. • If you are falling asleep to CD, the system will only operate until the CD ends.
MUTE Function (Model CKD2330 Only) To stop the sound from the speakers temporarily press the MUTE button on the remote control handset. The Mute indicator light (red) comes on. The sound stops but the unit remains ‘On’. Press the MUTE button again to cancel Mute function and restore the sound. The Mute indicator light (red) goes off. Display Dimmer The brightness of the display is automatically adjusted for the room light conditions.
CARE AND MAINTENANCE COMPACT DISC CARE • To remove a disc from its storage case, press down on the center of the case and lift the disc out, holding it carefully by the edges. • Fingerprints and dust should be carefully wiped off the disc’s recorded surface with a soft cloth.Unlike conventional records, compact discs have no grooves to collect dust and microscopic debris, so gently wiping with a soft cloth should remove most particles. Wipe in a straight line from the inside to the outside of the disc.
LIMITED WARRANTY Emerson Radio Corp. warrants manufacturing defects in original material, including original parts and workmanship, under normal use and conditions, for a period of ninety (90) days from the date of original purchase in the U.S. With your dated proof of purchase, we will provide repair service at no charge for labor and parts at an authorized Depot Repair Facility, or replace the product in our discretion.
R EMERSON Part No.: 16-2911B 309-01 CKD2328_2330_B091103.