Instruction Manual D200154X012 4194A, B, and C Controllers September 2014 Fisherr 4194A, B, and C Differential Pressure Controllers1‐1‐ Contents 1. Introduction Scope of Manual . . . . . . . . . . . . . . . . . . . . . . . . . . . . . 3 Description . . . . . . . . . . . . . . . . . . . . . . . . . . . . . . . . . 5 Specifications . . . . . . . . . . . . . . . . . . . . . . . . . . . . . . . 5 Educational Services . . . . . . . . . . . . . . . . . . . . . . . . . 5 2.
Instruction Manual 4194A, B, and C Controllers D200154X012 September 2014 Replacing the Proportional Band Adjustment Knob, Nozzle Assembly, and Set Point Beam Assembly . . . . . . . . . . . . . . . . . . . . . . Replacing the Flapper Assembly and Flapper Flexure Pivot Assembly . . . . . . . . . Replacing the Proportional or Reset Bellows . . . . . . . . . . . . . . . . . . . . . . . . . . . . . Replacing the Reset Restriction Valve (4194B Controllers) . . . . . . . . . . . . . . . . . . .
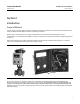
Instruction Manual 4194A, B, and C Controllers D200154X012 September 2014 Section 1 Introduction Scope of Manual This instruction manual provides installation, operating, calibration, maintenance, and parts ordering information for 4194A, 4194B and 4194C differential pressure indicating controllers. Portions of this manual apply only to specific configurations in the 4194 controller configurations.
Instruction Manual 4194A, B, and C Controllers D200154X012 September 2014 Table 1‐1. Specifications content is not to exceed 1 ppm weight (w/w) or volume (v/v) basis. Condensation in the air supply should be minimized. Available Configurations See table 1‐2 Input Signal (Differential Pressure Sensing Element Range) Lower and Upper Range Limits: As shown in table 1‐3 Maximum Allowable Pressure: As shown in table 1‐3 Remote Set Point Pressures 0.2 to 1.0 bar (3 to 15 psig) or 0.4 to 2.
Instruction Manual 4194A, B, and C Controllers D200154X012 September 2014 Table 1‐1. Specifications (continued) Operative Ambient Temperature Limits(2) -40 to 70_C (-40 to 160_F) Hazardous Area Classification Complies with the requirements of ATEX Group II Category 2 Gas and Dust Approximate Weight 4.
Instruction Manual 4194A, B, and C Controllers D200154X012 September 2014 Table 1‐2.
Instruction Manual 4194A, B, and C Controllers D200154X012 September 2014 Section 22‐2‐ Installation WARNING To avoid personal injury or property damage resulting from the sudden release of pressure: D Always wear protective clothing, gloves, and eyewear when performing any installation operations. D Personal injury or property damage may result from fire or explosion if natural gas is used as the supply medium and preventive measures are not taken.
Instruction Manual 4194A, B, and C Controllers D200154X012 September 2014 Pipestand Mounting Refer to figure 2‐2. Pipestand mounting parts are provided to mount the controller to a 2‐inch (nominal) pipe. Attach a bracket (key 68) to the controller with cap screws (key 66) and lock washers (key 67). Attach two clamps (key 69) to the bracket, and fasten the controller to the pipe. Figure 2‐2.
Instruction Manual 4194A, B, and C Controllers D200154X012 September 2014 Figure 2‐3. Panel Mounting HEX HEAD CAP SCREW (KEY 66) 13 (0.50) 62 (2.43) BRACKET (KEY 68) 84 (3.29) LOCK WASHER (KEY 67) 63 (2.49) ROUND HEAD MACHINE SCREW (KEY 70) 12.06 (306) 14 (0.56 R) TOP VIEW 236 (9.31) REAR VIEW 36A9760‐A A6733 DIMENSIONS OF PANEL CUTOUT mm (INCH) Wall Mounting Using the dimensions in figure 2‐4, drill holes in the wall to align with the four holes in the bracket (key 68).
4194A, B, and C Controllers September 2014 Instruction Manual D200154X012 Pressure Connections WARNING To avoid personal injury or property damage resulting from the sudden release of pressure, do not install any system component where service conditions could exceed the limits given in this manual. Use pressure‐relieving devices as required by government or accepted industry codes and good engineering practices. Refer to figure 2‐5 for pressure connection locations.
Instruction Manual 4194A, B, and C Controllers D200154X012 September 2014 (3 to 15 psig) remote set point pressure range for a 0.2 to 1.0 bar (3 to 15 psig) controller output signal range or a 0.4 to 2.0 bar (6 to 30 psig) remote set point pressure range for a 0.4 to 2.0 bar (6 to 30 psig) controller output signal range.
Instruction Manual 4194A, B, and C Controllers D200154X012 September 2014 Section 33‐3‐ 4194A Proportional‐Only Controllers Adjustments for 4194A Controllers This section includes descriptions of adjustments and procedures for prestartup, startup, and calibration. Adjustment locations are shown in figures 3‐1 and 3‐3. To better understand the adjustments and overall controller operation, refer to the principle of operation section and to the schematic diagrams in figures 3‐4 and 3‐5.
Instruction Manual D200154X012 4194A, B, and C Controllers September 2014 Remote Set Point (suffix letter M) Adjustment CAUTION Do not manually move the set point indicator on controllers with remote set point. Manually moving the set point indicator could damage the controller. If the controller is equipped with remote set point (suffix letter M), vary the remote set point pressure to change the set point.
4194A, B, and C Controllers Instruction Manual September 2014 D200154X012 For reverse control action: An increasing sensed differential pressure decreases output pressure. After changing the action, tighten the two screws on the proportional band indicator cover. Switching the Auto/Manual Station (suffix letter E) Note Switching the controller between automatic and manual mode without balancing can disturb the process and cause controller cycling.
Instruction Manual 4194A, B, and C Controllers D200154X012 September 2014 5. Adjust the proportional band for 5 percent DIRECT. 6. If necessary, connect a pressure source to the process connection and adjust the process pointer to the last mark on the left side of the scale. If the last scale mark is 0 psig, a pressure source is not required. 7. The controller output pressure should be 0 psig. 8. Rotate the proportional band to 5 percent REVERSE. 9. The controller output should be within 0.
4194A, B, and C Controllers September 2014 Instruction Manual D200154X012 5. Check the stability of the recommended proportional band setting by introducing a disturbance and monitoring the process. Calibration of 4194A Controllers WARNING To avoid personal injury or property damage resulting from the sudden release of pressure, do not exceed the operating limits given in this manual.
Instruction Manual 4194A, B, and C Controllers D200154X012 September 2014 4. The process pointer should indicate the process scale lower limit. If not, adjust the process pointer to the process scale lower limit by loosening the zero adjustment locking screw and turning the zero adjustment screw. Tighten the zero adjustment locking screw. 5. Apply process differential pressure equal to the process scale span upper limit. 6. The process pointer should indicate the process scale upper limit.
4194A, B, and C Controllers Instruction Manual September 2014 D200154X012 10. Loosen the remote set point zero adjustment locking screw and adjust the remote set point zero adjustment screw to correct for half the error at mid‐scale. Tighten the zero adjustment locking screw. 11. Apply remote set point pressure equal to the lower and upper range limits and make sure the set point indicator is within ±1 percent. 12.
Instruction Manual 4194A, B, and C Controllers D200154X012 September 2014 Figure 3‐3.
Instruction Manual 4194A, B, and C Controllers D200154X012 September 2014 Principle of Operation for 4194A Controllers Overall Operation Refer to the schematic diagram in figure 3‐4. The input element is connected to the process pointer and to the flapper by connecting links. As the process differential pressure increases (in a direct‐acting controller), the flapper moves toward the nozzle, restricting flow through the nozzle and increasing nozzle pressure.
Instruction Manual 4194A, B, and C Controllers D200154X012 September 2014 Remote Set Point (suffix letter M) Operation The capability to adjust the controller set point from a remote location is available with all 4194A controllers. This option is designated by the suffix letter M in the type number. A control pressure is applied to the capsular element within the remote set point assembly. The expansion and contraction of the capsule moves the set point indicator via a connecting linkage.
Instruction Manual 4194A, B, and C Controllers D200154X012 September 2014 Section 44‐4‐ 4194B Proportional‐ Plus‐Reset Controllers and 4194C Proportional‐ Plus‐Reset‐Plus‐Rate Controllers Adjustments for 4194B and C Controllers This section includes descriptions of adjustments and procedures for prestartup, startup and calibration. Adjustment locations are shown in figures 4‐1 and 4‐2.
Instruction Manual 4194A, B, and C Controllers D200154X012 September 2014 Figure 4‐2.
4194A, B, and C Controllers September 2014 Instruction Manual D200154X012 If the controller is equipped with the optional internal or external set point adjustment, turn the adjustment knob clockwise to increase the process set point and counterclockwise to decrease the process set point. Remote Set Point (suffix letter M) Adjustment CAUTION Do not manually move the set point indicator on controllers with remote set point. Manually moving the set point indicator could damage the controller.
Instruction Manual 4194A, B, and C Controllers D200154X012 September 2014 For direct control action: An increasing sensed differential pressure increases output pressure. For reverse control action: An increasing sensed differential pressure decreases output pressure. After changing the action, tighten the two screws on the proportional band indicator cover. Reset Adjustment To adjust reset, open the controller cover and locate the RESET adjustment.
4194A, B, and C Controllers Instruction Manual September 2014 D200154X012 Prestartup Checks for 4194B and C Controllers Refer to figure 4‐1 for adjustment locations and refer to figure 6‐1 for key number locations. When performing the checks, open loop conditions must exist. An open loop exists when the controller output does not affect the input pressure or other control signal to the controller.
Instruction Manual 4194A, B, and C Controllers D200154X012 September 2014 2. For controllers with: Manual set point: Move the set point indicator to the desired set point. Remote set point: a. See figure 2‐5 for the location of the remote set point connection. Connect an adjustable pressure source to the remote set point connection. b. Adjust the pressure source until the set point indicator reaches the desired set point. Remember: Increasing the remote set point pressure increases the set point. 3.
4194A, B, and C Controllers September 2014 Instruction Manual D200154X012 Calibration of 4194B and C Controllers WARNING To avoid personal injury or property damage resulting from the sudden release of pressure, do not exceed the operating limits given in this manual. General Calibration Instructions Note If the controller has the auto/manual station (suffix letter E), be sure the controller is in the automatic mode before performing calibration.
Instruction Manual 4194A, B, and C Controllers D200154X012 September 2014 5. Apply process differential pressure equal to the process scale span upper limit. 6. The process pointer should indicate the process scale upper limit. If not, adjust the span screw to correct one‐half the error as follows: clockwise to increase span for a low indication (below the upper limit); counterclockwise to decrease span for a high indication (above the upper limit). 7.
4194A, B, and C Controllers September 2014 Instruction Manual D200154X012 12. If necessary, perform the process indicator zero and span calibration procedure in this section. Otherwise, perform the flapper alignment procedure in this section. Flapper Alignment Note Perform the process indicator zero and span calibration procedure and, for controllers with remote set point (suffix letter M), the remote set point zero and span calibration procedure before the flapper alignment.
Instruction Manual 4194A, B, and C Controllers D200154X012 September 2014 10. Set the proportional band to 30 percent DIRECT. The controller output should be relatively stable at any value within the output range. If not, adjust flapper leveling screw 3 (the screw nearest the nozzle) until the output is relatively stable. 11. Set the proportional band to 30 percent REVERSE. The controller output should be relatively stable within the output range.
4194A, B, and C Controllers Instruction Manual September 2014 D200154X012 21. For controllers with anti‐reset windup (suffix letter F), remove the two machine screws, valve cover and two O‐rings installed in step 1 of this procedure. Install the anti‐reset windup relief valve (key 55) with the arrow pointing in the direction recorded in step 1. Anti‐Reset Windup Differential Relief Valve Calibration Calibration for the differential relief valve to relieve on rising controller output pressure 1.
Instruction Manual 4194A, B, and C Controllers D200154X012 September 2014 2. Set the reset adjustment to 0.01 minutes per repeat (wide open) and the rate adjustment (4194C controllers) to the OFF position. 3. For a controller with manual set point, move the set point indicator to the mid‐scale mark on the process scale. For a controller with remote set point, adjust the remote set point pressure until the set point indicator is at the mid‐scale mark on the process scale. 4.
Instruction Manual 4194A, B, and C Controllers D200154X012 September 2014 Figure 4‐5.
Instruction Manual 4194A, B, and C Controllers D200154X012 September 2014 Figure 4‐6.
Instruction Manual 4194A, B, and C Controllers D200154X012 September 2014 input and less feedback motion occurs, which increases the gain. The controller action is changed from direct to reverse by turning the proportional band adjustment to position the nozzle on the flapper quadrant to a point where the direction of the flapper motion versus input motion is reversed as shown in the flapper detail of figure 4‐5 or 4‐6.
Instruction Manual 4194A, B, and C Controllers D200154X012 September 2014 A control pressure is applied to the capsular element within the remote set point assembly. The expansion and contraction of the capsule moves the set point indicator via connecting linkage. Increasing the control pressure to the capsule increases the set point setting and decreasing the control pressure reduces the set point setting.
4194A, B, and C Controllers Instruction Manual September 2014 D200154X012 Section 55‐5‐ Maintenance Controller parts are subject to normal wear and must be inspected and replaced as necessary. The frequency of inspection and parts replacement depends upon the severity of the service conditions. When inspection or repairs are required, disassemble only those parts necessary to accomplish the job.
Instruction Manual 4194A, B, and C Controllers D200154X012 September 2014 Table 5‐1. Troubleshooting Chart Fault 1. Process wanders or cycles about set point Possible Cause Check Correction 1.1 Proportional band and reset settings 1.1 Refer to the Start‐up section for controller settings. 1.1 If stable control cannot be attained, and all other elements of the loop are functionally correct, examine other possible causes related to the controller. 1.2 Supply pressure varying 1.
Instruction Manual 4194A, B, and C Controllers D200154X012 September 2014 Table 5‐1. Troubleshooting Chart (Continued) Fault 2. Controlling off set point as reflected by process and set point indicators. Possible Cause Check Correction 2.7 Reset valve leaks. 2.7 Adjust output to 1.0 bar (15 psig) for a 0.2 to 1.0 bar (3 to 15 psig) output or 2.0 bar (30 psig) for a 0.4 to 2.0 bar (6 to 30 psig) output. Close the reset valve.
Instruction Manual 4194A, B, and C Controllers D200154X012 September 2014 Table 5‐1. Troubleshooting Chart (Continued) Fault 6. Controller will not attain full output range. 7. Controller remains at full output 8. Controller remains at zero output Check Correction 6.5 Leak in nozzle pressure tubing Possible Cause 6.5 Using soap solution, check for leaks in the nozzle tubing assembly. 6.6 Relay malfunction 6.6 Manually push the flapper away from the nozzle. The output pressure should be zero.
Instruction Manual 4194A, B, and C Controllers D200154X012 September 2014 Replacing Common Controller Parts WARNING To avoid personal injury or property damage caused by the uncontrolled release of pressure, be sure any trapped process pressure is properly vented from the controller. Vent any supply pressure from the controller before disassembly. Replacing the Process Pressure Scale WARNING Refer to the Maintenance WARNING on page 38.
Instruction Manual 4194A, B, and C Controllers D200154X012 September 2014 5. Secure the scale with the four self‐tapping screws (key 37). 6. If the controller has remote set point (suffix letter M), perform the appropriate remote set point zero and span calibration procedure in Section 3 or 4. 7. Perform the appropriate process indicator zero and span calibration and the flapper alignment procedures in Section 3 or 4. Replacing the Relay WARNING Refer to the Maintenance WARNING on page 38. 1.
4194A, B, and C Controllers September 2014 Instruction Manual D200154X012 CAUTION The case and cover are an integral unit; attempting to separate them will damage the hinge. If the cover needs to be replaced, replace the case also. 1. Remove the external piping and fittings from the controller. 2. Remove the controller from its mounting to a maintenance area. 3. Remove the nine screws (key 38) from the case and cover assembly (key 1) and lift out the controller assembly.
Instruction Manual 4194A, B, and C Controllers D200154X012 September 2014 1. After bleeding away pressure, remove the process pressure or remote set point piping from the controller. 2. At the pressure control block (key 57), unscrew the nut that secures the capsular element tubing so that the tubing can be removed from the pressure control block. 3. Remove the two cap screws (key 58) that hold the pressure control block to the frame, and lift out the pressure control block. 4.
Instruction Manual 4194A, B, and C Controllers D200154X012 September 2014 Figure 5‐3.
Instruction Manual 4194A, B, and C Controllers D200154X012 September 2014 10. Remove the E‐ring (key 27) from the nozzle assembly (key 21). 11. Remove the nozzle assembly (key 21) and plastic washer (key 22) from the bottom of the set point beam assembly (key 23). 12. Remove the retaining clip (key 26). 13. Remove the proportional band adjustment knob (key 25) and plastic washer from the set point beam assembly (key 23). 14. Inspect the nozzle assembly (key 21), and replace it if necessary.
Instruction Manual 4194A, B, and C Controllers D200154X012 September 2014 7. Install the relay nozzle tubing assembly (key 18) into the set point beam assembly. 8. Set the proportional band adjustment between DIRECT and REVERSE. Do this by aligning the tab on the proportional band adjustment knob with the hole in the set point beam assembly as shown in figure 5‐4. 9. Position the proportional band adjustment knob, relay nozzle tubing assembly and the set point beam assembly on the frame.
Instruction Manual 4194A, B, and C Controllers D200154X012 September 2014 16. At the frame manifold (key 135), tighten the nut that secures the tubing from the relay nozzle tubing assembly (key 18). Apply full supply pressure with the nozzle capped and check for leaks. Remove supply pressure. 17. Install the set point beam bias spring (key 28) into the frame bore and onto the spring seat on the set point beam assembly. 18. Attach link 3 to the set point beam shoe as shown in figure 5‐3. 19.
4194A, B, and C Controllers Instruction Manual September 2014 D200154X012 31. Perform the controller calibration procedures and, if necessary, the appropriate remote set point calibration procedure in Section 3 or 4. 32. Mount the controller as described in the Installation section. 33. Connect external piping to the controller. Replacing the Flapper Assembly and Flapper Flexure Pivot Assembly 1.
Instruction Manual 4194A, B, and C Controllers D200154X012 September 2014 Figure 5‐7. Bellows Assembly and Proportional Band Adjustment (Process Scale and Proportional Band Indicator Cover Removed) PROPORTIONAL BELLOWS BELLOWS BRACKET (KEY 31) ADJUSTABLE SET POINT PIVOT ASSEMBLY (KEY 17) SCREW AND WASHER (KEYS 19 AND 20) LINK 4 LINK 2 W4199 Figure 5‐8. Leveling Screw Alignment FLAPPER LEVELING SCREW NUMBER 2 FLAPPER ASSEMBLY Figure 5‐9.
4194A, B, and C Controllers September 2014 Instruction Manual D200154X012 22. Adjust the length of link 2 by turning the adjustment screw, shown in figure 5‐10, clockwise to increase the length or counterclockwise to decrease the length, so that the pin on the end of the link is approximately one‐half of its diameter short of aligning with the hole in the flapper assembly, as shown in figure 5‐11. 23. Connect link 2 to the flapper assembly. 24. Set the proportional band between DIRECT and REVERSE.
Instruction Manual 4194A, B, and C Controllers D200154X012 September 2014 Figure 5‐10. Link 2 and 4 Adjustment Locations LINK 4 LINK 4 ADJUSTMENT LINK 2 LINK 2 ADJUSTMENT LINK 3 W3442‐1 Figure 5‐11. Link 2 Adjustment LEVELING SCREW NUMBER 1 CONNECTING TAB ON FLAPPER ASSEMBLY W4191 W3451 1/2 OF PIN DIAMETER 39. Loosen the two adjustment screws on link 4, shown in figure 5‐10, and connect the link to the bellows bracket (key 31), allowing the link to find its free length. 40.
4194A, B, and C Controllers Instruction Manual September 2014 D200154X012 43. Adjust the set point to the process scale lower limit. 44. Tape the process pointer at the process scale lower limit. The output pressure may be anywhere between 0.2 to 1.0 bar (3 and 15 psig) for a 0.2 to 1.0 bar (3 to 15 psig) output signal range or between 0.4 to 2.0 bar (6 and 30 psig) for a 0.4 to 2.0 bar (6 to 30 psig) output signal range.
Instruction Manual 4194A, B, and C Controllers D200154X012 September 2014 Figure 5‐12. Bellows Assembly, Bellows Bracket, and Bellows Beam Location FOUR SCREWS (KEY 6) RESET BELLOWS WASHER (KEY 362) TWO SCREWS (KEY 35) PROPORTIONAL BELLOWS RESET GAIN BELLOWS BRACKET (KEY 31) LINK 4 (KEY 65) W4199 Note Both bellows need not be removed if only one requires replacement. 8. Unscrew the bellows assembly (key 48).
4194A, B, and C Controllers Instruction Manual September 2014 D200154X012 19. Lift link 4 out of the hole in the bellows bracket (key 31) and ensure it drops back into the hole under its own weight. If not, perform steps 35 through 41 of the Flapper Assembly and Flapper Flexure Pivot Assembly replacement procedures. 20. If the controller is proportional‐only (4194A controllers), go to step 34. If the controller has reset (4194B or C controllers), continue with step 21.
Instruction Manual 4194A, B, and C Controllers D200154X012 September 2014 36. Mount the controller as described in the Installation section. 37. Connect external piping to the controller. Replacing the Reset Restriction Valve (4194B Controllers) Refer to the 4194B controller portion of figure 6‐1 for key number locations. 1. Remove the controller assembly from the case by performing steps 1 through 3 of the case and cover replacement procedures. 2.
4194A, B, and C Controllers Instruction Manual September 2014 D200154X012 8. Remove the rate/reset valve assembly from the frame. 9. Inspect, and if necessary, replace the gasket (key 5). 10. To install the replacement rate/reset valve assembly, position the assembly on the frame (key 3) and secure it with the mounting screw (key 162). 11. Position the gasket (key 5) on the rate/reset valve assembly.
Instruction Manual 4194A, B, and C Controllers D200154X012 September 2014 2. Loosen the nuts at both ends of the relief valve tubing (key 44), and remove the tubing. 3. Install the replacement relief valve tubing, and tighten the tubing nuts at both ends. 4. Apply the proper supply pressure to the controller, cap the nozzle and check for leaks. Remove the supply pressure. 5. Position the controller assembly in the case and start, but do not tighten the nine mounting screws.
Instruction Manual 4194A, B, and C Controllers D200154X012 September 2014 3. Attach the replacement link in the same holes noted in step 2 to the process pointer and the short pivot clevis assembly. If you do not know in which hole in the process pointer the link was connected, place it in the middle hole.
Instruction Manual 4194A, B, and C Controllers D200154X012 September 2014 5. Move the set point indicator, manually or with remote set point pressure, to the process scale lower limit and set the proportional band to 5 percent REVERSE. The nozzle should not be touching the flapper. If it is, adjust flapper leveling screw 1 (the screw nearest the nozzle) until clearance is obtained. 6. Note the hole position and disconnect link 1 from the short pivot clevis assembly.
Instruction Manual 4194A, B, and C Controllers D200154X012 September 2014 11. If leveling screw 1 protrudes further than leveling screw 3, turn the link 3 adjusting screw counterclockwise. If leveling screw 3 protrudes further than leveling screw 1, turn the link 3 adjusting screw clockwise. 12. Repeat steps 8 through 11 until leveling screws 1 and 3 protrude an equal distance from the clinch nuts. 13.
Instruction Manual 4194A, B, and C Controllers D200154X012 September 2014 11. For a controller with reset, adjust the reset adjustment to 0.01. The rate adjustment (4194C) should remain in the OFF position. 12. The controller output should be within 0.14 bar (2 psig) of the supply pressure. If not, adjust flapper leveling screw 1 (the screw nearest the nozzle) until the output is within 0.14 bar (2 psig) of supply pressure. 13.
4194A, B, and C Controllers September 2014 Instruction Manual D200154X012 Refer to figures 6‐2 and 6‐3 for key number locations. 1. Remove process pressure from the controller. 2. Note the hole location and disconnect link 1 (key 90) from the process pointer. 3. Disconnect the process pressure connection unions (key 93) from the pedestal assembly (key 81). Use two 5/16‐inch hex wrenches. 4.
Instruction Manual 4194A, B, and C Controllers D200154X012 September 2014 5. Remove the two screws (key 102) attaching the long pivot clevis assembly to the mounting plate (key 77). 6. Loosen the screw on the pivot adjustment arm of the replacement pivot clevis assembly, and adjust the arm to the same length as the arm on the pivot assembly being replaced. 7. Attach the replacement pivot clevis assembly to the mounting plate with the two mounting screws (key 102). 8.
4194A, B, and C Controllers September 2014 Instruction Manual D200154X012 Refer to figure 6‐3 for capsular element key number locations. 1. Remove the process pressure from the controller. 2. Note the hole positions of links 1 and 5 (keys 88 and 90) and disconnect the links from the short pivot clevis assembly (key 89). Also, note the screw position of the linearity adjustment for later reference. 3.
Instruction Manual 4194A, B, and C Controllers D200154X012 September 2014 6. Perform the capsular element maintenance calibration procedures in this section. Perform the controller calibration procedures and, if necessary, the appropriate remote set point calibration procedures in Section 3 or 4. Replacing the Process Tubing WARNING Refer to the Maintenance WARNING on page 38. 1. Remove process pressure from the controller. 2.
4194A, B, and C Controllers Instruction Manual September 2014 D200154X012 5. Tighten the machine screw (key 98) and the set screw in the hex nut to fasten the drive bracket assembly in that position. Setting the Travel Stops WARNING Refer to the Maintenance WARNING on page 38. 1. Loosen the set screw in the travel stop nut (key 86). Note Make sure the loose travel stop nut does not bind on the diaphragm capsule extension when pressurizing the capsules. Damage to the capsules may result. 2.
Instruction Manual 4194A, B, and C Controllers D200154X012 September 2014 c. Before retightening the drive flexure screws, hold the long pivot clevis assembly shaft in the middle of the bushing end play. Be sure neither bushing is resting against the inside end of either bearing. d. Tighten the drive flexure screws to hold the pivot clevis assembly shaft in position. 2. Set the linearity adjustment screw on the short pivot clevis assembly so the two arms of the short pivot clevis assembly are parallel.
4194A, B, and C Controllers September 2014 Instruction Manual D200154X012 7. The process pointer should be aligned with the pointer subassembly as shown in figure 5‐14. If not, loosen the zero adjustment locking screw and adjust the zero adjustment screw to align the process pointer with the pointer subassembly. Tighten the zero adjustment locking screw. 8. The process pointer should indicate mid‐scale ±3 percent of the process scale span.
Instruction Manual 4194A, B, and C Controllers D200154X012 September 2014 Figure 5‐19.
4194A, B, and C Controllers September 2014 Instruction Manual D200154X012 18. Adjust the process differential pressure to the lower and upper limits of the scale span to make sure the process pointer is still within ±1 percent of the lower and upper scale limits. 19. Perform the flapper alignment procedure and, if necessary, the appropriate remote set point calibration procedure in Section 3 or 4.
Instruction Manual 4194A, B, and C Controllers D200154X012 September 2014 Figure 5‐20 shows the parts and adjustment locations. Refer to figure 6‐5 for key number locations. Figure 5‐20.
4194A, B, and C Controllers Instruction Manual September 2014 D200154X012 7. Loosen the adjustment screw (key 118) on the adjustment arm of the replacement pivot assembly, and set the arm to the same length as the arm on the pivot assembly being replaced. Tighten the screw. 8. To replace the pivot assembly, first put the spring washer (key 112) on the screw (key 109). Then, insert the screw through the replacement pivot assembly and into the mounting plate and tighten.
Instruction Manual D200154X012 4194A, B, and C Controllers September 2014 2. Set the remote set point pressure to 50 percent of the remote set point input range. Note See figure 5‐18. The adjustment arm of the remote set point pivot assembly A turns on a bushing at each end of the shaft supporting the adjustment arm. In the next step, position the shaft so both bushings “float” inside the bearings and do not rest against the end of either bearing. 3.
4194A, B, and C Controllers Instruction Manual September 2014 D200154X012 4. Perform the remote set point maintenance calibration procedure. Perform the appropriate process indicator zero and span calibration and flapper alignment procedures in Section 3 or 4. Remote Set Point (suffix letter M) Maintenance Calibration Refer to figure 5‐20 for parts and adjustment locations. Refer to figure 6‐5 for key number locations. Precalibration Procedures WARNING Refer to the Maintenance WARNING on page 38. 1.
Instruction Manual 4194A, B, and C Controllers D200154X012 September 2014 d. Hold the pivot assembly A shaft in the middle of the bushing end play. Be sure neither bushing is resting against the inside end of either bearing. e. Tighten the screws that hold the drive flexure in place. Setting the Travel Stops WARNING Refer to the Maintenance WARNING on page 38. 1. Loosen the set screw (key 87) in the travel stop nut (key 86).
4194A, B, and C Controllers Instruction Manual September 2014 D200154X012 Remote Set Point Zero and Span Adjustment WARNING Refer to the Maintenance WARNING on page 38. Note For routine remote set point zero and span calibration, refer to the appropriate procedures in Section 3 or 4. Use the following maintenance remote set point zero and span adjustment procedure only if difficulty is encountered with the routine procedure or if nonlinearity occurs.
Instruction Manual 4194A, B, and C Controllers D200154X012 September 2014 Remote Set Point Linearity Adjustment WARNING Refer to the Maintenance WARNING on page 38. Adjust the linearity by loosening and repositioning the linearity adjustment screw in the curved slot on the lever arm of pivot assembly B (key 115). Adjusting the linearity affects the zero and span adjustment. 1. Adjust the remote set point pressure to 50 percent of the remote set point input range.
4194A, B, and C Controllers September 2014 Instruction Manual D200154X012 6. Carefully loosen the nut on the relay nozzle tubing assembly (key 18) where it connects to the auto/manual tubing assembly (key 138). Loosen three screws (keys 34 and 131), and remove the tubing assembly and frame gaskets (keys 4 and 5). 7. Inspect the gaskets (keys 4 and 5) and O‐rings (key 312) for wear. Replace if necessary. Assembly 1. Install the gaskets and the tubing assembly to the frame.
Instruction Manual 4194A, B, and C Controllers D200154X012 September 2014 6. Loosen the two screws (key 290), and separate the switch body assembly (key 291) from the loader assembly (key 282). 7. Remove the O‐rings (keys 292, 293, and 294), switch body springs (key 295), and balls (key 296). 8. Loosen two screws (key 308), and remove the closing plate (key 307) and the closing plate gasket (key 306). 9. Pull the clip (key 300) from its engagement with the lever assembly shaft (key 297). 10.
4194A, B, and C Controllers Instruction Manual September 2014 D200154X012 2. Remove the tubing assembly (key 309). WARNING To avoid personal injury caused by preload from the range spring (key 283), turn the loader knob (key 287) counterclockwise (opposite to the arrow) to relieve pressure on the spring. 3. Loosen the four screws (key 289), and separate the upper loader assembly (key 282) and the lower loader assembly (key 274). 4.
Instruction Manual 4194A, B, and C Controllers D200154X012 September 2014 6. Tighten the spring seat screw. 7. Temporarily apply supply pressure and process differential pressure and check for leaks. 8. Position the controller assembly in the case and start, but do not tighten the nine mounting screws. Slide the controller assembly down to assure an O‐ring seal at the pressure connections along the bottom of the case. Hold the controller assembly in place while tightening the nine mounting screws. 9.
Instruction Manual 4194A, B, and C Controllers D200154X012 September 2014 Section 66‐6‐ Parts Parts Ordering Whenever corresponding with your Emerson Process Management sales office about this equipment, always mention the controller serial number. When ordering replacement parts, refer to the 11‐character part number of each required part as found in the following parts list. WARNING Use only genuine Fisher replacement parts.
Instruction Manual 4194A, B, and C Controllers D200154X012 September 2014 Controller Common Parts (figure 6‐1) Key 19 Note Figure 6‐1 shows key numbers for the construction of 4194A, 4194B, and 4194C controllers. Figure 6‐1 continues over several pages. Be sure to check all pages of figure 6‐1 to find the key numbers. 21 22 23 24* Note Part numbers are shown for recommended spares only. For part numbers not shown, contact your Emerson Process Management sales office.
Instruction Manual 4194A, B, and C Controllers D200154X012 September 2014 Key 46/47* Pressure Gauge(2) RANGE GAUGE MATERIAL Brass Key Description 59 Hex reducing nipple, 1/2 NPT external (2 req'd) (Use only when specified) Steel SST 60 Reducing adaptor, 1/2 NPT internal (2 req'd) (Use only when specified) Steel SST 61 Process scale, aluminum for indicator ass'y (key 101) 0‐5 psid 0‐10 psid 0‐15 psid 0‐20 psid 0‐30 psid 0‐40 psid 0‐50 psid 0‐60 psid 0‐75 psid 0‐
Instruction Manual 4194A, B, and C Controllers D200154X012 September 2014 Figure 6‐1. Controller Assembly Drawings 38A3819‐B SECTION B‐B SEE VIEW E SECTION D‐D 56A9752‐S SHT 1 j APPLY LUB/SEALANT VIEW C‐C, 4194A CONTROLLERS CONTROLLERS WITH REMOTE SET POINT (SUFFIX LETTER M) NOTE: 1 KEY 4 GASKET IS USED BETWEEN INTERNAL FRAME AND FRAME MANIFOLD. 2 KEY 5 GASKET IS USED BETWEEN FRAME MANIFOLD AND RATE/RESET MANIFOLD.
Instruction Manual 4194A, B, and C Controllers D200154X012 September 2014 Figure 6‐1.
Instruction Manual 4194A, B, and C Controllers D200154X012 September 2014 Figure 6‐1.
Instruction Manual 4194A, B, and C Controllers D200154X012 September 2014 Figure 6‐1. Controller Assembly Drawings (cont'd) SECTION B‐B, 4194A CONTROLLERS SECTION B‐B, 4194B CONTROLLERS SECTION B‐B, 4194C CONTROLLERS 56A9752‐S Key Description 262 Rate/reset valve ass'y (For 4194C controllers) Brass bellows 0.2 to 1.0 bar (3 to 15 psig) 0.4 to 2.0 bar (6 to 30 psig) SST bellows 0.2 to 1.0 bar (3 to 15 psig) 0.4 to 2.
Instruction Manual 4194A, B, and C Controllers D200154X012 September 2014 Figure 6‐2. Process and Set Point Indicator Assembly 36A6985‐C Key Description Process and Set Point Indicator Assembly (key 56) (figure 6‐2) 101 Key Description 113 Capsular element ass'y (cont'd) Capsular element assemblies are available in a wide variety of ranges and materials of construction. A few typical assemblies are listed here.
Instruction Manual 4194A, B, and C Controllers D200154X012 September 2014 Key Description Key Description 88 Connecting link ass'y, aluminum/bronze/brass Short pivot clevis ass'y, plastic/SST Connecting link ass'y, aluminum/bronze/brass Process tubing ass'y, S30400 (304 SST) Connects the high pressure capsule ass'y to the high pressure input pressure control block (key 57) 89 90 Capsular Element Assembly (key 113) (figure 6‐3) 12 Cap screw, hex socket, 18‐8 SST (4 req'd) 13 77 78
Instruction Manual 4194A, B, and C Controllers D200154X012 September 2014 Figure 6‐3.
Instruction Manual 4194A, B, and C Controllers D200154X012 September 2014 Figure 6‐4. Indicator Assembly 39A1126‐H Key Description Indicator Assembly (key 101) (figure 6‐4) Note Key numbers 37, 61, 376, 377, and 378 are not included as part of the indicator assembly (key 101). If replacing the indicator assembly and these parts are required, order them separately.
Instruction Manual 4194A, B, and C Controllers D200154X012 September 2014 Figure 6‐5.
Instruction Manual 4194A, B, and C Controllers D200154X012 September 2014 Auto/Manual Station (suffix letter E) (figure 6‐6) Key Description 274 275 Lower loader ass'y, aluminum Spring seat screw, pl steel Part Number Key Description 291 Switch body ass'y, aluminum/nitrile 292* O‐ring, nitrile(5) 293* O‐ring, nitrile(5) 294* O‐ring, nitrile(5) Part Number 1U2398X0032 11A8741X052 13A1584X012 295 276 Valve plug spring, A228 (“music wire”) alt desgntn: K08500 (pl steel) 277* Valve plug, 18‐8
Instruction Manual 4194A, B, and C Controllers D200154X012 September 2014 Figure 6‐6.
Instruction Manual 4194A, B, and C Controllers D200154X012 September 2014 Key Key Description Description Wall Mounting (figure 2‐4) Controller Mounting Parts 66 67 68 Note Contact your Emerson Process Management sales office for any additional parts required for controller mounting. Note Part numbers are shown for recommended spares only. For part numbers not shown, contact your Emerson Process Management sales office.
Instruction Manual 4194A, B, and C Controllers D200154X012 Key Description Regulator Mounting Parts for Yoke‐Mounted Regulator (Mounting Bracket Not Required) Cap screw, hex hd, pl steel (2 req'd) Lock washer, pl steel (2 req'd) Regulator Mounting Parts for Yoke‐Mounted Regulator (With Mounting Bracket) Cap screw, hex hd, pl steel (2 req'd) Lock washer, pl steel (4 req'd) Cap screw, hex hd, pl steel (2 req'd) Hex nut, pl steel (2 req'd) Mounting bracket, G10100 (pl steel) For 1061, size 30, all shaft
4194A, B, and C Controllers September 2014 Instruction Manual D200154X012 Neither Emerson, Emerson Process Management, nor any of their affiliated entities assumes responsibility for the selection, use or maintenance of any product. Responsibility for proper selection, use, and maintenance of any product remains solely with the purchaser and end user. Fisher is a mark owned by one of the companies in the Emerson Process Management business unit of Emerson Electric Co.