WATER RESISTANT PERSONAL STEREO RADIO with DIGITAL TUNING OWNER’S MANUAL HR2227BL Visit our web site at www.emersonradio.com HK2227BL_120203.
Thank you for purchasing this Emerson Water-Resistant Personal stereo FM/AM radio with digital tuner. Our engineers have included many useful and convenient features in this product. Please be sure to read this Owner’s Manual completely to make sure you are getting the maximum benefit from each feature. This product was manufactured using the highest quality components and standards of workmanship. It was tested by Emerson inspectors and found to be in perfect working order before it left our factory.
IMPORTANT NOTES This equipment has been tested and found to comply with the limits for a Class B digital device, pursuant to Part 15 of the FCC Rules. These limits are designed to provide reasonable protection against harmful interference in a residential installation. This equipment generates, uses and can radiate radio frequency energy and, if not installed and used in accordance with the instructions, may cause harmful interference to radio communications.
PREPARATION FOR USE POWER SOURCES This personal stereo radio with AM/FM digital tuner is designed to operate on two alkaline “AAA” batteries, not included. Attempting to operate this unit on any other power source may cause damage to the unit and such damage is not covered by your warranty. INSTALLING THE BATTERIES The battery compartment is located on the back-side of the radio cabinet. 1.) Press down on the mark on the battery cover and slide the cover in the direction of the arrow and lift it up. 2.
ARM-BAND STRAP INSTALLATION AND REMOVAL This radio is supplied with an accessory arm-band strap to secure the radio on your arm while you are jogging or performing other strenuous activities. To install the arm-band strap, slide the arm-band strap bracket into bracket holder on the back cabinet as shown. Adjust the Velcro® strap to fit comfortably but securely around your arm.
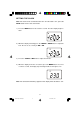
LOCATION OF CONTROLS AND INDICATORS 14 4 15 5 6 7 17 8 3 10 9 16 2 11 1 12 AL ON A R M /O FF 13 18 SIDE CABINET FRONT CABINET 1.) ALARM ON/OFF Button. 14.) PHONES 2.) SNOOZE Button. Jack. 15.) VOLUME (+ / –) Control. 3.) BASS BOOST Button. 16.) POWER “On/Off” Button. 4.) LCD Display. 5.) LOCK Switch. BACK CABINET 6.) BASS ON LED Indicator. 17.) Battery Compartment. 7.) MODE Button. 18.) Arm-band Strap Brackets. 8.) MEM. (Memory) DOWN Button. 9.) BAND (AM/FM) Button. 10.) MEM.
MULTIFUNCTION LCD DISPLAY 4 3 5 7 6 8 9 10 2 1 11 12 13 14 1.) AM (AM Radio Band) Indicator. 2.) FM (FM Radio Band) Indicator. 3.) AM (AM Time) Indicator. 4.) PM (PM Time) Indicator. 5.) AL (Alarm) Indicator. 6.) FM ST (Stereo) Indicator. 7.) LOCK Indicator. 8.) Battery Level Low Indicator. 9.) CH (Channel) Indicator. 10.) Preset Memory Number Display. 11.) MEM (Memory) Indicator. 12.) MHz Indicator. 13.) KHz Indicator. 14.) Radio Frequency/Time Display. 6 HK2227BL_120203.
OPERATING INSTRUCTIONS • Make sure the batteries are installed correctly. • Set the VOLUME control to a low level. • Fully unwind the headphone cord and connect the headphone plug to the PHONES jack. The plug must be fully inserted into the jack, otherwise the sound may be intermittent. • Make sure that the LOCK switch is in the ‘Off’position. IMPORTANT INFORMATION This personal stereo radio is designed to be “water-resistant”. Jogging in the rain with this radio will cause no problems.
LOCK Switch The LOCK switch locks all of the other controls buttons. If you are carrying the radio in a backpack, handbag, gym bag, etc, set the LOCK switch to the ‘On’ position to prevent it from turning ‘On’accidentally by something pressing against the POWER button. Likewise, once you start listening to the radio you can set the LOCK switch to the ‘On’ position to prevent you from accidentally pressing the POWER button again or the TUNING + / – or MEM.
SETTING THE CLOCK Note: The clock can be set with the radio ‘Off’. Or if the radio is ‘On’, press the MODE button once to the clock mode. 1.) Press the MODE button for at least two seconds. The time display begins to flash. 2.) While the display is flashing press the TUNING – /HOUR button to adjust the hour. Be sure to set correctly for AM or PM. 3.) Press the TUNING + /MIN button to adjust the minutes. 4.
LISTENING TO RADIO BASS BOOST Button Press the BASS BOOST button for added Bass response. The BASS ON LED indicator lights. Press again to cancel Bass Boost and resume normal sound. The BASS ON LED indicator goes off. OPERATION 1.) Make sure that the LOCK button is in the ‘Off’position. (The LOCK indicator does not appear in the display.) 2.) Press the POWER button to turn the radio ‘On’. An AM or FM Band frequency will appear in the display. 3.
PRESETTING STATIONS IN THE TUNER MEMORY You may preset up to 20 of your favorite stations (10 FM, 10 AM) in the tuner memory for easy recall at any time. 1.) Tune to the first station that you wish to memorize. Example: FM 103.5 MHz. When the desired frequency appears in the display depress and hold the MEMORY button. The MEM indicator flashes in the dispaly. 2.) Within 5 seconds press the MEM UP or MEM DOWN buttons to select a desired preset memory number. Example: CH 7. 3.
CHANGING A PRESET STATION To change a preset station simply tune to the new station that you wish to memorize, press the MEMORY button, and then select the number of the memory you wish to change by pressing the MEM UP or MEM DOWN buttons. When the desired preset number appears in the display press the MEMORY button once more to enter the new station in the desired preset memory number. The previously memorized station will be deleted from the memory. MEM. DOWN Button MEMORY Button AL ON A RM /O FF MEM.
SETTING THE ALARM TIMER You can set the Alarm Timer to turn the Buzzer ‘On’automatically. However you must have the headphones on to hear the Buzzer sound. 1.) Press the MODE button once while the radio is ‘Off’. Or press the MODE button twice if the radio is ‘On’to enter the Alarm Time. The “AL” indicator will flash in the display. 2.) While the “AL” indicator is flashing, press and hold the MODE button for least 2 seconds. The whole display will flash. 3.
6.) Press the ALARM ON/OFF button to activate the alarm. The “AL” indicator appears in the display. 7.) At the selected alarm time the buzzer will turn ‘On’automatically. The buzzer will sound for 1 hour and then shut off automatically. To shut the buzzer off sooner press the ALARM ON/OFF button once. The buzzer stops but the alarm remains active and the buzzer will turn on each day at the same time until the alarm is deactivated. To deactivate the alarm press the ALARM ON/OFF button once more.
CARE AND MAINTENANCE There are no user serviceable parts inside this radio. Please refer all service problems to a qualified service facility. If the cabinet becomes dusty, wipe the exterior with a soft dust cloth only. Never use dusting sprays or polishes on the cabinet. If the cabinet becomes dirty or smudged with fingerprints it may be wiped with a soft cloth that has been slightly dampened with a mild soap and water solution. and never allow any liquid to get inside the cabinet.
LIMITED WARRANTY Emerson Radio Corp. warrants manufacturing defects in original material, including original parts and workmanship, under normal use and conditions, for a period of ninety (90) days from the date of original purchase in the U.S. With your dated proof of purchase, we will provide repair service at no charge for labor and parts at an authorized Depot Repair Facility, or replace the product in our discretion.
EMERSON Part No. 16-2915 PRINTED IN CHINA 312-01 HK2227BL_120203.