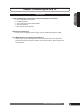
Installing the LCD TV Using the LCD TV 20 LCD TV User Guide TV AV S-VIDEO COMP. PIP SOURCE VGA DVI FAV. V-CHIP C.C.
Federal Communications Commission Statement Changes or modifications not expressly approved by the manufacturer responsible for compliance could void the user authority to operate the equipment. FCC 1 ENGLISH This equipment has been tested and found to comply with the limits of a class B digital device, pursuant to Part 15 of the FCC Rules. These limits are designed to provide reasonable protection against harmful interference in a residential installation.
Warnings and Precautions To prevent any injuries, the following safety precautions should be observed in the installation, use, servicing and maintenance of this equipment. Before operating this equipment, please read this manual completely, and keep it nearby for future reference. WARNING This symbol is intended to alert the user to avoid the risk of electric shock. This equipment must not be disassembled by anyone except qualified service personnel.
Remove the plug from the wall outlet, if the equipment will not be used for a long period of time. ▪ Do not place, use or handle this equipment near water. ▪ Never expose the equipment to liquid, rain, or moisture. Seek for service if any of the above is spilled into the equipment. ▪ Do not expose the equipment to extreme temperature or to direct sunlight, as the equipment may heat up and suffer damage.
Outdoor Antenna Safety Instructions If an outdoor antenna is connected, follow the precautions below: ▪ An outdoor antenna should not be located in any area where it could come in contact with overhead power lines, or any other electric light or power circuits. ▪ When installing an outdoor antenna system, extreme caution should be taken to prevent contact with power lines. Direct contact with power lines may be fatal and should be avoided at all costs.
CONTENTS ENGLISH Federal Communications Commission Statement Warnings and Precautions Important Safety Instructions ......................................................................................... 2 Antenna Safety Instructions ........................................................................................... 4 Chapter 1 Introducing the LCD TV Key Features .................................................................................................................
6 Chapter 1 Introducing the LCD TV
Chapter 1 Introducing the LCD TV Key Features ENGLISH Various Audio/Video terminals for external equipment connection ▪ ▪ ▪ ▪ ▪ 1 set of composite A/V terminals 1 S-VIDEO terminal 1 set of component Video input terminals 1 VGA input terminal 3 sets of Audio input terminals Digital Noise Reduction ▪ This function can digitally reduce image noise to provide better picture quality.
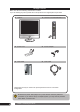
Package Contents Make sure all of the following contents are included. If you are missing any items, please return this product to the original place of purchase. LCD TV Remote Control/AAA Batteries x 2 Auto Tune POWER D1/D2/D3 SCART AV S-VIDEO COMP. PIP SOURCE VGA DVI FAV. V-CHIP C.C.
Setting Your LCD TV Use a supplied antenna cable to connect the VHF/UHF signal to the LCD TV’s ANT. terminal (refer to page11). ENGLISH Connect the DC plug of the AC-DC adapter to the DC 12V socket at the back of the TV. Connect the AC-DC adapter and its power cord. Connect the power cord to wall outlet. Insert the 2 batteries supplied in remote control. Step1 Slide the back cover up to open the battery compartment of the remote control. Step2 Insert two AAA size batteries.
Your LCD TV Front View and Controls SELECT▲▼ Scans up and down through channels. Selects sub-menu item when in the OSD mode. LED The LED light indicates when the LCD TV is activated. VOLUME◄► Adjusts the volume up and down. Selects the sub-menu item and change values for items when in the OSD mode. SOURCE Chooses from different input signal sources. Turns the LCD TV on and into standby mode. IR Infrared Receiver (IR) MENU Press once to display the OSD (on screen display), press again to turn the OSD off.
Rear View and Jacks ENGLISH VGA Connects the satellite receiver or other AV equipment with D-Sub connector. VGA AUDIO IN Connects the audio output jack of the satellite receiver or other AV equipment with D-SUB connector. AV Output Connects to the composite A/V intput jacks on external video equipment. AV/S-VIDEO Connects to the composite Video , S-VIDEO and Audio output jacks on external video equipment.
Your Remote Control Auto Tune Press to automatically adjust the display settings to optimize performance Auto Tune POWER Turns the LCD TV on and off. D1/D2/D3 SCART D1/D2/D3 (invalid) For Japan TV system only. AV S-VIDEO COMP. TV PIP SOURCE DVI PIP/SOURCE (invalid) V-CHIP VGA Turns the V-CHIP function on and off. Y, R, G, B For European TV system only. TELETEXT For European TV system only. INDEX C.C. FAV. V-CHIP C.C.
Chapter 2 Installing the LCD TV Connecting a TV Cable or Antenna Antenna Connection The antenna requirements for good color TV reception are more important than those for a black & white TV reception. For this reason, a good quality outdoor antenna is strongly recommended. The following is a brief explanation of the type of connection that is provided with the various antenna systems.
A. Combination VHF/UHF antenna VHF/UHF Antenna 300/75-ohm adapter (not included) 300-ohm twinlead cable VHF/UHF Antenna 75-ohm coaxial cable UHF Antenna B.
Cable TV (CATV) Connection ENGLISH This reminder is provided to call the CATV system installer’s attention to Article 820-40 of the National Electrical Code (NEC) that provides guidelines for proper grounding and, in particular, specifies that the cable ground shall be connected to the grounding system of the building accurately, or as close to the point of cable entry as possible.
Use a supplied antenna cable to connect the VHF/UHF signal to the LCD TV’s ANT. terminal. Connect the DC plug of the AC-DC adapter to the DC 12V socket at the back of the TV. Connect the AC-DC adapter and its power cord. Connect the power cord to wall outlet. Press the button on the remote to turn on the LCD TV. Always disconnect the LCD TV from the main voltage when the LCD TV will not be used for a long period of time.
Connecting a VCR ENGLISH A B METHOD A: Use an audio cable to connect the VCR’s audio output jacks to the LCD TV’s audio inputs. Use an S-Video cable to connect the VCR’s S-video output jack to the LCD TV’s S-video input jack. METHOD B: Use a composite cable to connect the VCR’s composite video/audio jacks to the LCD TV’s composite video/audio jacks. Connect all AC power sources, before turning on the power switch of the LCD TV or other connected equipment.
Connecting a DVD Player A B C DVD PLAYER METHOD A: Use a component cable to connect the DVD player’s component (YCbCr) output jacks to the LCD TV’s component input jacks. Use an audio cable to connect the DVD player’s component audio jacks to the LCD TV’s audio input jacks. METHOD B: Use an audio cable to connect the DVD’s audio output jacks to the LCD TV’s audio inputs. Use an S-Video cable to connect the DVD’s S-video output jack to the LCD TV’s S-video input jack.
Connecting a TV Cable Box and Satellite Receiver ENGLISH A B Use a component cable to connect the satellite receiver’s component (YCbCr) output jacks to the LCD TV’s component input jacks. Use an audio cable to connect the satellite receiver’s component audio jacks to the LCD TV’s audio input jacks. METHOD A: Use an audio cable to connect the TV Cable Box’s audio output jacks to the LCD TV’s audio inputs.
Press the To watch programs via satellite receiver, press the YCbCr button on the remote. 20 button on the remote to turn on the LCD TV. To watch TV via TV cable box, press the S-VIDEO (METHOD A), or VGA (Method B) on the remote.
Connecting a Video Camara ENGLISH A B METHOD A: Use an audio cable to connect the video camera’s audio output jacks to the LCD TV’s audio inputs. Use an S-Video cable to connect the VCR’s S-video output jack to the LCD TV’s S-video input jack. METHOD B: Use a composite cable to connect the video camera’s composite video/audio jacks to the LCD TV’s composite video/audio jacks. Connect all AC power sources, before turning on the power switch of the LCD TV or other connected equipment.
Connecting two VCRs Use a composite cable to connect the VCR’s composite video/audio input jacks to the LCD TV’s composite video/audio output jacks. Use a composite cable to connect the VCR’s composite video/audio outputjacks to the LCD TV’s composite video/audio input jacks. Connect all AC power sources, before turning the LCD TV’s power switch on. Press the button on the remote to turn on your LCD TV. Through connected two VCRs, you can record one VCR to the other.
Connecting a PC ENGLISH Use a D-SUB cable to connect the PC’s D-SUB output jack to the LCD TV’s VGA input jack. Connect all AC power sources, before turning on the power switch of the LCD TV or other connected equipment. Press the button on the remote to turn on the LCD TV. Press the VGA on the remote.
24 Chapter 3 Using the LCD TV
Chapter 3 USING THE FEATURES Press the button to turn the LCD TV on. 6 Press the TV button to enter TV mode, or press the SOURCE button on the front of TV to display the SOURCE SELECT Menu : Auto Tune POWER AV S-VIDEO COMP. TV PIP SOURCE VGA DVI FAV. V-CHIP C.C. MTS R G Y 2 SOURCE SELECT TV AV S-VIDEO YCBCR PC : EXIT : SELECT 1 D1/D2/D3 SCART TT SOURCE : OK B INDEX Sub-Page HOLD PAGE+ PAGE- MIX ZOOM CH+ Use to select TV and press the SOURCE button to enable.
Operating the Menu Press the button to turn the LCD TV on. To select the signal source, press the MENU button on the remote control. The main menu will appear on the screen.
If the signal source is PC singal, the menu displays: MAIN MEMU : EXIT : SELECT : ADJUST VIDEO ADJUST AUTO TUNE CONTRAST BRIGHTNESS PHASE H SIZE H POSITION V POSITION ( ( ( ( ( ( ( : EXIT : SELECT MEMORY RECALL Select to restore the factory settings. INFORMATION RESOLUTION: H FREQUENCY: V FREQUENCY: PIXEL CLOCK: SERIAL NO: MODEL NO: 800X600 37.8 KHz 60.2 Hz 39.
Setting up the Channel List Automatically scans and stores all the TV channels With the LCD TV connected to a television programming source, press the TV button on the remote control. Press the MENU button on the remote control to display the Main menu, and use to select the CHANNEL SETTING, and press ►.
Hiding the TV channels Press the MENU button on the remote control to display the Main menu, and use to select the CHANNEL SETTING, and press ►. CH+ CH- ENGLISH MAIN MEMU VIDEO ADJUST AUDIO ADJUST SYSTEM SETTING CHANNEL SETTING CLOSED CAPTION V-CHIP BLOACK FACTORY PRESET : EXIT : SELECT : ADJUST CH+ Press to select CH SELECT, then press the VOL+- to select the channel you choose to hide.
Setting the Favorite TV channels CH+ Press the MENU button on the remote control to display the Main menu, and use to select the CHANNEL SETTING, and press ►. MAIN MEMU VIDEO ADJUST AUDIO ADJUST SYSTEM SETTING CHANNEL SETTING CLOSED CAPTION V-CHIP BLOACK FACTORY PRESET : EXIT : SELECT : ADJUST CH+ Press to select CH SELECT, then press the VOL+-buttons to select one channel you want to assign to the favorite channel number.
Customizing the Picture Settings Press the button to turn the LCD TV on. ENGLISH Press the MENU button to display the Main Menu : MAIN MEMU VIDEO ADJUST AUDIO ADJUST SYSTEM SETTING CHANNEL SETTING CLOSED CAPTION V-CHIP BLOACK FACTORY PRESET : EXIT : SELECT : ADJUST CH+ Use to select VIDEO ADJUST, the VIDEO ADJUST menu will appear on CH- the screen.
Customizing the Audio Settings Press the button to turn the LCD TV on. Press the MENU button to display the Main Menu : MAIN MEMU VIDEO ADJUST AUDIO ADJUST SYSTEM SETTING PROGRAM SETTING FACTORY PRESET : EXIT : SELECT : ADJUST CH+ Use to select AUDIO ADJUST, the AUDIO ADJUST menu will appear on CH- the screen.
Customizing the Picture Color Settings Press the button to turn the LCD TV on.
Customizing the System Settings Press the button to turn the LCD TV on. Press the MENU button to display the Main Menu : MAIN MEMU VIDEO ADJUST AUDIO ADJUST SYSTEM SETTING PROGRAM SETTING FACTORY PRESET : EXIT : SELECT : ADJUST CH+ Use to select SYSTEM ADJUST, the SYSTEM ADJUST menu will appear on CH- the screen: SYSTEM ADJUST LANGUAGE SLEEP TIME WAKE UP TIME : EXIT : SELECT 34 ( ENGLISH ) ( OFF ) ( OFF ) : ADJUST CH+ Press Press to select the item to control.
Information Menu Press the button to turn the LCD TV on. ENGLISH If the signal source is PC singal, press the MENU button to display the Main Menu : MAIN MEMU VIDEO ADJUST AUDIO ADJUST COLOR ADJUST INFORMATION FACTORY PRESET : EXIT : SELECT : ADJUST CH+ Use to select INFORMATION, the INFORMATION menu will appear on the screen: CH- INFORMATION RESOLUTION: H FREQUENCY: V FREQUENCY: PIXEL CLOCK: SERIAL NO: MODEL NO: 800X600 37.8 KHz 60.2 Hz 39.
Customizing the V-CHIP Settings (For U.S TV system only) The US has 2 rating system for viewing content: Movie bloacking(MPAA) and TV Blocking. The TV Blocking conjuncts with the V-CHIP to help parents block inappropriate programs from their children. The Movie bloacking(MPAA) is used for original movies rated by the Motion Picture Association of America(MPAA) as broadcasted on cable TV and not edited for television. The V-CHIP can also be set to block MPAA-rated movies.
The TV GUIDELINE has 2 rating methods: Content-Based Rating and Age-Based Rating.
Setting the New Password CH+ Press the MENU button on the remote control to display the Main menu, and use to select the V-CHIP BLOCK, and press ►. MAIN MEMU VIDEO ADJUST AUDIO ADJUST SYSTEM SETTING CHANNEL SETTING CLOSED CAPTION V-CHIP BLOCK FACTORY PRESET : EXIT : SELECT : ADJUST Use the V-CHIP BLOCK function, must enter a four-digit password. The factory password is 0000. INPUT PASSWORD ? ? ? ? CH+ Press CH- to select NEW PASSWORD, then press ►.
Customizing the Closed Caption Settings (For U.S TV system only) Allows selection of the closed caption modes: CC1 /CC2 : Displays a printed version of the dialog or sound effects of the program. TEXT1/TEXT2: Displays station information presented using either half or the whole screen. ENGLISH CH+ Press the MENU button on the remote control to display the Main menu, and use to select the CLOSED CAPTION, and press ►.
40 Troubleshooting and Specifications
TROUBLESHOOTING TROUBLESHOOTING ENGLISH Before consulting service personnel, check the following chart for a possible cause of the trouble and for a possible solution. TV will not turn on Make sure the power cord is plugged in, then press the button on the remote. The batteries in the remote control may be exhausted. Replace the batteries. No picture, no sound Check the interface cable between TV and antenna/cable TV. Press the button on the remote.
SPECIFICATION TROUBLESHOOTING Panel System 20 inch Display Resolution 800 pixels(horizontal) x 600 pixels (vertical) Television System NTSC Antenna Input 75 Ω unbalanced AV IN 1 AV OUT 1 SV 1 YCbCr 1 VGA 42 1 AUDIO IN 3 AUDIO OUT 1 SPEAKER OUT 5Wx2 POWER SOURCE (Power consumption(Max)) 80W DIMENSION 580 mm (W) x 620 mm (H) x 285 mm (D) WEIGHT 11 KG Troubleshooting and Specifications