
Universal Remote User Manual

- 20 -
To set a Timer
(Note the Timer must be cleared first if it was previously set – see To Clear a
Timer below)
a. Press and hold S key until “Code Setup” is displayed (takes approximately 2-3 seconds).
b. Release S key.
c. Using the Up/Down keys, navigate to “Timer Setup”. Press and release OK key. “TV Sleep
Setup” is displayed.
d. Using the Up/Down keys, navigate to “Timer X Setup” (where “X” is 1, 2, 3 or 4). Press and
release the OK key.
e. “Timer X Set” is displayed. Press and release the OK key.
f. “Timer X Time?” is displayed with the “hours” flashing. Use the Up/Down keys to set the hours
then press and release the OK key.
g. The “minutes” will be flashing. Use the Up/Down keys to set the minutes then press and
release the OK key.
h. “Select Timer X Mode?” is displayed. Press and release the desired Mode key (TV, VCR, DVD,
etc.).
i. “Select Timer X Key1?” is displayed. Press and release the first key required. If only one key is
required, press and release OK at this point and go to Step “l” below.
j. “Select Timer X Key2?” is displayed. Press and release the second key required. If only two
keys are required, press and release OK at this point and go to Step “l” below.
k. “Select Timer X Key3?” is displayed. Press and release the third key required.
l. “Success” will be displayed and the remote will remain in Setup routine, returning to the “Code
Setup” screen.
m. Press and release the Exit key to return to normal operation. Leave the remote pointing at the
target device.
To clear a Timer (“Timer Bell” in normal display)
a. Press and hold S key until “Code Setup” is displayed (takes approximately 3 seconds).
b. Release S key.
c. Using the Up/Down keys, navigate to “Timer Setup”. Press and release OK key. “TV Sleep
Setup” is displayed.
d. Using the Up/Down keys, navigate to the desired “Timer X Setup” (where “X” is 1, 2, 3 or 4)
screen. Press and release the OK key.
e. “Timer X Clear” is displayed. Press and release the OK key.
f. “Confirm OK to Clear” is displayed. Press and release the OK key.
g. “Success” will be displayed and the remote will remain in Setup routine, returning to the “Code
Setup” screen.
8. Code Learning
Facility to Learn and store the IR Commands from your original remote under the Mode and key of your
choice. The Remote can store up to 150 original remote key commands (this depends upon the format of
the IR Code to be learned). Only one original remote type should be stored under any one Mode (see Tips
on Learning). The Remote can also be pre-programmed with one of the library codes and then have
Learned keys “overlaid “ in key positions of your choice i.e. the Remote can be customised using a pre-
programmed code and then learning key functions from their original IR remote.
Tips On Learning :
a. Where possible, use of fresh batteries for both remotes is recommended.
b. Only one original remote type can be learned per individual Mode.
c. Carry out a “Clear All Learn Modes” (clear all learned commands) before attempting any
Learning.
d. Experiment by Learning 2 or 3 keys initially (to ensure compatibility and familiarity) and then
carry out a “Clear All Learn Modes” (clear all learned commands) before completely Learning
your original remote’s keyboard.
e. Carry out a “Clear One Learn Mode” before learning a Mode to make sure there are no
previously learned commands for that Mode.
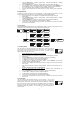
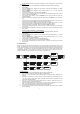
f. Place the remotes end-to-end so the IR LED’s on both remotes are directly in line with each
other. You may need to adjust the height of either remote to achieve this.
g. Keep the distance between the two remotes to approximately 25mm.
h. Do not move or change the distance between the two remotes while learning all the required
keys for that Mode.
OR