
Operating instructions


PRESET DEFINITION MODULE
© 1985, 1986, 1987 E-mu Systems, Inc. Page 129
This step of the set-up procedure lets you assign a number to the MIDI control source
that matches up with the number of the controller “transmitting” data from a MIDI unit
into the Emulator II. (For more information on controller numbers, see the MIDI
supplement.) Moving Slider D presents the following options:
off
= no controller number assigned
00 through 31
= assigns the controller number shown in the display
pwh
= assigns MIDI control source A the standardized controller
number for pitch bend
chp
= assigns MIDI control source A the standardized controller
number for overall volume (channel pressure)
When the display shows the desired controller assignment, press ENTER.
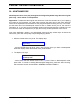
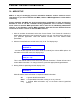
11. Continuing to move Slider A upwards gives the following display:
MIDI B > #XX
Use Slider D
Assign a controller number to control source B in exactly the same manner as you
assigned a controller number to control source A in step 9. When the display shows the
desired controller assignment, press ENTER.
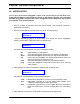
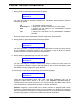
12. Continuing to move Slider A upwards gives the following display:
MIDI C > #XX
Use Slider D
Assign a controller number to control source C in exactly the same manner as you
assigned a controller number to control source A in step 9. When the display shows the
desired controller assignment, press ENTER.