
User manual


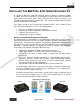


Page 10 of 14 Ethernet Extension Experts
Performing the On-Site Installation
After removing the Enable-IT 868 PoE+ & Extended Ethernet Kit from the box and
performing the out of the box testing all that remains to install the unit on-site is to mount
the unit, build the interconnect wiring, add voice lines if needed and attach the LAN
device cabling with the provided Ethernet Patch cords.
Mounting the Enable-IT 868 PoE+ & Extended Ethernet Units
The Enable-IT 868 PoE+ & Extended Ethernet Kit is designed for quick wall
mounting. Choose a location to mount each of the Enable-IT 868’s where the
maximum distance does not exceed 3,500ft or 1,067m total between devices to be
connected. When mounting the Enable-IT 868 PoE+ & Extended Ethernet Kit it is
recommended that you use the appropriate anchors for your mounting surface. If
mounting on plywood use wood screws; if mounting onto drywall or sheetrock, use
plastic drywall anchors or Velcro can also be used as the units are very lightweight.
Building the 868 Interlink wiring
The most important aspect of the install is the correct wiring of the Interlink cabling.
For CAT3 wiring (1-pair/2 wires) you will need to crimp a RJ-45 Male Head to each
end of the contiguous wire run and using the following pins(1,2) straight through.
This will deliver Ethernet Data and PoE+.
For CAT5e or better wiring (1-pair/2 wires) you will need to crimp a RJ-45 Male Head
to each end of the contiguous wire run and using the following pins(1,2) straight
through. This will deliver Ethernet Data and PoE+.
Attaching cabling and devices to the Enable-IT 868 Extended Ethernet Kit.
Attach your remote PoE+ device to the 868 CPE unit LAN1/PoE+ port with Ethernet
patch cord provided. Attach your local LAN to the 360 PoE+ injector Data IN port.
Attach the power adapter to the 868 CO unit. Attach the 360 PoE+ injector to the 868
CO LAN1/PoE+ port with Ethernet patch cord provided. Absolutely the last step is
to apply power to the 360 PoE+ injector with the country power cord provided.
Your equipment should now be powered up and functioning properly.
The LED indicators will provide visual operational status of the 868 units.
Sync - Slow to fast flicker on power up – indicates negotiation of a link.
Solid Green LED indicates link established and rapid pulse is traffic.
Pwr - Solid Green LED indicates that unit is receiving 5v power.
Mode - Solid Yellow LED on CPE unit only – No LED lit on CO
ACT - Yellow LEDs – Lit solid indicates the presence of local LAN
– Blinking indicates the presence of local LAN traffic
For troubleshooting, first examine the backbone wiring pair and make sure you have solid
connections. The Interlink Sync LED will be lit on each 868 unit to show proper
connection and pairing. If the Interlink Sync LED Link is flashing – (Not pulsing)
1) Make sure your wiring is straight through and not connected to any Telco punch
down blocks or a few as possible – they add interference. If your wiring is
spliced, use Telco butt clips or gel filled caps to bridge wire into a solid
connection. A flashing Interlink Sync LED indicated the units are trying to connect to
eachother and are looking to synchronize frequencies.