SAFETY AND OPERATING MANUAL Original Instructions V7.
Read all safety warnings and all instructions before use. Failure to follow the warnings and instructions may result in electric shock, fire and/or serious injury. Save all warnings and instructions for future reference.
GENERAL SAFETY INSTRUCTIONS WARNING! Read all safety warnings designated by the symbol and all instructions. WARNING! Read all safety warnings and all instructions. Failure to follow the warnings and instructions may result in electric shock, fire and/or serious injury. Save all warnings and instructions for future reference. The term "power tool" in the warnings refers to your mains-operated (corded) power tool or battery-operated (cordless) power tool 1) Work area a) Keep work area clean and well lit.
g) If devices are provided for the connection of dust extraction and collection facilities, ensure these are connected and properly used. Use of these devices can reduce dust-related hazards 4) Power tool use and care a) Do not force the power tool. Use the correct power tool for your application. The correct power tool will do the job better and safer at the rate for which it is designed. b) Do not use the power tool if the switch does not turn it on and off.
SPECIAL SAFETY INSTRUCTIONS 1. Wear ear protection when using the cordless drill. Exposure to the noise can cause hearing loss. 2. Use auxiliary handle(s), if supplied with the tool. Loss of control can cause personal injury. 3. Hold power tool by insulated gripping surfaces, when performing an operation where the drilling accessory may contact hidden wiring or its own cord.
If there is an electrolyte leak, avoid any contact with the skin. In the event of a leak, wipe with a rag. If the liquid comes into contact with the skin, rinse abundantly with water. In the event of a reaction or contact with the eyes or mucous membranes, consult a doctor. Ensure that the appliance is properly switched off before inserting the battery into the appliance. Inserting a battery into a appliance while it is switched on can cause accidents.
NOISE INFORMATION Wear hearing protection! Measured sound values determined according to EN 60745. The noise figures quoted are emission levels and are not necessarily safe working levels. Whilst there is a correlation between the emission and exposure levels, this cannot be used reliably to determine whether or not further precautions are required. Factors that influence the actual level of exposure of work-force include the characteristics of the work room, the other sources of noise, etc. i.e.
WARNING! Identify safety measures to protect the operator that are based on an estimation of exposure in the actual conditions of use (taking account of all parts of the operating cycle such as the times when the tool is switched off and when it is running idle in addition to the trigger time). Vibration and noise reduction To reduce the impact of noise and vibration emission, limit the time of operation, use low-vibration and low-noise operating modes as well as wear personal protective equipment.
Torque limiter There is a clutch in your hammer drill. The torque limiter will actuate when a certain torque level is reached. The motor will disengage from the output shaft. When this happens, the bit will stop turning. As soon as the torque limiter actuates, release the trigger and remove the tool and bit immediately. This will help prevent premature wear of the tool. Important note Be sure the supply is the same as the voltage given on the rating plate.
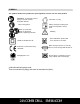
SYMBOLS The symbols shown on the product has great significance for the safe use of the product. WARNING - To reduce the risk of injury, user must read the instruction manual Wear safety gloves Wear eye protection Wear ear protection Wear respiratory protection Double insulation Class II Conforms to all relevant safety standards. Charging time 1.5 h For indoor use only Always charge the battery pack between temperatures 0°C to 30°C Warning Do not throw this product into rivers or immerse in water.
Components and controls 12 11 13 1 2 3 4 5 6 7 8 9 10 11 12 13 Gear control Keyless chuck Function adjustment ring Torque adjustment ring On/off switch with variable speed control Forward, reverse rotation and lock control Magnetic Strip Battery pack Battery pack release button Auxiliary handle Battery level display button LED battery level indicator light Charger 24V COMBI DRILL ENF464COM
TECHNICAL DATA Rated voltage: No load speed: Chuck capability: Number of clutch position: Maximum torque: Max drilling capability Machine weight: Normal charging time: Battery pack Charger Wood: Masonry: Steel: ENF464COM 24V 0-400 min-1/0-1150 min-1 13mm 20+1 Torque setting plus hammer 25 N.m 32mm 10mm 10mm 2.4kg 1.5 hours ENF471BAT 24V Ni-Cd, 1300mAh ENB472CHR PRI: 230-240V~50Hz 55W SEC: 24V 1.
CHARGING PROCEDURE 1. BEFORE USING THE CORDLESS DRILL If the machine is new, the battery must first be charged. A new battery or one which has not been used for an extended period achieves full performance only after few times charging and discharging cycles. Attention! After storing for a long time, the battery capacity will be reduced. A substantial drop in operating period per charge indicates that the battery is worn out and must be replaced.
Operating instructions 1. INSTALLING AND REMOVING BITS Warning! Always remove the battery before you change the drill or screw bit to avoid unintentional starting of the machine. 1. Open the drill chuck by holding the rear section of the chuck and turn the front section in an anti-clockwise direction, until the jaws are open enough. (Fig.1) 2. Insert the bit firmly into the chuck.
6. SWITCH LOCK Fig.4 The On/Off switch trigger can be locked in OFF position. This helps to reduce the possibility of accidental starting when not in use. To lock the switch, place the forward/reverse rotation control in the center position. (Fig.4) 7. REVERSIBLE The forward/reverse rotation control located above the On/Off switch controls the direction of rotation. For drilling and screw driving use forward rotation, slide the rotation lever to the right.
10. MAGNETIC STRIP The backup bit can be placed on the magnet temporary during working. Just put the bit on it. (Fig.8) 11. BATTERY LEVEL INDICATOR If press the button (11), battery power is displayed on the screen. Fig.8 When the three lights are on, the battery is operating at capacity. When two lights are on, it shows that the battery capacity begins to decrease. When only one light is lit, it indicates the need to recharge the battery (Fig.9). 12. DRILLING Fig.
TERMS OF USE When all precautions have been taken and the previous operations were done, you can start working. Always secure the work piece especially if it is small and the sheets. Use the appropriate drill bit and the material at the correct speed. In the woods, a burned area indicates an inappropriate speed or a bit sharpened improperly. In steel, lubricate to prevent overheating and premature wear of the drill.
GUARANTEE This ENERGER product carries a guarantee of 12 months. If your product develops a fault within this period, you should, in the first instance contact the retailer where the item was purchased.
PLUG REPLACEMENT (UK & IRELAND ONLY) If you need to replace the fitted plug then follow the instructions below. IMPORTANT The wires in the mains lead are colored in accordance with the following code: BLUE =NEUTRAL Brown = Live As the colors of the wires in the mains lead of this appliance may not correspond with the colored markings identifying the terminals in your plug, proceed as follows. The wire which is colored blue must be connected to the terminal which is marked with N.
Declaration of Conformity We, Importer Powersmith (UK) LTD.