EnGenius® EUB1200AC Dual Band Wireless AC1200 USB Adapter User Manual V1.0.
TABLE OF CONTENTS TABLE OF CONTENTS Introduction Introduction 1-1 Features. . . . . . . . . . . . . . . . . . . . . . . . . . . . . . . . . . . . . . . . . . . . . . . . . . . . . . . . . . .1-1 Package contents . . . . . . . . . . . . . . . . . . . . . . . . . . . . . . . . . . . . . . . . . . . . . . . . . . . .1-1 USB Adapter Description . . . . . . . . . . . . . . . . . . . . . . . . . . . . . . . . . . . . . . . . . . . . . . .1-1 System Requirements . . . . . . . . . . . . . . . . . . . . . . . . .
TABLE OF CONTENTS Windows USB Adapter 2-1 Before you Begin 2-1 Installing and Uninstalling the Driver 2-1 Installing the Driver. . . . . . . . . . . . . . . . . . . . . . . . . . . . . . . . . . . . . . . . . . . . . . . . . . .2-1 Uninstalling the Driver . . . . . . . . . . . . . . . . . . . . . . . . . . . . . . . . . . . . . . . . . . . . . . . . .2-3 Wireless LAN Utility 2-4 General . . . . . . . . . . . . . . . . . . . . . . . . . . . . . . . . . . . . . . . . . . . . . . . . . . . . . . . . .
TABLE OF CONTENTS MAC OS X USB Adapter 3-1 Installing and Uninstalling the Driver 3-1 Installing the Driver. . . . . . . . . . . . . . . . . . . . . . . . . . . . . . . . . . . . . . . . . . . . . . . . . . .3-1 Uninstalling the Driver . . . . . . . . . . . . . . . . . . . . . . . . . . . . . . . . . . . . . . . . . . . . . . . . .3-3 Wireless LAN Utility 3-4 Link Status . . . . . . . . . . . . . . . . . . . . . . . . . . . . . . . . . . . . . . . . . . . . . . . . . . . . . . . . .3-4 Profile . . .
TABLE OF CONTENTS Appendix B Industry Canada Statement B-1 Radiation Exposure Statement . . . . . . . . . . . . . . . . . . . . . . . . . . . . . . . . . . . . . . . . . .
Introduction Chapter 1
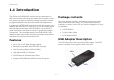
INTRODUCTION INTRODUCTION 1.1 Introduction Package contents The EnGenius EUB1200AC delivers the next generation of 802.11ac wireless technology and makes your wireless connectivity faster and wider to meet the growing demand for streaming high-bandwidth video and other multimedia applications. Open the package carefully, and make sure that none of the items listed below are missing. Do not discard the packing materials, in case of return; the unit must be shipped in its original package.
INTRODUCTION SYSTEM REQUIREMENTS System Requirements Network Configuration The following are the minimum system requirements in order to use the USB adapter. To better understand how the wireless LAN products work together to create a wireless network, it might be helpful to depict some of the possible wireless LAN PC card network configurations. PC/AT compatible computer with a USB interface. Windows 2000/XP/Vista or MAC OS operating system.
INTRODUCTION WPS SETUP 1.2 WPS Setup 1. Press and hold down the WPS button on your router (check with the User Manual that came with your router for any further instructions if necessary). 2. Within 2 minutes, press and hold down the WPS button on the EUB1200AC for 2 seconds. The LED should start to blink. 3. Wait for 2 minutes. 4. Confirm that the connection was successful by opening a web browser or checking the wireless signal indicator icon.
Windows Chapter 2
WINDOWS USB ADAPTER 2.1 USB Adapter 2.1.1 Before you Begin During the installation, XP may need to copy systems files from its installation CD. Therefore, you may need a copy of the Windows installation CD at hand before installing the drivers. On many systems, instead of a CD, the necessary installation files are archived on the hard disk in C:\WINDOWS\OPTIONS\CABS directory. 2.1.1 Installing and Uninstalling the Driver Installing the Driver not run automatically, then the setup.
WINDOWS INSTALLING THE DRIVER 2. Click on Windows Driver to start the install process. 3. Click on the Next button to begin the driver installation.
WINDOWS UNINSTALLING THE DRIVER 4. Wait until the driver and client utility is installed. 5. When installation is complete click on the Finish button to restart your computer. Uninstalling the Driver If you want to remove the EUB1200AC EUB1200AC Dual Band USB Adapter from your system, use device’s uninstall application or the Windows uninstall process.
WINDOWS WIRELESS LAN UTILITY 2.2 Wireless LAN Utility General There are five sections that allow the user to configure and monitor the device: general, profile, available networks, status, and Wi-Fi protected setup. The General section shows the connection status, speed, type, encryption, SSID, signal strength, and link quality of the AC1200 Dual Band USB Adapter. Additional configuration options located at the bottom of the window that define the behavior of the utility.
WINDOWS PROFILE Profile Wireless Network Properties Dialog The Profile section is used to create and modify profiles that the AC1200 Dual Band USB Adapter uses to connect to access points. Use the wireless network properties dialog to enter the connection properties for an access point.
WINDOWS ADDING A PROFILE Network Authentication The protocol used for network authentication. Adding a Profile Data Encryption The protocol used for data encryption. Note: When using the ASCII or PASSPHRASE feature the password must be obtained from the router. ASCII Enables use of ASCII characters in the passphrase. Passphrase Enables the use of hexadecimal characters passphrase. To add a profile, follow these steps: 1. Click the Add button.
WINDOWS ADDING A PROFILE 7. Select the ASCII checkbox to enter a password using ASCII characters. 3. Enter the profile name in Profile Name. 4. Enter the SSID in the Network Name (SSID). Note: The list of channels is only available if the ad hoc checkbox is selected. 5. Select a channel from the Channel list. Available channels are from 1 to 161. 6. Select a network authentication protocol from the Network Authentication protocol list.
WINDOWS ADDING A PROFILE Editing a Profile 8. Select the PASSPHRASE checkbox to enter a password using hexadecimal characters. The passphrase key length can be either 64 or 128 bits. Note: When using the ASCII or PASSPHRASE feature the password must be obtained from the router. To edit a profile, follow these steps: 1. Click the Edit button. 2. Select the checkbox to specify an ad hoc network. Note: If the ad hoc checkbox is selected, Profile Name is not available. 9.
WINDOWS ADDING A PROFILE 7. Select the ASCII checkbox to enter a password using ASCII characters. 4. Enter the SSID in the Network Name (SSID). Note: The list of channels is only available if the ad hoc checkbox is selected. 5. Select a channel from the Channel list. Available channels are from 1 to 161. 6. Select a network authentication protocol from the Network Authentication protocol list. The following protocols can be selected: Open System Shared Key WPA-PSK WPA2-PSK WPA 802.
WINDOWS AVAILABLE NETWORK Available Network 8. Select the PASSPHRASE checkbox to enter a password using hexadecimal characters. The passphrase key length can be either 64 or 128 bits. You can find access points that are within the proximity of your adapter by using the device to scan for them. The information returned by the adapter is shown in a list and includes the SSID, channel, encryption type, authentication type and signal strength. 9. Select the key index from the Key index list. 10.
WINDOWS STATUS Status The Status section shows a more detailed view of the information about the status of the adapter and the network connection.
WINDOWS WI-FI PROTECTED SETUP Wi-Fi Protected Setup 2. Select Yes to start scanning for access points. Use the Wi-Fi protected setup function to setup a connection between the adapter and a WPS enabled router. There are two ways to create a WPS connection: pin input config (PIN) or push button config (PBC). PIN Input Config 3. Select the target AP and click the Select button. Note: You must enter the PIN code in your router’s configuration dialog before establishing a connection.
WINDOWS WI-FI PROTECTED SETUP Push Button Config The following dialog is shown while the router is accepting the connection. When the dialog disappears the connection is established. 1. Click on the Push Button Config button to start the process. Note: The Push Button Config button and the WPS button on the access point must be pushed within ten seconds of each other.
WINDOWS WI-FI PROTECTED SETUP 2. Click on the Push Button Config in the following dialog. 3. Press the WPS button on the access point. The connection is established within a few seconds.
MAC OS X Chapter 3
MAC OS X USB ADAPTER 3.1 USB Adapter 3.1.1 Installing and Uninstalling the Driver Installing the Driver 3. Read the Important Information and then click on the Install button. Before you can use the AC1200 Dual Band USB Adapter you must install the device driver. To install the USB adapter drivers, follow these steps: 1. Insert the CD-ROM that was provided to you in this package. The setup should run automatically.
MAC OS X INSTALLING THE DRIVER 4. Select a language to read the software license agreement and then click on the Continue button to display the license dialog. 6. Click on the Install button to begin the installation process or Go Back to return to the previous step. 7. When the installation warning dialog is shown click the Continue Installation button to continue or the Cancel button to abort the process. 5. Click on the Read License button to read the license agreement.
MAC OS X UNINSTALLING THE DRIVER Uninstalling the Driver 8. Click the Restart button to restart your system. Note: If you want to remove the AC1200 Dual Band USB Adapter from your system, use device’s uninstall application or the Windows uninstall process. The adapter may not function properly if you do not restart the system. 9. Insert the USB adapter into the USB port. MAC OS X will detect and install the new hardware. 10.The client utility is installed in the Applications folder.
MAC OS X WIRELESS LAN UTILITY 3.2 Wireless LAN Utility There are six sections that allow the user to configure and monitor the device: link status, profiles, available network, advanced setting, WPS and information. Click on the Turn Radio OFF button to deactivate the adapter. Click on the Turn Radio ON button to activate the adapter. Profile Link Status The Profile section is used to create and modify profiles that the AC1200 Dual Band USB Adapter uses to connect to access points.
MAC OS X PROFILE Wireless Network Properties Dialog Add: Manually enter an access point’s configuration settings. Edit: Modify an access point’s configuration settings. Use the wireless network properties dialog to enter the connection properties for an access point. Remove: Delete the configuration settings of an access point. Duplicate: Clone an access point’s profile. Set Default: Reset all saved settings.
MAC OS X PROFILE Adding a Profile Network Authentication The protocol used for network authentication. Note: Data Encryption The protocol used for data encryption. When using the ASCII or Network key feature the password must be obtained from the router. ASCII Enables use of ASCII characters in the passphrase. Key Index (advanced) User has to specify which of the four keys will be active. Please make sure that both the AP/Router you are connected to and the EUB1200AC use the same key.
MAC OS X PROFILE 7. Select the ASCII checkbox to enter a five or thirteen character password using the WEP protocol. 4. Enter the SSID in SSID. Note: The list of channels is only available if the ad hoc checkbox is selected. 5. Select a channel from the Channel list. Available channels are from 1 to 11. X 6. Select a network authentication protocol from the Network Authentication protocol list. The following protocols can be selected: Open System Shared Key WPA-PSK WPA2-PSK WPA 802.
MAC OS X PROFILE Editing a Profile 4. Enter the SSID in SSID. Note: Note: The list of channels is only available if the ad hoc checkbox is selected. When using the ASCII or Network key feature the password must be obtained from the router. 5. Select a channel from the Channel list. Available channels are from 1 to 11. To edit a profile, follow these steps: 1. Click the Add button. 6. Select a network authentication protocol from the Network Authentication protocol list.
MAC OS X AVAILABLE NETWORK Available Network 7. Select the ASCII checkbox to enter a five or thirteen character password when using the WEP protocol. You can find access points that are within the proximity of your adapter by using the device to scan for them. The information returned by the adapter is shown in a list and includes the SSID, channel, authentication type, encryption type and BSSID (MAC address). X 8. Enter the network key value in Network key.
MAC OS X ADVANCED SETTINGS Advanced Settings 4. Set the Fragment Threshold by moving the slider control or manually entering a value in the text box. The fragment threshold specifies the maximum size of a packet during data transmission. A value too low could lead to low performance. In the Advanced Settings section you can modify the 802.11b preamble mode, QoS mode, and PSP Xlink mode. 5. Set the RTS Threshold by moving the slider control or manually entering a value in the text box.
MAC OS X WI-FI PROTECTED SETUP Wi-Fi Protected Setup PIN Input Config Note: If you do not want to set up a protected connection manually, you can use the Wi-Fi protected setup function. You must enter the PIN code in your router’s configuration dialog before establishing a connection. There are two ways to create a WPS connection: pin input config (PIN) or push button config (PBC). Before selecting either method, click the SCAN button to locate the access points within the proximity of the adapter.
MAC OS X INFORMATION Information Push Button Config 1. Select the target access point. The Information tab displays information about the network driver version and date. 2. Click the PBC button. Note: The PBC button and the WPS button on the access point must be pushed within ten seconds of each other. 3. Press the WPS button on the access point. When the connection is established the Link Status section will show the connection information. See Link Status for more details.
APPENDIX A FEDERAL COMMUNICATION COMMISSION INTERFERENCE STATEMENT Appendix A Federal Communication Commission Interference Statement This device complies with Part 15 of the FCC Rules. Operation is subject to the following two conditions: (1) This device may not cause harmful interference, and (2) this device must accept any interference received, including interference that may cause undesired operation.
APPENDIX A RADIATION EXPOSURE STATEMENT Radiation Exposure Statement The product comply with the FCC portable RF exposure limit set forth for an uncontrolled environment and are safe for intended operation as described in this manual. The further RF exposure reduction can be achieved if the product can be kept as far as possible from the user body or set the device to lower output power if such function is available. The USB dongle transmitter is approved for use in typical laptop computers.
APPENDIX B INDUSTRY CANADA STATEMENT Appendix B Industry Canada Statement This device complies with RSS-210 of the Industry Canada Rules. Operation is subject to the following two conditions: (1) This device may not cause harmful interference, and (2) this device must accept any interference received, including interference that may cause undesired operation. Ce dispositif est conforme à la norme CNR-210 d'Industrie Canada applicable aux appareils radio exempts de licence.
APPENDIX B RADIATION EXPOSURE STATEMENT Radiation Exposure Statement The product comply with the Canada portable RF exposure limit set forth for an uncontrolled environment and are safe for intended operation as described in this manual. The further RF exposure reduction can be achieved if the product can be kept as far as possible from the user body or set the device to lower output power if such function is available.
APPENDIX C EUROPE – EU DECLARATION OF CONFORMITY Appendix C Europe – EU Declaration of Conformity This device complies with the essential requirements of the R&TTE Directive 1999/5/EC.
APPENDIX C EUROPE – EU DECLARATION OF CONFORMITY EN 301 489-17 Electromagnetic compatibility and Radio spectrum Matters (ERM); ElectroMagnetic Compatibility (EMC) standard for radio equipment and services; Part 17: Specific conditions for 2,4 GHz wideband transmission systems and 5 GHz high performance RLAN equipment This device is a 5GHz wideband transmission system (transceiver), intended for use in all EU member states and EFTA countries, except in France and Italy where restrictive use applies.
APPENDIX C EUROPE – EU DECLARATION OF CONFORMITY Ελληνική [Greek] ΜΕ ΤΗΝ ΠΑΡΟΥΣΑ [name of manufacturer] ΔΗΛΩΝΕΙ ΟΤΙ [type of equipment] ΣΥΜΜΟΡΦΩΝΕΤΑΙ ΠΡΟΣ ΤΙΣ ΟΥΣΙΩΔΕΙΣ ΑΠΑΙΤΗΣΕΙΣ ΚΑΙ ΤΙΣ ΛΟΙΠΕΣ ΣΧΕΤΙΚΕΣ ΔΙΑΤΑΞΕΙΣ ΤΗΣ ΟΔΗΓΙΑΣ 1999/5/ΕΚ. Français [French] Par la présente [nom du fabricant] déclare que l'appareil [type d'appareil] est conforme aux exigences essentielles et aux autres dispositions pertinentes de la directive 1999/5/CE.
APPENDIX D WORLDWIDE TECHNICAL SUPPORT Appendix D WorldWide Technical Support REGION/COUNTRY OF PURCHASE SERVICE CENTRE SERVICE INFORMATION CANADA Canada LOS ANGELES, USA USA D-1 web site www.engeniuscanada.com email rma@engeniuscanada.com contact numbers Toll Free: (+1) 888-397-2788 Local: (+1) 905-940-8181 hours of operation Monday - Friday 9:00AM to 5:30PM EST (GMT-5) web site www.engeniustech.com email support@engeniustech.
APPENDIX D WORLDWIDE TECHNICAL SUPPORT REGION/COUNTRY OF PURCHASE SERVICE CENTRE SERVICE INFORMATION MIAMI, USA Mexico, Central and Southern America NETHERLANDS Europe Africa Middle East Russia CIS / Armenia, Azerbaijan, Belarus, Georgia, Kazakhstan, Kyrgyzstan, Moldova, Tajikistan, Turkmenistan, Ukraine, Uzbekistan Turkey Afghanistan Pakistan Bangladesh, Maldives, Nepal, Bhutan, Sri Lanka DUBAI, UAE D-2 web site [ES] es.engeniustech.com [PT] pg.engeniustech.
APPENDIX D WORLDWIDE TECHNICAL SUPPORT REGION/COUNTRY OF PURCHASE Singapore, Cambodia, Indonesia, Malaysia, Thailand, Philippines, Vietnam China, Hong Kong, Korea India South Africa Oceania Others SERVICE CENTRE SERVICE INFORMATION SINGAPORE TAIWAN, R.O.C. Note: * Service hours are based on the local time of the service center. * Please visit the website for the latest information about customer service. D-3 web site www.engeniustech.com.sg/e_warranty_form email techsupport@engeniustech.com.