
User Manual


~53~
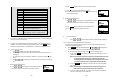
Off.
(2) If “On” is selected, the handset is prompted to enter the prefix
number (up to 14 digits can be entered).
(3) Use Delete right soft key to delete the prefix number.
(4) Press SAVE left soft key to confirm the selection.
(5) When this feature is turned on, the LCD will prompt the user “Dial
Prefix? Yes or No”. On each outgoing phone call from call logs,
phonebook, and dial-and-send dialing, the current prefix is also
displayed.
Re: the prefix number will be added automatically in front of the
dialed number if the YES left soft key is pressed.
(6) This feature is useful for access code (PBX code for outside dial tone),
a calling card, or credit card calls, etc.
b. Press 2 to set Group Select: see Handset Group Subscription on page 37 .
c. Press 3 to set Call Barring: see Call Barring operation on Page 43.
d. Press 4 to set Feature Call: see Feature Call operation on Page 45.
e. Press 5 to set Baby Monitor: see Baby Monitor operation on Page 49.
6. Press 5 to set Phone Settings:
a. Press 1 to set Mic Gain: See Mic Gain operation on Page 49.
b. Press 2 to set Any Key TALK (answering a call by pressing any key versus
only the talk key):
Use CHANGE left soft key to select and confirm “On” or “Off".
Default is “Off”.
Re: When set to “on”, press any key (except
and SILENT key) to
answer the incoming call.
c. Press 3 to set LCD Contrast:
(1)
Use or to scroll through option 1~8. Default is 6.
(2)
Press SAVE left soft key to confirm selection.
d. Press 4 to set LCD Backlight:
(1)
Use or to scroll through option 1~3 (1.8 seconds 2.On
3.Off ). Default is 8 seconds.
(2)
Press SAVE left soft key to confirm selection.
e. Press 5 to set Name Tag:
~54~
(1)
Use CHANGE left soft key to select and confirm “On” or “Off". Default is
“Off”.
(2)
Press SAVE left soft key to confirm selection.
Re: When Set to “On”, the handset will match the caller ID with the phone
book entries. Once matched, the LCD screen will display the name or
nickname instead of pure caller ID info (needs Call Waiting with Caller
ID service from local telephone company along with PBX system if a PBX
system is used).
f. Press 6 to set Language:
(1)
Use or to scroll through option 1~10 (1.English 2.Spanish
3.French 4.Italian 5.German 6.Dutch 7.Polish 8.Czech 9.Hungary
10.Romanian).
Default is “English”.
(2)
Press SAVE (Left) soft key to confirm selection.
g. Press 7 to set Custom Name:
(1)
Enter characters using the Character Table and method discussed in the
Phonebook section (On page 41).
(2)
Use or to move the cursor backward or forward to insert (to
the left of the cursor) or delete (the character above the cursor, or left
of the cursor if cursor is on the right of the last character).
(3)
Press SAVE (Left) soft key to confirm setting.
Re:
Once entering the custom name, the greeting of LCD in standby mode
will be changed to what you have entered.
Default greeting is “FREESTYL V2”.
h. Press 8 to Change Password:
(1)
Enter original password (4 digits) of handset then press OK left soft key
when enter this menu (default password is 0000).
(2)
Enter new password (4 digits) then press SAVE left soft key to confirm
new password.
i. Press 9 to set Headset Ring: See Headset Ring operation on Page 49.
7. Press 6 to set Base Settings:
When entering this menu, you must enter the Base PIN code first (4 digits).
Re: The PIN code is for Base Settings. Default is 0000.