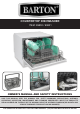
COUNTERTOP DISHWASHER ITEM: 99830 / 99831 OWNER’S MANUAL AND SAFETY INSTRUCTIONS SAVE THIS MANUAL: KEEP THIS MANUAL FOR SAFETY WARNINGS, PRECAUTIONS, ASSEMBLY, OPERATING, INSPECTION, MAINTENANCE AND CLEANING PROCEDURES. WRITE THE PRODUCT’S SERIAL NUMBER ON THE BACK OF THE MANUAL NEAR THE ASSEMBLY DIAGRAM (OR MONTH AND YEAR OF PURCHASE IF PRODUCT HAS NO NUMBER).
SAFETY INFORMATION GENERAL SAFETY WARNINGS The warnings, precautions, and instructions discussed in this instruction manual cannot cover all possible conditions and situations that may occur. It must be understood by the operator that common sense and caution are factors which cannot be built into this product, but must be supplied by the operator. Read carefully and understand all instructions before operating.
SAFETY INFORMATION Keep children away from detergent and rinse aid, keep child away from the open door of the dishwasher, there could still be some detergent left inside. This appliance is not intended for use by persons (including children with reduced physical, sensory or mental capabilities, or lack of experience and knowledge ,unless they have been given supervision or instruction concerning use of the appliance by a person responsible for their safety.
INSTALLATION The position of the dishwasher should be near the existing inlet and drain hoses and power cord. One side of the cabinet sink should be chosen to facilitate the connection of drain hoses of the dishwasher. Position the appliance in the desired location. The back should rest against the wall behind it, Position the appliance in the desired location. The back should rest against the wall behind it, and the sides, along the adjacent cabinets or wall.
INSTALLATION DRAIN HOSE: 1. Drain port connection 2. Quick connect connection INLET HOSE: 3. Inlet port connection 4. Quick connect connection FAUCET ADAPTER: 5. Faucet adapter 6. Faucet washer QUICK CONNECT: 1. Pressure relief valve 2. Faucet adapter connection 3. Locking collar 4. Inlet hose connection 5. Drain hose connection NOTE: In order to avoid water staying in the inlet hose, close the faucet after using it.
CONTROL PANEL / FEATURES 1 POWER: To turn on the power supply. 4 RINSE AID: Lights up when rinse aid is needed 6 PROGRAM SELECTOR: To select washing cycle. 2 POWER LIGHT: Lights up when power is on. 5 Program indicator lights. 7 START/RESET: To start or pause the washer. 3 FAUCET LIGHT: Lights up when Faucet is on.
OPERATION PRIOR TO USING THE DISHWASHER THE FIRST TIME RINSE AID DISPENSER: The rinse aid is released during the final rinse to prevent water from forming film on your dishes. It also improves drying by allowing water to sheet off the dishes. Your dishwasher is designed to use liquid rinse aids. The rinse aid dispenser is located inside the door next to the detergent dispenser. To fill the dispenser, open the cap and pour the rinse aid into the dispenser until the level indicator turns completely black.
OPERATION DETERGENTS: There are 3 sorts of detergents 1. With phosphate and with chlorine 2. With phosphate and without chlorine 3. Without phosphate and without chloride Normally new pulverised detergent is without phosphate. The water softener function of phosphate is not given. In this case we recommend to fill salt in the salt container even when the hardness of water is only 6 dH. If detergents without phosphate were used in case of hard water often white spots appear at dishes and glasses.
OPERATION AMOUNT OF DETERGENT TO USE: LOADING DISHWASHER BASKETS NOT SUITABLE LIMITED SUITABILITY BEFORE AND AFTER LOADING DISHWASHER BASKETS Scrape off any large amounts of leftover food. Soften remnants of burnt food in pans It is not necessary to rinse the dishes under running water. Place objects in the dishwasher in following way: 1. Items such as cups, glasses, pots/pans, etc. are face down. 2. Curved items, or those with recesses, should be loaded at a slant so that water can run off. 3.
OPERATION LOADING THE BASKET: Position the dishes and cookware so that they will not get moved by the spray of water.
OPERATION STARTING THE DISHWASHER: Check to make sure the following steps are followed 1. The dishwasher is level and fixed properly. 2. The inlet valve is open 3. There are no leakages at the connections of the conducts 4. Wires are tightly connected 5. Power is switched on 6. Inlet and drain hoses are knotted LOADING THE BASKET: STARTING A WASH CYCLE: 1. Draw out the basket(see the section entitled Loading the Dishwasher ); 2. Pour in the detergent (see the section entitled Detergent and Rinse Aid ); 3.
MAINTENANCE The filter prevents larger remnants of food from getting inside the pump. END OF WASH CYCLE: The filter efficiently removes food particles from the wash water, allowing it to be recirculated during the cycle. For best performance and results, the filter assembly must be regularly. This reason, it is a good idea to remove the larger food particles trapping in the filter after each wash cycle by rinsing the filter and cup under running water.
MAINTENANCE CLEANING THE FILTER: To clean the coarse filter and the fine filter, use a cleaning brush. Reassemble the filter parts as shown in the figures in the last page and reinsert the entire assembly in the dishwasher, positioning in its seat and pressing downward. CLEANING THE DISHWASHER: To clean the edge around the door, you should use only a soft warm, damp cloth. To avoid penetration of water into the door lock and electrical components, do not use a spray cleaner of any kind.
TROUBLESHOOTING Before calling for service, review the charts below for common troubleshooting techniques.
TECHNICAL DATA 14
WARRANTY PLEASE READ THE FOLLOWING CAREFULLY THE MANUFACTURER AND/OR DISTRIBUTOR HAS PROVIDED THE PARTS LIST AND ASSEMBLY DIAGRAM IN THIS MANUAL AS A REFERENCE TOOL ONLY. NEITHER THE MANUFACTURER OR DISTRIBUTOR MAKES ANY REPRESENTATION OR WARRANTY OF ANY KIND TO THE BUYER THAT HE OR SHE IS QUALIFIED TO MAKE ANY REPAIRS TO THE PRODUCT, OR THAT HE OR SHE IS QUALIFIED TO REPLACE ANY PARTS OF THE PRODUCT.