
Owner manual

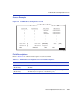

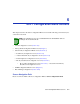


VLAN Redirect Configuration Screen
Port Configuration Menu Screens 5-21
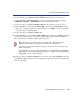
3. Use the arrow keys to highlight the Destination Port field near the bottom of the screen.
4. Use the SPACE bar or BACKSPACE key to step to the appropriate port number for the
destination port.
5. Use the arrow keys to highlight the Frame Format field near the bottom of the screen.
6. Use the SPACE bar or BACKSPACE key to step to the appropriate frame format setting
(RECEIVED, TAGGED, or UNTAGGED) for the selected Destination Port.
7. Use the arrow keys to highlight the Status field.
8. Use the SPACE bar to select either the ADD or DEL (delete) option. Press ENTER. This adds
or deletes the selections for the Source VLAN, Destination Port, and Frame Format made in
steps 1 through 6 and also updates the screen.
9. Use the arrow keys to highlight SAVE at the bottom of the screen. Press ENTER. The message
“SAVED OK” displays. This saves the new settings and updates the Source Port and Destination
Port read-only fields.
TIP: If more than 1 port is being redirected, repeat steps 1 through 8 for each additional
setting. Then go to step 9 to save all the new settings at once.
If an entry is to be changed, delete the entry, save the screen, then recreate the entry
with its new settings.
Any combination, up to 128, of port redirect instances (configured on the Port Redirect
Configuration screen) and/or VLAN redirect instances (configured on the VLAN Redirect
Configuration screen) can be configured.