
Specifications


Lecture Recorder x2 User Guide 5-3 File and Recording Transfer
One-Time Copy/Move of All Recorded Files to USB Drive
When configured to make a one-time copy of files, the device will automatically begin to copy files to an
inserted USBdrive, starting with the newest recording. Files will continue to copy until all are copied, the
specified maximum number of files is copied, or the target drive runs out of storage space.
The file currently being recorded (if any) cannot be transferred until recording is completed.
This procedure is separate from automatic file upload and does not need any pre-configuration in the
automatic file upload page.
Ideally only USB drives with visible activity indicators should be used. If your USB drive has no
activity indicator, you can check the greed LED on your Lecture Recorder x2. It blinks during
copy/move operations.
To configure a one-time copy of all recorded files to a USB drive:
1. Connect to the admin interface using your preferred connection mechanism. See Connect to the Admin
Interface.
2. Login as admin.
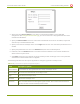
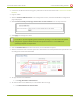
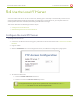
3. Select the External USB Drive link in the Configuration section; the External USB Drive configuration
page is displayed.
4. Select used for one-time move/copy of the recorded files (upon insertion) from the drop down list.
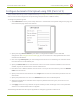
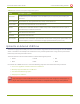
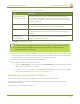
5. Select the appropriate check boxes based on the descriptions provided in the following table. If your
USB drive does not have activity indicators it is suggested you select either remove after copying or mark
file as downloaded.
126