
User guide

13
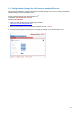
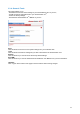
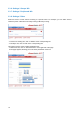
3.3.3. General / SNMP
The ePowerSwitch 1G
R2
provides a built-in SNMP (Simple Network Management Protocol) agent, which
enables you to manage the ePowerSwitch 1G
R2
through SNMP-based network management systems.
The ePowerSwitch 1G
R2
MIB file enables to remotely read out the status of all power outlets and the
values of all sensors (temperature, humidity, ambient light). It also enables to control individually all power
outlets and all groups of power outlets. The MIB file is stored on the ePowerSwitch 1G
R2
and can be
downloaded from the General / Tools Page.
SNMP enabled:
Check this box if you want to enable the SNMP protocol.
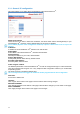
Contact:
In this field, enter the name you want to give to the Contact field. The name can be from 1 to 64
characters long, and can contain alphanumeric characters. Default name is "contact".
Name:
In this field, enter the name you want to give to the Name field. The name can be from 1 to 64 characters
long, and can contain alphanumeric characters. Default name is "name".
Location:
In this field, enter the name you want to give to the Location field. The name can be from 1 to 64
characters long, and can contain alphanumeric characters. Default name is "location".
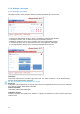
Read Community:
In this field, enter the name you want to give to the Read Community field. The name can be from 1 to 64
characters long, and can contain alphanumeric characters. Default name is "public".
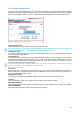
Write Community:
Check this box if you want to be able to control the power outlets through a MIB browser. In the following
field, enter the name you want to give to the Write Community. The name can be from 1 to 64 characters
long, and can contain alphanumeric characters. Default name is "private".
Trap Community:
Check this box if you want to configure the ePowerSwitch 1G
R2
SNMP agent to send traps to a
community. In the following field, enter the name you want to give to the Trap Community. The name can
be from 1 to 64 characters long, and can contain alphanumeric characters. Default name is "trap".
Trap Destination 1:
Check this box and enter the primary SNMP Server address the traps will be sent to.
Trap Destination 2:
Check this box and enter the secondary SNMP Server address the traps will be sent to.
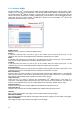
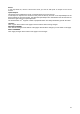
LOGOUT:
Click "Logout" at the bottom of the page to exit the session without saving changes.
DISCARD CHANGES:
Click "Discard Changes" at the bottom of the page to discard all the changes you have made on this page.
APPLY CHANGES:
Click "Apply Changes" at the bottom of the page to save changes.