
User Guide
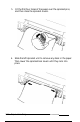


If the perforation is not aligned with the tear-off edge, adjust
the tear-off position as follows:
1.
Make sure the paper is in the tear-off position.
2.
While holding down the
ALT
button, press the
ECONOMY/CONDENSED
(up) or
FONT
(down) button to
adjust the position. The printer remembers the new
position even after you turn it off.
3.
Tear off any printed pages.
Note:
Q
The printer has a minimum and maximum tear-offposition.
If
you try to move the
tear-ofiposition
beyond these limits, the
printer beeps and the paper stops moving.
U When the paper reaches the
factory-set
tear-off position, the
printer beeps. Use the factory setting as a reference point when
adjusting the
tear-oflposition.
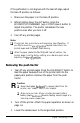
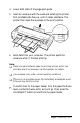
Removing the push tractor
1.
Tear off any printed pages. Press the
LOAD/EJECT
button to
feed the paper backward out of the printer and into the
paper-park position. Remove the paper from the push
tractor.
R
Caution:
U
Never feed labels
backzuard.
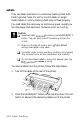
To remove labels from the
printer, see “Labels“ later in this chapter.
U
Make sure you tear offyour printed document before
feeding paper
backzuard.
Reverse feeding several pages at a
time may cause a paper jam.
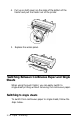
2.
Turn off the printer. Attach the paper separators as shown on
page l-6.
3.
Lower the release lever to the single-sheet position.
Paper Handling
2-13