
User`s guide


23
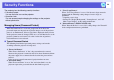
Adjusting Colour for Several Projectors (Multi-Screen Colour Adjustment)
When several projectors are lined up and projecting images, you can
adjust the brightness and colour tone of each projector's image with
multi-screen colour adjustment so that the colours of images from
each projector match closely.
In some cases the brightness and colour tone may not match
completely even after adjustment.
Summary of Adjustment Procedure
Make adjustments according to the following procedure.
1. Setting screen ID
Before setting up the projectors, set one screen ID for each.
When making adjustments for two or more projectors using the remote
control, you can operate them individually by setting individual screen
IDs for each projector.
2. Making image corrections
After the projectors are setup, you can adjust the image for each
projector.
Using Image Correction you can adjust from black to white in five
stages called levels 1 to 5, and in each level 1 to 5 you can adjust the
following two points.
• Adjusting brightness
Adjust each image by levels 1 to 5 so that they are all equal.
• Adjusting colour
Adjust each image by levels 1 to 5 so that the colours match using
"Color Correct. (G/R)" and "Color Correct. (B/Y)".
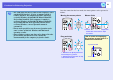
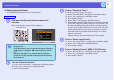
Setting Screen ID
For instance, after setting one projector as screen ID3, when you press
button [3] while holding down the [Num] button, even if there is more
than one projector setup, you can operate just the one set as screen ID3.
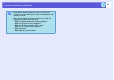
A
Press the [Menu] button and select "Extended" -
"Multi-screen" - "Screen ID" from the configuration
menu. s p.31
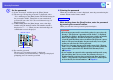
Check the buttons you can use and the operations they perform in
the guide under the menu.
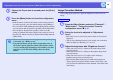
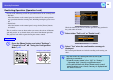
Procedure
Using the remote control Using the control panel