
User`s guide

104 Presenting from a Digital Camera or External Drive
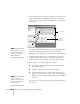
3. Drag and drop the files you want to include in your scenario from
either the file window or thumbnail window into the scenario
window. (You can also double-click a thumbnail to add the file to
the scenario.)
To include a whole PowerPoint file (instead of individual slides),
drag the PowerPoint icon itself into the scenario window.
Dragging an entire file preserves the transitions set in PowerPoint.
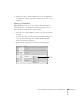
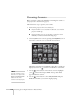
4. Continue dragging files into the scenario window to build your
presentation. Each slide appears in a numbered cell. The cell
background color varies according to the type of file in the cell.
5. If you want, you can make changes to the scenario:
■ To rearrange cells, drag and drop them as necessary within
the scenario window.
■ To delete a cell, right-click the cell and select Cut.
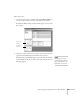
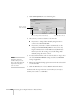
■ To check the animation for a slide, click its cell. A section
appears at the bottom of the scenario window displaying each
animation operation. (Slides using animation have an .EMA
extension.)
You can also create transitions between slides, as described in the
next section.
Check a slide’s
animation
effects here
Scenario Cell
note
Transition effects created in
PowerPoint look smoother
than those you add with
EMP SlideMaker 2.
note
Unless you change the
transition setting, your slides
will automatically advance
after 30 seconds.