
User`s guide

Connecting to Computers, Cameras, and Other Equipment 39
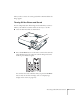
3. You can connect an optional stereo mini-jack audio cable to play
sound through the projector (see page 48), or connect a USB
cable to use the remote control as a mouse (see page 40).
4. When you’ve finished making any connections, see page 17 for
instructions on turning on the projector and adjusting the
image.
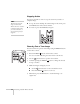
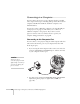
Connecting to the USB Port
You can connect a Windows XP or Windows 2000 (SP4) computer to
the projector’s Type B (square) USB port and project your
computer’s display. A USB 2.0 connection provides better picture
quality and response than USB 1.1.
The first time you connect a computer to the projector’s USB port,
software from the projector installs on your computer.
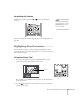
1. Follow the instructions beginning on page 17 to turn on the
projector and adjust the image.
2. Make sure the USB Type B setting under the projector’s
Extended menu is set to
USB Display (see page 133).
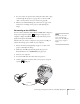
3. Turn on your computer.
4. Locate the USB cable that came with your projector.
5. Connect the square end of the cable to the projector’s Type B
(square) USB port.
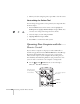
note
You can’t use the remote
mouse control function
when you use the USB port
to project your computer’s
display.
USB cable