
User`s guide

40 Connecting to Computers, Cameras, and Other Equipment
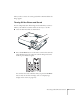
6. Connect the flat end of the cable to any available USB port on
your notebook or desktop computer.
Messages appear as the projector is recognized and the software
installation begins.
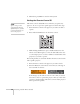
7. Follow the instructions on your computer screen to install the
Epson USB Display software. If you see a “Digital Signature
Warning,” select
Continue. You will only need to install the
software the first time you connect.
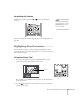
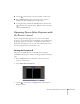
After the software has installed, you see your computer’s desktop
displayed by the projector. You can switch the projector to other
image sources using the
Source buttons on the remote control,
and then switch back to your desktop display by pressing
EasyMP.
When you’re done projecting from your computer, disconnect
the USB cable.
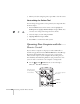
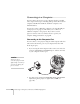
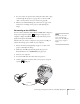
Connecting the Cable for Remote Mouse
Control
If you’ve connected a computer as described in this chapter (using the
Computer 1 or Computer 2 port) and set the USB Type B setting
under the projector’s Extended menu to
Wireless Mouse (see
page 133), you can use the projector’s remote control as a wireless
mouse. This lets you control your computer and click through
slideshow-style presentations, such as PowerPoint, from up to 20 feet
away.
note
For details on how to use the
remote control in place of
your computer’s mouse, see
page 34.
Move
cursor
Left-
click
Right-
click