
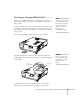
User`s guide


60 Presenting Through a Wireless Network
4. Make sure
Quick is selected for the Connection mode. If not, use
the pointer button on the remote control to highlight
Quick,
then press
Enter to select it.
5. If your network is using 802.11a, use the pointer button on
the remote control to highlight
802.11a, then press Enter to
select it.
6. If your computer’s network card supports an SSID or ESSID
name (see page 63), highlight the
ESSID text box, press Enter,
and enter a name:
Press the pointer button to select individual letters; then press
Enter to input a character. To add a blank space or to navigate
backward and forward through the input text, highlight the
arrows and press
Enter. To toggle symbol settings or capital
letters, highlight the option and press
Enter. When you’re done,
highlight
Finish and press Enter.
Note that the ESSID is case-sensitive (if you enter the name in
uppercase on the projector, you must type it the same way on the
computer connecting to the projector).
7. When you’re done making these settings, select Return, select
Setup complete, and then select Yes to confirm that you want
to save the changes. Press
Menu to exit the menu system.
Now you’re ready to set up your computer to project wirelessly. Go to
“Configuring the Network Settings for Windows” below, or “Setting
Up Your Mac for Ad Hoc Mode” on page 63.