
User`s guide


Presenting Through a Wireless Network 61
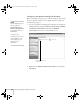
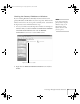
8. If your access point assigns IP addresses automatically, turn on
DHCP. Otherwise, turn off DHCP and enter the following
information manually:
■ IP address: Type in the IP address you want to assign to the
projector. It must be formatted like other addresses on the
network. The last section should be unique.
■ Subnet mask: For example: 255.255.255.000, but this
depends on how your network is set up.
■ Gateway address: Enter the IP address that was assigned to
the access point or AirPort base station when it was set up.
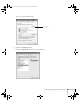
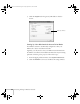
9. If you want to monitor the projector using HP OpenView,
™
you’ll need to enter at least one trap IP address. See page 122 for
details on monitoring the projector.
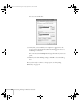
10. When you’re done making these settings, highlight the
OK button
at the top of the screen (you can either use the button on the
remote control or press to highlight it), then press
Enter.
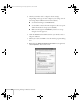
Highlight the
OK button again and press Enter to return to the
main EasyMP Network Screen.
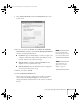
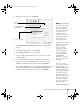
Now you’re ready to set up your computer for wireless projecting. Go
to “Configuring the Network Settings for Windows” below, or go to
“Setting Up Your Macintosh for Access Point Mode” on page 68. If
you need to use WEP, WPA, or LEAP security options, see page 70 to
set up the option that your network uses on the projector.
note
For specific details about
your network, please consult
your network administrator.
If you don’t know your
gateway or access point
address, see page 67. If you’re
using AirPort, start the
AirPort Admin utility, select
your base station and click
Configure. Then click the
Network tab to see your
base station’s IP address.
Canada User's Guide.book Page 61 Friday, September 3, 2004 3:49 PM