Lily-fm.
Lily.book Page A Tuesday, March 2, 1999 4:06 PM FCC COMPLIANCE STATEMENT FOR AMERICAN USERS This equipment has been tested and found to comply with the limits for a class B digital device, pursuant to Part 15 of the FCC Rules. These limits are designed to provide reasonable protection against harmful interference in a residential installation.
Lily-fm.fm Page ii Monday, April 5, 1999 10:03 AM IMPORTANT NOTICE DISCLAIMER OF WARRANTY Epson America makes no representations or warranties, either express or implied, by or with respect to anything in this manual, and shall not be liable for any implied warranties of merchantability and fitness for a particular purpose or for any indirect, special, or consequential damages. Some states do not allow the exclusion of incidental or consequential damages, so this exclusion may not apply to you.
Lily.
Lily.
Lily.
Lily.
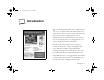
Lily.book Page 1 Tuesday, March 2, 1999 4:06 PM Introduction our new EPSON PhotoPC 750Z is a high resolution, easy-to-use digital camera with a built-in LCD screen and 3× optical zoom. You can view your pictures before and after you capture them, or display them on a TV or multimedia projector and transfer them to your computer. You can even upload pictures, text, and graphics into your camera, and play them back for presentations.
Lily.book Page 2 Tuesday, March 2, 1999 4:06 PM Your PhotoPC 750Z comes complete with cables, batteries, battery charger, camera bag, software, and utilities for downloading, editing, organizing, and printing your pictures.
Lily.
Lily.book Page 4 Tuesday, March 2, 1999 4:06 PM Minimum System Requirements Macintosh Systems To transfer images to your computer and edit them, make sure your system meets these minimum requirements: ◗ Macintosh with PowerPC™ or higher processor ◗ System Software Version 7.1 or later (System 7.
Lily.book Page 5 Tuesday, March 2, 1999 4:06 PM The following tables list the contact information: To speak to a technical support representative, dial Electronic support services (310) 974-1983 (U.S.), or (905) 709-3839 (Canada), 6 AM to 6 PM, Pacific Time, Monday through Friday. Toll or long distance charges may apply. Service Access World Wide Web From the Internet, you can reach EPSON’s Home Page at http://www.epson.com.
Lily.book Page 6 Tuesday, March 2, 1999 4:06 PM Software Support Registration If you are having problems with a software application included with the camera, you can call one of the following numbers for technical support: Please take a minute to fill out the registration card for the PhotoPC 750Z digital camera and mail it back to us. This enables you to receive special information on accessories, new products, and software upgrades.
Lily.book Page 7 Tuesday, March 2, 1999 4:06 PM ◗ To prevent fire or explosion, do not use the camera or battery charger where inflammable or volatile gas is stored. ◗ If the camera shows unusual signs such as noise, odor, or smoke, turn it off immediately. Remove the batteries and/or disconnect the AC adapter, and unplug the AC adapter from the electrical outlet. ◗ If the battery charger shows unusual signs such as noise, odor, or smoke, unplug it immediately.
Lily.book Page 8 Tuesday, March 2, 1999 4:06 PM ◗ Remove batteries and/or unplug the camera and the AC adapter and refer servicing to qualified service personnel under the following conditions: if the power cord or plug is damaged; if liquid has entered the camera; if the camera has been dropped or its exterior has been damaged; if the camera or its optional accessories do not operate normally or exhibit a distinct change in performance.
Lily.book Page 1 Tuesday, March 2, 1999 4:06 PM 1 . 1 Using Advanced Camera Features T FOR SALE • 1995 Mitsubishi Montero • Good condition • Low Mileage 999-555-5555 Jim Jackson’s Auto Sales he PhotoPC 750Z has advanced features for taking specialized photos.
Lily.book Page 2 Tuesday, March 2, 1999 4:06 PM Taking Pictures With the Timer 4 Setting the timer creates a 10-second delay between the time you press the shutter button and the actual image capture. This allows you to take a picture of yourself. The camera beeps when the image is captured. The status light on the back of the camera flashes red as PhotoPC 750Z processes the image. When the status light stops flashing and turns green, you can take another picture.
Lily.book Page 3 Tuesday, March 2, 1999 4:06 PM 2 Press the Mode button on the back of the camera. 4 Press the button all the way down to capture the image. 5 To turn off macro mode, press the mode button three times or turn off the camera. 1 NOTE When you take macro close-ups, you should use a tripod (as described in Appendix A) and disable the flash. Otherwise, your pictures may appear blurry and washed-out.
Lily.book Page 4 Tuesday, March 2, 1999 4:06 PM The word PANORAMA appears briefly on your screen and black margins appear at the top and bottom of the LCD screen, and you see the panorama icon at the bottom. You can use the image quality button on top of the camera to select fine, super fine, monochrome fine, or monochrome super fine image quality (all at 1280 × 480 pixels); or HyPict or monochrome HyPict (both at 1600 × 600 pixels). 2 3 Press the shutter button halfway to lock the auto focus.
Lily.book Page 5 Tuesday, March 2, 1999 4:06 PM Taking Digital Zoom Pictures 3 Digital zoom pictures are magnified two times (2×). This format is like a digital version of telephoto. The automatic cropping effect makes file sizes smaller, allowing you to store more pictures in the digital zoom format. The zoom format remains active until you press the Mode button again or turn off the camera.
Lily.book Page 6 Tuesday, March 2, 1999 4:06 PM 2 3 Press the SEL (select) button. Press the and buttons to view the settings for other menus. The orange highlight indicates the currently selected menu. You can choose from the following menus: Conditions (use advanced photo settings). See arrow buttons page 1-7 for instructions. SEL (select) button Settings (change the date, time, beep, power setting, and LCD brightness). See page 6-9 for instructions.
Lily.book Page 7 Tuesday, March 2, 1999 4:06 PM Continuous Shooting 2 Press 3 Press the SEL button to display the menu options: or to display the Conditions menu: 1 In this mode, you can take two standard resolution pictures a second, with up to sixteen pictures in a sequence. You can capture a complex motion, such as a golf swing, in a series of steps to create animation sequences for the Internet, screen savers, or presentations.
Lily.book Page 8 Tuesday, March 2, 1999 4:06 PM 4 Press button until cont/quick is selected and then press SEL to view the continuous/quick shot menu. 5 Press 6 Press SEL, then press the ESC button twice to return to view mode. or 7 Press and hold the shutter button all the way down. The status light flashes red and the camera beeps as it captures each picture. 8 Release the shutter button when you have captured the pictures you want. The red light flashes as the camera processes the images.
Lily.book Page 9 Tuesday, March 2, 1999 4:06 PM 3 Follow steps 1 through 5 on page 1-8 to select continuous shooting. 6 4 Press the timer button. Taking Quick Shots timer button The timer icon 5 appears on the display panel. Press the shutter button. The timer icon and the red timer light on the front of the camera flash slowly for 8 seconds. Then they flash rapidly for 2 seconds before the shutter is released.
Lily-1.fm Page 10 Monday, April 5, 1999 10:51 AM 3 Press the SEL button to display the menu options: Taking HyPict Mode Pictures The PhotoPC 750Z features a new Epson technology called HyPict. In this mode, the PhotoPC 750Z captures images at 1280 × 960 pixels, and then interpolates them up to 1600 × 1200 pixels inside the camera, before compressing them into JPEG format.
Lily.
Lily.book Page 12 Tuesday, March 2, 1999 4:06 PM However, you can have the camera use a fixed white balance for a warmer appearance under fluorescent lighting or special effects, such as a red-tinted sunset. The white “color temperature” of the fixed setting is 5200 degrees Kelvin. Or, you can set the white balance yourself.
Lily.book Page 13 Tuesday, March 2, 1999 4:06 PM An arrow appears next to the WB (white balance) symbol on the display panel. 9 3 Press the SEL button to display the menu options: 4 If the advanced settings are set to Auto (gray and not selectable), highlight the Auto/Manual advanced settings icon and press the SEL button. 5 Press 6 Press the SEL button to view the white balance menu. 7 Press or to change the white balance setting to (Setting) and press SEL.
Lily.book Page 14 Tuesday, March 2, 1999 4:06 PM 8 9 Focus the camera on a piece of white paper, or some other object to set the white balance by, and press the shutter button to save the setting. Press to select User and press the SEL button. 10 Press the ESC button twice to return to view mode. An arrow appears next to the WB (white balance) symbol on the display panel. 11 Follow the instructions on page 3-9 in Getting Started to take pictures with the LCD screen as usual.
Lily.book Page 15 Tuesday, March 2, 1999 4:06 PM 3 Press the SEL button to display the menu options, as shown. 4 If the advanced settings are set to Auto, highlight the Auto/Manual advanced settings icon and press the SEL button. 5 Press until the exposure icon is highlighted and press the SEL button to view the exposure menu. 6 Press button. 7 Press or press SEL. 8 Press the ESC button twice to return to view mode. The manual exposure icon appears in the upper left corner of the screen.
Lily.book Page 16 Tuesday, March 2, 1999 4:06 PM Press to make the image one half step darker (–0.5); press again to make it one whole step darker (–1.0). You can go to two steps darker than the normal exposure. This is useful when you’re photographing an object with a dark background. Make sure the camera dial is set to View, then follow these steps to use the high sensitivity mode to take night photos: 1 Press the SEL button to display the menus.
Lily.book Page 17 Tuesday, March 2, 1999 4:06 PM 5 Press to highlight the sensitivity icon SEL to display the sensitivity menu: and click Using Slow Synchronized Flash Mode for Night Photography 1 To light up the background as well as your subject, use the slow synchronized flash mode when taking pictures at night. This option causes the aperture to stay open longer, allowing more light to enter the camera.
Lily.book Page 18 Tuesday, March 2, 1999 4:06 PM 3 Press the SEL button to display the menu options: 4 If the advanced settings are set to Auto, highlight the Auto/Manual advanced settings icon and press the SEL button. 5 Press 6 Press SEL to change from Std to Slow. 7 Press the ESC button twice to return to view mode. to highlight the flash icon. 1-18 Using Advanced Camera Features 8 Take your pictures with the LCD screen as usual.
Lily.book Page 1 Tuesday, March 2, 1999 4:06 PM . 2 2 Playing Back Photos T he LCD screen lets you play back your pictures oneby-one or in groups of nine at a time. You can magnify or erase selected pictures and customize playback features through the LCD screen menus. You can view your pictures on a television just as easily as on the camera’s screen.
Lily.book Page 2 Tuesday, March 2, 1999 4:06 PM Using the Playback Mode 2 Follow these steps to use the camera’s playback mode: 1 Push down the camera dial lock and turn the camera dial to Play. To access the screen menus, press the SEL button. Blue menu icons appear at the top of the screen with the currently selected menu displayed in orange. The settings for this menu are displayed on the screen, as shown: 3 Press the and other menus.
Lily.book Page 3 Tuesday, March 2, 1999 4:06 PM Information (turn off the display of 4 To exit the menus, press the ESC button until the menu icons and settings disappear. (Depending on the menu, you may have to press this button several times.) 5 When you’re finished with playback mode, turn the camera dial Off. information on played-back pictures). See page 2-5 for instructions. Playback Mode (display one at a time or groups of 9 images). See page 2-4 for instructions.
Lily.book Page 4 Tuesday, March 2, 1999 4:06 PM Thumbnail images of the last photos you took appear on the screen, with the currently selected image framed in white, as shown below. Press the button to display the earliest picture taken. You can continue pressing the button to view your pictures in order. Press to move backward through your pictures. Playing Back Multiple Pictures You can play back your pictures in Multi mode to view small “thumbnail” versions of nine pictures at once.
Lily.book Page 5 Tuesday, March 2, 1999 4:06 PM 5 ◗ To switch back to displaying one picture at a time, follow steps 1 through 3 again, but choose the Normal setting on the Playback Mode menu. ◗ Playing Your Pictures as a Slide Show You can use the LCD screen to display your pictures automatically. Make sure the camera dial is set to Play, and follow these steps: 1 Press the SEL button to display the LCD screen menus. 2 Press the or Show option. 3 Press the SEL button again.
Lily.book Page 6 Tuesday, March 2, 1999 4:06 PM 2 Press the or Information menu. 3 Press the SEL button to turn information Off. You can press it again to turn information back on. 4 button until you see the The sections of your image that can be viewed are demonstrated in the figure below: Make sure the camera dial is set to Play, and follow these steps: To save your setting, press the ESC button. You can also turn off information displayed in view mode.
Lily.book Page 7 Tuesday, March 2, 1999 4:06 PM 4 5 Use the and buttons to move the display left or right. To move the display up or down, hold down the Function button and press the or buttons. The icon indicates which section is displayed. Erasing the Currently Displayed Picture Make sure the camera dial is set to Play and the image you want to erase is displayed. Then follow these steps: 1 Press the ESC button to return to normal view. Press ESC again to exit the menu.
Lily.book Page 8 Tuesday, March 2, 1999 4:06 PM Selecting Pictures to Erase 3 Press the SEL button to enter the Erase mode. The following menu is displayed: 4 Press the or or Erase All: You select pictures to erase using the Photo Control menu. You can either select individual pictures, or choose to erase all the pictures in the camera. Using the same menu, you can select pictures to lock (protect from erasing) or lock all pictures.
Lily.book Page 9 Tuesday, March 2, 1999 4:06 PM 6 Press the SEL button. An orange frame appears around the image. If you want to erase other photos at the same time, use the or button to display them, then press the SEL button to select them. NOTE 9 Press ESC until you return to normal playback mode. 2 Locking Photos The lock feature allows you to keep your photos from being accidentally erased. You can lock selected photos or all the photos in the camera.
Lily.book Page 10 Tuesday, March 2, 1999 4:06 PM 3 Press the button until Lock is highlighted in orange, then press the SEL button to view the Lock Photos menu: 5 Press the SEL button, then press the or button to move through the images in the camera until the photo you want to lock appears on the screen. 6 Press the SEL button. A lock icon appears next to the frame number. If you want to lock other photos, use the or button to display them, then press the SEL button to select them.
Lily.book Page 11 Tuesday, March 2, 1999 4:06 PM 8 Press the SEL button to lock the images. 9 Press ESC until you return to normal playback mode. 3 Press the button until Lock is highlighted in orange, then press the SEL button to view the Lock menu: 4 Press the or or Unlock All. 2 Unlocking Photos After you have locked some of your pictures, you can unlock selected photos or all the photos in the camera.
Lily.book Page 12 Tuesday, March 2, 1999 4:06 PM 5 6 Press the SEL button, then press the or button to move through the images in the camera until the photo you want to unlock appears on the screen. 8 Press the SEL button to unlock the images. 9 Press ESC until you return to normal playback mode. Press the SEL button. The lock icon disappears from the screen. If you want to unlock other photos at the same time, use the or button to display them, then press the SEL button to select them.
Lily.book Page 13 Tuesday, March 2, 1999 4:06 PM 2 Open the camera’s connector cover and connect the black end of the video cable to the Video Out port as shown: 3 Connect the yellow end of the cable to the VIDEO IN port on the television or VCR: 4 Turn on the TV (and VCR) and switch to the correct video mode.
Lily.book Page 14 Tuesday, March 2, 1999 4:06 PM 5 Turn the camera dial to Play. The last picture you took appears on the TV screen. You can use all of the camera’s playback features when your pictures are displayed on TV. NOTE Using the optional AC adapter is highly recommended when you play back your pictures on a TV. See page A-1 for instructions and ordering information.
Lily.book Page 1 Tuesday, March 2, 1999 4:06 PM . 3 Getting Photos Into Applications and Documents P hotoPC 750Z provides several methods for getting your pictures into applications and projects. You can drag and drop a picture from an Image Expert album into a document or presentation. You can also import an image into your application, or copy and paste it. You can use the Camio™ Viewer to drag a picture directly from the camera and drop it into your project.
Lily.book Page 2 Tuesday, March 2, 1999 4:06 PM 3 Choose EPSON PhotoPC 750Z-600 as the TWAIN source. 4 Choose Import, then TWAIN_32 (or Acquire, then TWAIN Acquire) from the File menu. 5 The EPSON Photo!2 screen appears, with “thumbnail” images of your pictures, as shown below. Click to transfer your picture(s) Click if you need help 3-2 Getting Photos Into Applications and Documents If you see a Setup screen that says The Camera Is Not Responding, see page 3-5.
Lily.book Page 3 Tuesday, March 2, 1999 4:06 PM 7 After transferring, click Erase Photos if you want to remove the picture(s) from your camera. 8 If necessary, click Close to exit the EPSON Photo!2 screen and return to your application. You see the picture or pictures in the work area. You see a screen like the one below. (If you see a Setup screen that says The Camera Is Not Responding, see page 3-5.
Lily.book Page 4 Tuesday, March 2, 1999 4:06 PM 3 Click the Export Photos button. The Save As dialog box appears: Click if you want to choose a different folder 5 Click if you want to create a new folder 6 Select the file type from the pull-down menu. You can choose any of the following formats: ◗ Bitmap (BMP) ◗ JPEG ◗ PCX ◗ PICT (Macintosh only) Click Save. Your pictures are transferred one by one. NOTE You cannot open exported photos in EPSON Photo!2.
Lily.book Page 5 Tuesday, March 2, 1999 4:06 PM Here are some of the additional things you can do with EPSON Photo!2: What To Do If the Camera Is Not Responding ◗ Select the Folder tab and click Browse to locate and display pictures you have downloaded. You can then select a picture and click Upload Photos to transfer a picture from your computer to the camera or an optional memory card. See Chapter 7 for more information.
Lily.book Page 6 Tuesday, March 2, 1999 4:06 PM 2 Check the cable and make sure the connections are secure. Make sure the pins inside the connector are not bent. 7 3 Make sure your batteries have enough power, or your AC adapter is connected. Importing Images Into Documents 4 Click Test Connection. If you see the same screen, continue with step 5. 5 Select another port if necessary.
Lily-3.fm Page 7 Monday, April 5, 1999 10:35 AM 3 Select the point where you want to place your picture. 4 Select Picture from the Insert menu. (In some applications you may need to select a different command, such as Import Picture, which is usually in 6 Click OK (or Insert, Import, or whatever command your application uses) to insert your picture. The picture appears in your document. 3 the File or Insert menu.
Lily-3.fm Page 8 Monday, April 5, 1999 4:13 PM NOTE In some applications, you can add a frame around the picture if you want to move it around on the page or resize it. In other applications, you create a frame first, and then place the picture in it. For instructions, see your application’s online help or documentation. Getting Images With Copy and Paste You can use this method to place a picture in just about any type of document or project.
Lily.book Page 9 Tuesday, March 2, 1999 4:06 PM Or, from the Image Expert screen, click the Open Album button or select Open Album from the File menu. You see a dialog box like the following: 3 Locate the album you want and double-click the album name to open it. 4 Start your word processor or other application. 5 Open the document where you want to use the picture. You should have both the Image Expert album and the document displayed on your screen, as shown: 6 Click the image you want.
Lily.book Page 10 Tuesday, March 2, 1999 4:06 PM 8 Release the mouse button. The picture appears in your document. If you want to edit or modify the picture, just double-click it to bring up the Image Expert menus and toolbar. (See Chapter 5 for more information on editing images.) First you need to connect the camera to your computer as described in Chapter 4. Then follow these steps: 1 Double-click the camera icon your Windows Taskbar.
Lily.book Page 11 Tuesday, March 2, 1999 4:06 PM 3 Choose one of the following options: ◗ View images in the Camera/PC Card Displays a filmstrip of your pictures. You can then select an image to drag and drop into a document or presentation. (The image will be embedded in your document, and will not be available as a separate file.) ◗ Dragging and Dropping a Picture Into a Document Follow these steps if you chose View images in the Camera: 1 3 Click OK.
Lily.book Page 12 Tuesday, March 2, 1999 4:06 PM 3 Click the picture you want to use. Without releasing the mouse button, drag the picture to your document. When your pointer is over the location where you want the picture to appear, release the mouse button. The picture is downloaded from the camera, and it appears in your document. If you want to edit or modify the picture, just doubleclick it to bring up the Image Expert menus and toolbar.
Lily.book Page 1 Tuesday, March 2, 1999 4:06 PM 6. 8 4 Working With Photos and Albums 4 Y ou can use Image Expert albums to organize and display your pictures. You can print using dozens of predefined layouts. On Windows systems, you can also record sounds for each image, copy an album to diskette, use your images as wallpaper, and more.
Lily-4.fm Page 2 Monday, April 5, 1999 10:39 AM Using Albums If you want to create a new album, click the Image Expert albums provide a convenient way to access and New Album button view your pictures. Here are some of the things you can do the File menu.
Lily.book Page 3 Tuesday, March 2, 1999 4:06 PM 5 When the second album is highlighted, let go of the mouse button. The images are copied to the album. You can sort the pictures and save or rename the new album. Renaming a Picture You can easily rename a picture displayed in an album. Follow these steps: 3 Viewing Picture Information Click the picture to select it. 2 Double-click the name that appears above the picture.
Lily-4.fm Page 4 Monday, April 5, 1999 10:58 AM 2 Click the Properties button or select Properties 3 from the Image menu. You see information like the following: Click the Camera Settings tab to display information like the following: 4 Click another image to view its information, or close the Properties box. Printing an Image or Album Image Expert offers many choices for printing an individual picture or album with titles, labels, or any text you want to add.
Lily.book Page 5 Tuesday, March 2, 1999 4:06 PM The image in the center of the screen shows you a preview of your printout. Follow these steps to print: 1 Open the image or album you want to print. 2 Click the Print Layout button Layout from the file menu.
Lily-4.fm Page 6 Monday, April 5, 1999 3:52 PM 4 Follow these steps: 1 Click the Print Setup button page. If you need a custom size, choose Custom Size. You can then enter exact dimensions for your picture or if you need to select your printer or paper size. Otherwise, all layouts are set up for a standard letter-size sheet. 2 In Windows, click the Portrait button Landscape button to change the orientation of the page.
Lily.book Page 7 Tuesday, March 2, 1999 4:06 PM Adding Text If you want to have image labels or page headers or footers printed with your pictures, follow these steps: 1 Click the Edit Text button dialog box appears: Click Change Font to set the font size, style, color, and so on for your header, footer, or labels. 4 Click Insert Special Item to choose one of the following for your header, footer, or labels (only some of the choices are available for each): .
Lily.book Page 8 Tuesday, March 2, 1999 4:06 PM 2 Choosing Album Images If you’re printing an album, Image Expert uses as many pages as necessary to print the entire album. If you don’t want to print all the images, you can choose the ones you want and position them in your layout. Follow these steps: 1 Click the Pick Images button . Your album appears in a “filmstrip” on the right side of your screen. Choose the images you want to print, and drag each one where you want it to appear in the layout.
Lily-4.fm Page 9 Monday, April 5, 1999 3:53 PM The other images fade out, and the sizing tools on the 3 left side of the screen become active. Click the Move tool and then click on an image to move it and choose the portion you want to display. 4 sizing tools 5 Click the Reset Size button size and layout. to return to the default 4 When the preview shows the layout you want, you can click the Print button to produce your printout.
Lily.book Page 10 Tuesday, March 2, 1999 4:06 PM 2 Click the Record button on the left side of your screen or select Record Audio from the Annotation menu to open the Record dialog box: 4 If you like your new recording, click OK. Otherwise, click Cancel to delete the new recording and exit the Record window. (You can start over with step 1, if you want.) Playing Back Sounds When you open an image that has audio attached to it (indicated by a musical note), the audio clip automatically plays.
Lily.book Page 11 Tuesday, March 2, 1999 4:06 PM You can also select the image with sound and use the Audio buttons on the left side of your screen to listen to it: 3 Click and drag to select a section of the audio clip or the entire clip. You can perform the following operations: ◗ Click the Play button to hear the section you selected. stop ◗ Click Cut to remove the section. record ◗ Click Copy to copy it. edit ◗ Select another image and click Paste to add the sound clip to the new image.
Lily-4.fm Page 12 Monday, April 5, 1999 3:54 PM 2 Select Delete Annotations from the Edit menu. The following dialog box appears: 3 Click Yes. 3 Draw your highlights, signature, or other additions. Adding Annotations (Windows Only) You can draw on your images to highlight specific areas or add special effects using the annotations feature. You can choose to have these annotations only show in Image Expert If you want to change the color or width of the lines, click the Ink Options button .
Lily.book Page 13 Tuesday, March 2, 1999 4:06 PM The annotations don’t appear in other applications or in printed images. If you want the annotation to be a permanent part of your image, you can blend it in, as described in the section below. Deleting Annotations If you have not blended the annotation into your image, you can delete it.
Lily.book Page 14 Tuesday, March 2, 1999 4:06 PM Displaying Albums as Slide Shows 4 If you want to change the appearance of your slide show, click the Options button. The Slide Show Options dialog box appears: 5 Set any of the following options and click OK: With Windows, when you display an album as a slide show, you can have it play automatically with various transition effects between images. Follow these steps: 1 Open your album.
Lily-4.fm Page 15 Monday, April 5, 1999 4:10 PM ◗ To play the slide show only once, click 2 Continuous Repeat to deselect it. ◗ To hide the titles of your pictures, click Show Choose Set Screen Saver from the File menu. Image Expert asks you to confirm your choice. 3 Click Yes. Titles to deselect it. ◗ Windows will play a slide show of your album whenever your system is idle. To turn off the fades and dissolves that play between pictures, click Show Transition Effects 4 to deselect it.
Lily-4.fm Page 16 Monday, April 5, 1999 4:10 PM For Macintosh, the image is set as the desktop You can minimize Image Expert to see your new background. wallpaper. In Windows, the following dialog box appears. Copying to Diskette or Zip™ Disk If you’re using Windows 95, Windows 98, or Windows Windows NT 4.0, you can copy albums or individual images to diskettes or Zip disks. You can also include a player, so your friends and business associates can view your pictures on their computers.
Lily.book Page 17 Tuesday, March 2, 1999 4:06 PM You see the following dialog box: NOTE Depending on the size of your image files, you may be able to fit only two or three on a diskette. You may want to use Zip disks or other large-format storage media. Make sure your diskette (or other storage device) is not write-protected 4 before you try to copy. 7 4 Make sure your diskette drive or Zip drive letter appears in the Copy images to box.
Lily.book Page 18 Tuesday, March 2, 1999 4:06 PM Sending Pictures and Sound by E-mail 2 Choose Send from the file menu. You see the Choose Profile dialog box on the right. You can send a picture directly from Image Expert if your e-mail application complies with the MAPI (messaging application programming interface) standard (Windows 95, Windows 98, or Windows NT 4.0 only). For example, you can use Inbox or Microsoft Exchange. You need to set up Microsoft Exchange to work with your Internet service.
Lily.book Page 19 Tuesday, March 2, 1999 4:06 PM 6 When your e-mail is ready, click whatever button your application uses to send. The picture(s) are mailed. Your e-mail application closes, and Image Expert becomes active again.
Lily.book Page 1 Tuesday, March 2, 1999 4:06 PM . 35 5 Editing Images Y ou can edit your images to enhance their appearance, crop, rotate, and resize them, or create special effects.
Lily.book Page 2 Tuesday, March 2, 1999 4:06 PM Viewing and Selecting Images When your image is displayed in an album, you can rotate it or do a quick fix. However, to use any other editing features, you need to open the image by double-clicking it or selecting Open Image from the File menu. ◗ Click Zoom, and then click anywhere on your image to enlarge your view. Right click or hold down the control key and click to zoom out.
Lily.book Page 3 Tuesday, March 2, 1999 4:06 PM Applying Quick Fix Correcting an Image The easiest way to improve your image is to have Image Expert automatically “correct” it with the Quick Fix command. You can click the Quick Fix tool or select Quick Fix from the Image menu. To fine-tune an image, click the Corrections tool or choose Corrections from the Image menu. You see a window like the following: 5 If you don’t like the results, simply select Undo Quick Fix from the Edit menu.
Lily.book Page 4 Tuesday, March 2, 1999 4:06 PM Click the tabs at the top of the screen to make these kinds of corrections: ◗ Contrast and Brightness For adjusting the amount of light in your image and the difference between light and dark areas. ◗ Color For correcting color casts and adjusting the balance of cyan (blue), magenta (red), and yellow; and red, green, and blue in your picture. ◗ ◗ The preview window shows your image with the original view on the left and the corrected image on the right.
Lily.book Page 5 Tuesday, March 2, 1999 4:06 PM Cropping an Image 4 If you change your mind about which part of the image to crop, simply click anywhere outside the selected area of the image and repeat step 3. 5 Click the Crop tool If you want to save only part of your image, use the crop function to cut out the rest of the image. Follow these steps: 1 Open the image you want to modify. 2 Click one of the selection tools. 3 Click and drag the mouse over the area you want to save.
Lily.book Page 6 Tuesday, March 2, 1999 4:06 PM Choose Resize from the Image menu. You see a dialog box like the following: Rotating an Image You can click the Rotate tool to quickly rotate a picture to the right. For more options, select Rotate from the Image menu. NOTE This box changes size to reflect the numbers you enter If you rotate an image displayed in an album (without opening it in the Image Expert window), you can’t undo it.
Lily.book Page 7 Tuesday, March 2, 1999 4:06 PM A rectangular outline of your image and an arrow appear, as shown: Flipping an Image You can reverse your image by selecting Flip Horizontal from the Image menu. This is useful for printing T-shirt transfers. Select Flip Vertical to turn your image upside down. 5 Applying Special Effects To transform or distort your images in interesting ways, choose Effects from the Image menu.
Lily.book Page 8 Tuesday, March 2, 1999 4:06 PM Click the tabs at the top of the screen to add these effects: ◗ Ripples For an underwater effect. You can create whirlpool effects or just a slight distortion. ◗ Glass blocks You can change the number and size of the blocks. ◗ Click Apply to make your changes on the current “tab.” Your distorted image becomes your new original and the slide indicators move to the center of the range.
Lily.book Page 9 Tuesday, March 2, 1999 4:06 PM Picture-Taking Tips Use a tripod if possible. If you don’t have a tripod, take pictures by placing the camera on a flat surface or try keeping the camera level and near your face (use the viewfinder). See the Image Expert Quick Tour for some good examples of stitches and additional tips. Stitching Images Follow these steps to stitch your panoramic images: Take pictures in Super Fine mode for best results.
Lily.book Page 10 Tuesday, March 2, 1999 4:06 PM 4 5 You can use any of the following options for your stitch: ◗ To remove an image, click the Remove button ◗ For panoramas that are narrow to medium in width or tall, vertical images, click the Perspective Projection button . ◗ For wider panoramas, click the Cylindrical Projection button . ◗ For images that are aligned correctly but vary in brightness, click the Smooth Blend button .
Lily.book Page 11 Tuesday, March 2, 1999 4:06 PM Your image seems to have parts out of place. ◗ ◗ If there is movement in the scene, especially at a critical place of overlap, it may not be possible to determine how the photos should fit together. Try using cylindrical projection. Images are not stitched together well. ◗ Make sure you have enough overlap between images (50% is recommended). ◗ Be careful that the camera does not move or tilt to different angles between shots.
Lily.book Page 12 Tuesday, March 2, 1999 4:06 PM pictures. If this happens, try taking a new set of pictures, making sure to follow all the picture-taking tips mentioned on page 5-9. NOTE Unlike the other editing options, changing the number of colors applies to the whole image. You can’t change the number of colors for a selected area only. Changing the Number of Colors To convert the color format of your image, select Number of Colors from the Image menu.
Lily.book Page 1 Tuesday, March 2, 1999 4:06 PM . 6 Using Custom and Advanced Features W hen the camera is connected to your computer, you can take pictures with a live preview on your computer screen to help you frame each shot. You can also set the camera’s clock and adjust a number of other settings from your computer.
Lily.book Page 2 Tuesday, March 2, 1999 4:06 PM You see a dialog box like the following: NOTE If you have the optional AC adapter, you can save on batteries by using it when you connect the camera to your computer. The AC adapter should be available where you bought your Click to capture the image you see. PhotoPC 750Z, or you can order it from EPSON Accessories. See page A-1 for more information.
Lily.book Page 3 Tuesday, March 2, 1999 4:06 PM 6 Click Continuous Update to activate the live preview feature. The image you see is updated every 8 to 10 seconds, depending on your connection speed. You may need to move the camera or your subject until you see the image you want to capture. 7 When your shot is ready, click Take Picture. The image is captured and processed. 8 Click Close when you’re finished taking pictures from your computer.
Lily.book Page 4 Tuesday, March 2, 1999 4:06 PM Follow these steps: 1 Click Self Timer. You see the following dialog box: 2 Enter a number for the delay period you want to use. You can set up to a 120-second delay. 3 Click Start/Stop to start the countdown and take the picture. The red timer light on the camera remains on for the delay period you entered. Then the light flashes rapidly for 2 seconds and the shutter is released. The camera beeps and processes your picture.
Lily.book Page 5 Tuesday, March 2, 1999 4:06 PM 2 Click the Controls tab. You see a dialog box like the following: You can click the Mode, Flash, Self Timer, and Macro buttons on the screen to adjust these settings just as you would by using the buttons on the camera. For more information, see Chapter 1 and Getting Started. 4 When your shot is ready, click Take a Picture. The image is captured and processed. 5 Click Close when you’re finished taking pictures from your computer.
Lily-6.fm Page 6 Monday, April 5, 1999 2:32 PM Adjusting Camera Settings From Your Computer 3 You can use either Image Expert or EPSON Photo!2 to 4 change the following camera settings: ◗ Time ◗ Date ◗ Power down time (Auto Shutoff) ◗ Camera ID ◗ Connection Port ◗ Connection Speed Start Image Expert an described in Getting Started and click the View Images button .
Lily-6.fm Page 7 Monday, April 5, 1999 2:45 PM ◗ ◗ ◗ Type in the Computer Time and Camera Time Select another port if you want to change your boxes to change the time and date of either one. Or, click Set Camera to Computer Time to connection. In most cases, it is best to leave the Port setting at Auto because Image Expert can automatically synchronize your camera to your computer. detect the camera connection automatically.
Lily.book Page 8 Tuesday, March 2, 1999 4:06 PM Changing Settings With EPSON Photo!2 ◗ Select another port if you want to change your connection. In most cases, it is best to leave the Port setting at Auto because EPSON Photo!2 can detect the camera connection automatically. ◗ Select a different communication speed. EPSON Photo!2 automatically chooses the fastest speed that works with your system. This may actually be too fast for the configuration of your port.
Lily.book Page 9 Tuesday, March 2, 1999 4:06 PM Enter new values for the settings, or click Copy from Computer to have your camera automatically synchronized to your computer. Click OK to return to the Setup dialog box. ◗ ◗ Enter a new Auto Shut-off Time if you want to change this setting (not available on Macintosh). This is the idle period after which the camera turns off automatically when it is not connected to your computer.
Lily.book Page 10 Tuesday, March 2, 1999 4:06 PM 4 Follow the instructions below for the settings you want to change. 3 Press SEL again to choose the portion of the time or date you want to adjust. The selected item turns red. 5 When you’re finished adjusting settings, press the ESC button to return to normal playback mode. 4 Press the button to increase the number, or the button to decrease the number, until the item you want to adjust is correct.
Lily.book Page 11 Tuesday, March 2, 1999 4:06 PM Setting the Alert Beep Setting the LCD Brightness The camera’s alert beep lets you know when an image has been captured. To turn the beep on or off, follow these steps: To adjust the brightness of the screen, follow these steps: 1 With the Settings menu selected, press the SEL button. Icons for each setting appear on the screen, as shown on page 6-11. 2 Press the button until the brightness icon highlighted in orange.
Lily.book Page 12 Tuesday, March 2, 1999 4:06 PM Setting the Power Mode Setting the Language Your camera is set at the factory to the “Normal” power mode. This means that the camera remains on after you take a picture with the LCD screen. You can change the power setting to “Save” if you want the camera to shut off automatically after you take a picture with the screen. Follow these steps: You can choose from two languages for information displayed on the LCD screen.
Lily.book Page 1 Tuesday, March 2, 1999 4:06 PM . 7 Using Your Camera for Presentations Y ou can connect your camera to a multimedia projector or television and show not just photos, but also text and graphics. The EPSON Photo File Uploader lets you transfer images from your computer to your camera. Anything you can display on your computer screen can be captured, converted, and uploaded.
Lily-7.fm Page 2 Monday, April 5, 1999 11:06 AM Uploading Existing Images From Your Windows PC NOTE If you want to upload images from a network drive, you may Before you start, make sure the camera is connected to your computer, and the computer is on and the camera dial is need to map the drive before opening the EPSON Photo File turned to Play. Then follow these steps: documentation for more information. 1 Uploader software.
Lily.book Page 3 Tuesday, March 2, 1999 4:06 PM 3 Select the format of the images you want to upload from the File Type list. 4 Select the images you want to upload in the File Name list. Then click the –> button. If you want to upload all the images in the list at once, click the >> button. As you select files, they appear in the Selected Files List in the order they will be uploaded, as shown on the right. This determines the sequence in which you can display the images.
Lily.book Page 4 Tuesday, March 2, 1999 4:06 PM 6 Click the Select Camera button, choose your camera, and click Select. 7 Click Start to start uploading the images. EPSON Photo!2 opens and displays the images you selected: 8 Click Select All to select all the images, or select individual images by clicking the thumbnails in the image selection window. 9 Click Upload/Copy.
Lily.book Page 5 Tuesday, March 2, 1999 4:06 PM The images are uploaded to the destination you selected. If you clicked the Save file to checkbox in step 5, the converted images are also saved to the folder you specified. If you want to preview a selected image and confirm its size, click the Preview checkbox. It takes a few seconds longer to select images with previews displayed.
Lily.book Page 6 Tuesday, March 2, 1999 4:06 PM 5 6 When you finish selecting image files, click Done to close the Select Files dialog box. The selected images appear in the Selected File List in the order they will be uploaded. This determines the sequence in which you can display the images. ◗ To rearrange the uploading order, select the image you want to reorder, then click Up or Down. ◗ To remove files from this list, select the file(s) and click Remove.
Lily.book Page 7 Tuesday, March 2, 1999 4:06 PM 10 Click Upload. The Upload/Copy Photos dialog box appears. Converting Presentations If you want to upload a presentation or document that is not saved as a standard image file, you can make a “screen capture” of your computer desktop with the file open. This lets you turn any document or presentation into a series of image files that you can convert and upload to the camera or to a storage card.
Lily.book Page 8 Tuesday, March 2, 1999 4:06 PM Capturing Windows Screens Before you start, make sure the camera is connected to your computer, and the computer is turned on and the camera dial is turned to Play. Then follow these steps: 1 Start the EPSON Photo File Uploader program as described on page 7-2. You see the EPSON Photo File Uploader window, as shown on page 7-2. 2 Click the Screen Capture tab. The Screen Capture dialog box appears, as shown on the right.
Lily.book Page 9 Tuesday, March 2, 1999 4:06 PM 5 6 Click Start to activate the key combination. When the key combination is activated, the Start button changes to a Stop button. The key combination remains active only for the current session. To deactivate the hot key combination, press the Stop button. 8 When you’re finished, close your application and click the Stop button on the Screen Capture dialog box. The key combination you selected is erased.
Lily.book Page 10 Tuesday, March 2, 1999 4:06 PM Make sure the camera is connected to your Macintosh, the computer is turned on, and the camera dial is turned to Play. Then follow these steps: 1 Open the EPSON Photo File Uploader as described on page 7-8. 2 Start your application and open the file to the image you want to capture. You can make as many screen shots as you’d like; simply repeat this step. 4 When you are finished, close your application.
Lily.book Page 11 Tuesday, March 2, 1999 4:06 PM Follow these steps: 1 Make sure your camera and TV or video projector are turned off. 2 Open the camera’s connector cover and connect the black end of the video cable to the Video Out port, as shown below: 4 Turn on the TV or video projector and switch it to video mode. 5 Turn the camera dial to Play. 7 The last image that you uploaded into the camera is projected.
Lily.book Page 1 Tuesday, March 2, 1999 4:06 PM . 8 Using CompactFlash Memory Cards Y our 8MB ATA-compatible CompactFlash card increases the storage capacity of your PhotoPC 750Z camera. You can use additional cards to take pictures and copy photos from and to your camera. It’s easy to install and remove memory cards from your camera. You can use an optional IOMEGA Clik! drive to access images directly from your card.
Lily.book Page 2 Tuesday, March 2, 1999 4:06 PM ◗ Getting images from a card to your computer Installing a Memory Card ◗ Getting memory information ◗ Copying to and from a memory card Before you start, make sure the camera is turned off. Then follow these steps: Your 8MB CompactFlash card increases the camera’s picture storage capacity as shown in the table below. 1 Lift open the memory card cover and insert the card all the way into the slot, as shown below. 2 Close the memory card cover.
Lily.book Page 3 Tuesday, March 2, 1999 4:06 PM Formatting a Memory Card 3 Press the or button until you see the Photo Control menu . Then press the SEL button to display the menu options, as shown below: 4 Press the or highlighted. Most ATA CompactFlash cards are already formatted when you buy them. However, to ensure proper formatting, always format new cards before using them. With the memory card installed in the camera, follow these steps: 1 Set the camera dial to Play.
Lily.book Page 4 Tuesday, March 2, 1999 4:06 PM 2 NOTE If you have problems formatting or using a memory card, try the Remove the card by hand, then close the memory card cover. following technical support numbers: Lexar Media: (510) 413-1200 CAUTION SanDisk: (408) 542-0400 Never remove the card while the camera is accessing it. Data in the card may be lost or damaged.
Lily.book Page 5 Tuesday, March 2, 1999 4:06 PM NOTE 2 If you don’t have a PCMCIA adapter, you can simply leave the Insert the adapter into your computer’s Type II PCMCIA slot: card in your camera and transfer the images to your computer following the instructions in Chapter 4.
Lily.book Page 6 Tuesday, March 2, 1999 4:06 PM ◗ In Windows NT 3.51, use the Windows File Manager to copy image files to your hard drive. 2 Press the or Control menu. ◗ On a Macintosh, use the Finder to drag and drop image files to your desktop or hard drive. 3 Press the SEL button to display the menu options: ◗ in Image Click the View PC Card Images button Expert and follow the instructions in the Getting Started guide to transfer images in the usual way.
Lily.book Page 7 Tuesday, March 2, 1999 4:06 PM 5 Press ESC to return to the Photo Control menu. Continue pressing ESC to return to normal playback mode. 2 Press the or button until you see the Photo Control menu. Then press the SEL button to display the menu options: 3 Press the or button until Copy is highlighted in orange, then press the SEL button to enter the Copy mode.
Lily.book Page 8 Tuesday, March 2, 1999 4:06 PM 5 Press the SEL button, then press the or button to move forward or back through the images in the camera until the photo you want to copy appears on the screen. 6 Press the SEL button. An orange frame appears around the photo. If you want to copy several photos at the same time, use the or button to display them and press the SEL button each time. NOTE To cancel the selection of a photo, simply press the SEL button again.
Lily.book Page 1 Tuesday, March 2, 1999 4:06 PM . 9 Printing Directly From the Camera Y our PhotoPC 750Z camera lets you print your pictures directly to any of several EPSON ink jet printers, without using a computer. You can choose from a number of layout options and print in four different color modes. NOTE Using the optional AC adapter is highly recommended when you’re printing from the camera. The adapter should be available where you bought your camera.
Lily-9.fm Page 2 Monday, April 5, 1999 11:09 AM NOTE The Direct Print program is designed to work with special ink jet media, including coated or glossy paper, glossy film, ink jet cards, Then turn on your computer and the camera and follow these steps: 1 be printed at the highest quality. See your printer User’s Guide for Make sure the camera is connected to your AC adapter and to your computer, and the camera and computer are more information about special paper and film available from turned on.
Lily.book Page 3 Tuesday, March 2, 1999 4:06 PM ◗ You see the EPSON Program Uploader window: Direct Print V2.3: EPSON Stylus Photo, EPSON Stylus Photo EX, EPSON Stylus Photo 700, EPSON Stylus COLOR 740 Note: EPSON Stylus Photo, EPSON Stylus Photo EX, and EPSON Stylus Photo 700 support both versions of Direct Print. The Direct Print programs appear in the Applications in Folder list on the left. 3 Highlight the version of Direct Print for your printer: ◗ Direct Print V2.
Lily.book Page 4 Tuesday, March 2, 1999 4:06 PM Connecting the Camera to the Printer Before you start, make sure you have the Macintosh connection/Direct Print cable that came with your camera (or a standard Apple System Serial-8 printer cable). Don’t use the PC connection cable. 2 Connect either end of the interface cable to the serial connector on the back of the printer. . Follow these steps to connect your camera to the printer: 1 Make sure both the camera and printer are turned off.
Lily.book Page 5 Tuesday, March 2, 1999 4:06 PM 4 Line up the arrow on the cable connector with the mark on the camera’s serial port, then insert the connector. 4 Press the or Software Menu 5 Press the SEL button. 6 Press the button to highlight Direct Print and press the SEL button. You see the Print menu: button until you see the . 9 Starting Direct Print Follow these steps to start Direct Print: 1 Turn on the printer. 2 Turn the camera dial to Play. 3 Press the SEL button.
Lily.book Page 6 Tuesday, March 2, 1999 4:06 PM Printing You can print any selected image(s) or all the images in your camera on various types of paper.
Lily.book Page 7 Tuesday, March 2, 1999 4:06 PM Load your paper in the printer following the instructions in your printer User’s Guide, then follow these steps to print a full size or 5 × 7 image: 1 3 Press the button to highlight Photo and press SEL. You see the Photo screen: On the Print menu (shown on page 9-5), press the button to highlight Layout and press the SEL button. You see the Layout menu: To print all the photos in the camera, highlight All and press SEL. Then go to step 6 on page 9-8.
Lily.book Page 8 Tuesday, March 2, 1999 4:06 PM Repeat this step for as many images as you want to print. When you move the highlight to other images, you can see a dark blue border around any image you have selected. To deselect an image, highlight it and press the SEL button. The dark blue border disappears. 5 When you are done selecting images, press the ESC button. You see a message like the following: Press the SEL button (if you want to keep what you have selected).
Lily.book Page 9 Tuesday, March 2, 1999 4:06 PM 7 Press the or button to highlight the paper type you’re using and press the SEL button to return to the Print menu. 8 You see the Copies menu: Press the SEL button to go to the next paper menu (if you selected Photo Paper, you return to the Print menu with Glossy Paper automatically selected): If you want to print more than one copy of each photo, press the or button to highlight the copies option and press the SEL button.
Lily.book Page 10 Tuesday, March 2, 1999 4:06 PM 10 Press the button to highlight the Color option and press the SEL button. You see the Print Color menu: Choose Color to print the picture in full color, Monochrome to print it in black and white, Blue to print it in blue tones, or Sepia to print it in brown tones for an old-fashioned look. Highlight the setting you want and press the SEL button.
Lily.book Page 11 Tuesday, March 2, 1999 4:06 PM Producing Your Printout When you’re ready to print your picture, first make sure you have the correct paper or film loaded in the printer. (See your printer’s User’s Guide for paper loading instructions.) Then follow these steps: 3 When you’re finished printing your picture(s), press the ESC button several times to exit the Direct Print program. Turn the camera dial to Off and turn off the printer.
Lily.book Page 12 Tuesday, March 2, 1999 4:06 PM This section provides an overview of how to print cards. See the previous section for detailed instructions on using most of the menus. Load your card(s) in the printer, then follow these steps to print: 1 From the Print menu, select Layout and then select Card. (See page 9-7.) 2 Go to the Photo menu and select All to print all your photos, or select which photos you want to print. (See page 9-7.
Lily.book Page 13 Tuesday, March 2, 1999 4:06 PM Printing Album Images This layout allows you to print up to three images on A4 or Letter-size paper, and up to two images on A6-size cards or film. These pictures show the way your printouts appear: 3 Go to the Paper menu and select the correct paper type (see page 9-8). You can select Letter, A4, or A6 for the paper size. 4 Press the button to highlight Posi. (position) and press the SEL button.
Lily.book Page 14 Tuesday, March 2, 1999 4:06 PM 5 If you want to print the time each photo was taken, go to the Time menu and select On. (See page 9-9.) 6 Go to the Color menu and select the color format you want to use for your printout. (See page 9-10.) 7 To change the print mode, go to the Mode menu and select Fast or Fine. (See page 9-10.) 8 When you’re ready to print your card, follow the steps under “Producing Your Printout” on page 9-11.
Lily.book Page 15 Tuesday, March 2, 1999 4:06 PM Press the or button to set the adjustment and press SEL. The Adjust Top & Bottom menu appears: NOTE Don’t use the Stickers4 layout option (available in version 2.3). This layout uses images that are a different size from your EPSON Photo Stickers. 2 Go to the Photo menu and select the photo you want to print. (See page 9-7.) 3 Go to the Color menu and select the color format you want to use for your printout. (See page 9-10.
Lily.book Page 16 Tuesday, March 2, 1999 4:06 PM Printing a Contact Sheet 2 Go to the Photo menu and select All to print all your photos, or select which photos you want to print. (See page 9-7.) 3 Go to the Paper menus and select the correct paper size and type. (See page 9-8.) For the paper size, you can select Letter, A4, or A6. 4 If you want to print the date, time, and photo number for each photo, press the button to highlight the Date option and press the SEL button.
Lily.book Page 17 Tuesday, March 2, 1999 4:06 PM 5 Go to the Color menu and select the color format you want to use for your printout. (See page 9-10.) 6 To change the print mode, go to the Mode menu and select Fast or Fine. (See page 9-10.) 7 When you’re ready to print your contact sheet, follow the steps under “Producing Your Printout” on page 9-11. Follow these steps: 1 From the Print menu, press the cleaning is highlighted. 2 Press the SEL button to start the cleaning cycle.
Lily.book Page 18 Tuesday, March 2, 1999 4:06 PM Removing Direct Print 7 If you installed Direct Print and aren’t using it, you can remove it to create more space for storing images. You can always upload the program later, using your PhotoPC 750Z software. Highlight Direct Print V2.2 or Direct Print V2.3 and press SEL. The program is deleted. 8 Press the ESC button several times to return to playback mode.
Lily.book Page 19 Tuesday, March 2, 1999 4:06 PM Message Explanation Message Explanation Check Printer Connection or Printer Error. Printing stopped because of a printer error. Clear the error (you may need to turn the camera and printer off and then on again), then start printing again from the beginning. (See your printer’s User’s Guide for troubleshooting information.) E51: Another interface is active The printer is receiving a print job through another interface.
Lily.book Page 1 Tuesday, March 2, 1999 4:06 PM . 10 Maintenance and Troubleshooting Y our PhotoPC 750Z camera is easy to take care of, and any problems you may have are easy to solve. This chapter includes the following sections: Cleaning the Camera and Battery Charger ◗ ◗ Unplug the battery charger before cleaning. ◗ Use a clean, dry cloth to wipe the camera free of dust. Caring for the camera and battery charger ◗ Use a damp cloth for cleaning the battery charger.
Lily.book Page 2 Tuesday, March 2, 1999 4:06 PM ◗ If necessary, clean the battery contacts with a dry cloth. ◗ In areas of excessive dirt or dust ◗ If the LCD screen gets fingerprints or smudges on it, use a soft, damp cloth to lightly wipe the screen. ◗ Where it will be exposed to strong vibrations or magnetic fields Storing the Camera Solving Camera Problems ◗ Keep the lens cover on and store the camera in a carrying case or bag when you’re not using it.
Lily.book Page 3 Tuesday, March 2, 1999 4:06 PM You can’t take a picture with the camera. ◗ ◗ The flash may be recharging. Wait until the status light turns green, and try again. The camera may be full. Check the picture counter on the display panel. Erase some pictures (see Chapter 3), or transfer the pictures to your computer and then erase them (see Chapter 4). Or, install or remove your CompactFlash storage card to take more pictures (see Chapter 8).
Lily.book Page 4 Tuesday, March 2, 1999 4:06 PM The icon appears on the LCD screen when you take a ◗ Make sure the TV is set to video mode. See the manual for your television if you need help. You need to have S-Video on your TV to use this option. ◗ Check your batteries and make sure they are installed correctly. Recharge or replace the batteries if necessary. picture in View mode.
Lily.book Page 5 Tuesday, March 2, 1999 4:06 PM ◗ ◗ ◗ Check the serial port settings in your Image Expert or EPSON Photo!2 software. You may need to change the Port and Speed serial connection settings to Auto. You get a “Camera Connection Failed” error message when If you’re using a Windows system and have trouble connecting to the COM port, check the computer’s COM port settings.
Lily.book Page 6 Tuesday, March 2, 1999 4:06 PM You are unable to drag and drop photos into a document. The pictures transfer to your computer too slowly. ◗ If you’re using Windows NT 3.51, this method of getting pictures into your documents may not be reliable. Try importing or using copy and paste. ◗ ◗ If your system has less than 16MB RAM, you may not be able to use drag and drop. Make sure you don’t run too many applications at the same time.
Lily.book Page 7 Tuesday, March 2, 1999 4:06 PM You get a TWAIN error message when you try to transfer images with Adobe® Photoshop. ◗ If you’re using Windows NT 3.51, make sure you select TWAIN (not TWAIN_32) as your source. ◗ If you’re using Windows NT 4.0, you may need to upgrade your software to Photoshop 4.0, or later. Earlier versions of Photoshop do not support Windows NT 4.0. ◗ If you’re using Windows 95 or Windows 98, make sure you select TWAIN_32, not TWAIN.
Lily.book Page 8 Tuesday, March 2, 1999 4:06 PM 3 Insert the CompactFlash card with a PCMCIA adapter. The system should prompt for a driver. Select OK to use the Windows default “ESDI/IDE HDD Controller” driver. A folder appears on the desktop with a drive letter that has been assigned to the card. When you upload pictures to a storage card in your computer, your system appears to hang.
Lily.book Page 9 Tuesday, March 2, 1999 4:06 PM When you preview images on your computer, they look Your picture is blurry or out of focus. distorted. ◗ Make sure your subject is within the camera’s range. You should be at least 31 inches away to take a picture without the flash, and 31 inches to 8 feet away to take a picture with the flash. You can take a picture as close as 8 inches in macro mode. ◗ When you take macro close-ups, make sure you have adequate lighting (with the flash disabled).
Lily.book Page 10 Tuesday, March 2, 1999 4:06 PM ◗ When you focus on a nearby object, your picture’s background may appear blurry. Try changing your focus. ◗ Your picture is too dark (underexposed). ◗ ◗ ◗ ◗ ◗ You may need to use the flash. Make sure the setting is not flash off. If you’re taking a picture at night and you want to light up the background as well as your subject, use the camera’s slow synchronized flash mode as described on page 1-17. Your picture is too light (overexposed).
Lily.book Page 11 Tuesday, March 2, 1999 4:06 PM A horizontal or vertical red line appears on your picture. The area captured in the photo is different from what you ◗ saw in the viewfinder. Red lines are caused by glare. Avoid photographing shiny surfaces that reflect excessive amounts of light into your lens. ◗ Make sure you look straight through the viewfinder. Keep in mind that the area visible through the viewfinder is slightly smaller than the area captured in the photo.
Lily.book Page 1 Tuesday, March 2, 1999 4:06 PM A Optional Accessories Y ou can use the PhotoPC 750Z with a variety of options. To save battery power, you can use the AC adapter. For portraits or other studio photographs, you can attach a tripod to your camera. You can also get a second set of NiMH batteries or a replacement NiMH Power Pak. For information on using memory cards, see Chapter 8.
Lily.book Page 2 Tuesday, March 2, 1999 4:06 PM Using the Optional AC Adapter 2 The AC adapter (B867038) allows you to connect your PhotoPC 750Z to any standard (110 V) electrical outlet. This is especially useful for transferring pictures and operating the camera from your computer, or using Direct Print. The adapter powers the camera but does not charge the batteries. Plug the adapter cable into the DC port on the camera. PSO WARNING ◗ Use only the adapter designed for the PhotoPC 750Z.
Lily.book Page 3 Tuesday, March 2, 1999 4:06 PM 2 Find the opening for the tripod screw on the bottom of your camera. Carefully place the camera on the tripod. Screw the camera on until it is firmly in place. 3 Adjust the tripod to view your subject as desired. About the IOMEGA Clik! Drive You can use an IOMEGA Clik! digital camera drive to store extra pictures when you’re on the go and read CompactFlash cards directly from your computer.
Lily.book Page 1 Tuesday, March 2, 1999 4:06 PM B Specifications Camera Power Sources Width 5.41 in (137.5 mm) Height 3.01 in (76.4 mm) Includes 4 AA rechargeable NiMH batteries and pocket-size charger. Also accepts 4 AA batteries (single-use alkaline or lithium or rechargeable NiCad) Depth 2.43 in (61.8 mm) Optional AC adapter (B867038) Weight 10.
Lily.book Page 2 Tuesday, March 2, 1999 4:06 PM Technical Product type 1.25 megapixel CCD (charged coupled device) still frame auto focus camera Image size 1280 × 960 pixels (fine and super fine) 640 × 480 pixels (standard) 1280 × 480 pixels (panoramic fine and super fine) 1600 × 1200 pixels* (HyPict) 1600 × 600 pixels* (HyPict panorama) Serial communication speed Up to 230.4 Kbps with high-speed serial port (19.2 Kbps or higher), 1.
Lily.book Page 3 Tuesday, March 2, 1999 4:06 PM Photographic Shutter Electric iris with mechanical shutter, 1/2 second to 1/750 second (flash off mode) Lens f = 5.2 to 15.6 mm (equivalent to a 34 to 102 mm lens on a 35 mm camera) f2.8 ~ 4.7 Range 31.5 inches (80 cm) to infinity 8 inches to 31.
Lily.book Page 4 Tuesday, March 2, 1999 4:06 PM NiMH Battery Charger Flash range: Sensitivity setting Normal distance 3× zoom Physical Dimensions Std. (ISO 90) 31.5 in to 9.2 ft (0.8 to 2.8 m) 31.5 in to 5.2 ft (0.8 to 1.6 m) Width 3.0 inches (76 mm) Med. (ISO 180) 31.5 in to 12.8 ft (0.8 to 3.9 m) 31.5 in to 7.2 ft (0.8 to 2.2 m) Height 4.25 inches (108 mm) High (ISO 360) 31.5 in to 18.4 ft (0.8 to 5.6 m) 31.5 in to 10.5 ft (0.8 to 3.2 m) Depth 0.
Lily.book Page 5 Tuesday, March 2, 1999 4:06 PM Optional AC Adapter Physical Dimensions Width 1.97 inches (50 mm) Height 1.18 inches (30 mm) 1.85 inches (47 mm) including pins Depth 3.74 inches (95 mm) Technical Output DC 7V/2.
Lily.
Lily.
Lily.
Lily.
Lily.
Lily.
Lily.
Lily.
Lily.book Page B Tuesday, March 2, 1999 4:06 PM EPSON AMERICA, INC. LIMITED WARRANTY What is Covered: Epson America, Inc. (“EPSON”) warrants to the first end-user customer that the EPSON PhotoPC 750Z Digital Camera enclosed with this limited warranty statement, if purchased and used in the United States or Canada, conforms to the manufacturer’s specifications and will be free from defects in workmanship and materials for a period of one year from the date of original purchase.
Lily.