Epson America, Inc.
Copyright Notice All rights reserved. No part of this publication may be reproduced, stored in a retrieval system, or transmitted in any form or by any means, electronic, mechanical, photocopying, recording, or otherwise, without the prior written permission of SEIKO EPSON CORPORATION. The information contained herein is designed only for use with this EPSON printer. EPSON is not responsible for any use of this information as applied to other printers.
FCC Compliance Statement For United States Users This equipment has been tested and found to comply with the limits for a Class B digital device, pursuant to Part 15 of the FCC Rules. These limits are designed to provide reasonable protection against harmful interference in a residential installation. This equipment generates, uses, and can radiate radio frequency energy and, if not installed and used in accordance with the instructions, may cause harmful interference to radio or television reception.
Contents INTRODUCTION How to Use Your Documentation Warnings, Cautions, Notes, and Tips Windows/PC System Requirements Macintosh System Requirements ENERGY STAR Compliance Year 2000 Ready Printer Parts About Your Software Important Safety Instructions Ink Cartridge Safety Instructions 1 2 3 4 5 6 6 6 7 8 9 SETTING UP YOUR PRINTER 11 Unpack the Printer Attach the Paper Support Install the Ink Cartridges Load Paper Connect the Printer to Your Network Printing a Status Sheet 11 12 13 16 17 17 CONFIGURING
ii Configuring for AppleTalk Configuring for NetBEUI 44 46 INSTALLING THE PRINTER DRIVER ON THE WORKSTATIONS Installing the Printer Driver Installing in Windows 98, Windows 95, or Windows NT 4.0 Installing in Windows 3.
Replacing an Ink Cartridge Removing and Installing Ink Cartridges Replacing an Outdated Ink Cartridge Aligning the Print Head Cleaning the Printer Transporting the Printer 80 81 83 85 86 87 PROBLEM SOLVING Diagnosing Printer Problems Checking the Control Panel Lights Running a Printer Check Problems and Solutions Problems Setting Up the Printer or Installing Its Software Problems Getting Good Print Quality Uninstalling Printer Software Uninstalling Your Printer Driver Uninstalling EPSON Status Monitor 2 U
iv Installing the Printer Driver in Windows Installing the Printer Driver in Macintosh 110 111 INDEX 113
Introduction Your EPSON Stylus® COLOR 900N Professional Series printer/print server is the ideal output device for business graphics, digital photographs, and more. You can print anything from reports and resumes to photos and greeting cards with fabulous results.
How to Use Your Documentation This Start Here book explains how to set up your printer and covers basic printing and maintenance procedures. It contains the following information: Setting Up Your Printer explains how to set up your printer and connect it to the network. Configuring Your Printer for the Network gives instructions for installing the network software and using it to configure the printer.
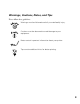
Warnings, Cautions, Notes, and Tips Please follow these guidelines: Warnings must be followed carefully to avoid bodily injury. Cautions must be observed to avoid damage to your equipment. Notes contain important information about your printer. Tips contain additional hints for better printing.
Windows/PC System Requirements To use your printer and its software with a PC, your system should have: ■ An IBM® compatible PC with at least a 386/25 (for Windows 3.1x), 486/25 MHz (for Windows 95 or Windows NT® 4.0), or 486/66 MHz (for Windows 98) processor ■ DOS, Microsoft® Windows 3.1, Windows 95, Windows 98, or Windows NT 4.0 ■ At least 16MB of RAM (32MB recommended for Windows 95 or 98, or 64MB for Windows NT 4.
Macintosh System Requirements To use your printer and its software with a Macintosh, your system should have: ■ One of the following Macintosh models: LC475, LC575, LC630 Macintosh Quadra® series Macintosh Centris® series PowerBook® series (190, 520, 540, 550, or later) PowerBook Duo® 280, 2300c/100 Performa® 475, 575, 588, 630, 5210 or later Power Macintosh® series iMac™ series ■ System 7.5.1 or later (7.6 or later recommended), or iMac with System 8.
ENERGY STAR Compliance As an ENERGY STAR Partner, EPSON has determined that this product meets the ENERGY STAR guidelines for energy efficiency. The EPA ENERGY STAR office equipment program is a voluntary partnership with the computer and office equipment industry to promote the introduction of energy-efficient personal computers, monitors, printers, fax machines, and copiers in an effort to reduce air pollution caused by power generation. Year 2000 Ready Your EPSON printer is Year 2000 Ready.
About Your Software The printer software CD-ROM includes all the software you need for configuring your printer and printing: ■ The EPSON Net!2 utility (for Windows 98, Windows 95, Windows NT 4.0, and Macintosh) allows you to configure your printer for protocols including Novell® NetWare®, TCP/IP, and AppleTalk®. ■ EPSON Status Monitor 2 for Windows allows you to monitor your printer over the network and use TCP/IP for printing in Windows 98/Windows 95 peer-to-peer networks.
Important Safety Instructions Before using your printer, read the following safety instructions to make sure you use the printer safely and effectively: ■ Turn off and unplug the printer before cleaning. Clean with a damp cloth only. Do not spill liquid on the printer. Always turn the printer off using the P power button. Don’t switch off the power strip, or unplug the printer until the power light is off.
■ Unplug the printer and refer servicing to qualified service personnel under the following conditions: If the power cord or plug is damaged; if liquid has entered the printer; if the printer has been dropped or the case damaged; if the printer does not operate normally or exhibits a distinct change in performance. Adjust only those controls that are covered by the operating instructions. Ink Cartridge Safety Instructions ■ Do not put your hand inside the printer or touch the cartridge during printing.
10
Setting Up Your Printer This chapter describes how to set up your printer by doing the following: ■ Unpack the printer ■ Attach the paper support ■ Install the ink cartridges ■ Load paper ■ Connect the printer to your network Unpack the Printer Remove any packing material from the printer as described on the unpacking sheet in the printer box.
Attach the Paper Support Insert the paper support into the slots at the back of the printer’s sheet feeder. Put the printer near an available grounded outlet, but avoid areas: ■ With high temperature or humidity ■ In direct sunlight or dusty conditions ■ Near sources of heat or electromagnetic interference, such as loudspeakers or cordless telephone base units Also be sure to check safety requirements and follow all the safety instructions in the Introduction.
Install the Ink Cartridges 1. Make sure the printer is turned off (the P power button should be up). Then plug the printer’s power cord into a grounded outlet. Don’t use an outlet controlled by a wall switch or timer, or one that uses the same circuit as a large appliance. This may disrupt the power, which can erase memory or even damage the power supply. 2. Unwrap the ink cartridges. Then remove only the yellow part of the tape seal on the top, as shown.
3. Lower the printer’s output tray and open the cover. 4. Press the P power button to turn on the printer. The P power light flashes and the B and A ink out lights come on. The black ink cartridge holder moves slightly left to the loading position. Always use the P power button to turn the printer on or off. Never use the external switch on a power strip. 5. Lift up the black ink cartridge clamp.
6. Place the black ink cartridge in the holder with the label facing up and toward the back of the printer, as shown. Then close the clamp, making sure it clicks into place. If ink gets on your hands, wash them thoroughly with soap and water. If ink gets in your eyes, flush them immediately with water. 7. Now press the X color cleaning button to move the color ink cartridge holder into loading position. 8. Repeat steps 5 and 6 to install the color ink cartridge. 9.
Load Paper 1. Open the output tray extensions. Slide the left edge guide right until it is a little wider than your paper. 2. Load a stack of plain paper with the printable side up and place it against the right edge guide. Then slide the left edge guide to the paper’s left edge. Don’t load paper higher than the arrow on the guide.
Connect the Printer to Your Network Connect your printer to an Ethernet twisted-pair (10BaseT or 100BaseTX) network connection. 1. Attach the network cable to the connector on the card. status sheet button twisted-pair connector (10BaseT or 100BaseTX) 2. To initialize the card, turn on the printer while pressing down the status sheet button. Continue pressing the status sheet button for five seconds.
18
Configuring the Printer for the Network See the table below to find your network configuration (operating system and protocol), and determine what to install and where to find instructions for configuring your network. For many operating systems, you can change configuration settings using the Ethernet card’s internal home page. See the Administrator’s Manual for more information. Operating system Network protocol Windows 98, Windows 95 TCP/IP What you need to install and configure 1.
Operating system Network protocol DOS 6.22 Novell NetWare, Windows NT Server, Windows for Workgroups DOS acts as a client only, you can’t use a DOS workstation to monitor the printer. Windows NT 4.0 (Service Pack 3, or higher) TCP/IP 1. EPSON Net!2 (page 21) What you need to install and configure 2. EPSON Status Monitor 2 (page 23) 3. IP address for the Ethernet card (page 39) 4. Printer driver on each workstation** (page 49) NetBEUI (TCP/IP must also be installed) 1.
Install the Network Software To configure the Ethernet card, you need to install the network software (EPSON Net!2) on only one workstation or on the server, depending on your network. If you have a TCP/IP network, you need to install EPSON Status Monitor 2 on all your Windows 98 and Windows 95 workstations to use the EPSON TCP/IP printing protocol. Log in as an Administrator (NT) or Supervisor (NetWare). Before you start, turn off all other active applications, including virus protection programs.
Installing EPSON Net!2 in Windows 1. Insert the printer software CD-ROM in your drive. You see the EPSON Installation Program screen: If the screen does not appear, go to My Computer and double-click the Epson CD-ROM icon to start the EPSON Installation program. 2. Highlight Install EpsonNet!2 for Windows and click the right arrow button . 3. Follow the instructions on screen to install EPSON Net!2.
Installing EPSON Net!2 on a Macintosh 1. Create a folder for EPSON Net!2 on your hard disk. 2. Insert the printer software CD-ROM in your CD-ROM drive. 3. Copy EPSON Net!2 to the folder you created. After you install EPSON Net!2, use it to configure your printer for AppleTalk, following the steps on page 44. Installing Status Monitor 2 EPSON Status Monitor 2 is a single utility that you install in two parts.
Follow these steps to install Status Monitor 2: 1. Insert the printer software CD-ROM. You see the following screen: If the screen does not appear, type D:\EPSETUP (where D: is the drive letter of your CD-ROM) and click OK to start the EPSON Installation program. 2. Highlight Install Status Monitor 2 for Network and click the right arrow button . 3. Close any open programs and click Next. A screen appears asking where you want to install Status Monitor 2. 4.
7. Select Monitor to monitor EPSON network printers that do not have drivers on your computer. Select Do not monitor if network traffic is a problem. Then click Next. Printers: Monitor_______ Do not monitor_______ If you have dial-up routers in a NetWare environment, they may automatically dial up the next hop and you may be charged for the line connection depending on the number of hops you set. To prevent this and to keep network traffic to a minimum, set hops carefully. 8.
If you are not using EPSON Net!2 on your computer, you do not have to turn off background monitoring. (You should limit the number of systems that monitor the printer, however, to prevent network traffic problems.) Configuring for NetWare You can configure the printer for NDS or bindery with NwAdmin and EPSON Net!2. (If you want to use PCONSOLE, see Chapter 4 in your Administrator’s Manual.
Follow these steps to set up your printer: 1. Log in to the NDS tree (or to the server with bindery context) with admin or supervisor privileges. 2. Run the administrator tool (NwAdmin). 3. Create a printer: Click the directory context icon (or bindery context), and select Object, Create, and then Printer. Type the printer name and click Create. 4. Create a print server: Click the directory context icon (or bindery context), and select Object, Create, and then Print Server.
5. Create a print queue: Click the directory context icon (or bindery context), and select Object, then Create, and then Print Queue. Type the print queue name and select the print queue volume. Then click Create. The objects you have just created are added to the NDS tree (or bindery). 6. Double-click the Printer Object icon on the NetWare Administrator screen.
7. The Printer dialog box appears. Click Assignments and then click Add. 8. From the print queue list, select the queue you want to assign and click OK. 9. For Print Server mode, go to step 11. For Remote Printer mode, click Configuration, select Other/Unknown for the Printer type box and click OK.
10. Double-click the print server object icon on the NetWare Administrator screen. 11. The Print Server dialog box appears. Click Assignments and then click Add. 12. From the printer object list, select the printer object you want to assign and click OK.
13. For Print Server mode, go to step 14. For Remote Printer mode, go back to the screen in step 11 and click the Printer Number button to set up the printer number from 0 to 254. 14. Double-click the print queue object icon on the NetWare Administrator screen.
15. The Print Queue dialog box appears. Click Assignments. Check that the print server and the printer are assigned to the queue. You now need to use EPSON Net!2 to configure the card: 32 ■ For Print Server mode, see the section below. ■ For Remote Printer mode, go to page 36.
Using EPSON Net!2 to Configure the Card in Print Server Mode Once you have set up the printer in NwAdmin or PCONSOLE, you can configure the printer with EPSON Net!2, as described below. If the Status Monitor 2 utility is running, or if background monitoring is turned on, it may interfere with EPSON Net!2. Close Status Monitor 2 if it is running and turn off background monitoring, following step 14 on page 25.
3. Click the NetWare Basic tab and make the following settings: Frame type Select one of the following: Auto, Ethernet 802.2, Ethernet 802.3, Ethernet II, or SNAP. Mode Select Print Server. NDS Select Enable or Disable. NDS Tree name If you are using NDS mode, type the same name as you used in NwAdmin (up to 31 characters). NDS Context NDS context is the Object rank in the Directory tree. Type the container object (up to 255 characters) from the Object to the Root. Do not type the “.” at the top.
See your NetWare manual for the available characters and number of characters you can use. 4. Click the Print Server tab and make the following settings: Primary file server name Select the server where you created the queue. Password Type any new password up to 19 characters. The characters you enter appear as “∗”. Print server name Type any new name up to 47 characters. The default name consists of the printer name and the last six digits of the Ethernet card’s serial number.
6. In the file Server Console’s MONITOR.NLM, select the Connection Information. Check if the print server name assigned to the Ethernet card has been logged in to the Active Connections list. It takes up to five minutes to complete this. Once you make changes to the Ethernet card, you must wait until it registers the settings (the “Configuration is successfully done” message appears) before you turn off the printer.
2. Start EPSON Net!2. The following screen appears: 3. Highlight your printer and click Configuration. 4. Click the NetWare Basic tab and make the following settings: Frame type Select one of the following: Auto, Ethernet 802.2, Ethernet 802.3, Ethernet II, Ethernet SNAP. Mode Select Remote Printer.
NDS Select Enable or Disable. NDS Tree name If you are using NDS mode, type the same name (up to 31 characters) as you set in NwAdmin. NDS Context NDS context is the Object rank in the Directory tree. Type the container object (up to 255 characters) from the Object to the Root. Do not type the “.” at the top. See your NetWare manual for the available characters and number of characters you can use. 5.
6. Click OK to save changes. If the message “Configuration is successfully done” appears on your screen, the update is complete. 7. Select Printer Status from the Console screen of the print server. Then check the status. 8. Select Queues serviced. Check that the print queue name which you set in step 5 on page 28 is in the Print Queues Serviced By Printer box.
Follow these steps to assign an IP address: 1. Make sure Windows is running, the Ethernet card is connected to the network, and the printer is turned on. 2. Click Start, point to Programs, point to EPSON Net!2, then click EPSON Net!2. 3. Click the printer where you want to set the IP address, and then click the Configuration button. click here If you have connected more than one printer with the same type of Ethernet card to the network, you can distinguish the cards by their MAC addresses.
4. Click the TCP/IP tab to display the TCP/IP menu. 5. For The way of acquiring an IP address, select one of the following: Manual, RARP, BOOTP, or DHCP. To use RARP, BOOTP, or DHCP, a server for each protocol is necessary. If there is no corresponding server, do not use any of these settings. See your network operating system documentation for the settings. 6. Assign the IP address, the Subnet mask, and the Default gateway.
7. Click OK to save the new settings. The update is complete when the message “Configuration is successfully done” appears. (After you click OK, wait a few minutes before turning off the printer, so the settings have time to reach the card.) Before you can print using TCP/IP, you still need to do the following on each computer that will use the printer: ■ Install the printer driver (see page 49) ■ Add a printer port (see page 51) See page 46 if you need to enable NetBEUI on the Ethernet card.
7. Type in the following command to set up the routing table: ping 11.22.33.44 8. Add an entry in the ARP table that assigns an IP address to the hardware address of the Ethernet card. Use the following command: arp -s For example: arp -s 192.1.1.6 00-00-48-92-BD-9A For Windows NT, substitute colons (:) for the hyphens (-) shown in the MAC address. 9.
Before you can print using TCP/IP, you still need to do the following on each computer that will use the printer: ■ Install the printer driver (see page 49) ■ Add a printer port (see page 51) See page 46 if you need to enable NetBEUI on the Ethernet card. Configuring for AppleTalk To use your printer on an AppleTalk network, you need to configure the Ethernet card for AppleTalk. Follow these steps to configure your card using EPSON Net!2: 1. Open the EPSON Net!2 utility.
2. Highlight Stylus COLOR 900 and click Configuration. The IP Address Configuration and AppleTalk Configuration dialog box appears. 3. Make the following settings in the AppleTalk Configuration box. Printer Name Type the printer name (up to 31 characters). The default name consists of the printer name and the last six digits of the Ethernet card’s serial number. Entity Type You do not have to set this option. Zone Name Select the network zone in which you want the printer to appear.
4. Click the Send button to save the new settings to the Ethernet card. If the message “Configuration is successfully done” appears, the update is complete. Configuring for NetBEUI You can use NetBEUI in Windows networks to print to your EPSON Stylus COLOR 900N. Configure the card for NetBEUI using the card’s internal home page. Before you can configure the card for NetBEUI, you must: ■ Set up TCP/IP on all the workstations that will use the printer.
2. Click NetBEUI under Network on the Configuration menu. The NetBEUI setting screen appears. 3. Select Enable in order to use NetBEUI. If Disable is on, all NetBEUI related functions stop. The NetBIOS name is the name of your computer on the network. Make sure to give the printer a unique name for the network. For the workgroup name, type the domain name or the workgroup name used in the Windows network. 4.
6. If the message “Configuration change is complete!” appears on your screen, the update is complete. Enable the changes by pressing RESET or turning your printer off and on.
Installing the Printer Driver on the Workstations This chapter describes how to install the printer driver. For Windows computers, you need to change the port settings and for Macintosh computers, you need to select the printer in the Chooser. Unless you are on a Windows NT Server network, you need to install the printer driver on each workstation to enable it to print. If you like, you can also install Status Monitor 2 on Windows 98, Windows 95, and Windows NT 4.
Installing in Windows 98, Windows 95, or Windows NT 4.0 1. Insert the printer software CD-ROM. You see the EPSON Installation Program screen: If you do not see the screen, click Start, Run, and type D:\EPSETUP (where D: is the drive letter of your CD-ROM). Then click OK. 2. Highlight Install Printer Driver and click the right arrow button . 3. Click OK to install the printer driver. Your printer is automatically set to your local port, LPT1.
Changing Your Port Setting Follow the steps below to change the port setting. In Windows NT 4.0, make sure the TCP/IP Print Server service is running before you start. 1. Click Start, point to Settings, and click Printers. 2. Right-click the EPSON Stylus COLOR 900N printer icon. 3. Select Properties. 4. In Windows 98 or Windows 95, click the Details tab. In Windows NT 4.0, click the Ports tab. 5. Click Add Port. 6.
Changing Your Port Setting Follow these steps to change the port setting under Windows 3.1x: 1. Open the Print Manager and select EPSON Stylus COLOR 900N from the list of printers. 2. Select Network Connections from the Options menu. 3. In the New Connection area, type the network path and port, or click Browse to find the network path to your printer. 4. Click Connect and then click Close. Installing on a Macintosh 1.
Printing a Test Page If you have a Windows 98, Windows 95, or Windows NT 4.0 workstation, follow the steps below to test the printer and make sure that the network is working correctly. Make sure the printer is turned on and a sheet of letter-sized paper is loaded. 1. Point to Start, Settings, and click Printers. 2. Right-click the EPSON Stylus COLOR 900N icon and click Properties. You see the printer driver screen. 3. Click the General tab and click Print Test Page.
54
Installing and Using Your Electronic Manual This chapter describes how to install the EPSON Stylus COLOR 900N Manual on your hard disk and how to view the manual using Adobe Acrobat Reader. Installing the Manual Follow the instructions below for your operating system to copy the electronic EPSON Stylus COLOR 900N Manual from the CD-ROM to your hard disk: ■ Windows 95, 98, and NT: Insert the printer software CD-ROM into your CD-ROM drive. Then use Windows Explorer or My Computer to copy the file 900Ndoc.
Installing Acrobat Reader Follow the instructions below to install Acrobat Reader on your hard disk, if necessary: ■ Windows 95, Windows 98, and Windows NT: Insert the printer software CD-ROM into your CD-ROM drive. When you see the Installation Program screen, select Install Adobe Acrobat Reader and click the right arrow button . Follow the instructions on the screen to install Acrobat Reader. ■ Windows 3.1: Insert the printer software CD-ROM into your CD-ROM drive.
Navigating an Electronic Manual When you open an electronic manual, you’ll see this toolbar: Bookmarks and Page First Page Previous Page Last Page Next Page There are several ways to navigate through electronic manuals: ■ Click on hot topics, which are usually underlined or displayed in a different color. To find out if a topic is hot, move your cursor over it. If the cursor turns into a pointing hand, the topic is hot—you can jump to it by clicking once.
58
Basic Printing This chapter describes what you need to do to print a basic document—such as a memo, newsletter, or photograph—from loading the paper to selecting print settings to controlling print jobs. Follow the step-by-step instructions for your operating system in these sections: ■ “Printing with Windows” on page 60 ■ “Printing with a Macintosh” on page 64 For instructions on using special papers such as EPSON Photo Paper or envelopes, see page 73.
Printing with Windows 1. Make sure your printer and computer are turned on. 2. Load a stack of plain paper with the printable side up and place it against the right edge guide. Then slide the left edge guide against the paper’s left edge, making sure the stack is lower than the arrow on the guide. If you are using letterhead or preprinted paper, be sure the top of the paper feeds into the printer first. load paper only up to this arrow slide paper against the right edge guide 3.
6. If your application’s Print dialog box contains a Properties button, click Properties and go to step 7. If you see a Setup, Printer, or Options button, click it. Then click Properties on the next screen. In Windows 3.1, you won’t see a Properties button; just click Setup, Printer, or Options until you see the window in step 7. 7. Now you see the printer settings dialog box.
8. Check the following settings: ■ Make sure the Media Type is set to Plain paper. (If you load a different type of paper, select the corresponding Media Type for it, as described on page 76. For instructions on loading special paper, see page 73.) ■ Make sure Ink is set to Color if you want to print in color. ■ Set the Mode option to Automatic. This is the easiest way to get good printing results for all kinds of documents, on all types of paper.
10. Click the Layout tab (not available with Windows 3.1) if you want to reduce or enlarge your printed image, print multiple pages on one sheet of paper, or add a watermark. Reduce/Enlarge, Print Layout, and Watermark settings 11. Click OK until you see the Print dialog box again. 12. Click OK to start printing. After a moment, the Progress Meter (Despooler in Windows 3.1) appears and shows the progress of your print job. You can cancel , pause , or restart your print job as necessary.
Printing with a Macintosh 1. Make sure your printer and Macintosh are turned on. 2. Load a stack of plain paper with the printable side up and place it against the right edge guide. Then slide the left edge guide against the paper’s left edge, making sure the stack is lower than the arrow on the guide. If you are using letterhead or preprinted paper, be sure the top of the paper feeds into the printer first. load paper only up to this arrow slide paper against the right edge guide 3.
6. Now open the File menu and choose Print. You see the main printer settings dialog box: Media Type setting Automatic mode setting Ink setting Quality/Speed slider 7. Check the following settings: ■ Make sure the Media Type is set to Plain Paper. (If you load a different type of paper, select a corresponding Media Type for it, as described on page 76. For instructions on loading special paper, see page 73.) ■ Make sure Ink is set to Color if you want to print in color.
8. Click the Layout icon if you want to reduce or enlarge your printed image, print multiple pages on one sheet of paper, or add a watermark. 9. Click the Background Printing icon if you want to prioritize or schedule your print job for printing. 10. Click the Preview icon, then click the Preview button that appears, if you want to preview how your layout and other settings will look.
11. Click Print to start printing. If you turned on background printing, you see the EPSON Monitor3 dialog box to show you the print job’s progress. You can cancel , pause , or restart your print jobs as necessary. Job currently printing Jobs waiting to print Click to set priorities or print times for waiting print jobs For more information on printing, see the electronic EPSON Stylus COLOR 900N Manual. See page 55 for instructions on viewing the manual.
Follow these steps to print with custom project types: 1. Create your image or document in your application software. 2. Access the printer settings dialog box as described in “Printing with Windows” on page 60 or “Printing with a Macintosh” on page 64. 3. Choose the Media Type you want to print on. (If you’re not sure which setting to choose, see “Selecting the Correct Media Type” on page 76.) 4. Choose Color or Black ink. 5. Click Custom (in Windows 3.1, click Advanced), and then click Custom Settings.
Always choose your Media Type and Ink setting before you select a custom project type. Some project types may not be available with the Media Type or Ink settings you choose. Printing with PhotoEnhance3 or PhotoEnhance™ may take longer on some systems and images. 6. Choose the right setting for your project and Media Type following these guidelines: ■ PhotoEnhance3 (Windows 95, 98, NT, or Macintosh) or PhotoEnhance (Windows 3.
Using the Advanced Dialog Box For maximum control over your project, you can customize your print settings and special effects. You can even save your custom settings as a group so you can use them whenever you print a similar project. For more information, see your electronic EPSON Stylus COLOR 900N Manual. 1. Create your image or document in your application software. Then access the printer settings dialog box as described in “Printing with Windows” on page 60 or “Printing with a Macintosh” on page 64.
3. Choose the Media Type and Ink settings you want to use. These settings are the same as the ones you selected on the main printer settings dialog box. You can change them here as you customize your settings, if needed. The available Print Quality settings may be limited by the Media Type you choose. 4. Choose one of the following Print Quality options: ■ Economy: For low-resolution rough drafts on plain paper. Saves ink.
7. Select a color management system (the availability depends on your operating system): ■ Color Adjustment mode lets you choose just the level of adjustment you need, from Automatic mode to No Color Adjustment (for using other color management software). You can then individually adjust the levels of Brightness, Contrast, and Saturation in your image, and increase or decrease the amount of Cyan, Magenta, and Yellow inks used to print your image.
Using Special Papers How can you get the best-looking photos, most vivid colors, and sharpest text? Always use EPSON’s special ink jet papers. To show you how much difference EPSON paper can make, we’ve included some free samples. Check out the EPSON Photo Paper Pack that came with your printer. Then follow the instructions below to print your favorite photos and documents on EPSON paper. For a list of EPSON special ink jet papers and ordering information, see the inside back cover.
If you’re using 4 × 6-inch Photo Paper, follow these steps: 1. Load the paper against the right edge guide with the glossy side facing up and the perforated margins positioned as shown: You can load up to 20 sheets of 4 × 6-inch Photo Paper at a time. Make sure you place the included support sheets A and B beneath the stack, but don’t print on them. 2. Slide the left edge guide against the left edge of the paper. 3. When you create the image in your application software, size it to 4.25 × 6.25 inches.
Envelopes You can load up to 10 envelopes at a time. Load the envelope flap edge first and printable side up. Place it against the right edge guide and adjust the left edge guide as shown here. You may get better results if you press each envelope flat before loading it, or try loading one envelope at a time. Select Plain paper as the Media Type and choose the correct envelope size as the Paper Size setting in the printer software.
Selecting the Correct Media Type When you print on special media, you need to be careful about choosing the correct Media Type setting in your printer software. Check the table below if you’re not sure which setting to choose. For details on loading special media, see your electronic EPSON Stylus COLOR 900N Manual. For this media name . . . Select this Media Type setting . . .
Maintaining Your Printer This section describes the most common maintenance procedures you’ll need to perform to keep your printer working at its best and to prepare it for moving. Just follow the instructions in this chapter for: ■ Cleaning the print head ■ Replacing an ink cartridge ■ Aligning the print head ■ Transporting the printer For more details, see your electronic EPSON Stylus COLOR 900N Manual as described on page 55.
Using the Head Cleaning Utility Follow these steps to run the Head Cleaning utility: 1. Make sure the printer is turned on but not printing, and both the B black and A color ink out lights are off. 2. Access the printer settings dialog box as described in “Printing with Windows” on page 60 or “Printing with a Macintosh” on page 64. 3. Click the Utility tab (Windows) or the Utility icon (Macintosh). 4. On the Utility menu, click the Head Cleaning icon. 5.
Using the Control Panel Follow these steps to clean the print head using the control panel: 1. Make sure the printer is turned on but not printing, and both the B black and A color ink out lights are off. 2. Press the R cleaning button and hold it down for three seconds. Cleaning takes a little over a minute, during which the printer makes some noise and the P power light flashes.
Examining the Nozzle Check Pattern Examine the nozzle check pattern you print. It should look something like this: missing dots Each staggered horizontal and straight vertical line should be complete, with no gaps in the dot pattern. If your printout looks okay, you’re done. If any dots are missing, as shown to the right, clean the print head again; see page 77 for instructions.
When you need new ink cartridges, contact your dealer or call EPSON Accessories at (800) 873-7766 or visit our web site at www.epsonsupplies.com (U.S. sales only). In Canada, please call (800) 873-7766 for dealer referral. If you need to replace an ink cartridge before the lights flash (because the ink is too old, for example) follow the instructions in “Replacing an Outdated Ink Cartridge” on page 83.
To avoid damaging the printer, never move the print head by hand. Don’t open the clamp or remove a cartridge except to replace it with a new one. Once you remove a cartridge, you can’t reuse it, even if it contains ink. 5. Pull up the ink cartridge clamp. The cartridge rises up from its holder. 6. Lift the cartridge out of the printer and dispose of it carefully. If ink gets on your hands, wash them thoroughly with soap and water. If ink gets into your eyes, flush them immediately with water. 7.
Replacing an Outdated Ink Cartridge If an ink cartridge is more than six months old, you may need to replace it. How can you tell? You may notice that your printouts don’t look as good as they used to. If print quality doesn’t improve after cleaning and aligning the print head, you can replace one or both cartridges. Follow these steps to replace an ink cartridge before the B black or A color ink out light is flashing or on: 1. Remove the new ink cartridge from its packaging. 2.
6. Pull up the ink cartridge clamp. The cartridge rises up from its holder. 7. Lift the cartridge out of the printer and dispose of it carefully. If ink gets on your hands, wash them thoroughly with soap and water. If ink gets into your eyes, flush them immediately with water. 8. Lower the new ink cartridge into its holder with the label facing up and toward the back of the printer. 9. Press down the ink cartridge clamp until it locks in place. 10. Press the E load/eject button.
Aligning the Print Head If your printouts contain misaligned vertical lines, you may need to align the print head. If you are using DOS, follow the instructions in your electronic EPSON Stylus COLOR 900N Manual instead. Follow these steps: 1. Make sure the printer is turned on and letter-size paper is loaded. Load paper that’s at least 8.27 inches (210 mm) wide. This prevents ink from spraying inside the printer and smudging your printouts.
Cleaning the Printer To keep your printer working at its best, you should clean it several times a year. Follow these steps: 1. Turn off the printer, unplug the power cord, and disconnect the network cable. 2. Remove all the paper from the sheet feeder. 3. Clean the exterior of the printer with a soft, damp cloth. 4. Clean ink out of the printer’s interior with a soft, damp cloth. Don’t touch the gears inside the printer.
Transporting the Printer If you move your printer some distance, you need to prepare it for transportation in its original box. Follow these steps: To avoid damage, always leave the ink cartridges installed when transporting the printer. Be sure to remove the tape used in step 4 after installing the printer in its new location. 1. Turn on the printer and wait until the print head locks in the far right position. Then turn off the printer. 2. Unplug the power cord from the electrical outlet.
88
Problem Solving This section gives you the basics for diagnosing and solving printer problems. First see “Diagnosing Printer Problems” below to help determine what the cause of the problem may be. Then see “Problems and Solutions” on page 92 for solutions to common setup and software problems. There are additional problem solving tips in the “Troubleshooting” section of your electronic EPSON Stylus COLOR 900N Manual.
Follow these guidelines when the control panel lights come on or flash: 90 P is on The P power light is on when the printer is on and ready to print. It flashes when the printer is receiving a print job or performing a maintenance operation, such as cleaning the print head. S flashes When the S paper out light flashes, you have a paper jam. Turn off the printer and gently pull out all paper. Make sure none of the sheets are curled, creased, old, stuck together, or too thin.
Running a Printer Check You can run a printer check to determine whether the problem comes from the printer itself or some other source. Follow these steps to run the printer check: 1. Make sure both the printer and computer are turned off. 2. Disconnect the interface cable from the printer. 3. Make sure paper is loaded in the printer. Load paper that’s at least 8.27 inches (210 mm) wide. This prevents ink from spraying inside the printer and smudging your printouts. 4.
Problems and Solutions Here are some basic troubleshooting tips if you have any problems setting up your printer, installing software, or getting good print quality. Problems Setting Up the Printer or Installing Its Software If you installed the ink cartridges and the printer started making noise . . . ■ The first time you install ink cartridges, the printer must charge its ink delivery system for a couple minutes.
If your printer icon doesn’t appear in the Chooser (Macintosh) . . . ■ Your Macintosh has extension conflicts. Disable Quick Draw GX in the Extensions Manager. Make sure AppleTalk and SC 900 (AT) are enabled, and then restart your Macintosh. Also, make sure your AppleTalk connection is set to Ethernet. ■ You may have too many items in the Chooser. Delete any unused items and check the Chooser again. If you can’t see the ink level gauge when you print in Windows . . .
■ Make sure the Media Type setting matches the paper you loaded. See page 76 for guidelines. ■ Make sure the printable side of the paper is face up. It is usually the whiter or shinier side of ink jet paper. ■ Make sure the ink cartridges aren’t low on ink. If either ink out light is flashing, replace the ink cartridge; see page 80. If your ink cartridge is more than six months old, you may need to replace it; see page 83. ■ Try using Automatic mode.
For most papers, set the paper thickness lever to the 0 position. If your printout is blurry or smeared . . . ■ Make sure your paper isn’t damp or loaded face down (the printable side should be loaded face up). If it’s damp, reload a new stack of paper. ■ Use a support sheet with special media or try loading your media one sheet at a time. ■ Make sure your paper or media meets the specifications listed in your electronic EPSON Stylus COLOR 900N Manual. ■ Run the Print Head Alignment utility.
If your printout is faint or has gaps in the image . . . ■ Make sure the print head nozzles are not clogged. To clean the print head, see page 77. ■ Make sure your paper isn’t damaged, old, dirty, or loaded face down. If it is, reload a new stack of paper with the printable side up. The printable surface is usually whiter or shinier. If your printout contains incorrect or missing colors . . . 96 ■ Make sure the Ink setting is set to Color for color images.
If your printout contains incorrect characters . . . ■ Your printer’s network cable may not be securely connected. Check that the cables are connected correctly at all places between your computer and the printer on the network to ensure proper communication. After adjusting the cable(s), try printing from an application again. ■ Your printer may not be selected as the current printer in your application, or as the Windows default printer, or as the current printer in the Macintosh Chooser.
Windows 98 and Windows 95 Follow the steps below to uninstall the printer driver. If you are using Status Monitor 2 and uninstall and then reinstall the printer driver software, you must either run the setup program as described in “Changing the Status Monitor 2 Setup” on page 103 in your electronic EPSON Stylus COLOR 900N Manual, or uninstall and reinstall Status Monitor 2, so it can recognize your printer. In Windows NT 4.0, you can’t uninstall the printer driver with the Add/Remove Programs utility.
Macintosh 1. Insert the EPSON printer software CD-ROM in your drive. 2. Double-click the Installer icon. Then click Continue. 3. Click the arrow in the list at the top showing Easy Install, and select Remove from the list. 4. Click the Remove button on the bottom of the screen. 5. Follow the instructions on the screen to uninstall the printer software. To reinstall your software, see page 49. Uninstalling EPSON Status Monitor 2 Follow the steps below to uninstall EPSON Status Monitor 2.
Uninstalling EPSON Net!2 Follow these steps to uninstall EPSON Net!2 in Windows: 1. Double-click the My Computer icon, then double-click the Control Panel icon. 2. Double-click Add/Remove Programs. 3. Select EPSON Net!2 in the program list. 4. Click the Add/Remove button. Follow the instructions on the screen to uninstall your software. To reinstall your software, see page 21. To remove EPSON Net!2 from a Macintosh system, find the EPSON Net!2 folder that you created and drag it to your Trash icon.
Electronic support services Service Access World Wide Web From the Internet, you can reach EPSON’s Home Page at http://www.epson.com. EPSON Internet FTP Site If you have Internet FTP capability, use your Web browser (or other software for FTP downloading) to log onto ftp.epson.com with the user name anonymous and your e-mail address as the password. EPSON Forum on CompuServe Members of CompuServe can type GO EPSON at the menu prompt to reach the Epson America Forum.
102
Installing Software From Diskettes If you need to install the printer software on a system that doesn’t have a CD-ROM drive (such as a workstation), use the instructions in this chapter to do one of the following: ■ For Windws, you can create the software diskettes on another computer that has a CD-ROM drive using the disk creation utility on the printer software CD-ROM, as described below. ■ For a Macintosh, you can copy the files on a computer that has a CD-ROM drive. See page 106.
1. Insert the printer software CD-ROM in your CD-ROM drive and a blank, formatted diskette in the diskette drive. You see the EPSON Installation Program screen: If the screen does not appear, go to My Computer and double-click the Epson CD-ROM icon to start the EPSON Installation program. 2. Highlight Create Printer Driver/Utility diskettes and click the right arrow button . 3. Select which program you want and click OK.
4. Click Next. You see a screen similar to the following: 5. Click Copy to copy the first diskette. You see a screen showing the progress as the files are copied to the diskette. For multiple diskettes, when the first diskette is finished, the installer prompts you to insert disk 2. Make sure you label each diskette in order as you create it: Status Monitor 2, network part, disk 1 of 2, etc.
Copying Macintosh Files If you have a Macintosh computer and you need to create diskettes, use a computer that has a CD-ROM drive to drag the following files from your CD-ROM onto diskettes (1 per file): ■ EPSON Installer (printer driver software) ■ EPSON Net!2 Ordering Printer Software Diskettes You can order software diskettes from EPSON by phone or fax for $19.95 shipping and handling (plus tax where applicable), or you can download the diskette image files.
■ Daytime telephone number ■ Payment method (VISA, MasterCard, or American Express) Card number and expiration date Be sure to sign your fax; it is required for the credit card purchase ■ Printer name (EPSON Stylus COLOR 900N) ■ Operating system (Window 3.1, Windows 95, Windows 98, Windows NT 4.0, or Macintosh). Phone: Call (310) 533-8467 from 6 AM to 6 PM Pacific time, Monday through Friday.
Installing EPSON Net!2 on a Macintosh Follow these steps: 1. Create a folder for EPSON Net!2 on your hard disk. 2. Insert the EPSON Net!2 diskette in your drive. 3. Double-click the diskette to open it and copy EPSON Net!2 to the folder you created. After you install EPSON Net!2, you use it to configure your printer for AppleTalk, as described on page 44. Installing Status Monitor 2 EPSON Status Monitor 2 is a single utility that you install on your computer in two parts.
3. Type A:\SETUP and click OK. 4. Close any open programs and click Next. A screen appears asking where you want to install Status Monitor 2. 5. Click Next to accept the default directory or choose a different directory and click Next. 6. If you are using Windows 98 or Windows 95 and you have TCP/IP installed, you see a screen asking you if you want to enable EPSON TCP/IP printing. Select Yes if you want to print with TCP/IP, and then click Next. TCP/IP Printing: Yes_______ No_______ 7.
13. Follow steps 2 through 10, using the same settings you used in those steps. 14. When the Setup Complete screen appears, select Yes and click Finish. 15. After you restart your computer, right-click the green background monitoring icon in your Startup group on the taskbar. Click Stop monitoring now. This turns off background monitoring, which may interfere with EPSON Net!2 when you configure the card.
Installing the Printer Driver in Macintosh Follow these steps to install your printer driver: 1. Turn on your printer and your Macintosh and turn off any virus protection programs you may have. 2. Insert the diskette in your drive and double-click the diskette icon that appears. 3. Double-click the Installer icon. 4. Follow the instructions on the screen and restart your computer. To use the printer, you need to select the SC 900 (AT) printer in the Chooser and make sure AppleTalk is on.
112
Index 360 dpi Ink Jet Paper, 76 Custom project types, 67 to 69 A D Accessories, 101 Adobe Acrobat Reader, 55 to 57 Advanced mode, 70 to 72 Advanced settings print quality, 70 to 72 project types, 67 to 69 special effects, 70 to 72 Aligning print head, 85 arp command, 42 to 44 Automatic mode Macintosh, 65 Windows, 62 Despooler, Windows 3.
Ethernet card MAC address, 17 Ethernet card home page, 46 to 48 F Faint images, 96 Finest Detail setting, 71 Flip Horizontal setting, 71 G Gateway, 41 Graph setting, 69 H Halftoning setting, 71 Head Cleaning utility, 78 Help, 100 to 101 High Speed setting, 71 I ICM (Image Color Matching) setting, 69, 72 Incorrect colors in printout, 96 Ink cartridge replacing, 80 to 82 replacing outdated, 80, 83 to 84 safety instructions, 9 Ink Jet Transparencies, 76 Ink level gauge, 93 Ink setting, 68, 71 Installation,
Preview, Macintosh, 66 Print head aligning, 85 cleaning, 77 to 79 Print quality, 71, 93 to 97 Printable area setting, Photo Paper, 74 Printer cable, 4, 5 noise, 92 parts, 6 Printer software, uninstalling, 97 to 100 Printing advanced settings, 67 to 72 Macintosh, 64 to 67 special papers, 73 to 76 Windows, 60 to 63 Problems, diagnosing, 89 to 91 Progress Meter, 63 Project types, custom, 67 to 69 Software installation troubleshooting, 92 Special effects, 70 to 72 Special papers, 73 to 76 sRGB (Standard Red Gr
Windows Progress Meter, 63 system requirements, 4 using diskettes, 103 to 110 Workgroup name, 47 World Wide Web, 101 Y Year 2000, 6 116
EPSON Ink Jet Papers Use EPSON’s paper and inks to get the same photo quality results that have earned your printer all of its awards! EPSON’s papers are specially coated to work with EPSON’s quick drying inks. You’ll notice that when prints come out of your printer, you can immediately handle them. There is no drying time, no smearing or smudging, and your image is clean and smooth.
How to Order EPSON Ink and Paper To order EPSON ink cartridges, paper, and other printing media, contact your dealer or call EPSON Accessories at (800) 873-7766 or visit our web site at www.epsonsupplies.com (U.S. sales only). In Canada, please call (800) 873-7766 for dealer referral.