Copyright Notice All rights reserved. No part of this publication may be reproduced, stored in a retrieval system or transmitted in any form a by any means, electronic, mechanical, photocopying, recording, or otherwise, without the prior written permission of Seiko Epson Corporation. No patent liability is assumed with respect to the use of the information contained herein. Neither is any liability assumed for damages resulting from the use of the information contained herein.
Contents Introduction System Requirements . . . . . . . . . How to Use This Manual . . . . . . . Warnings, Cautions, Tips, and Notes Where to Get Help . . . . . . . . . . Electronic support Services . . . Chapter 1 . . . . . . . . . . . . . . . . . . . . . . . . . . . . . . . . . . . . . . . . . . . . . . . . . . . . . . . . . . . . . . . ............ 2 3 3 4 4 Installing Your Software Installing the Scanning Utilities . . . . . . . . . . . . . . . . . . 1-1 Testing the Scanning Utilities . . . . . .
Using Special Effects Chapter 4 Modifying the TWAIN Configuration Using Image Controls . . . . . . . . . Adjusting Gamma Correction . . . . . Adjusting Colors . . . . . . . . . . . . Setting the Gray Balance . . . . . Changing Saturation . . . . . . . Using Color Filters . . . . . . . . Inverting an Image . . . . . . . . . . . Using Automatic Features . . . . . . . Using Auto Exposure . . . . . . . Using Auto Locate . . . . . . . . Chapter 5 . . . . . . . . . . . . . . . . . . . . . . . . . . . . . . . .
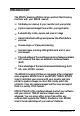
Introduction ® The EPSON Scanning Utilities let you perform the following functions with your EPSON scanner: Calibrate your scanner to your monitor and your printer Capture scanned images from within your application Automatically locate, expose, and scan an image Adjust individual settings and preview the effects before you scan Choose single- or triple-pass scanning Save and reuse scanning settings that work well in your environment Take advantage of the multipage scanning feature available with scanners
Note: As you use the EPSON Scanning Utilities, the top fine of the window identifies whether you are using EPSON Scan! II or EPSON TWAIN. System Requirements For the EPSON Scanning Utilities to work properly, your system must have at least the following configuration: ® ® Apple Macintosh or Power Macintosh™ computer with a 68030 or 68040 processor Apple system software 7.
How to Use This Manual This User’s Guide contains information you need to install and use the EPSON Scanning Utilities with your EPSON scanner. Chapter 1 describes installing your EPSON Scanning Utilities software. Be sure to read this first. Chapter 2 describes how to calibrate your system. Basic information for scanning from within your application is included in Chapter 3, while Chapter 4 describes using the special effects features of your software.
Where to Get Help If you purchased your scanner in the United States or Canada, EPSON provides customer support and service through a network of Authorized EPSON Customer Care Centers.
EPSON Bulletin Board Service You can call the EPSON Bulletin Board Service (BBS) at (310) 782-4531. No membership is required. Make sure your communications software is set to 8 data bits with 1 stop bit, no parity bit, and a modem speed up to 28.8 Kbps. See the documentation that came with your communications software for more information. To download the latest TWAIN drivers from the BBS, use the Drivers library.
Chapter 1 Installing Your Software EPSON Scanning Utilities come with installer software that makes them easy to install on your Macintosh. Before you install the software, make sure that the SCSI interface cable is connected properly and the SCSI ID and terminator are set correctly; see your scanner documentation for instructions. Then follow the instructions below to install your software. Installing the Scanning Utilities Follow these steps to install EPSON Scanning Utilities: 1. Turn on the scanner.
You see the Easy Install screen: 7. To install all the program components, click Install. To select only one or two components, click Customize; then highlight the components on the next screen and click Install. 8. The program begins copying files. Insert the diskettes as prompted. 9. When installation is complete, you see a success message. Click Restart to restart your Macintosh. The program creates an EPSON Scan! II folder on your hard disk containing EPSON Scan! II and EPSON Scan! II Help icons.
Testing the Scanning Utilities After you have installed the Scanning Utilities, test your scanner with the utilities to make sure everything works correctly. Follow these steps: 1. Raise the scanner’s cover and place an image face down on the glass surface. Then carefully close the cover. 2. Double-click the EPSON Scan! II icon. 3. From the File menu, select Acquire. You see the EPSON TWAIN easy screen: 4. Click Scan. After a few moments, you see the image in the EPSON Scan! II Untitled-l window.
Chapter 2 Calibrating Your System Sometimes the colors of your original image do not match the colors you see on your screen and in the final printed output. This is because of the different color processes your scanner, monitor, and printer use to produce color. The scanner and the monitor both create a range of colors by adding red, green, and blue (RGB) in different proportions and intensities (an additive color process).
Calibrating Your Monitor to Your Scanner To calibrate your monitor to your scanner, you first need to perform a screen calibration using EPSON Scan! II and then enable screen calibration in TWAIN. Performing Screen Calibration Follow these steps to perform a screen calibration: 1. Select EPSON Scan! II in the EPSON Scan! II folder. 2. Choose Screen Calibration from the Calibrate menu. You see this screen: 3.
Note: If you use a different monitor or change your video resolution, calibrate your screen again. Enabling Screen Calibration Once you calibrate your screen, you need to make sure screen calibration is enabled (the default setting). Follow these steps: 1. Start EPSON Scan! II, if necessary. 2. From the File menu, choose Acquire to start EPSON TWAIN. You see the EPSON TWAIN screen. If the screen is fairly small and has an Advanced button, it is the easy screen.
® If you have one of these EPSON Stylus ink jet printers, Scan! II provides printer calibration profiles for you so you do not have to create them: EPSON Stylus COLOR EPSON Stylus COLOR II EPSON Stylus COLOR IIs EPSON Stylus Pro EPSON Stylus Pro XL For these printers you simply select the printer calibration profile before you scan an image. See “Scanning Using Calibration” on page 2-8.
You see the following screen: 3. From the Export File Format pull-down menu, select a format your application software can open, such as PICT. 4. In the Export image as field, type the name you want to use for the calibration chart file, such as COLOR1. 5. Click Export to create the calibration chart in the EPSON Scan! II folder. 6. Exit EPSON Scan! II. 7. Start your image editing application. 8. Open the calibration chart file you just created in the EPSON Scan! II folder. 9.
10. Print the calibration chart on your color printer. 11. Exit your image editing application. Note: To print images on more than one color printer, print the calibration chart on each printer you’ll use. If you plan to print the image on a service bureau’s color printer, have them print the calibration chart on their printer so you can create a calibration profile for it. Tip: when you label the printed charts to help you identify which printer produced them, don’t write on the chart itself.
You see the following screen: 4. In the Filename field, type the filename of the calibration file you want to create, such as COLOR1 PRINTER. Tip: If you are creating more than one calibration profile (for instance, if you have more than one color printer), make sure you assign a unique filename to each calibration profile so you can distinguish between them. 5. Click Continue. You see the EPSON TWAIN advanced screen. (If you see the easy screen, click Advanced.
6. If necessary, choose Color Photo from the Image Type pull-down menu. 7. Choose Calibration Profile from the Destination pull-down menu. 8. Click Scan. The program scans the calibration chart and creates a calibration profile. You see the EPSON Scan! II program screen. Note: If a message appears indicating that the specified scan settings are incorrect, you need to reset the Destination options to their default settings.
2. If you see a submenu, choose TWAIN (and then EPSON TWAIN, if necessary). You see EPSON TWAIN advanced screen. (If you see the easy screen, click Advanced.) 3. Click Destination to open the Destination dialog box. 4. If you have one of the EPSON Stylus printers listed on page 2-4, select the printer from the Destination Name pull-down menu. The Calibration description is assigned automatically. Go to step 6.
Chapter 3 Capturing Images From Within Applications When you scan an image from within an application using EPSON TWAIN, you follow these basic steps: Access TWAIN from within your application’s File menu Choose either the easy or advanced TWAIN screen Select the correct image type and destination settings l Preview the image and select the scan area (advanced screen only) l Scan the image Close TWAIN and edit the image in your application.
Accessing EPSON TWAIN To access EPSON TWAIN, choose Acquire (or Place, or the appropriate command) from the File menu within your application. You may then have to select TWAIN (and then maybe EPSON TWAIN) from a submenu. When TWAIN opens, you see either the easy or advanced screen, depending on which was opened last. The easy screen allows you to select the type, destination, and document source (if available) of your image. When you scan with this screen, your entire image is captured and scanned.
Using the Easy Screen The following basic settings are available on the TWAIN easy screen: Document source Imagetype Destination. You must select the appropriate option from each of these settings to successfully scan your image. Selecting the Document Source If you have an optional Automatic Document Feeder (ADF) or Transparency Unit installed on your scanner, you can select the option from the Document Source pull-down menu.
Selecting the Image Type To scan images with satisfactory results, you must use the correct image type option. You can select one of the following options from the Image Type pull-down menu: Color Photo 256 Colors Black & White Photo Color Halftone Color Drawing Black & White Halftone Line Art OCR If you haven’t modified these options by changing any of their settings, the image type you select uses the default settings listed in the Appendix.
If you haven’t modified these options by changing any of their settings, the destination you select uses the default settings listed in the Appendix. To add a new destination option or modify any existing settings, see “Using the Advanced Screen.” To scan text, select OCR (for Optical Character Recognition) from both the Image Type and Destination pull-down menus. Leave the settings for these options at their defaults, listed in the Appendix.
Modifying an Image Type To modify an Image Type setting, choose the Image Type button. You see the following screen: Not all options on this screen are available with all scanners, Image Types, or Pixel Depth settings. The Image Type options are described in the following table.
Image Type Options (Continued) Function Setting Option Halftone’ None Determines tones by data format Mode A (Hard Tone) Uses a hard tone to produce a distinct image (1 and 2 bits/pixel per color) Mode B (Soft Tone) Uses a softer tone: most suited for images containing large areas of similar tones (1 bit/pixel per color) Mode C (Net Screen) Uses a pattern like newspaper photographs (1 bit/pixel per color) Dither A (4 x 4 Bayer) Uses a 4 x 4 bayer dither pattern Dither B (4 x 4 Spiral) Uses a
The following table identifies the options available with each Pixel Depth setting. Since both the Draft and Best Quality settings are available with all the Pixel Depth settings, this option is not included in the matrix.
To modify an existing image type, select it from the Image Type Name pull-down menu and change the necessary settings. Choose Save and then choose OK. Note: If you don‘t choose Save before you choose OK, the image type settings are not changed. Adding and deleting Image Type options To add a new image type, select a pm-defined type that closely resembles the one you want to create. Then delete the existing name from the Image Type Name field and type in a new name.
Note: If your scanner does not support Text Enhancement Technology, the option does not appear or is grayed out in the Image Type dialog box. Modifying the Destination The Destination dialog box allows you to define different resolutions for each destination output device. You can also use it to modify, add, or delete a calibration profile for your output device. To modify the Destination, click the Destination button.
Optimum scanning resolutions Outputdevice Grayscale Color Monochrome printer 80-170 Desktop or off ice color printer 150-240 150 - 240 Printing press or imagesetter 150-350 150-350 The higher the resolution you select, the larger the resulting image file. For example, an 8.5 x 11-inch photograph scanned at 300 dpi can produce a 24MB file. The same photograph scanned at 72 dpi creates a file of only 1.36MB. Large files take longer to process and print.
Selecting calibration profiles Use the Calibration pull-down menu to select a predefined calibration profile or create a custom one. TWAIN can then use the profile as it scans to create the best quality image.
To delete an existing Destination, select it from the Destination Name pull-down menu and choose Delete; then choose OK Previewing and Adjusting the Image Once you have selected the Image Type and Destination settings, you can preview and adjust your image before you scan it. (To use the special effects features, see Chapter 4.
Adjusting the preview area Once you see a preview of the image on the screen, you can define the area you want to scan or select the entire image area. To define a specific area, position the mouse pointer at a comer of the area; the pointer changes to a +. Hold down the mouse button as you drag the pointer across the image. When you release the mouse button, a rectangle on the screen identifies the scan area.
The size of the full image or the selected area appears in the Width and Height fields. You can type new values in these fields to define a selection area of a specific size. You can select the Lock icons to keep specific values in either the Width field or the Height field. Click the Lock icon once to lock the value in place; the icon shows a closed lock. Click it again to unlock the value. As you modify your selection area or other image settings, you see the file size of the image in the Size field.
Scanning the Image When you are finished selecting settings on either the easy or advanced screen, and the image you are scanning looks just right in the advanced preview window, you can scan the image by choosing the Scan button. If you choose Scan from the easy screen, TWAIN automatically selects the entire image and scans it. If you are scanning from the advanced screen and have not previewed the image or selected a preview area for it, be sure to click the Auto Locate icon before choosing Scan.
Chapter 4 Using Special Effects The EPSON TWAIN advanced screen gives you many options for editing images before you scan them. If you have image editing software, you can achieve all of the special effects described in this chapter-and more-using that software.
To save the preview image so it reappears in the preview window when you next open the advanced screen, select the Save Preview Image and Settings option. The preview image, any TWAIN settings you select, and any user-defined options you create are saved in EPSON TWAIN Settings in your System Preferences folder. (If you need to return all the TWAIN settings to their default values, drag the EPSON TWAIN Settings icon into the Trash and start over.
Using Image Controls The Image Controls available when you choose the let you adjust the following image settings: icon Brightness changes the intensity of light Contrast determines the gradation between highlights and shadows Highlight adjusts the lightest areas Shadow adjusts the darkest areas Sharpness adjusts the focus Threshold adjusts the point at which the gray values change to either black or white.
2. Choose the Image Controls icon. You see the following dialog box: 3. Adjust the settings until the image in the preview window looks the way you want it to look. See the following table for guidelines on changing these settings.
4. When the image in the preview window looks the way you want, close the Image Controls dialog box. 5. You can now scan the image into your application. You can return any option you’ve modified to its default setting by holding down the Option key and clicking the option’s slide bar. To reset all the Image Controls, click the Reset button just below the Image Controls icon.
Adjust the gamma curve settings using the slide bar. You see the effects of the new settings in the preview window and the Gamma Correction Name changes to User Defined. If you choose the Comparison icon to the left of the graph, you see either three or five comparison views with different gamma settings. You can choose the comparison sample that most closely reflects what you want the image to look like. If you modify the existing setting, you can save it for future use by choosing the Save button.
Adjusting Colors After you have previewed the image, choose the Color Adjustment icon, . You see the following screen: Note: Color Adjustment settings are not available for the ES-300C. You can adjust these settings in the Color Adjustment dialog box, as described in this section: Gray Balance Saturation Color Filter. You can return the Gray Balance and Saturation options to their default settings by holding down the Option key and clicking the option’s slide bar.
Setting the Gray Balance Neutral shades of gray are produced by mixing the three colors used to make up the image in approximately equal proportions. Sometimes, however, the resulting gray shades are not truly neutral. To create a more neutral gray, adjust the Gray Balance setting. Choose the left Color button below the Gray Balance slide bar; the mouse pointer changes to an eyedropper icon. Select the color in the preview scan you want to neutralize.
Using Color Filters Color filters can help eliminate color tinges (or an undesirable overall color tone) that exist in the original. You can also use filters to give your image a specific color effect. When you click any point in the Color Filter wheel radials, that color is increased in the image. You can see numerical values for the amount of red, green, and blue to the right of the color wheel. To reset the values to 0, click the center of the wheel.
Using Automatic Features The TWAIN advanced screen offers two automatic features: Auto Exposure, which automatically adjusts the exposure of an image and sets the Highlight and Shadow settings Auto Locate, which locates and selects the target image from within the preview image. Note: When you scan using the easy screen, both automatic features are always in effect. Using Auto Exposure After you preview an image, click the Auto Exposure icon, to automatically adjust the brightness and contrast in an image.
Chapter 5 Saving and Exporting Images You can always scan an image using your TWAIN-compliant image editing application. However, if your application is not TWAIN-compliant, you can use EPSON Scan! II to scan the image and export it in a format your application can open, as described in this chapter. Saving a Scanned Image Before you export an image, you need to save it in its original EPSON Scan! II format. Otherwise, you will not be able to retrieve it again in EPSON Scan! II. Follow these steps: 1.
5. In the pull-down menu at the top, select the folder in which you want to save the file. 6. Type a filename for your image in the Save image as field. 7. Click Save. The image is saved in the EPSON Scan! II file format. You can now open this file in EPSON Scan! II and export it with a different format, as described below. Exporting an Image EPSON Scan! II allows you to export an image in a file format your application software can use.
2. In the pull-down menu at the top, select the folder to which you want to export the file. 3. Type a filename for your image in the Export image as field. 4. You can choose one of these formats from the Export File Format menu: PICT, TIFF5.0, TIFF6.0(JPEG), JPEG, and EPS. (For a description of these file formats, see the Term Glossary.) Note: You cm select TIFF6.
Acquiring and Exporting an Image EPSON Scan! II allows you to scan and export an image directly into a selected file format without displaying it on the screen. Since the image is not displayed, you can perform scanning operations more quickly. Note: EPSON Scan! II cannot open an image file once if is exported. Follow these steps: 1. Start EPSON Scan! II, if necessary. 2. Choose Acquire & Export from the File menu. You see the TWAIN screen. (If you see the easy screen, click Advanced.) 3. Choose Scan.
6. You can choose one of these formats from the Export File Format menu: PICT, TIFF5.0, TIFF6.0(JPEG), JPEG, and EPS. (For a description of these file formats, see the Term Glossary.) Note: You can select TIFF6.0(JPEG) and JPEG formats only if you selected 16 Million Colors for the Pixel Depth setting in the Image Type dialog box when you scanned the image. 7. If you selected the PICT format, you can click the Compression checkbox to turn this feature on and off.
Chapter 6 Troubleshooting If you have problems using the EPSON Scanning Utilities, or with the quality of your printed or scanned images, check the two sections in this chapter for possible solutions. Problems Using the EPSON Scanning Utilities When you select a TWAIN data source, EPSON Scanners is not listed. Either the EPSON Scanning Utilities were not installed or they were not installed correctly. Reinstall the EPSON Scanning Utilities; see Chapter 1 for instructions.
An error condition may have caused your application or the TWAIN data source in the EPSON Scanning Utilities to stop working correctly. Save any documents in process and close any open applications. Restart your Macintosh to restore the TWAIN data source; then start your application and try again. Sometimes an error condition may cause the computer to display a message telling you that your scanner is not recognized. If this happens, reset your scanner by turning it off and on or pushing the RESET button.
See if your Macintosh has enough application memory to run your software. If you are running other software at the same time, you may not have enough memory left. See the section on memory allocation in your Macintosh manual. The scanner does not start scanning. See that the scanner’s READY light is on. Make sure the scanner's terminator and SCSI ID are set correctly. After clicking the Preview icon, the image does not appear in the preview window. Click on the TWAIN preview window.
An error in the scanner or a paper jam in the Automatic Document Feeder caused an error message. Remove the jammed paper or reset the scanner to clear the error condition; then try scanning again. The Sharpness setting is grayed out in the Image Controls dialog box Your scanner does not support the Sharpness feature. The Document Source setting is grayed out in the EPSON TWAIN screen. This is normal.
Auto Locate does not work when scanning two or more originals. Make sure none of the documents are touching one another on the document table. When you scan a monochrome image, the scanned image is reversed like a negative image. If your application has an invert function, use it to reverse the image, or use the Invert option on the TWAIN advanced screen. Some applications misinterpret the scanner data. Check with the application’s manufacturer for an updated program version.
If you scanned an image at a high resolution (800 dpi) and at the maximum allowable width using the Color Photo Image Type setting, restart your Macintosh and reduce the resolution and the width of the scanned image. Then try scanning again. If your application contains a scan manager feature, you may have closed it before closing the EPSON TWAIN screen. Scan your image again, but close the TWAIN screen before closing your application’s scan manager.
After starting a multipage scan using the Automatic Document Feeder, the image editing application freezes, displays an error message, or fails. Reset the system and reduce the number of pages you are scanning with the Automatic Document Feeder. After closing the EPSON TWAIN screen, a partial image of the screen appears over the scanned image. Scroll the application’s frame to clear the partial image. After selecting a part of an image to scan, the image did not scan correctly.
Part of the image is distorted or blurred. Part of the original may be wrinkled, warped, or not in contact with the document table. Be sure the document is uniformly flat. Caution: Do not place heavy objects on the document table. The edges of the document are not scanned. The document table has non-readable areas around the edges. Adjust your document’s position so that the image comes inside the readable area. Color is patchy or distorted at the edges of the document.
The image is too dark and without details. Adjust the Brightness, Gamma Correction, and Shadow settings to lighter values and scan the image again. Also check the brightness and contrast values of your monitor. Check that the Destination output device is set correctly. If it is set to Screen, output on a printer may be too dark. Straight lines in the image are jagged. The document may be placed at an angle on the document table.
Using halftoning, textured dot patterns appear in the image. This is normal halftoning; see your scanner manual for examples. The color on the video display seems different from that of the original image. Depending on your monitor, its resolution/color settings, and your EPSON TWAIN settings, the screen colors may be different from the original. This may be normal, especially if colors in the printed image more closely match the original.
The image cannot be printed on the printer, the printout is garbled, or the printout is not an image. Check that the printer is properly connected to your Macintosh and is set up correctly; see your printer manual. Check that your software is properly installed and set up for your printer; see your software manual. Images cannot be scanned at all or only a few dots appear in the scanned image. Try different EPSON TWAIN settings. Be aware that some settings disable others for a particular effect.
When you select 16 Gray for the Pixel Depth setting, the scanned image appears black in your application software. Choose 256 Gray for the Pixel Depth setting and try scanning again. The image appears upside down and truncated in your application software after scanning. Before you scan the image, reduce its file size to less than 1MB by adjusting settings on the TWAIN advanced screen. When you select 256 Color for the Pixel Depth setting, the scanned image does not match the previewed image.
Appendix This appendix lists the default settings for the Image Type and Destination options in EPSON TWAIN. Default Image Type settings lmage type Default color Photo 16-million colors, best qualitv, and 1 pass scanning I 256 Cdors I I Black & White Photo Color Halftone seltings 256 colors, best quality, and 1 pass scanrjng 256 grays and best quality and 1 pass scanning I I 8 colors. Mode A (Hard Tone) halftone, draft quality, I and 1 passscanning I Color Drawing 8 colors. draft qualiiy.
Default Destination settings I Destination I (continued) Default settings FAX 200 dpi resolution for line drawings and halftone images, 200 dpi resolution for photos, and calibration for Inkjet printers OCR 300 dpi resolution far line drawings. halftone images, and photos.
Icon Glossary This glossary describes the TWAIN icons. If you want to know what a specific icon does, locate the icon in this glossary; then read its description. Some icons open dialog boxes that contain more icons. Icons in the dialog box are described after the initial icon. See Chapters 3 and 4 for instructions on using the icons. Preview. Allows you to see your entire image before scanning it. Once an image is in the preview window, you can check its width, height, and file size on the screen.
Auto Locate. Allows you to automatically select just the image. If your preview window contains more than one image and you only need one, roughly select the image you want by dragging the mouse pointer and clicking the Auto Locate icon. When you select Scan from the easy screen, TWAIN uses this setting. Lock and Unlock. Allow you to lock or unlock the current width, height, unit, or scale settings for an image. The default setting is unlock. Image Controls.
Shadow Comparison. Allows you to compare three or five image samples of varying shadow intensity or color. The middle sample reflects the current shadow setting. Sharpness Comparison. Allows you to compare three or five image samples of varying sharpness. The middle sample reflects the current sharpness setting. Threshold Comparison. Allows you to compare three or five image samples of varying black and white contrast. The middle sample reflects the current threshold setting.
Color Adjustment. Opens the Color Adjustment dialog box, which lets you adjust the colors in an image using the settings described below. Gray Balance Comparison. Allows you to compare three or five-image samples with varying casts of gray so you can select the most neutral gray. Saturation Comparison. Allows you to compare three or five image samples of varying color saturations so you can select the paleness or richness you want in an image. Three-pass scanning ignores saturation settings.
Term Glossary Application Program A software program designed to perform a specific task, such as word processing, image editing, or spreadsheet functions. Automatic Document Feeder A scanner accessory that automatically feeds a stack of paper into the scanner. Brightness A scanner software function to lighten or darken the output image data.
Destination A set of resolution and calibration settings that match the characteristics of the scan to the final output device. EPSON TWAlN provides several Destination settings to adjust your scanned image to suit the output device you intend to use. You can also define your own Destination settings. Device A piece of computer equipment that performs a specific task, such as a disk drive, a monitor, a printer, or a scanner. Also called a peripheral.
Gray Balance An EPSON TWAIN software setting that lets you adjust the grayness of any area of an image. You can remove color casts and discoloration to make the grays in an image more neutral. Grayscale The measure of grayness of any area of an image. When an image is scanned, the gray level of each pixel is determined. Halftone An image type which simulates grayscale by varying the sizes of the dots printed.
Moire An unwanted pattern that can occur when a halftone image is scanned or when it is scaled in an application after it has been scanned. PICT An industry-standard file format supported by many applications. Pixel Picture Element. Each image is composed of a number of pixels. Pixels are sometimes called dots. Pixel Depth An EPSON TWAIN setting that lets you select the amount of color information in a file. Port An interface channel through which data is transmitted between devices.
SCSI Small Computer System Interface. EPSON scanners use the SCSI interface to communicate between the Macintosh and the scanner. Shadow The darkest area of an image. The range between highlight and shadow determines the range and the color differentiation of the image. Sharpness The measure of enhanced detail in an image. Threshold The point at which the gray values are changed to either black or white. TIFF5.0 Tagged Image File Format, version 5.0.
Index A Accessories, purchasing, Intro-4 Acquire & Export option, 5-4 to 5-5 Acquire option, 3-2, 5-1, 6-1 to 6-2 Additive color process, 2-1, 6-10 Advanced screen accessing 3-2, 3-5 Destination settings, 3-10 to 3-13 Image Type settings, 3-6 to 3-10 preview features, 3-13 to 3-15 scanning using, 3-16 special effects, 4-1 to 4-10 using, 3-5 to 3-15 Apple ColorSync, 4-2 Auto Exposure, 4-10 Auto Locate, 3-14, 3-16, 4-10, 6-5 Automatic Document Feeder, 3-3, 6-4, 6-7 Automatic features, 4-10 B Best Quality mode
24-bit mode, 3-15, 6-3 formats, 3-6 source, 1-3, 6-1 to 6-2 Default settings, 3-4 to 3-5, A-1 to A-2 Destination advanced screen options, 3-10 to 3-13 button, 2-9, 3-10 default settings, A-1 to A-2 defining, 6-5, 6-11 easy screen options, 3-4 to 3-5 Display, see Video display Dither options, 3-7 to 3-8, 6-5 Document Source option, 3-3, 4-9, 6-4 Document table, 3-3, 3-16, 6-4 to 6-5, 6-7 to 6-8 Draft Quality mode, 3-7 to 3-8 Dropout setting 3-7 to 3-8 EPSON Scan! II acquiring and exporting images, 5-4 to 5-
I M Image acquiring and exporting, 5-4 to 5-5 adjusting preview, 3-14 to 3-16 exporting, 5-1 to 5-5 file size, 3-11, 3-14 to 3-15, 6-5, 6-12 inverting, 4-9, 6-5 monochrome, 6-5 negative, 6-5 previewing, see Preview quality, 3-7 to 3-8, 5-3, 5-5, 6-7 to 6-12 saving, 4-2, 5-1 to 5-2 scale, 3-15, 6-11 scanning, 3-16 size, 3-14 to 3-15, 6-10, 6-12 Image Controls icon, 4-4 settings, 4-3 to 4-5 Image editing software, 3-16, 4-1, 6-3, 6-6, 6-9 Image Type option advanced screen, 3-6 to 3-10, 4-3, 4-5 default sett
printer calibration, see Calibration Printer driver, 6-12 Problems EPSON scanning Utilities, 6-1 to 6-7 Image quality, 6-7 to 6-12 Profile, see Calibration profile Q Quality setting, 3-7 to 3-8 Quality slide bar, 5-3, 5-5 R READY light, 6-3 Requirements, system, Intro-2, 6-2 Reset button 4-5 to 4-7 Resolution limitations, 3-13, 6-3, 6-6, 6-10, 6-12 optimum scanning, 3-11 selecting, 3-10 to 3-11 RGB, 2-1 Rulers setting, 3-14 S Samples, comparison, 4-2 Saturation 3-8, 4-7 to 4-8 Save Preview Image and Sett
Tips, Intro-3 Transparency Unit, 3-3, 4-9, 6-4 Troubleshooting, 6-1 to 6-12 TWAIN accessing, 3-2 advanced screen, see Advanced screen automatic features, 4-10 compliant applications, 5-1 configuration, 2-3, 4-1 to 4-2 data source, 1-3, 6-1 to 6-2 default settings, A-1 to A-2 easy screen, see Easy screen installing, 1-1 to 1-2 introduction, Intro-1 to Intro-2 problems, 6-1 to 6-7 requirements, system, Intro-2 scanning using, 3-16 special effects, 4-1 to 4-10 testing, 1-3 U Units, measurement, 3-14 Utilities