AcuLaser Basics Guide LASER PRINTER CX11N/CX11NF
Manuals
Brands
Epson Manuals
Printer
AcuLaser CX11N
81
82
83
84
85
86
87
88
89
90
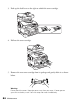
Replacing the Photoconductor
87
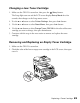
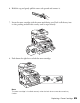
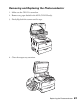
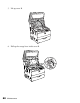
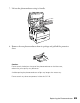
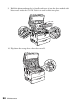
Removing and Replacing the Photoconductor
1.
Make sure the CX11N is turned on.
2.
Remove any paper loaded in the ADF (CX11NF only).
3.
Slowly flip back the scanner until it stops.
4.
Close the output tray extension.
1
...
...
85
86
87
88
89
...
...
144