Network Guide
Copyright and Trademarks All rights reserved. No part of this publication may be reproduced, stored in a retrieval system, or transmitted in any form or by any means, mechanical, photocopying, recording, or otherwise, without the prior written permission of Seiko Epson Corporation. No patent liability is assumed with respect to the use of the information contained herein. Neither is any liability assumed for damages resulting from the use of the information contained herein.
❏ Redistributions of source code must retain the above copyright notice, definition, disclaimer, and this list of conditions. ❏ Redistributions in binary form (compiled executables) must reproduce the above copyright notice, definition, disclaimer, and this list of conditions in documentation and/or other materials provided with the distribution.
Contents Copyright and Trademarks Safety Instructions Warnings, Cautions, and Notes . . . . . . . . . . . . . . . . . . . . . . . . . . . . . . . . . . . . . . . . . . . . . . . . 7 Chapter 1 Introduction About Your Printer . . . . . . . . . . . . . . . . . . . . . . . . . . . . . . . . . . . . . . . . . . . . . . . . . . . . . . . . . . 8 About This Guide . . . . . . . . . . . . . . . . . . . . . . . . . . . . . . . . . . . . . . . . . . . . . . . . . . . . . . . . . . . 8 Operating Environment . . . . .
Windows Server 2003 . . . . . . . . . . . . . . . . . . . . . . . . . . . . . . . . . . . . . . . . . . . . . . . . . . 34 Windows 2000 . . . . . . . . . . . . . . . . . . . . . . . . . . . . . . . . . . . . . . . . . . . . . . . . . . . . . . . . 37 Macintosh. . . . . . . . . . . . . . . . . . . . . . . . . . . . . . . . . . . . . . . . . . . . . . . . . . . . . . . . . . . . 40 Chapter 3 Network Software EpsonNet Config for Windows. . . . . . . . . . . . . . . . . . . . . . . . . . . . . . . . . . . . .
Chapter 5 Tips for Administrators Setting an IP Address on the Printer’s Control Panel . . . . . . . . . . . . . . . . . . . . . . . . . . . . . . Network Menu . . . . . . . . . . . . . . . . . . . . . . . . . . . . . . . . . . . . . . . . . . . . . . . . . . . . . . . . Universal Plug and Play. . . . . . . . . . . . . . . . . . . . . . . . . . . . . . . . . . . . . . . . . . . . . . . . . . . . . Uninstalling Software . . . . . . . . . . . . . . . . . . . . . . . . . . . . . . . . . . . . . . . . . . . . .
Safety Instructions Warnings, Cautions, and Notes w c Warnings must be followed carefully to avoid bodily injury. Cautions must be observed to avoid damage to your equipment. Notes contain important information and useful tips on the operation of your printer.
Chapter 1 Introduction About Your Printer Your printer has a built-in Ethernet interface and can connect anywhere on your network using 10Base-T or 100Base-TX. The built-in Ethernet interface, which is called the network interface in this manual, automatically selects the correct standard when it connects to a network. In addition, it supports and automatically selects the IEEE 802.2, IEEE 802.3, Ethernet II, and Ethernet SNAP network protocols.
❏ The term “network administrator” refers to the person responsible for maintaining the network. “Administrator” is synonymous with “Supervisor” in this guide. ❏ The term “network interface” refers to the built-in Ethernet interface of the printer in this guide. Operating Environment The network interface supports the following environments.
❏ Supports SNMP and MIB. ❏ Supports SNTP (Simple Network Time Protocol). ❏ Supports Bonjour on Mac OS X 10.4 or later. ❏ Supports Rendezvous on Mac OS X 10.3.9. Network Interface Operation Status Light The indicator lights provide you with important information on the operations of the network interface.
c Caution: You must use a category-5 shielded twisted-pair cable to connect the network interface to a network. About the Software The Software CD-ROM provided with your printer includes the following network software. Note: The software provided varies depending on your printer model. ❏ EpsonNet Config is a Windows-based configuration utility for administrators that allows you to configure the network interface for various protocols such as TCP/IP and SNMP. See “EpsonNet Config for Windows” on page 43.
Chapter 2 How To Overview This section describes the general procedure on how to set up the network interface for use on a network. 1. Check the network interface operation. Check the functions and operations of the network interface, such as status lights and RJ-45 connector. See “Network Interface Operation” on page 10 for details. 2. Select a printing method. Select a printing method appropriate for your network environment and operating system.
Selecting a Printing Method for Windows Check if there is a Windows Vista/XP/Server 2003/2000 print server on your network, and then use the suggestions below. If a print server exists, set the printer to connect with LPR on the server and turn it into a shared printer. Your clients can then print to this shared printer. If no Windows print server exists, we recommend TCP/IP printing via LPR. This is the method to use when you connect the printer to your network through the printer’s Ethernet port.
❏ No special print utility is required. Disadvantages ❏ Epson Status Monitor cannot be used. ❏ You cannot print via a router. ❏ It takes longer to start printing because more time is required to search for a network printer. Note: Instructions for setting up Microsoft network shared printing are included in the printer User’s Guide.
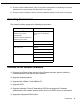
3. Check if the following necessary components are in the list. If they are already installed, go to the next chapter. The following table lists the components required for configuring the network interface with EpsonNet Config. EpsonNet Config’s setting screens Necessary components TCP/IP, SNMP (IP trap) Internet Protocol (TCP/IP) MS Network Internet Protocol (TCP/IP) The following table lists the components required for network printing.
The necessary components are now installed. Go to the section “Connecting the Network Interface to the Network” on page 21. Windows XP For Windows XP, use the following procedure to install the necessary components. 1. Click Start, highlight Control Panel, and then click Network and Internet Connections. Select Network Connections. 2. Under LAN or High-Speed Internet, click the Local Area Connection icon. 3. Under Network Tasks, click Change settings of this connection. 4.
The following table lists the components required for network printing. Printing method Necessary components LPR Internet Protocol (TCP/IP) Microsoft Network Shared printing TCP/IP client for Microsoft Networks 5. If the necessary components are not in the list, click Install to install them, as described below. For LPR: Internet Protocol (TCP/IP) is installed by default. You cannot add or delete it. For Microsoft Network Shared printing: Select Client and then click Add.
3. Check if the following necessary components are in the list. If they are already installed, go to the next chapter. The following table lists the components required for configuring the network interface with EpsonNet Config. EpsonNet Config’s setting screens Necessary components TCP/IP, SNMP (IP trap) Internet Protocol (TCP/IP) MS Network Internet Protocol (TCP/IP) The following table lists the components required for network printing.
5. For LPR or Microsoft Network Shared printing: Double-click Internet Protocol (TCP/IP) on the Local Area Connection Properties dialog box to open the Internet Protocols (TCP/IP) Properties dialog box. Set the IP address and so on if necessary, then click OK. 6. Restart the computer. The necessary components are now installed. Go to the section “Connecting the Network Interface to the Network” on page 21. Windows 2000 For Windows 2000, use the following procedure to install the necessary components. 1.
The following table lists the components required for network printing. Printing method Necessary components LPR Internet Protocol (TCP/IP) Microsoft Network Shared printing Internet Protocol (TCP/IP) Client for Microsoft Networks 4. If the necessary components are not in the list, click Install to install them, as described below. For LPR: Select Protocol and then click Add. In the Select Network Protocol dialog box, select Internet Protocol (TCP/IP) and then click OK.
5. Click the Apply Now button to save any changes. Go to the next section. Setting Up the Network Interface Connecting the Network Interface to the Network Follow the instructions below to connect the network interface to the network. For more information, see the Start Here sheet that came with your printer. 1. Make sure that your printer is turned off. 2. Connect one end of the network cable to the RJ-45 connector on the network interface, and the other end to the network.
Configuring the Network Interface for Windows Configure the network interface for use on the TCP/IP network and install the printer driver on your computer. 1. Insert the Software CD-ROM in the CD-ROM drive. With Windows Vista, if you see the AutoPlay window, click Run Epsetup.exe. When you see the User Account screen, click Continue. 2. Click Easy Install. 3. Select Network. Note: If your printer is connected to your computer with a USB cable, select Local. Then follow the on-screen instructions. 4.
6. If you see the following screen, you can select a method for specifying the IP address. If you select Automatic, DHCP becomes available and assigns an IP address automatically. If you want to set the IP address manually, select Manual and then enter the IP address, subnet mask, and default gateway. Click the Next button. Note: It’s a good idea to write down the IP address for use when you set up additional computers. 7. Confirm the settings you have made, and then click the Next button. 8.
9. Enter the printer name. If you want to print a test page, select the Print test page check box. Click the Next button. Note: If the Windows Security Alert window appears, click the Unblock button. 10. Select the default printer, and then click the Next button. 11. Click the Finish button, and then follow the on-screen instructions to complete the installation. Now you can use the printer on the TCP/IP network.
Configuring the Network Interface for Macintosh Configure the network interface for use on the TCP/IP network and install the printer driver on your computer. 1. Insert the Software CD-ROM in the CD-ROM drive. The EPSON folder opens automatically. 2. Double-click the Mac OS X icon in the EPSON folder. 3. Make sure that all applications are closed, and then click Easy Install. 4. Select Network.
7. Select a method for specifying the IP address. If you select Automatic, DHCP becomes available and assigns an IP address automatically. If you want to set the IP address manually, select Manual and then enter the IP address, subnet mask, and default gateway. Click the Next button. Note: It’s a good idea to write down the IP address for use when you set up additional computers. 8. Check the settings you have made, and then click the Next button.
9. Click the Finish button, and then follow the on-screen instructions to complete the installation. Follow the steps below to set up the printer. Setting Up the Printer Mac OS X 10.5 1. Open System Preferences. 2. Open Print & Fax. 3. Click the + button to add a new printer. 4. Select the desired printer model that is connected with Bonjour.
Mac OS X 10.4 or below 1. Open the Applications folder. 2. Open the Utilities folder. 3. Open Printer Setup Utility, and then click Add. 4. For Mac OS X 10.4, select the printer model that is connected with Bonjour. For Mac OS X 10.3, select Rendezvous from the drop-down list, and then select the printer model from the list. Note: For Mac OS X 10.
3. Click Add a local printer. 4. Select the Create a new port radio button, and then select Standard TCP/IP Port from the list. Then click Next.
5. Enter the IP address of the network interface and then click Next. If you don’t know the IP address, you can print a network status sheet. See “Printing a Network Status Sheet” on page 56. 6. If an error occurs, the following dialog box appears. Select the Standard radio button and then select EPSON Network Printer. Click Next. 7. Click Finish. 8. See the following section to install the printer driver. Installing the printer driver 1. Insert the Software CD-ROM shipped with the printer. 2.
5. Select the CD-ROM drive for Drives, and double-click the WINVISTA_XP_2K folder. Click Open. 6. Click OK in the Install From Disk dialog box. 7. Select the model name of the device, and then click Next. Note: If the Add Printer wizard prompts you to select either Keep existing driver or Replace existing driver, be sure to select the Replace existing driver radio button. 8. Click Finish and follow the on-screen instructions to complete the setup.
Note: You must clear the Automatically detect and install my Plug and Play printer check box because the printer is attached directly to the network, not to a Windows XP computer. 4. Select the Create a new port radio button, and then select Standard TCP/IP Port from the list. Then click Next.
5. Enter the IP address of the network interface and then click Next. If you don’t know the IP address, you can print a network status sheet. See “Printing a Network Status Sheet” on page 56. 6. If an error occurs, the following dialog box appears. Select the Standard radio button and then select EPSON Network Printer. Click Next. 7. Click Finish. 8. See the following section to install the printer driver. Installing the printer driver 1. Insert the Software CD-ROM shipped with the printer. 2.
4. Click Browse. 5. Select the CD-ROM drive for Drives, and double-click the WINVISTA_XP_2K or WINXP_2K folder. Click Open. 6. Click OK in the Install From Disk dialog box. 7. Select the model name of the printer, and then click Next. Note: If the Add Printer wizard prompts you to select either Keep existing driver or Replace existing driver, be sure to select the Replace existing driver radio button. 8. Click Finish and follow the on-screen instructions to complete the setup.
Note: You must clear the Automatically detect and install my Plug and Play printer check box because the printer is attached directly to the network, not to a computer. 4. Select the Create a new port radio button, and then select Standard TCP/IP Port from the list. Click Next. 5. When Add Standard TCP/IP Printer Port Wizard dialog box appears, click Next.
6. Enter the IP address of the network interface and then click Next. If you don’t know the IP address, you can print a network status sheet. See “Printing a Network Status Sheet” on page 56. 7. If an error occurs, the following dialog box appears. Select the Standard radio button and then select EPSON Network Printer. Click Next. 8. Click Finish. 9. See the following section to install the printer driver. Installing the printer driver 1. Insert the Software CD-ROM shipped with the printer. 2.
4. Click Browse. 5. Select the CD-ROM drive for Drives, and double-click the WINVISTA_XP_2K, WINXP_2K, or WIN2000 folder. Click Open. 6. Click OK in the Install From Disk dialog box. 7. Select the model name of the printer, and then click Next. Note: If the Add Printer wizard prompts you to select either Keep existing driver or Replace existing driver, be sure to select the Replace existing driver radio button. 8. Click Finish and then follow the on-screen instructions to complete the setup.
Note: You must clear the Automatically detect and install my Plug and Play printer check box because the printer is attached directly to the network, not to a Windows 2000 computer. 4. Select the Create a new port radio button, and then select Standard TCP/IP Port from the list. Then click Next.
5. Enter the IP address of the network interface and then click Next. If you don’t know the IP address, you can print a network status sheet. See “Printing a Network Status Sheet” on page 56. 6. If an error occurs, the following dialog box appears. Select the Standard radio button and then select EPSON Network Printer. Click Next. 7. Click Finish. 8. See the following section to install the printer driver. Installing the printer driver 1. Insert the Software CD-ROM shipped with the printer. 2.
4. Click Browse. 5. Select the CD-ROM drive and double-click the ENGLISH\WINVISTA_XP_2K, or WINVISTA_XP folder. Click Open. 6. Click OK in the Install From Disk dialog box. 7. Select the model name of the printer, and then click Next. Note: If the Add Printer wizard prompts you to select either Keep existing driver or Replace existing driver, be sure to select the Replace existing driver radio button. 8. Click Finish and follow the on-screen instructions to complete the setup.
4. Click More Printers, select EPSON TCP/IP from the drop-down list, and then select the printer model. 5. Click Add. Mac OS X 10.4 or below Bonjour/Rendezvous printing 1. Open the Applications folder. 2. Open the Utilities folder. 3. Open Printer Setup Utility, and then click Add. 4. For Mac OS X 10.4, select the printer model that is connected with Bonjour. For Mac OS X 10.3, select Rendezvous from the drop-down list, and then select the printer model from the list. 5. Click Add. TCP/IP printing 1.
4. For Mac OS X 10.4, click More Printers, select EPSON Apple Talk from the dropdown list, select the zone, and then select the printer model. For Mac OS X 10.3, select EPSON Apple Talk from the drop-down list, select the zone, and then select the printer model. 5. Click Add.
Chapter 3 Network Software This chapter explains how to use the network software provided with your printer. Note: The software provided varies depending on your printer model. EpsonNet Config for Windows About EpsonNet Config EpsonNet Config is a Windows-based configuration software for administrators to configure the network interface for TCP/IP, MS Network, and SNMP. Note: Be sure to use EpsonNet Config included on the Software CD-ROM shipped with this product.
1. Make sure all the applications are closed, then insert the Software CD-ROM in the CD-ROM drive. 2. Click Install Network Utility. 3. Click the icon located next to EpsonNet Config. 4. Follow the on-screen instructions to complete the installation. Note: If the Windows Security Alert window appears after you start EpsonNet Config, click the Unblock button; otherwise the devices are not listed on the screen of EpsonNet Config.
1. Double-click the Macintosh HD icon. In the Applications folder, double-click the EpsonNet folder, and then double-click the EpsonNet Config folder. Finally, double-click the EpsonNet Config icon. 2. From the Help menu, select EpsonNet Config Help. The EpsonNet Config User’s Guide appears. Click the links on the left side of the screen to get information on using EpsonNet Config.
Installing EpsonNet Print Follow the steps below to install EpsonNet Print. Be sure to install it on a computer connected to the network. Note: If EpsonNet Direct Print (the older version of EpsonNet Print) is already installed on your computer, you need to uninstall it before installing EpsonNet Print (the installation program will lead you through uninstalling EpsonNet Direct Print 2). 1. Make sure all the applications are closed, then insert the Software CD-ROM in the CD-ROM drive. 2.
Adding a port for a printer assigned with a dynamic IP address 1. For Windows Vista: Click Start, Control Panel, and then Printer. Click Add a printer to start the Add Printer wizard. For Windows XP: Click Start and then Printers and Faxes. Under Printer Tasks, click Add a printer to start the Add Printer Wizard. Click Next. For Windows Server 2003: Click Start and then Printers and Faxes. Double-click Add Printer in the Printers folder to start the Add Printer Wizard. Click Next.
3. Select the target printer, and then click Next. Note: ❏ If the target printer is not in the list, click the Search Again button to search the printers using new parameters. ❏ If you want to search printers in other segments, click the N/W Settings button. Select the Specific Network Segments check box, and then enter the network address and subnet mask of the network segment for the search. Then click the Add button. You can also specify the time before declaring communication error.
4. Confirm the information about the printer’s port you want to configure, and then click Finish. Items Explanations Port Type The following items are listed in the pull-down menu, and you can select the port type you need. IP Address (Auto): Configure the port automatically. If the IP address of the printer is acquired automatically and the computer and the printer are in the same segment, you can select this port type. IP Address (Manual): Use the printer’s IP Address for the port name.
Adding a port for a printer assigned with a static IP address 1. For Windows Vista: Click Start, Control Panel, and then Printer. Click Add a printer to start the Add Printer wizard. For Windows XP: Click Start and then Printers and Faxes. Under Printer Tasks, click Add a printer to start the Add Printer Wizard. Click Next. For Windows Server 2003: Click Start and then Printers and Faxes. Double-click Add Printer in the Printers folder to start the Add Printer Wizard. Click Next.
4. Enter the printer’s name and the port name is automatically entered to the Port Name edit box. Then click Next. 5. Confirm the information about the printer’s port you want to configure, and then click Finish. Items Explanations The port Information The following items are displayed: - Port Name - Host Name or IP Address - Protocol Finish button Register the port information to the system and close the Add EpsonNet Print Port Wizard. Back button Go back to the printer list window.
Installing the Printer Driver Install the printer driver that comes with your printer. 1. Insert the Software CD-ROM shipped with the printer. 2. Close the EPSON Installation Program screen if it appears. 3. Click the Have Disk button. The Install From Disk dialog box appears. 4. Click Browse. 5. Select the CD-ROM drive for Drives, and double-click the appropriate folder for your operating system. Click OK. 6. Click OK in the Install From Disk dialog box. 7.
4. Make the appropriate settings for the desired port. LPR enhanced printing: Select the LPR Printing radio button, and then specify the queue name (up to 32 characters). LPR enhanced printing sends a print job to the target network printer without spooling all of the print data. LPR enhanced printing is faster than LPR standard printing. LPR standard printing: Select the Confirm file size check box, and then specify the queue name (up to 32 characters).
Chapter 4 Troubleshooting General Problems Cannot configure the network interface or cannot print from the network. Cause What to do The printer settings or network settings may be wrong. First, check to see if you can print a status sheet, as described in “Printing a Network Status Sheet” on page 56. If you can print a status sheet, check the network settings; otherwise, set the interface mode of the printer’s control panel to Auto or Option.
The message “EpsonNet Config cannot be used because no network is installed.” appears when you start EpsonNet Config. Cause What to do TCP/IP is not installed on the computer. Install the TCP/IP protocol. TCP/IP is installed on the computer, but its IP address is not set correctly. Set a correct IP address for the computer. The message “Could not complete communicating configuration data” appears when you send settings to the network interface.
Problems Specific to Your Network Environment Windows 2000 Environment A dial-up connection dialog box appears when printing with TCP/IP via EpsonNet Print. Cause What to do You have selected a phone line or modem (for Internet Explorer 4.0x) for the Internet connection. Printing ends normally after you cancel this dialog box, but the message appears every time you print. Connect to the Internet using a local area network or start a dial-up network manually.
Chapter 5 Tips for Administrators Setting an IP Address on the Printer’s Control Panel After connecting the printer to the network, you need to set the IP address for the network interface. To set the IP address, subnet mask, and default gateway from the control panel, follow the steps below. 1. Turn on your printer. 2. Press the r Right button on the printer’s control panel once to enter the Menu mode. 3. Press the d Down button until NETWORK SETTING appears. 4.
9. Print a network status sheet to confirm the new IP address. Note: See the User’s Guide for more information about settings on the printer’s control panel. Network Menu These items are used to make network settings on the printer’s control panel. Item Settings NETWORK SETUP Panel, Auto, Init N/W set IP ADDRESS 0.0.0.1 to 255.255.255.254 SUBNET MASK 0.0.0.0 to 255.255.255.255 DEFAULT GATEWAY 0.0.0.0 to 255.255.255.
Uninstalling Software Follow the steps below to uninstall the network software. Windows Vista 1. Click Start, click Control Panel, and then click Uninstall a program. 2. Select the utility you want to uninstall, and then click the Uninstall/Change button. 3. Follow the on-screen instructions to complete uninstallation. Windows 2000 1. Click Start, point to Settings, and then select Control Panel. 2. Double-click the Add/Remove Programs icon. 3.
4. Select Uninstall from the pull-down menu. 5. Click the Uninstall button. 6. Follow the on-screen instructions to complete uninstallation. Note: You can also uninstall EpsonNet Config by dragging the folder to the Trash.
Index A N Administrator tips, 57 to 60 Network components, installing, 14 to 21 Network interface configuring for Macintosh, 25 to 28 configuring for Windows, 22 to 24 connecting to network, 21 lights, 10 Network software, uninstalling, 59 to 60 Network status sheet, 56 D Data light, 10 DHCP, 11, 23, 57 E EpsonNet Config Macintosh, 44 Windows, 43 EpsonNet EasyInstall, 22 to 24 EpsonNet Print, 45 to 53 G Glossary, 11 I Installation EpsonNet Config, 43 EpsonNet Print, 46 printer driver, 28 to 42 IP add
U Uninstalling network software, 59 to 60 Universal Plug and Play, 58 Using the printer with Macintosh, 40 Windows 2000, 37 Windows Server 2003, 34 Windows Vista, 28 Windows XP, 31 Index 62