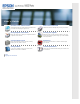
User’s Guide Overview of Your Scanner Features Guide to the Scanner Parts These features help you create the best possible scans, no matter what shape your original is in. Check this section to identify the parts of your scanner. Placing Originals on the Scanner Scanning Your Originals Follow the steps here to place your original documents or photos on the scanner. Follow the step- by- step instructions here to scan your original documents or photos using any of the available scanning methods.
Home > Overview of Your Scanner Features Overview of Your Scanner Features These features help you create the best possible scans, no matter what shape your original is in.
Home > Guide to the Scanner Parts Guide to the Scanner Parts Check these sections to identify the parts of your scanner.
Home > Placing Originals on the Scanner Placing Originals on the Scanner Follow the steps here to place your original documents or photos on the scanner.
Home > Scanning Your Originals Scanning Your Originals Follow the step-by-step instructions here to scan your original documents or photos using any of the available scanning methods.
Home > Scanning Special Projects Scanning Special Projects Follow these instructions for specific scanning projects you may need to create.
Home > Maintenance Maintenance Follow the guidelines here to maintain and transport your scanner.
Home > Solving Problems Solving Problems Troubleshooting If you have a problem using your scanner or its software, check here for solutions.
Home > Technical Specifications Technical Specifications Check here for technical details about your scanner and its accessories. System Requirements Scanner Specifications Note: Epson offers a recycling program for end of life products. Please go to www.epson.com/recycle for information on how to return your products for proper disposal.
Home > Safety Important Safety Instructions Restrictions on Copying Read all these instructions, and follow all warnings and instructions marked on the scanner. In this document, warnings, cautions, and notes indicate the following: Warnings must be followed carefully to avoid bodily injury. Cautions must be observed to avoid damage to your equipment. Notes contain important information and useful tips on the operation of this product.
AC adapter has been dropped or the case has been damaged; the scanner or the AC adapter does not operate normally or exhibits a distinct change in performance. (Do not adjust controls that are not covered by the operating instructions.) Unplug the scanner and the AC adapter before cleaning. Clean with a damp cloth only. Do not use liquid or aerosol cleaners. If you are not going to use the scanner for a long period, be sure to unplug the AC adapter from the electrical outlet.
Home > Copyright and Trademarks Copyright and Trademarks No part of this publication may be reproduced, stored in a retrieval system, or transmitted in any form or by any means, electronic, mechanical, photocopying, recording, or otherwise, without the prior written permission of Seiko Epson Corporation. No patent liability is assumed with respect to the use of the information contained herein. Neither is any liability assumed for damages resulting from the use of the information contained herein.
Home > Overview of Your Scanner Features Color Restoration Using the Color Restoration feature in Epson Scan, you can transform an old, faded, or badly exposed photo into one with true-to-life color and sharpness. Original image For instructions on using this feature, see Restoring Color.
Home > Overview of Your Scanner Features Dust Removal Using the Dust Removal feature in Epson Scan, you can virtually “clean” the dust marks from your originals as you scan them. Original image Dust Removal applied For instructions on using this feature, see Removing Dust Marks with the Dust Removal Feature.
Home > Overview of Your Scanner Features DIGITAL ICE Technology Your scanner and its Epson Scan software are equipped with the DIGITAL ICE Technology feature that removes dust or scratch marks from your originals. Original image DIGITAL ICE Technology applied DIGITAL ICE Technology can remove dust marks that the Dust Removal feature cannot. However, it takes longer to scan using DIGITAL ICE Technology and also uses more of your system resources.
Home > Overview of Your Scanner Features Backlight Correction Using the Backlight Correction feature in your scanning software, you can remove shadows from photos that have too much background light. Original image For instructions on using this feature, see Fixing Backlit Photos.
Home > Overview of Your Scanner Features Text Enhancement When you scan documents, you can sharpen the text and increase accuracy by using the Text Enhancement feature in Epson Scan. Original Text Enhancement: Off For instructions on using this feature, see Text Enhancement.
Home > Guide to the Scanner Parts Scanner Parts a. scanner cover a. document mat b. document table c.
a. b. c. d. Power switch DC inlet transportation lock USB interface connector a.
Home > Guide to the Scanner Parts Lights and Buttons Lights Buttons Note: Your product may look different from the illustrations in this guide, but the instructions are the same. The scanner has four buttons for scanning operations. The Status lights indicate whether the scanner is operating normally. a. Status lights b. PDF button c. E-mail button d. Copy button e. Start button Lights The green and orange status lights are on the left of the buttons.
(None) Off The scanner is off. Top Buttons Before using the scanner buttons, make sure you have installed Epson Scan. Button Function Start Epson Scan starts. Copy Copy Utility starts. E-mail Epson Scan automatically scans, then the Send File Via E-mail window appears. PDF The Scan to PDF window appears. See Using the Scanner Buttons.
Home > Placing Originals on the Scanner Placing Documents or Photos Placing Documents or Photos on the Document Table Placing Large or Thick Documents Caution: Do not place heavy objects on the document table glass and do not press the glass with too much force. Placing Documents or Photos on the Document Table Open the scanner cover. Make sure the document mat is installed inside the cover. If it is not installed, see Replacing the Document Mat for instructions. a.
Note: If you are scanning multiple photos at once, position each photo at least 20 mm (0.8 inch) apart from the others. Close the scanner cover gently so that your original does not move. Note: Always keep the document table clean. Do not leave photos on the document table for an extended period of time as they may stick to the glass.
To start scanning, see Starting Epson Scan for instructions. Top Placing Large or Thick Documents When you scan a large or thick document, you can pull the scanner cover straight up. Place a large or thick document on the document table. Close the document cover and hold it down firmly as you scan.
Home > Placing Originals on the Scanner Placing Film or Slides Removing the Document Mat Placing Film in the Holder Placing Slides in the Holder Replacing the Document Mat Removing the Document Mat To scan film strips or slides, you need to remove the document mat from the scanner cover. This uncovers the transparency unit window so your scanner can use it to scan your film or slides. Open the scanner cover and gently slide up the document mat to remove it.
a. transparency unit window To place film for scanning, see Placing Film in the Holder. To place slides for scanning, see Placing Slides in the Holder. To replace the document mat, see Replacing the Document Mat. Top Placing Film in the Holder Placing 35 mm Film Strips Open the cover of the 35 mm film strip holder. Slide one or two film strips all the way into the film holder with the shiny base side facing down.
Note: Hold the edge of the film gently or use gloves to touch the film; otherwise you may damage the film. Make sure the white stickers on the back of the film holder and the areas around them are not scratched, dusty, or covered in any way. If the areas are obscured, the scanner may have trouble recognizing your film in Full Auto Mode. Do not cover the small holes in the film holder. Make sure the film strip is placed as shown. Close the cover and press it down until you hear a click.
Make sure you removed the document mat. See Removing the Document Mat. Close the scanner cover. To scan your film, see Starting Epson Scan. When you are finished scanning film, be sure to replace the document mat before scanning documents or photos. See Replacing the Document Mat. Placing Medium Format Film Open the cover on the medium format film holder. Slide one medium format film image into the film holder with the shiny base side facing down.
Make sure the film strip is placed as shown. Close the cover over the film and press it down until it clicks. Then press down on all the edges of the cover to secure it. Place the film holder on the document table so that it is aligned with the upper left corner. Make sure the tab labelled “B” on the film holder fits into the area labelled “B” on the scanner. Make sure you removed the document mat. See Removing the Document Mat. Close the scanner cover.
Note: You cannot use Full Auto Mode to scan medium format film. When you are finished scanning film, be sure to replace the document mat before scanning documents or photos. See Replacing the Document Mat. Using the scanning support sheet When the film is curled, flatten the film using the scanning support sheet that came with the medium format film holder. Caution: Keep at least 2 mm space between the image frame and scanning support sheet. Make sure that the glossy side contacts with the film surface.
Note: Make sure the white stickers on the back of the film holder and the areas around them are not scratched, dusty, or covered in any way. If the areas are obscured, the scanner may have trouble recognizing your slides in Full Auto Mode. Do not cover the small holes on the film holder. Place the film holder on the document table so that it is aligned as shown. Make sure the tab labelled “C” on the film holder fits into the area labelled “C” on the scanner.
Make sure you place the long edge of the slide in the film holder as shown above. Make sure you removed the document mat. See Removing the Document Mat. Close the scanner cover. To scan your slides, see Starting Epson Scan. When you are finished scanning slides, be sure to replace the document mat before scanning documents or photos. See Replacing the Document Mat. Top Replacing the Document Mat Replace the document mat by sliding it into the notches in the scanner cover.
Home > Scanning Your Originals Starting Epson Scan Using the Scanner Buttons Using the Epson Scan Icon Using the Scanner Buttons a. PDF button b. E-mail button c. Copy button d. Start button You can start Epson Scan just by pressing the Start button on the scanner. The Epson Scan window automatically opens. See Selecting an Epson Scan Mode for instructions on selecting an Epson Scan mode. You can also start scanning by pressing the following buttons on the scanner.
Windows 7/Vista/XP: Double-click the Epson Scan icon on the desktop. Or, select the start button icon or Start > All Programs or Programs > Epson > Epson Scan > Epson Scan. Mac OS X: Select Applications > Epson Software > Epson Scan. The Epson Scan window automatically opens. See Selecting an Epson Scan Mode for instructions on selecting an Epson Scan mode. Note: You can use any TWAIN-compliant scanning program, such as ArcSoft PhotoStudio, to scan with your scanner.
Home > Scanning Your Originals Selecting an Epson Scan Mode Epson Scan offers several scanning modes to choose from. Full Auto Mode lets you scan quickly and easily, without selecting any settings or previewing your image. Full Auto Mode is best when you need to scan your originals at 100% size and you do not need to preview the images before scanning. You can restore faded colors or remove dust marks in Full Auto Mode. This is the default mode in Epson Scan.
Home > Scanning Your Originals Changing the Scan Mode To change the scan mode, click the arrow in the Mode box in the upper right corner of the Epson Scan window. Then, select the mode you want to use from the list that appears. Note: The mode you select remains in effect when you start Epson Scan next time. For instructions on scanning using these modes, see one of these sections.
Home > Scanning Your Originals Scanning in Full Auto Mode When you start Epson Scan for the first time, it runs in Full Auto Mode and displays the Epson Scan Full Auto Mode window. Note for film or slides: In Full Auto Mode, you can scan only 35 mm color film strip or color positive slides. To scan other types of film, use Home Mode or Professional Mode. To change the scan mode, see Changing the Scan Mode.
Film or slides: Placing Film or Slides Start Epson Scan. See Starting Epson Scan for instructions. Select Full Auto Mode from the Mode list. See Changing the Scan Mode for instructions. If you want to select a custom resolution, restore faded colors, or remove dust marks, click Customize. You see the Customize window. Note: If you started scanning from a TWAIN-compliant program like ArcSoft PhotoStudio, the File Save Settings button does not appear. Select your settings and click OK.
Epson Scan previews each image, detects which type of original it is, and selects the scan settings automatically. After a moment, you see a small preview of each image in the Epson Scan window. Note: It takes a few minutes to scan a full film strip. If you need to change any settings, click Pause. You will return to the Epson Scan Full Auto Mode window. If you need to cancel scanning, click Cancel when it appears. What happens next depends on how you started your scan.
Home > Scanning Your Originals Scanning in Office Mode When you select Office Mode, you see the Epson Scan Office Mode window. Place the original(s) on the document table. See Placing Documents or Photos for instructions. Start Epson Scan. See Starting Epson Scan for instructions. Select Office Mode in the Mode list. See Changing the Scan Mode for instructions. Select Color, Grayscale, or Black&White as the Image Type setting. Select Document Table as the Document Source setting.
Click the arrow to open the Resolution list and select an appropriate resolution for your original. See Selecting the Scan Resolution for instructions. Click Preview to preview your image(s). The Preview window appears and displays your image. See Previewing and Adjusting the Scan Area for instructions. Modify the image quality if necessary. See Adjusting the Color and Other Image Settings for instructions. Click Scan. What happens next depends on how you started your scan.
Home > Scanning Your Originals Scanning in Home Mode When you select Home Mode, you see the Epson Scan Home Mode window. Place your original(s) on the document table. See one of these sections for instructions. Documents or photos: Placing Documents or Photos Film or slides: Placing Film or Slides Start Epson Scan. See Starting Epson Scan for instructions. Select Home Mode in the Mode list. See Changing the Scan Mode for instructions.
Select Color, Grayscale, or Black&White as the Image Type setting. In the Destination box, click the button for the way you plan to use the scanned image(s). Screen/Web for images you will view only on a computer screen or post on the web. Printer for image(s) you will be printing or converting to editable text with an OCR (Optical Character Recognition) program. Other if you want to select a specific resolution for other purposes.
Home > Scanning Your Originals Scanning in Professional Mode When you select Professional Mode, you see the Epson Scan Professional Mode window.
Place your original(s) on the document table. See one of these sections for instructions. Documents or photos: Placing Documents or Photos Film or slides: Placing Film or Slides Start Epson Scan. See Starting Epson Scan for instructions. Select Professional Mode in the Mode list. See Changing the Scan Mode for instructions. Click the arrow to open the Document Type list and select Reflective (for scanning documents or photos) or Film (for scanning film or slides).
What happens next depends on how you started your scan. See Finishing the Scan for instructions.
Home > Scanning Your Originals Selecting File Save Settings When you see the File Save Settings window, you can select the location, name, and format of the scanned image file. Full Auto Mode: Click Customize, then click File Save Settings. Office Mode, Home Mode, or Professional Mode: Click the button. File Save Settings icon to the right of the Scan The File Save Settings window appears.
If you want to save your image on the desktop, simply click the Other radio button. Specify a file name prefix with an alphanumeric character string. A 3-digit number is automatically added to the file name, but you can change the Start Number if you like. If you are scanning multiple images at once, each image will receive a different 3-digit number. Note: The following characters cannot be used in the prefix.
Home > Scanning Your Originals Detailed Setting Instructions Selecting the Scan Resolution Previewing and Adjusting the Scan Area Adjusting the Color and Other Image Settings Selecting the Scan Size Selecting the Scan Resolution You can select a specific Resolution setting for your images. Keep in mind that higher resolution settings increase scanning time, so do not select a higher resolution than you need.
Click the Specify resolution for Full Auto Mode check box and select the number of dpi (dots per inch) at which you want to scan. Selecting the Resolution in Home Mode To change the resolution, first select Other as the Destination setting. Click the arrow next to the Resolution list and select the number of dpi (dots per inch) at which you want to scan. Selecting the Resolution in Office Mode or Professional Mode You can select the resolution you want at any time.
Professional Mode Click the arrow next to the Resolution list and select the number of dpi (dots per inch) at which you want to scan. Top Previewing and Adjusting the Scan Area Once you have selected your basic settings and resolution, you can preview your image and select or adjust the image area of the image(s) in a Preview window on your screen. There are two types of preview. Normal preview displays your previewed image(s) in their entirety.
Thumbnail preview Document Film If you are viewing the normal preview, you can do the following to adjust the image(s). To select your scan area, click the auto locate icon to create a marquee that marks the edges of your image area. You can move the marquee to change the scan area. See Creating a Marquee on a Preview Image for instructions.
If you are going to scan at a different size than your original, you must first select your Target Size and automatically create a marquee that is proportioned to that size. See Selecting the Scan Size for instructions. You can then copy the marquee and place it on each image you will scan at that size. To enlarge or reduce the preview image in the Normal preview, resize the Preview window. The image size changes corresponding to the Preview window size.
You can move the marquee and adjust its size. If you are viewing the normal preview, you can create multiple marquees (up to 50) on each image to scan different image areas in separate scan files. Note for film or slides: When you use the Thumbnail preview, Epson Scan automatically creates marquees around your image(s) for you. If you need to adjust a marquee, click inside it and click the delete marquee icon before completing the steps in this section.
Do one of the following to adjust the marquee. To move the marquee, position your cursor inside the marquee. The pointer becomes a hand. Click and drag the marquee to the desired location. To resize the marquee, position your cursor over the edge or corner of the marquee. The pointer becomes a straight or angled double-arrow. Click and drag the edge or corner to the desired size. Note: To restrict the movement of the marquee to vertical or horizontal only, hold down the Shift key as you move the marquee.
If you draw multiple marquees, make sure you click All in the Preview window before you scan. Otherwise, only the area inside the last marquee you drew will be scanned. Top Adjusting the Color and Other Image Settings Once you have previewed your image(s) and adjusted the scan area, you can modify the image quality, if necessary. Epson Scan offers a variety of settings for improving color, sharpness, contrast, and other aspects affecting image quality.
is selected - when the Image Type is set to Black&White and Image Option is selected When the Image Type is set to Black&White, the results of Text Enhancement do not appear in the preview, only in your scanned image. Auto Area Segmentation Makes Black&White images clearer and text recognition more accurate by separating the text from the graphics. This setting is available only when the Image Type is set to Black&White and Image Option is selected. Dropout Drops out red, green, or blue in the scan.
The table below describes the settings available in Home Mode. For details on adjusting these settings, see Epson Scan Help. Note: If you are scanning multiple images at the same time and you want to apply the image adjustments to all of your images or scan areas, click All in the Preview window before you begin making your adjustments. Setting Description Descreening Removes the rippled pattern that can appear in subtly-shaded image areas, such as in skin tones.
- when you select Magazine as the Document Type, the Image Type is set to Black&White, and Image Option is selected - when you select Newspaper as the Document Type, the Image Type is set to Black&White, and Image Option is selected - when you select Text/Line Art as the Document Type, the Image Type is set to Black&White, and Image Option is selected Brightness Adjusts the overall image lightness and darkness.
The table below describes the settings available in Professional Mode. For details on adjusting these settings, see Epson Scan Help. Note: You may need to scroll down to view the Adjustments area of the Professional Mode window. If you are scanning multiple images at the same time and you want to apply the image adjustments to all of your images or scan areas, click All in the Preview window before you begin making your adjustments. Setting Description Auto Exposure Click the Auto Exposure icon.
This setting is available in - when the Image Type is - when the Image Type is - when the Image Type is - when the Image Type is the set set set set following conditions: to 48-bit Color to 24-bit Color to 16-bit Grayscale to 8-bit Grayscale Descreening Removes the rippled pattern that can appear in subtly shaded image areas, such as skin tones. Also improves results when scanning magazine or newspaper images that include screening in their original print processes.
To undo any image quality adjustments you make to the preview image, click Reset if available, turn off the setting, or preview your image again. Top Selecting the Scan Size You can scan your images at their original size, or you can reduce or enlarge their size as you scan them. You do this using the Target Size setting.
If you need to create a scan size that is not in the Target Size list, you can create a custom size. Click the arrow to open the list and select Customize. You see the Target Size window. Type a name for your custom size, enter the size, click Save, then click OK. Your new size appears in the Target Size list. Once you have selected your scan size, you can click and drag the marquee to the area in the image you want to scan. For details, see Creating a Marquee on a Preview Image.
The orientation icon is not available if you selected Original as the Target Size setting. Selecting the Scan Size in Professional Mode You can select a predefined scan size from the Target Size list. Click the arrow to open the list and select the size you want. A marquee (dotted line) proportioned for that size appears on your preview image. Documents or photos Film or Slides If you need to create a scan size that is not in the Target Size list, you can create a custom size.
Type a name for your custom size, enter the size, click Save, then click OK. Your new size appears in the Target Size list. You can fine-tune the size using additional tools. Click the + (Windows) or display these tools. (Mac OS X) button next to Target Size to To size your image by a certain percentage, adjust the Scale value. To change the way your image is cropped, turn Trimming on or off. See Epson Scan Help for details. To unlock the proportions of your scan size, click the width/height measurements.
Home > Scanning Your Originals Finishing the Scan What happens after you scan depends on how you started your scan. Full Auto Mode: If you started your scan by running Epson Scan from the Epson Scan icon, your scanned image is saved in the file format and location you selected in the File Save Settings window. If you did not select any settings in the File Save Settings window, it is saved as a JPEG file in Pictures or My Pictures.
Home > Scanning Your Originals Scanning with Easy Photo Scan You can scan documents or photos and upload them to Facebook and other online destinations, such as photo-sharing sites, web servers, or network folders using Easy Photo Scan. Note: The settings may vary, depending on the software version you are using. See the Help information in Easy Photo Scan for details. Place your original(s) on the document table. See one of these sections for instructions.
Click to open the Epson Scan window. Click Scan in the Epson Scan window. The scanned image is displayed in the Easy Photo Scan window. To edit the name of the file, select the image thumbnail at the bottom of the screen, click filename. To edit the scanned image, click , and enter the new and select one of the displayed options. Note: See the Easy Photo Scan help for additional information on image editing options. Repeat these steps for each image you want to upload.
Home > Scanning Special Projects Restoring Color Color Restoration in Full Auto Mode Color Restoration in Home Mode Color Restoration in Professional Mode Using the Color Palette Feature (for Professional Mode Only) Using the Color Restoration feature in Epson Scan, you can transform old, faded, or badly exposed photos into ones with true-to-life color and sharpness. You can restore printed photos, film, or slides automatically as you scan them.
If you want to select the file save settings, click File Save Settings. See Selecting File Save Settings for instructions. Note: If you started Epson Scan from a TWAIN-compliant program like ArcSoft PhotoStudio, the File Save Settings button does not appear. When you finish making all the necessary settings, click OK to return to the Full Auto Mode window. Click Scan. What happens next depends on how you started Epson Scan. See Finishing the Scan for instructions.
Note: If you are scanning multiple images at the same time and you want to apply the Color Restoration feature to all of your images or scan areas, click All in the Preview window before you click the check box. Make any other necessary image adjustments. See Adjusting the Color and Other Image Settings for details. Size your image(s) as necessary. See Selecting the Scan Size for details. Click Scan. What happens next depends on how you started Epson Scan. See Finishing the Scan for instructions.
Note: If you are scanning multiple images at the same time and you want to apply the Color Restoration feature to all of your images or scan areas, click All in the Preview window before you click the check box. Make any other necessary image adjustments. See Adjusting the Color and Other Image Settings for details. If you want to make more precise color adjustments, click the Feature (for Professional Mode Only) for instructions. Color Palette icon.
Click the color extractor icon. Your cursor changes to an eye dropper. In the Preview window, click on the color in your image that needs adjustment. The color you selected is moved to the center cell in the Color Palette window with variations in hue in the surrounding cells. Select the cell that contains the hue you would like to use to adjust the color in your image. This color now becomes the color of the center cell and the color change is reflected in your image.
Applying a Color to an Image Click the Color Palette icon. Select the cell that contains the hue you would like to use to adjust the color in your image. This color now becomes the color of the center cell. Note: You can also use the cells to the right of the adjustment area to change the brightness, if necessary. Click the color applicator icon. Your cursor changes to a droplet. In the Preview window, click on the color in your image that needs adjustment. The color change is reflected in your image.
For further details on using the Color Palette feature, see Epson Scan Help.
Home > Scanning Special Projects Removing Dust Marks with the Dust Removal Feature Dust Removal in Full Auto Mode Dust Removal in Professional Mode Using the Dust Removal feature in Epson Scan, you can virtually “clean” the dust marks from your originals as you scan them. Before scanning your originals, carefully remove any dust that you can see on them. Original image Dust Removal applied Note: Before scanning your originals, carefully remove any dust that you can see on them.
Note for film or slides: You can only scan 35 mm color film strip or color positive slides in Full Auto Mode. To scan other types of film, use Home Mode or Professional Mode. To change the scan mode, see Changing the Scan Mode. Start Epson Scan. See Starting Epson Scan for instructions. In the Full Auto Mode window, click Customize. The Customize window appears. Click the Dust Removal check box. If you want to select the file save settings, click File Save Settings.
Documents or photos: Placing Documents or Photos Film or slides: Placing Film or Slides Start Epson Scan. See Starting Epson Scan for instructions. In the Professional Mode window, select the Document Type, Document Source, Auto Exposure Type (for scanning documents or photos) or Film Type (for scanning film or slides), Image Type, and Resolution settings. For details, see Scanning in Professional Mode. Click Preview to preview your image(s), then select your scan area.
Home > Scanning Special Projects Removing Dust and Scratch Marks from Originals Using DIGITAL ICE Technology DIGITAL ICE Technology Specifications Using DIGITAL ICE Technology in Home Mode Using DIGITAL ICE Technology in Professional Mode Your scanner and its Epson Scan software are equipped with the DIGITAL ICE Technology feature that removes stubborn dust or scratch marks from your originals.
Medium format film (6 × 20 cm) 2400 dpi 63 MB 117 MB 3600 dpi 142 MB 175 MB 12800 dpi 251 MB 233 MB 150 dpi 4 MB 34 MB 300 dpi 8 MB 70 MB 600 dpi 29 MB 139 MB 1200 dpi 116 MB 277 MB 2400 dpi 464 MB 553 MB 3600 dpi 1042 MB 830 MB 12800 dpi 1853 MB 1106 MB * This is the actual scan resolution used by DIGITAL ICE Technology, which is higher than the scan resolution you specify in Epson Scan. Make sure your system resources meet these increased requirements.
In the Home Mode window, select the Document Type, Image Type, and Destination settings. For details, see Scanning in Home Mode. Click Preview to preview your image(s), then select your scan area. See Previewing and Adjusting the Scan Area for details. Click the DIGITAL ICE Technology check box. Note: The results of DIGITAL ICE Technology do not appear in the images in the Preview window, but apply to all of them. You must scan the images to see the effects. Make any other necessary image adjustments.
Note: The results of DIGITAL ICE Technology do not appear in the images in the Preview window, but apply to all of them. You must scan the images to see the effects. Make any other necessary image adjustments. See Adjusting the Color and Other Image Settings for instructions. Size your image(s) as necessary. See Selecting the Scan Size for instructions. Click Scan to scan and remove dust and scratch marks in your image(s). What happens next depends on how you started Epson Scan.
Home > Scanning Special Projects Fixing Backlit Photos Backlight Correction in Home Mode Backlight Correction in Professional Mode Using the Backlight Correction feature in Epson Scan, you can remove shadows from photos that have too much background light. You can fix printed photos, film, or slides automatically as you scan them. Original image Backlight Correction applied See one of these sections for instructions on fixing backlit photos.
Note: If you are scanning multiple images at the same time and you want to apply the Backlight Correction feature to all of your images or scan areas, click All in the Preview window before you click the check box. Make any other necessary image adjustments. See Adjusting the Color and Other Image Settings for details. Size your image(s) as necessary. See Selecting the Scan Size for details. Click Scan. What happens next depends on how you started Epson Scan. See Finishing the Scan for instructions.
Note: If you are scanning multiple images at the same time and you want to apply the Backlight Correction feature to all of your images or scan areas, click All in the Preview window before you click the check box. Make any other necessary image adjustments. See Adjusting the Color and Other Image Settings for details. Size your image(s) as necessary. See Selecting the Scan Size for details. Click Scan. What happens next depends on how you started Epson Scan. See Finishing the Scan for instructions.
Home > Scanning Special Projects Text Enhancement Text Enhancement Using the PDF Button Text Enhancement in Office Mode Text Enhancement in Home Mode When you scan documents, you can sharpen the text and increase accuracy by using the Text Enhancement feature in Epson Scan. Original Text Enhancement: Off Text Enhancement: On Note: You can enhance text only when you scan using a resolution of 600 dpi or less. See one of these sections for instructions on text enhancement.
Make any other necessary image adjustments. See Adjusting the Color and Other Image Settings for details. Click File Save Settings. Make file save settings as necessary and click OK. See Scanning to a PDF File Using the PDF Button for details. Click Close to close the Scan to PDF Settings window, then click Scan or press the Epson Scan scans your page. Start button on the scanner. When you are finished scanning all of your pages, click Finish or press the PDF button on the scanner.
Click Scan. The File Save Settings window appears. Make File Save and PDF settings as necessary. See Scanning to a PDF File in Office Mode for details. Click OK. Top Text Enhancement in Home Mode Place your document on the document table. See Placing Documents or Photos for instructions. Start Epson Scan. See Starting Epson Scan for instructions. In the Home Mode window, select the Document Type, Image Type, and Destination settings. For details, see Scanning in Home Mode.
Home > Scanning Special Projects Using the Scanner as a Copier You can use your scanner along with a printer connected to your computer just like you would use a copy machine. You can even enlarge and reduce, restore faded colors, remove dust, enhance text, and adjust image brightness and contrast as you copy. Place your original(s) on the document table. See one of these sections for instructions.
The scanned image is displayed in the Copy Utility main window. Check the scanned image and then rotate it using the thumbnail tool if necessary. When you have finished checking the image, click . The window for print settings is displayed. Note: The button is not active until after a scan has been performed and an image is ready to be printed. Specify the necessary items, and then click Print to print the image. The scanned image is printed.
Home > Scanning Special Projects Scanning to a PDF File Scanning to a PDF File Using the PDF Button Scanning to a PDF File in Office Mode Scanning to a PDF File in Home Mode Scanning to a PDF File in Professional Mode The easiest way to scan multiple document pages to a PDF file is to press the a PDF File Using the PDF Button for instructions. PDF button on the scanner. See Scanning to Using Epson Scan, you can create a PDF file with the following features.
Click Settings. You see the Scan to PDF Settings window. Select Color, Grayscale, or Black&White as the Image Type setting to select the colors in the original.
Select Document Table as the Document Source setting. Click the arrow to open the Size list and select the size of your original(s). If you need to select a size that is not in the Size list, you can create a custom size. Click the arrow in the Size list and select Customize. You see the Source Size window. Type a name for your custom size, enter the size, click Save, then click OK. Your new size appears in the Size list.
- when the Image Type is set to Color and Image Option is selected - when the Image Type is set to Grayscale and Image Option is selected - when the Image Type is set to Black&White and Image Option is selected When the Image Type is set to Black&White, the results of Text Enhancement do not appear in the preview, only in your scanned image. Threshold Auto Area Segmentation Makes Black&White images clearer and text recognition more accurate by separating the text from the graphics.
If you need to change any of the current PDF settings, click Options. You see the Epson PDF Plug-in Settings window. Select the settings that match your document and click OK. You return to the File Save Settings window. Note: The Text tab is available only when ABBYY FineReader is installed. If ABBYY FineReader is not available in your country, you will not see the Text tab. Make any other file save settings, and click OK.
Start Epson Scan. See Starting Epson Scan for instructions. In the Office Mode window, select the Image Type, Document Source, Size, and Resolution settings. For details, Scanning in Office Mode. Click Preview to preview your image(s), then select your scan area. For details, see Previewing and Adjusting the Scan Area. Make any other necessary image adjustments. See Adjusting the Color and Other Image Settings for details. Click Scan. The File Save Settings window appears. Select PDF as the Type setting.
Note: The Text tab is available only when ABBYY FineReader is installed. If ABBYY FineReader is not available in your country, you will not see the Text tab. To specify the maximum number of pages that can be included in one PDF file, click the General tab and adjust the Select number to make file setting.
For other settings in the Epson PDF Plug-in Settings window, see Epson Scan Help for details. Select the settings that match your document and click OK. You return to the File Save Settings window. Make any other file save settings, and click OK. Epson Scan scans your document and displays the window below. Note: If you deselect the Show Add Page dialog after scanning check box in the File Save Settings window, this window does not appear and Epson Scan automatically saves your document.
Add page: Click this button to scan the next page of your document. Replace the first page on the document table with the next page, and click Scan. Repeat this step for each page in your document. When you are finished, click Edit page and go to step 12. Edit page: Click this button if you have scanned all the necessary pages so you can edit the scanned pages before saving them in one PDF file. Then go to step 12.
Documents or photos: Placing Documents or Photos Film or slides: Placing Film or Slides Start Epson Scan. See Starting Epson Scan for instructions. In the Home Mode window, select the Document Type, Image Type, and Destination settings. For details, see Scanning in Home Mode. Click Preview to preview your image(s), then select your scan area. For details, see Previewing and Adjusting the Scan Area. Make any other necessary image adjustments. See Adjusting the Color and Other Image Settings for details.
Note: The Text tab is available only when ABBYY FineReader is installed. If ABBYY FineReader is not available in your country, you will not see the Text tab. To specify the maximum number of pages that can be included in one PDF file, click the General tab and adjust the Select number to make file setting.
For other settings in the Epson PDF Plug-in Settings window, see Epson Scan Help for details. Select the settings that match your document and click OK. You return to the File Save Settings window. Make any other file save settings, and click OK. Epson Scan scans your document and displays the window below. Note: If you deselect the Show Add Page dialog after scanning check box in the File Save Settings window, this window does not appear and Epson Scan automatically saves your document.
Add page: Click this button to scan the next page of your document. Replace the first page on the document table with the next page, and click Scan. Repeat this step for each page in your document. When you are finished, click Edit page and go to step 13. Edit page: Click this button if you have scanned all the necessary pages so you can edit the scanned pages before saving them in one PDF file. Then go to step 13.
Documents or photos: Placing Documents or Photos Film or slides: Placing Film or Slides Start Epson Scan. See Starting Epson Scan for instructions. In the Professional Mode window, select the Document Type, Document Source, Auto Exposure Type, Image Type, and Resolution settings. For details, see Scanning in Professional Mode. Click Preview to preview your image(s), then select your scan area. For details, see Previewing and Adjusting the Scan Area. Make any other necessary image adjustments.
Note: The Text tab is available only when ABBYY FineReader is installed. If ABBYY FineReader is not available in your country, you will not see the Text tab. To specify the maximum number of pages that can be included in one PDF file, click the General tab and adjust the Select number to make file setting.
For other settings in the Epson PDF Plug-in Settings window, see Epson Scan Help for details. Select the settings that match your document and click OK. You return to the File Save Settings window. Make any other file save settings, and click OK. Epson Scan scans your document and displays the window below. Note: If you deselect the Show Add Page dialog after scanning check box in the File Save Settings window, this window does not appear and Epson Scan automatically saves your document.
Add page: Click this button to scan the next page of your document. Replace the first page on the document table with the next page, and click Scan. Repeat this step for each page in your document. When you are finished, click Edit page and go to step 13. Edit page: Click this button if you have scanned all the necessary pages so you can edit the scanned pages before saving them in one PDF file. Then go to step 13.
Home > Scanning Special Projects Scanning Directly to an E-mail You can scan and automatically attach scanned image file(s) to an e-mail message with the E-mail button on the scanner. Place your original(s) on the document table. See one of these sections for instructions. Documents or photos: Placing Documents or Photos Film or slides: Placing Film or Slides Press the a JPEG file. E-mail button on the scanner.
Note: The box at the bottom of the window displays information about the image file(s) you are attaching to the email message. Click OK. Your e-mail program is opened and any scanned images you selected are attached to a new e-mail message. See your e-mail program Help if you need instructions on sending your e-mail message.
Home > Scanning Special Projects Converting Scanned Documents Into Editable Text Converting into Editable Text in Full Auto Mode Converting into Editable Text in Office Mode Converting into Editable Text in Home Mode Converting into Editable Text in Professional Mode You can scan a document and convert the text into a format that you can edit with a word processing program. This process is called OCR (Optical Character Recognition).
Select the language used in the document you are going to scan as the Document Language setting. Click either the Scan to Other Formats icon or the icon that corresponds with the program you want to scan to. If you see the Select Scanner window, select your product and click OK. Note: Do not select a WIA option for your product; it will not work correctly. Select your scan settings. Click Preview and adjust the area you want to scan, if necessary. Click Scan.
Select your scanner from the Get Images From list. Select the language used in the document you are going to scan as the Document Language setting. Click the icon for the type of document you want to scan to. Epson Scan starts in the last mode you used. Change the scan mode to Full Auto Mode if necessary. See Changing the Scan Mode for instructions. Click Scan. Your document is scanned and processed into editable text. Follow the instructions in ABBYY FineReader Help to edit and save your document.
Select the language used in the document you are going to scan as the Document Language setting. Click either the Scan to Other Formats icon or the icon that corresponds with the program you want to scan to. If you see the Select Scanner window, select your product and click OK. Note: Do not select a WIA option for your product; it will not work correctly. Select your scan settings. Click Preview and adjust the area you want to scan, if necessary. Click Scan.
Select your scanner from the Get Images From list. Select the language used in the document you are going to scan as the Document Language setting. Click the icon for the type of document you want to scan to. Epson Scan starts in the last mode you used. Change the scan mode to Office Mode if necessary. See Changing the Scan Mode for instructions. Select Color, Grayscale, or Black&White as the Image Type setting. Select the size of your original document as the Size setting.
Top Converting into Editable Text in Home Mode Windows Place your document on the document table. See Placing Documents or Photos for instructions. Do one of the following to start ABBYY FineReader. Windows 8: Navigate to the Start screen and select ABBYY FineReader 9.0 Sprint. Windows 7/Vista/XP: Select the start button or Start > Programs or All Programs > ABBYY FineReader 9.0 Sprint > ABBYY FineReader 9.0 Sprint.
page. When you are finished scanning, click Close. Your document is scanned and processed into editable text, then you see the Save As window. Select a name and a file format for your document and click Save. The file is saved and then opened in an application associated with the file type you selected, if available on your system. Top Mac OS X Place your document on the document table. See Placing Documents or Photos for details. Select Applications > ABBYY FineReader Sprint 8.0.
Note: If you select Other, select 300 as the Resolution setting. Click Preview to preview your document. The Preview window appears and displays your document. See Previewing and Adjusting the Scan Area for instructions. Modify the image quality if necessary. See Adjusting the Color and Other Image Settings for instructions. Click Scan. Your document is scanned and processed into editable text.
Select the language used in the document you are going to scan as the Document Language setting. Click either the Scan to Other Formats icon or the icon that corresponds with the program you want to scan to. If you see the Select Scanner window, select your product and click OK. Note: Do not select a WIA option for your product; it will not work correctly. Select your scan settings. Click Preview and adjust the area you want to scan, if necessary. Click Scan.
Select your scanner from the Get Images From list. Select the language used in the document you are going to scan as the Document Language setting. Click the icon for the type of document you want to scan to. Epson Scan starts in the last mode you used. Change the scan mode to Professional Mode if necessary. See Changing the Scan Mode for instructions. Select Reflective as the Document Type setting. Select Document as the Auto Exposure Type setting.
Home > Scanning Special Projects Scanning Accurate Color Images Start Epson Scan, select Home Mode or Professional Mode, select the appropriate scan settings, then click Preview to prescan your image and adjust the marquee. For details, see one of these sections. Home Mode: Scanning in Home Mode Professional Mode: Scanning in Professional Mode Note: You cannot use Full Auto Mode or Office Mode for color management.
For the Target setting, select Adobe RGB. Select Display preview using monitor compensation, then click OK to return to the Epson Scan window. Click Scan. What happens next depends on how you started your scan. See Finishing the Scan for instructions. Note: You can also optimize the color accuracy of your images using a photo-editing application, such as ArcSoft PhotoStudio.
Home > Scanning Special Projects Assigning a Program to a Scanner Button Assigning a Project Program in Epson Event Manager to a Scanner Button Each scanner button opens a pre-selected program when you press it. The default programs they open and the default actions they perform are described in the table below. Button Default action Start Epson Scan starts. Copy Epson Copy Utility starts. E-mail Epson Scan automatically scans, then the Send File Via E-mail window appears.
Click the arrow in the list next to the button name, then select the action you want to assign. Click Close to close the Epson Event Manager window. Now whenever you press the button you assigned, the action you selected opens. Note: If you need help using Epson Event Manager, do one of the following. For Windows: Click the icon in the upper right corner of the screen.
Home > Maintenance Cleaning the Scanner To keep your scanner operating at its best, clean it periodically using the following procedure. Caution: Do not press the glass surface of the document table with any force. Be careful not to scratch or damage the glass surface of the document table, and do not use a hard or abrasive brush to clean it. A damaged glass surface can decrease the scan quality. Never use alcohol, thinner, or corrosive solvent to clean the scanner.
a. transparency unit window Make sure that no dust builds up on the surface of the document table or the transparency unit window. Dust can cause spots in your scanned images.
Home > Maintenance Replacing the Scanner Light Source The luminosity of the scanner light source declines over time. If the light source breaks or becomes too dim to operate normally, the scanner stops working and the Status light rapidly flashes. When this happens, the light source assembly must be replaced by a professional. For details, contact Epson Support. See Epson Technical Support for more information.
Home > Maintenance Power Off Timer Setting The product turns off automatically if no operations are performed for the selected period. You can adjust the time before power management is applied. Any increase will affect the product's energy efficiency. Please consider the environment before making any change. Follow the steps below to adjust the time. Make sure that the scanner is connected to your computer and that the scanner is turned on. Start Epson Scan Settings.
Home > Maintenance Transporting the Scanner Before you transport the scanner for a long distance or store it for an extended period of time, the scanner’s carriage needs to be in the home position to prevent damage. Make sure the carriage is in the home position on the upper side of the scanner. If the carriage is not in the home position, turn on the scanner and wait until the carriage moves to the home position. Turn off the scanner using its power switch, then unplug the AC power cord.
Home > Solving Problems Scanner Problems The Status Light Is Flashing The Scanner Does Not Turn On The Scanner Turns Off You Cannot Start Epson Scan Pressing a Scanner Button Does Not Start the Correct Program The Status Light Is Flashing The green and orange status lights are on the left of the buttons. Color Green Indicator Status On Flashing Orange Flashing PDF button and the blue status light is on the bottom of the four Meaning Power is on. Entering power saving mode. An error has occurred.
Top You Cannot Start Epson Scan Wait until the blue status light stops flashing to indicate that the scanner is ready to scan. Make sure the scanner is turned on. Turn off the scanner and computer, then check the interface cable connection between them to make sure it is secure. Use the USB cable that came with your scanner or that is indicated in USB Interface. Connect the scanner directly to the computer’s USB port or through one USB hub only.
Home > Solving Problems Scanning Problems You Cannot Scan Using the Thumbnail Preview You Have Trouble Adjusting the Scan Area in the Thumbnail Preview Negative Film Preview Images Look Strange You Cannot Scan Multiple Images at One Time You Cannot Scan in Full Auto Mode Scanning Takes a Longer Time You Cannot Scan Film or Slides You Cannot Scan Using the Thumbnail Preview If you are using Full Auto Mode or Office Mode, the thumbnail preview is not available.
Top You Cannot Scan Multiple Images at One Time Position photos at least 20 mm (0.8 inch) apart from each other on the document table. Top You Cannot Scan in Full Auto Mode If you are scanning images with a very dark or bright background, switch to Office Mode, Home Mode, or Professional Mode. To change the scan mode, see Changing the Scan Mode. Then, use normal preview and create marquees on the area you want to scan. See Previewing and Adjusting the Scan Area for instructions.
Home > Solving Problems Scan Quality Problems The Edges of Your Original Are Not Scanned You See Only a Few Dots in Your Scanned Image A Line or Line of Dots Always Appears in Your Scanned Images Straight Lines in Your Image Come Out Crooked Your Image Is Distorted Colors Are Patchy or Distorted at the Edges of Your Image Your Scanned Image Is Too Dark An Image on the Back of Your Original Appears in Your Scanned Image Ripple Patterns Appear in Your Scanned Image Characters Are Not Recognized Well When Con
The document table or transparency unit window may need cleaning. Clean the document table. See Cleaning the Scanner. If you still have the problem, the document table or transparency unit window may be scratched. Contact Epson Support for assistance. See Epson Technical Support. Top Straight Lines in Your Image Come Out Crooked Make sure the document lies perfectly straight on the document table. Top Your Image Is Distorted Make sure the document or photo lies flat on the document table.
Your Scanned Image Is Too Dark If your original is too dark, try using the Backlight Correction feature in Home Mode or Professional Mode. See Fixing Backlit Photos for instructions. Check the Brightness setting in Office Mode, Home Mode, or Professional Mode. See Epson Scan Help for details. Click Configuration, select the Color tab, and change the Display Gamma setting to match your output device, such as a monitor or printer. See Epson Scan Help for details.
Select a lower resolution setting. See Selecting the Scan Resolution for instructions. Note: You cannot remove ripple patterns when you are scanning film or monochrome images, or scanning using a resolution higher than 600 dpi. Top Characters Are Not Recognized Well When Converted into Editable Text (OCR) Make sure the document lies perfectly straight on the document table. In Office Mode or Home Mode, select the Text Enhancement check box. Adjust the Threshold setting.
Top Striped Rings Appear in Your Scanned Image of Film or Slides Images A ring-shaped pattern of stripes (called a Newton ring) sometimes appears on scanned images of transparent materials. This may occur if the film is curled. Place the film or slides with the base side facing up and preview using thumbnail preview. Then flip the previewed image by clicking the mirroring icon in the Preview window. See Adjusting the Color and Other Image Settings for instructions.
Home > Solving Problems Uninstalling Your Scanning Software For Windows For Mac OS X You may need to uninstall and then reinstall your scanner software to solve certain problems or if you upgrade your operating system. For Windows Note: For Windows 8, 7, and Vista, you need an administrator account and password if you log on as a standard user. For Windows XP, you must log in as an administrator. Turn off the scanner. Disconnect the scanner’s interface cable from your computer.
In most cases, you do not need to uninstall your product software before reinstalling it. However, you can download the Uninstaller utility from the Epson support website to uninstall your product software as described here. Note: To uninstall applications you must log in as an administrator. You cannot uninstall programs if you log on as a Limited account user. If you find that reinstalling your product software does not solve a problem, contact Epson.
Home > Solving Problems Epson Technical Support Before Contacting Epson Help for Users in North America Help for Users in Latin America Other Software Technical Support Before Contacting Epson If your Epson product is not operating properly and you cannot solve the problem using the troubleshooting information in your product documentation, contact Epson support services for assistance.
For help using any other software on your system, see the documentation for that software for technical support information. Purchase Supplies and Accessories You can purchase genuine Epson accessories from an Epson authorized reseller. To find the nearest reseller, call 800-GO-Epson (800-463-7766). Or you can purchase online at http://www.epsonstore.com (U.S. sales) or http://www.epson.ca (Canadian sales). Top Help for Users in Latin America Epson provides the technical support services listed below.
Venezuela (58 212) 240-1111 * Contact your local phone company to call this toll free number from a mobile phone. ** Dial the first 7 digits, wait for a message, then enter the code. Top Other Software Technical Support ArcSoft PhotoStudio www.arcsoft.com/support Top ABBYY FineReader (408) 457-9777 www.abbyy.com support@abbyyusa.
Home > Technical Specifications System Requirements Windows System Requirements Macintosh System Requirements Make sure your system meets the requirements in these sections before using it with your scanner. Windows System Requirements System Microsoft Windows 8.x, Windows 7, Windows Vista, Windows XP, Windows XP x64 Interface USB 2.
Home > Technical Specifications Scanner Specifications General Mechanical Electrical Environmental Interfaces Standards and Approvals Note: Specifications are subject to change without notice. General Scanner type Flatbed color Photoelectric device Color CCD line sensor Effective pixels 54400 × 74880 pixels at 6400 dpi Scanning area may be restricted if resolution setting is large. Document size Reflective: 216 × 297 mm (8.5 × 11.
Weight Approx. 4.1 kg (9.0 lb) without AC adaptor Top Electrical Note: Check the label on the AC adapter or on the back of the scanner for voltage information. Scanner Rated voltage DC 24 V Rated input current 1.3 A Power consumption 16.5 W Operating 5.5 W Ready Mode 1.6 W Sleep Mode 0.4 W Power off AC Adapter 100-120 V model 220-240 V model A411B A411E Rated input voltage AC 100 to 120 V AC 220 to 240 V Rated input current 1.0 A 0.
Operating conditions Ordinary office or home conditions. Avoid operating the scanner in direct sunlight, near a strong light source, or in extremely dusty conditions. Top Interfaces USB Interface Interface type Universal Serial Bus Specification Revision 2.0 Electrical standard Full Speed mode (12 Mbits per second) and Hi-Speed mode (480 Mbits per second) of Universal Serial Bus Specification Revision 2.0.